
Grow bell peppers at home, even if you think you don’t have a green thumb! Have you ever dreamt of plucking a vibrant, juicy bell pepper straight from your own backyard, ready to be sliced into a salad or stuffed for a delicious meal? It’s more achievable than you might think, and this guide is packed with simple DIY tricks to make it a reality.
Bell peppers have a rich history, originating in South America and spreading throughout the world thanks to their adaptability and delicious flavor. For centuries, they’ve been a staple in diverse cuisines, adding color and nutrition to countless dishes. But beyond their culinary appeal, there’s something incredibly satisfying about nurturing your own food source.
In today’s busy world, taking the time to connect with nature and grow bell peppers at home can be incredibly therapeutic. Plus, let’s be honest, store-bought peppers can sometimes be bland and expensive. With a few clever DIY hacks, you can enjoy fresh, flavorful peppers that are bursting with vitamins and grown with love. I’m excited to share my favorite tips and tricks that will help you cultivate a thriving bell pepper garden, no matter your experience level. Let’s get started!
Growing Bell Peppers: From Seed to Table (DIY Guide!)
Hey there, fellow gardening enthusiasts! I’m so excited to share my tried-and-true method for growing vibrant, delicious bell peppers right in your own backyard (or even on your balcony!). Forget those bland, overpriced peppers from the grocery store – with a little patience and these simple steps, you’ll be harvesting your own colorful bounty in no time.
What You’ll Need: The Bell Pepper Arsenal
Before we dive in, let’s gather our supplies. Here’s what you’ll need to get started:
* **Bell Pepper Seeds:** Choose your favorite varieties! I personally love the classic green, but yellow, orange, and even purple bell peppers are super fun to grow. Make sure to buy from a reputable source to ensure good germination rates.
* **Seed Starting Trays or Small Pots:** These will be your pepper seedlings’ first home.
* **Seed Starting Mix:** This is a light, sterile soil mix specifically designed for starting seeds. Don’t use regular garden soil – it’s too heavy and can harbor diseases.
* **Grow Lights (Optional but Recommended):** Bell peppers need lots of light, especially when they’re young. Grow lights will give them a head start, especially if you live in a cloudy area.
* **Larger Pots (for Container Gardening) or a Garden Bed:** This is where your peppers will spend their adult lives. If you’re using pots, make sure they’re at least 12 inches in diameter.
* **Well-Draining Potting Mix or Garden Soil:** Again, good drainage is key! Amend your garden soil with compost or other organic matter to improve drainage and fertility.
* **Fertilizer:** A balanced fertilizer (like 10-10-10) or a fertilizer specifically formulated for tomatoes and peppers will help your plants thrive.
* **Watering Can or Hose:** For keeping your peppers hydrated.
* **Gardening Gloves:** To protect your hands.
* **Small Shovel or Trowel:** For transplanting.
* **Stakes or Cages (Optional):** Bell pepper plants can get quite heavy with fruit, so staking or caging them can prevent them from toppling over.
* **Patience:** Growing bell peppers takes time, so be prepared to wait!
Phase 1: Starting Your Bell Pepper Seeds Indoors
Bell peppers have a long growing season, so starting them indoors is essential in most climates. This gives them a head start before the weather warms up.
1. **Sow the Seeds:** Fill your seed starting trays or small pots with seed starting mix. Moisten the mix thoroughly. Sow the bell pepper seeds about ¼ inch deep, placing 2-3 seeds per cell or pot. Gently cover the seeds with more mix.
2. **Water and Cover:** Water the seeds gently to avoid disturbing them. Cover the trays or pots with a clear plastic dome or plastic wrap to create a humid environment. This will help the seeds germinate.
3. **Provide Warmth and Light:** Place the trays or pots in a warm location (around 70-80°F). A heat mat can be helpful if your home is cool. If you’re using grow lights, position them a few inches above the trays.
4. **Wait for Germination:** Bell pepper seeds can take 1-3 weeks to germinate, so be patient! Keep the soil consistently moist but not soggy. Remove the plastic dome or wrap once the seedlings emerge.
5. **Thin the Seedlings:** Once the seedlings have their first true leaves (the second set of leaves that appear after the initial seed leaves), thin them to one seedling per cell or pot. Choose the strongest, healthiest-looking seedling and snip off the others at the soil line.
6. **Continue Growing Under Lights:** Keep the seedlings under the grow lights for 14-16 hours per day. As they grow, you may need to raise the lights to prevent them from burning the leaves.
7. **Water Regularly:** Water the seedlings when the soil surface feels dry to the touch. Avoid overwatering, which can lead to root rot.
8. **Fertilize Lightly:** Once the seedlings have a few sets of true leaves, start fertilizing them with a diluted liquid fertilizer (half strength) every 1-2 weeks.
Phase 2: Hardening Off Your Bell Pepper Seedlings
Before transplanting your bell pepper seedlings outdoors, you need to “harden them off.” This process gradually acclimates them to the outdoor environment, preventing shock.
1. **Start Gradually:** About 1-2 weeks before you plan to transplant, start taking your seedlings outdoors for a few hours each day. Choose a sheltered location with partial shade.
2. **Increase Exposure:** Gradually increase the amount of time the seedlings spend outdoors each day, and slowly expose them to more sunlight.
3. **Protect from Harsh Weather:** If there’s a risk of frost or strong winds, bring the seedlings back indoors.
4. **Monitor for Stress:** Watch your seedlings closely for signs of stress, such as wilting or leaf burn. If they show signs of stress, reduce their exposure to the outdoors.
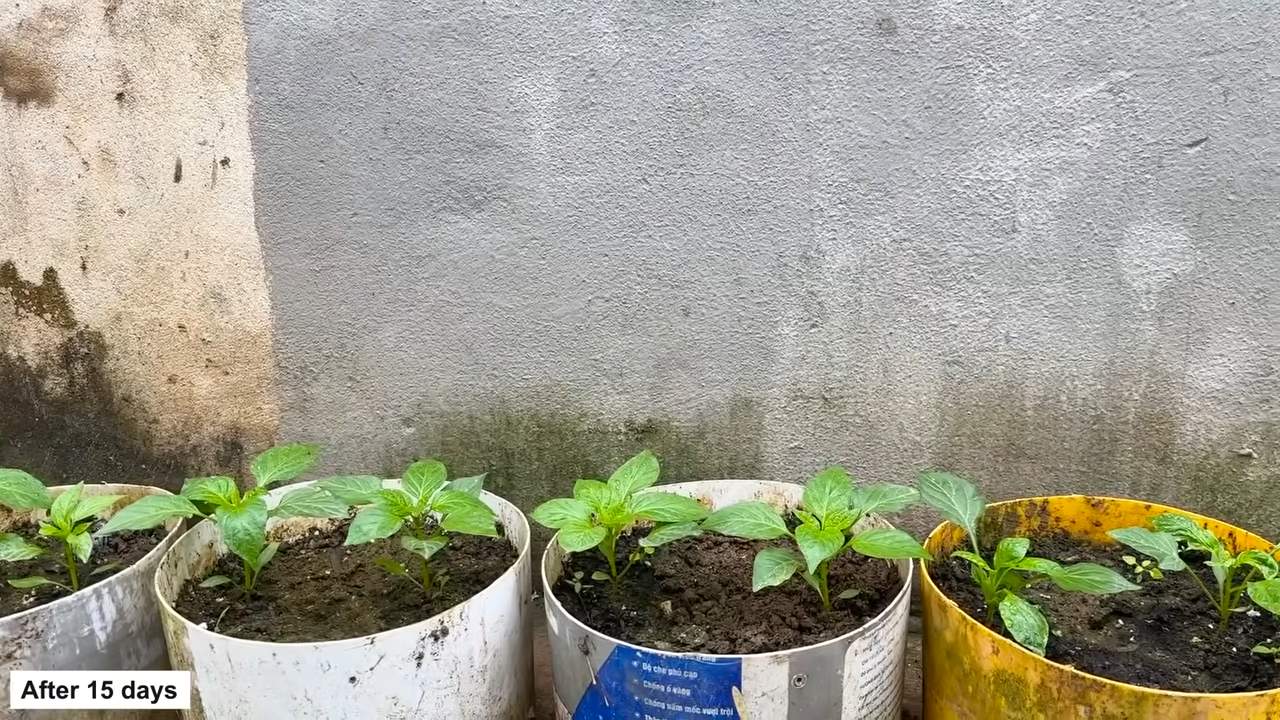
Phase 3: Transplanting Your Bell Pepper Seedlings Outdoors
Once the danger of frost has passed and the soil has warmed up, it’s time to transplant your bell pepper seedlings into their permanent home.
1. **Choose a Sunny Location:** Bell peppers need at least 6-8 hours of sunlight per day. Choose a location that gets plenty of sun.
2. **Prepare the Soil:** If you’re planting in a garden bed, amend the soil with compost or other organic matter to improve drainage and fertility. If you’re planting in pots, use a well-draining potting mix.
3. **Dig the Holes:** Dig holes that are slightly larger than the root balls of your seedlings. Space the holes about 18-24 inches apart.
4. **Transplant Carefully:** Gently remove the seedlings from their trays or pots. Loosen the roots slightly and place the seedlings in the holes.
5. **Backfill and Water:** Backfill the holes with soil and gently firm the soil around the base of the plants. Water thoroughly.
6. **Add Support (Optional):** If you’re using stakes or cages, install them now to provide support for the plants as they grow.
7. **Mulch:** Apply a layer of mulch around the base of the plants to help retain moisture, suppress weeds, and regulate soil temperature.
Phase 4: Caring for Your Bell Pepper Plants
Now that your bell pepper plants are in the ground, it’s time to provide them with the care they need to thrive.
1. **Water Regularly:** Water your bell pepper plants deeply and regularly, especially during hot, dry weather. Aim to keep the soil consistently moist but not soggy.
2. **Fertilize Regularly:** Fertilize your bell pepper plants every 2-3 weeks with a balanced fertilizer or a fertilizer specifically formulated for tomatoes and peppers. Follow the instructions on the fertilizer label.
3. **Pinch Off Early Flowers (Optional):** Pinching off the first few flowers that appear on your bell pepper plants can encourage them to focus on vegetative growth, resulting in a stronger, more productive plant.
4. **Watch for Pests and Diseases:** Keep an eye out for common bell pepper pests and diseases, such as aphids, flea beetles, and blossom end rot. Take action promptly to control any problems that arise.
5. **Provide Support:** As your bell pepper plants grow and produce fruit, they may need additional support. Use stakes or cages to prevent them from toppling over.
6. **Prune (Optional):** Pruning bell pepper plants can improve air circulation and sunlight penetration, which can help prevent diseases and increase fruit production. Remove any suckers (shoots that grow from the base of the plant) and any yellowing or diseased leaves.
Phase 5: Harvesting Your Bell Peppers
The moment you’ve been waiting for! Harvesting your own homegrown bell peppers is incredibly rewarding.
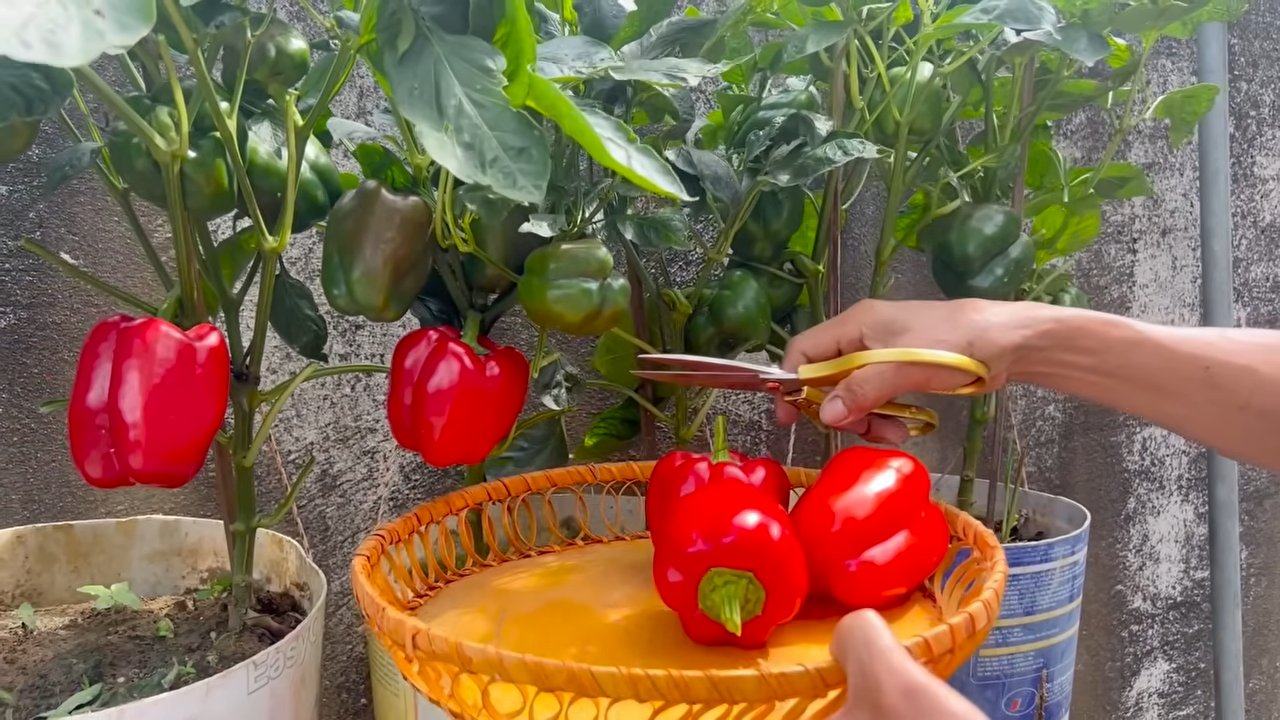
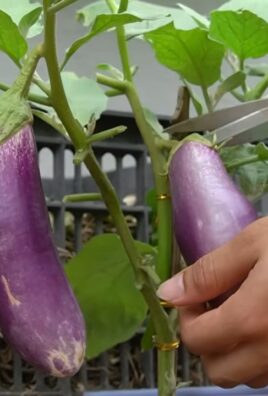
1. **Harvest When Mature:** Bell peppers are typically ready to harvest when they’re fully colored and firm to the touch. You can harvest them at any stage of maturity, but they’ll be sweetest and most flavorful when they’re fully ripe.
2. **Use Pruning Shears or a Knife:** Use pruning shears or a sharp knife to cut the bell peppers from the plant, leaving a short stem attached.
3. **Store Properly:** Store your harvested bell peppers in the refrigerator for up to a week.
Troubleshooting Common Bell Pepper Problems
Even with the best care, you may encounter some problems while growing bell peppers. Here are some common issues and how to address them:
* **Blossom End Rot:** This is a common problem caused by calcium deficiency. The bottom of the pepper turns brown and leathery. To prevent blossom end rot, ensure your soil is rich in calcium and water your plants consistently. You can also add calcium to the soil by using bone meal or crushed eggshells.
* **Aphids:** These tiny insects can suck the sap from your bell pepper plants, causing them to weaken and become
Conclusion
So, there you have it! Growing bell peppers at home isn’t just a fun gardening project; it’s a gateway to fresher, tastier, and more vibrant meals. We’ve explored the simple yet effective methods to cultivate these colorful vegetables right in your own backyard or even on a sunny balcony. From selecting the right seeds or seedlings to nurturing them with proper sunlight, water, and soil, you’re now equipped with the knowledge to embark on this rewarding journey.
Why is this DIY trick a must-try? Because it puts you in control. You know exactly what goes into your bell peppers – no mystery pesticides or long-distance transportation affecting their flavor and nutritional value. Imagine the satisfaction of harvesting your own plump, juicy bell peppers, bursting with flavor and ready to be incorporated into your favorite dishes. Think of the vibrant colors adding a touch of sunshine to your salads, stir-fries, and stuffed pepper recipes.
But the benefits extend beyond just taste and freshness. Growing your own bell peppers is also a sustainable choice. It reduces your carbon footprint by minimizing the need for commercially grown produce that travels miles to reach your plate. Plus, it’s a fantastic way to connect with nature, relieve stress, and learn about the fascinating process of plant growth.
Looking for variations? Absolutely! Experiment with different bell pepper varieties to discover your favorites. Try growing sweet bell peppers like the classic California Wonder or the vibrant Yolo Wonder. Or, if you’re feeling adventurous, venture into the world of hotter peppers like poblano or Anaheim, keeping in mind that they require similar growing conditions. You can also explore different growing methods, such as container gardening, raised beds, or even hydroponics, depending on your space and resources. Consider companion planting with herbs like basil or rosemary, which can help deter pests and enhance the flavor of your bell peppers.
Don’t be afraid to get your hands dirty and embrace the learning process. Gardening is all about experimentation and adapting to your local climate and soil conditions. Even if you encounter challenges along the way, remember that every mistake is an opportunity to learn and improve.
We wholeheartedly encourage you to try this DIY trick and experience the joy of growing bell peppers at home. It’s a simple, rewarding, and sustainable way to enhance your culinary creations and connect with nature. Once you’ve harvested your first batch of homegrown bell peppers, we’d love to hear about your experience! Share your tips, successes, and even your challenges in the comments below. Let’s create a community of bell pepper enthusiasts and inspire others to embark on this green adventure. Happy gardening!
Frequently Asked Questions (FAQ)
What is the best time of year to start growing bell peppers?
The ideal time to start growing bell peppers depends on your climate. In general, bell peppers are warm-season crops that thrive in temperatures between 70°F and 85°F (21°C and 29°C). If you live in a region with a long growing season, you can start seeds indoors 6-8 weeks before the last expected frost. Once the weather warms up and the soil temperature reaches at least 60°F (16°C), you can transplant the seedlings outdoors. In areas with shorter growing seasons, consider purchasing starter plants from a local nursery to give them a head start.
How much sunlight do bell peppers need?
Bell peppers require at least 6-8 hours of direct sunlight per day to thrive. Choose a location in your garden that receives ample sunlight throughout the day. If you’re growing bell peppers in containers, make sure to place them in a sunny spot on your patio or balcony. Insufficient sunlight can lead to stunted growth, reduced fruit production, and pale-colored peppers.
What type of soil is best for growing bell peppers?
Bell peppers prefer well-drained, fertile soil that is rich in organic matter. The ideal soil pH is between 6.0 and 7.0. Before planting, amend your soil with compost, aged manure, or other organic materials to improve its drainage, fertility, and water-holding capacity. Avoid heavy clay soils, as they can become waterlogged and hinder root growth. If you have clay soil, consider growing bell peppers in raised beds or containers filled with a well-draining potting mix.
How often should I water my bell pepper plants?
Bell peppers need consistent moisture to produce healthy fruits. Water your plants deeply whenever the top inch of soil feels dry to the touch. Avoid overwatering, as this can lead to root rot. During hot, dry weather, you may need to water your bell peppers more frequently. Mulching around the base of the plants can help retain moisture and suppress weeds.
What are some common pests and diseases that affect bell peppers?
Bell peppers are susceptible to various pests and diseases, including aphids, flea beetles, spider mites, blossom-end rot, and fungal diseases. Regularly inspect your plants for signs of infestation or disease. If you spot any problems, take action promptly to prevent them from spreading. Use organic pest control methods, such as insecticidal soap or neem oil, to control aphids, flea beetles, and spider mites. To prevent blossom-end rot, ensure that your plants receive consistent watering and that the soil is rich in calcium. Apply a fungicide to control fungal diseases.
How do I prevent blossom-end rot in my bell peppers?
Blossom-end rot is a common problem in bell peppers, characterized by a dark, leathery spot on the bottom of the fruit. It is caused by a calcium deficiency in the developing fruit, often due to inconsistent watering or poor soil conditions. To prevent blossom-end rot, ensure that your plants receive consistent watering, especially during hot, dry weather. Amend your soil with calcium-rich materials, such as bone meal or crushed eggshells, before planting. You can also apply a calcium foliar spray to the plants during fruit development.
When should I harvest my bell peppers?
Bell peppers are typically ready to harvest 60-90 days after transplanting, depending on the variety. The peppers should be firm, plump, and brightly colored. You can harvest them at any stage of ripeness, but they will be sweetest and most flavorful when fully ripe. Use a sharp knife or pruning shears to cut the peppers from the plant, leaving a short stem attached.
Can I grow bell peppers in containers?
Yes, bell peppers can be successfully grown in containers. Choose a container that is at least 12 inches in diameter and 12 inches deep to provide enough room for the roots to grow. Use a well-draining potting mix and ensure that the container has drainage holes. Place the container in a sunny location that receives at least 6-8 hours of direct sunlight per day. Water the plants regularly and fertilize them with a balanced fertilizer every 2-3 weeks.
How do I encourage my bell pepper plants to produce more fruit?
To encourage your bell pepper plants to produce more fruit, provide them with optimal growing conditions, including plenty of sunlight, consistent watering, and fertile soil. Fertilize the plants regularly with a balanced fertilizer that is rich in phosphorus and potassium. Prune the plants to remove any suckers or unproductive branches. You can also try pinching off the first few blossoms to encourage the plant to focus its energy on vegetative growth before producing fruit.
Can I save seeds from my homegrown bell peppers?
Yes, you can save seeds from your homegrown bell peppers, but keep in mind that the resulting plants may not be true to type, especially if you grew hybrid varieties. To save seeds, allow the peppers to fully ripen on the plant until they are soft and wrinkled. Cut open the peppers and scoop out the seeds. Rinse the seeds thoroughly and spread them out on a paper towel to dry completely. Store the dried seeds in an airtight container in a cool, dark place.
Leave a Comment