
Grow Bean Sprouts Easily, even if you think you have a black thumb! Have you ever craved a fresh, crunchy addition to your salad or stir-fry, only to find the grocery store sprouts looking a little…sad? Well, I’m here to tell you that you can ditch the wilted disappointment and cultivate your own vibrant, delicious bean sprouts right in your kitchen. This isn’t just a gardening project; it’s a culinary adventure!
Sprouting beans has a rich history, particularly in Asian cultures where they’ve been a staple for centuries. Think of the vibrant flavors of Pad Thai or the refreshing crunch in a Vietnamese spring roll – bean sprouts are often the unsung heroes. Beyond their deliciousness, they’re packed with nutrients, offering a healthy and affordable way to boost your diet.
But why should you bother with this DIY project? Because knowing how to grow bean sprouts easily at home gives you complete control over freshness and quality. No more worrying about preservatives or questionable origins. Plus, it’s incredibly satisfying to watch those tiny seeds transform into a bounty of crisp, flavorful sprouts in just a few days. I’m going to show you a simple, foolproof method that requires minimal effort and equipment. Get ready to impress yourself (and your taste buds!) with your newfound sprouting skills!
Bohnensprossen einfach selbst ziehen: Eine Schritt-für-Schritt-Anleitung
Hallo ihr Lieben! Ich liebe frische Sprossen, besonders in Salaten, Sandwiches oder einfach so als gesunden Snack. Und wisst ihr was? Es ist super einfach, sie selbst zu ziehen! Keine komplizierten Geräte, keine teuren Samen – nur ein bisschen Geduld und ein paar einfache Zutaten. Ich zeige euch, wie es geht!
Was du brauchst:
* Bohnen: Am besten eignen sich Mungbohnen, aber auch Linsen, Kichererbsen oder Adzukibohnen funktionieren prima. Achtet darauf, dass sie unbehandelt und für den Verzehr geeignet sind. Bio-Qualität ist natürlich top!
* Ein Sprossenglas oder ein großes Einmachglas: Alternativ könnt ihr auch ein Sieb oder einen Keimbeutel verwenden.
* Ein feinmaschiges Sieb oder ein Stück Gaze/Mulltuch: Um die Bohnen im Glas zu halten und das Wasser abzugießen.
* Ein Gummiband: Um das Sieb oder Tuch am Glas zu befestigen.
* Frisches, sauberes Wasser: Am besten gefiltert oder abgekochtes Wasser, das abgekühlt ist.
* Ein dunkler, kühler Ort: Sprossen keimen am besten im Dunkeln.
* Geduld: Sprossen brauchen ein paar Tage, um zu wachsen.
Vorbereitung ist alles!
Bevor wir loslegen, ist es wichtig, die Bohnen richtig vorzubereiten. Das hilft ihnen, schneller und gleichmäßiger zu keimen.
1. Bohnen auswählen und waschen: Sucht die Bohnen sorgfältig aus und entfernt alle beschädigten oder verfärbten Exemplare. Gebt die Bohnen dann in ein Sieb und spült sie gründlich unter fließendem Wasser ab.
2. Einweichen: Gebt die gewaschenen Bohnen in eine Schüssel und bedeckt sie mit reichlich Wasser. Lasst sie mindestens 8 Stunden oder über Nacht einweichen. Die Bohnen quellen dabei auf und werden weicher, was den Keimprozess erleichtert. Ich mache das meistens abends, dann können sie über Nacht einweichen.
3. Glas vorbereiten: Während die Bohnen einweichen, könnt ihr euer Sprossenglas vorbereiten. Reinigt es gründlich mit heißem Wasser und Spülmittel. Spült es anschließend gut aus, um alle Spülmittelreste zu entfernen.
Der Keimprozess: Schritt für Schritt
Jetzt kommt der spannende Teil: Das Keimen der Bohnen!
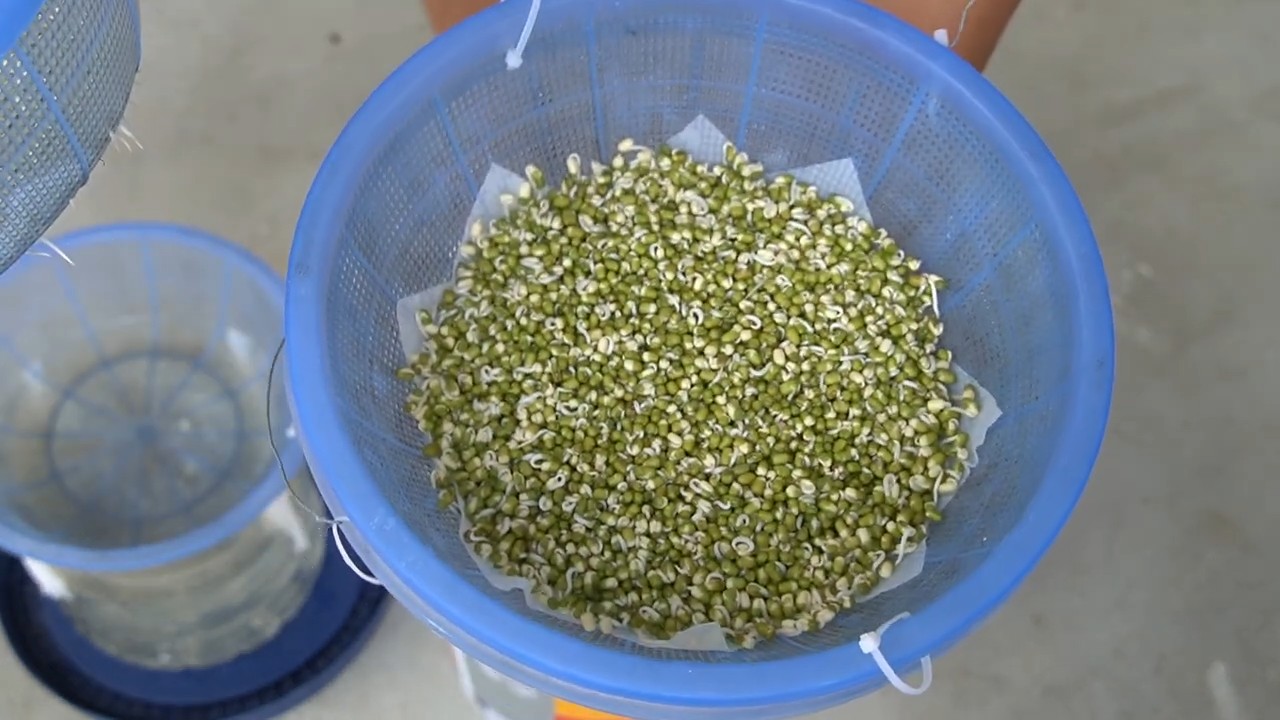
1. Bohnen ins Glas füllen: Gießt das Einweichwasser ab und spült die Bohnen noch einmal gründlich ab. Gebt die Bohnen dann in euer vorbereitetes Sprossenglas. Achtet darauf, dass das Glas nicht zu voll ist, da die Sprossen noch Platz zum Wachsen brauchen. Ich fülle das Glas meistens nur zu etwa einem Viertel.
2. Sieb oder Tuch befestigen: Legt das feinmaschige Sieb oder das Stück Gaze/Mulltuch über die Öffnung des Glases und befestigt es mit einem Gummiband. Das dient dazu, dass die Bohnen nicht herausfallen, wenn ihr das Wasser abgießt.
3. Erste Spülung: Füllt das Glas mit frischem, sauberem Wasser und schwenkt es vorsichtig, um alle Bohnen zu befeuchten. Gießt das Wasser dann durch das Sieb oder Tuch ab. Achtet darauf, dass kein Wasser im Glas zurückbleibt, da dies zu Schimmelbildung führen kann.
4. Dunkler Ort: Stellt das Glas an einen dunklen, kühlen Ort. Ideal ist ein Küchenschrank oder eine Speisekammer. Die Dunkelheit fördert das Wachstum der Sprossen.
5. Regelmäßiges Spülen: Das ist das A und O! Spült die Sprossen mindestens zweimal täglich (morgens und abends) mit frischem Wasser. Füllt das Glas mit Wasser, schwenkt es vorsichtig und gießt das Wasser dann wieder ab. Achtet darauf, dass kein Wasser im Glas zurückbleibt.
6. Geduld haben: Nach ein paar Tagen (je nach Bohnensorte und Temperatur) beginnen die Sprossen zu keimen. Ihr werdet kleine Wurzeln und grüne Blättchen sehen.
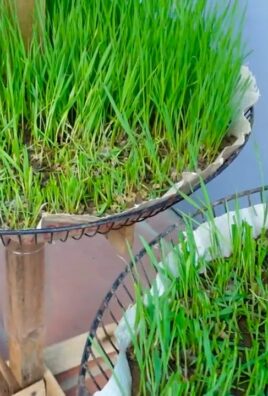
7. Licht: Sobald die Sprossen die gewünschte Länge erreicht haben (meistens nach 3-5 Tagen), könnt ihr sie für ein paar Stunden ins Licht stellen. Das fördert die Chlorophyllbildung und macht sie grüner. Aber Achtung: Nicht zu lange in die pralle Sonne stellen, da sie sonst austrocknen können.
Ernte und Lagerung
Wenn die Sprossen die gewünschte Größe erreicht haben, ist es Zeit für die Ernte!
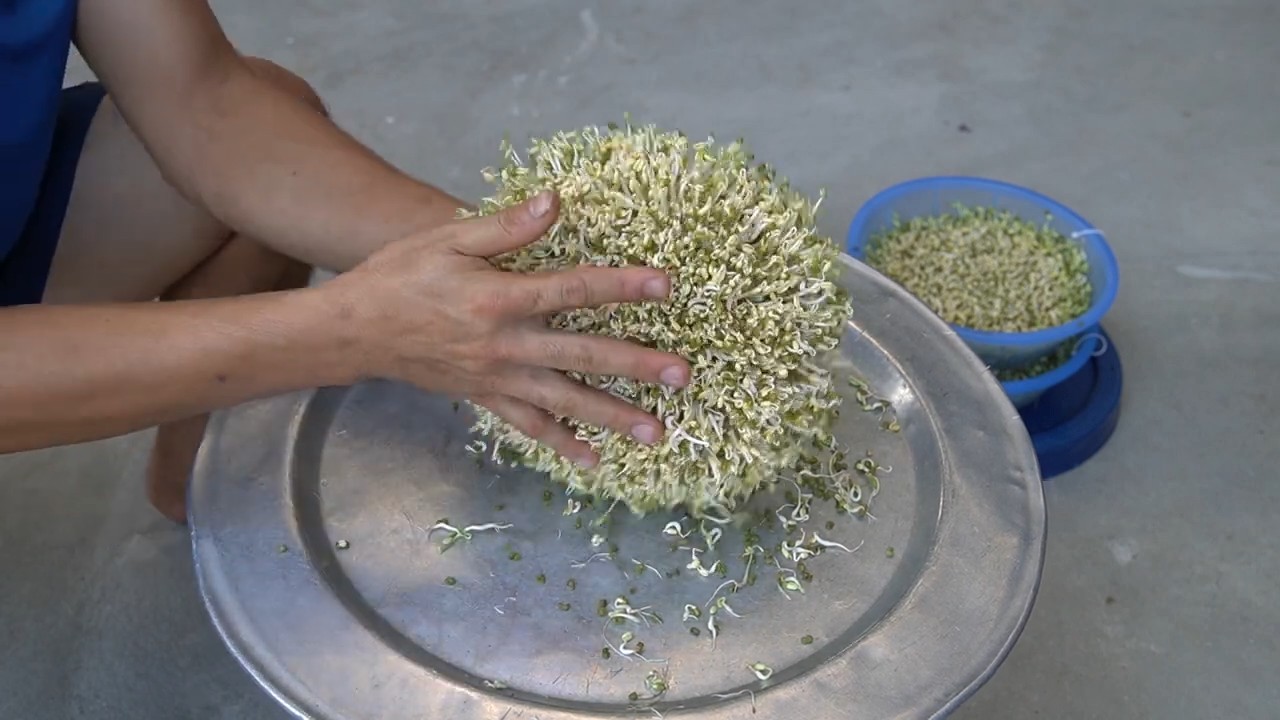
1. Ernten: Spült die Sprossen noch einmal gründlich ab, um eventuelle Schalenreste zu entfernen.
2. Abtropfen lassen: Lasst die Sprossen gut abtropfen, bevor ihr sie lagert.
3. Lagern: Bewahrt die Sprossen in einem luftdichten Behälter im Kühlschrank auf. Sie halten sich dort etwa 3-5 Tage. Achtet darauf, dass sie nicht zu feucht sind, da sie sonst schnell verderben.
Häufige Probleme und Lösungen
Manchmal läuft nicht alles glatt. Hier sind ein paar häufige Probleme und wie ihr sie lösen könnt:
* Schimmelbildung: Wenn ihr Schimmel auf den Sprossen entdeckt, solltet ihr sie sofort entsorgen. Schimmelbildung wird meistens durch zu viel Feuchtigkeit oder unzureichende Belüftung verursacht. Achtet darauf, die Sprossen regelmäßig zu spülen und gut abtropfen zu lassen.
* Unregelmäßiges Keimen: Manchmal keimen nicht alle Bohnen gleichzeitig. Das kann an der Qualität der Bohnen liegen oder daran, dass sie nicht gleichmäßig eingeweicht wurden. Versucht, nur hochwertige Bohnen zu verwenden und sie ausreichend lange einzuweichen.
* Sprossen riechen unangenehm: Ein unangenehmer Geruch kann ein Zeichen für Bakterienwachstum sein. Spült die Sprossen gründlicher und öfter. Wenn der Geruch anhält, solltet ihr sie entsorgen.
Weitere Tipps und Tricks
* Verschiedene Bohnensorten: Probiert verschiedene Bohnensorten aus, um euren Favoriten zu finden. Jede Sorte hat ihren eigenen Geschmack und ihre eigene Textur.
* Sprossenmischungen: Mischt verschiedene Bohnensorten, um eine interessante Sprossenmischung zu kreieren.
* Sprossen als Deko: Verwendet Sprossen als dekorative Garnitur für eure Gerichte.
* Sprossen im Salat: Gebt Sprossen in euren Salat, um ihn mit zusätzlichen Nährstoffen und Geschmack zu bereichern.
* Sprossen im Sandwich: Belegt euer Sandwich mit Sprossen, um es knackiger und gesünder zu machen.
* Sprossen als Snack: Esst Sprossen einfach so als gesunden Snack zwischendurch.
Reinigung des Sprossenglases
Nach jeder Sprossen-Zucht ist es wichtig, das Sprossenglas gründlich zu reinigen, um Bakterien und Schimmelbildung vorzubeugen.
1. Entleeren: Entfernt alle restlichen Sprossen und Schalenreste aus dem Glas.
2. Spülen: Spült das Glas gründlich mit heißem Wasser aus.
3. Reinigen: Reinigt das Glas mit heißem Wasser und Spülmittel. Verwendet eine Bürste, um auch schwer zugängliche Stellen zu erreichen.
4. Desinfizieren (optional): Um sicherzustellen, dass alle Bakterien abgetötet werden, könnt ihr das Glas zusätzlich mit Essigwasser (1 Teil Essig, 1 Teil Wasser) desinfizieren. Lasst die Essiglösung einige Minuten einwirken und spült das Glas dann gründlich mit klarem Wasser aus.
5. Trocknen: Lasst das Glas vollständig an der Luft trocknen, bevor ihr es wieder verwendet.
Warum Sprossen so gesund sind
Sprossen sind wahre Nährstoffbomben! Sie enthalten viele Vitamine, Mineralstoffe, Enzyme und Ballaststoffe. Durch den Keimprozess werden die Nährstoffe in den Bohnen aufgeschlossen und für den Körper leichter verfügbar. Sprossen sind außerdem sehr kalorienarm und somit ideal für eine gesunde Ernährung.
Die Vorteile im Überblick:
*
Conclusion
So, there you have it! Growing your own bean sprouts at home is not only incredibly easy and cost-effective, but it also provides you with a continuous supply of fresh, nutritious ingredients right at your fingertips. Forget those limp, pre-packaged sprouts from the grocery store – with this simple DIY trick, you can enjoy crisp, flavorful bean sprouts whenever you want.
The beauty of this method lies in its simplicity. You don’t need any fancy equipment or specialized knowledge. Just a jar, some beans, water, and a little patience. The process is also incredibly rewarding, watching those tiny sprouts emerge and grow day by day. It’s a fantastic project for kids, teaching them about the wonders of nature and the importance of healthy eating.
But the benefits extend beyond just convenience and cost savings. Homegrown bean sprouts are significantly fresher and more flavorful than store-bought varieties. You also have complete control over the growing environment, ensuring that your sprouts are free from harmful chemicals and pesticides. This means you’re getting the purest, most nutritious product possible.
Don’t be afraid to experiment with different types of beans. Mung beans are the most common and readily available, but you can also try adzuki beans, lentils, or even chickpeas. Each type of bean will offer a slightly different flavor and texture, adding variety to your meals. Consider adding a touch of lemon juice or apple cider vinegar to the rinsing water to help prevent mold growth and enhance the flavor. You can also adjust the sprouting time to achieve your desired sprout length. Some people prefer shorter, more delicate sprouts, while others prefer longer, more robust ones.
This DIY trick for growing bean sprouts is a must-try for anyone looking to add a healthy and delicious element to their diet. It’s a sustainable, eco-friendly way to enjoy fresh produce, and it’s a fun and engaging activity for the whole family.
We encourage you to give this method a try and see for yourself how easy and rewarding it is to grow your own bean sprouts. Once you’ve mastered the basics, you can start experimenting with different beans and flavors to create your own unique sprout blends.
Don’t forget to share your experiences with us! We’d love to hear about your successes, challenges, and any variations you’ve tried. Share your photos and tips in the comments below, and let’s inspire each other to grow our own food and live healthier lives. Happy sprouting!
Frequently Asked Questions (FAQ)
What types of beans work best for sprouting?
Mung beans are the most commonly used and easiest to sprout. They are readily available in most grocery stores and produce consistent results. However, you can also experiment with other types of beans and legumes, such as adzuki beans, lentils, chickpeas, and even soybeans. Keep in mind that different beans may require slightly different sprouting times and techniques. Always ensure that the beans you use are specifically intended for sprouting and are not treated with any chemicals or pesticides. Avoid using dried beans from the regular grocery aisle, as they may not germinate properly. Look for beans specifically labeled for sprouting or purchase them from a health food store or online retailer specializing in sprouting supplies.
How long does it take to grow bean sprouts?
The sprouting time can vary depending on the type of bean, the temperature, and the humidity. Generally, mung beans will sprout in about 3-5 days. Other beans may take slightly longer. The key is to keep the beans consistently moist and at a moderate temperature (around 70-75°F or 21-24°C). Avoid exposing the sprouts to direct sunlight, as this can cause them to become bitter. Check the sprouts regularly and rinse them thoroughly at least twice a day to prevent mold growth. You’ll know the sprouts are ready when they have reached your desired length and have a crisp, fresh appearance.
How do I prevent mold growth during sprouting?
Mold growth is a common concern when sprouting beans, but it can be easily prevented with proper hygiene and technique. The most important thing is to rinse the sprouts thoroughly at least twice a day with fresh, cool water. This will help to remove any bacteria or mold spores that may be present. Make sure the jar or container you are using is clean and sanitized before starting the sprouting process. You can also add a tablespoon of lemon juice or apple cider vinegar to the rinsing water to help inhibit mold growth. Ensure adequate air circulation around the sprouts by using a sprouting lid or mesh screen that allows for proper drainage and ventilation. Avoid overcrowding the jar with too many beans, as this can also contribute to mold growth. If you notice any signs of mold, such as a fuzzy or slimy texture, discard the entire batch of sprouts immediately.
How do I store bean sprouts after they are grown?
Once your bean sprouts have reached your desired length, rinse them thoroughly and drain them well. Pat them dry with a clean paper towel to remove any excess moisture. Store the sprouts in an airtight container in the refrigerator. They will typically last for up to a week if stored properly. Check the sprouts regularly for any signs of spoilage, such as a slimy texture or a foul odor. It’s best to use the sprouts as soon as possible to ensure optimal freshness and flavor.
Can I eat the bean sprout roots?
Yes, the roots of bean sprouts are perfectly edible and are often consumed along with the sprouts themselves. They are a good source of nutrients and add a slightly crunchy texture to dishes. However, some people may find the roots to be slightly bitter. If you prefer, you can trim the roots off before using the sprouts.
Are there any health benefits to eating bean sprouts?
Yes, bean sprouts are a highly nutritious food that offers a variety of health benefits. They are a good source of vitamins, minerals, and antioxidants. They are also low in calories and fat, making them a healthy addition to any diet. Bean sprouts are particularly rich in vitamin C, vitamin K, and folate. They also contain fiber, which can help to promote digestive health. The antioxidants in bean sprouts can help to protect against cell damage and reduce the risk of chronic diseases.
Can I grow bean sprouts without a special sprouting jar?
Absolutely! While sprouting jars are convenient, you can easily grow bean sprouts using items you likely already have in your kitchen. A wide-mouth mason jar works perfectly. Simply cover the mouth of the jar with a piece of cheesecloth or a mesh screen and secure it with a rubber band. You can also use a plastic container with holes poked in the bottom for drainage. The key is to ensure that the container allows for proper drainage and ventilation.
What if my bean sprouts don’t sprout?
If your bean sprouts don’t sprout, there could be several reasons why. First, make sure that the beans you are using are specifically intended for sprouting and are not too old. Old beans may have a lower germination rate. Also, ensure that the beans are being kept consistently moist but not waterlogged. Overwatering can cause the beans to rot. The temperature is also important. The ideal temperature for sprouting is around 70-75°F (21-24°C). If the temperature is too cold or too hot, the beans may not sprout. Finally, make sure that the beans are not exposed to direct sunlight, as this can inhibit germination. If you’ve tried all of these tips and your beans still aren’t sprouting, try using a different batch of beans or adjusting the temperature and humidity.


Leave a Comment