
Grow Basil Kitchen: Imagine stepping into your kitchen, not just to cook, but to snip fresh, fragrant basil leaves straight from your own little garden. Sounds dreamy, right? Well, it’s absolutely achievable, even if you think you have a “brown thumb”! For centuries, basil has been more than just a culinary herb; it’s been a symbol of love, good fortune, and even protection in various cultures. From ancient Greece, where it was associated with royalty, to Italian families who cherish it in their Sunday sauce, basil boasts a rich history.
But let’s be honest, buying fresh basil from the store can be expensive, and it often wilts before you even get a chance to use it all. That’s where the magic of DIY comes in! I’m here to share some super simple, yet effective, tricks and hacks to help you grow basil kitchen style. Whether you have a sprawling backyard or just a sunny windowsill, these tips will empower you to cultivate your own thriving basil plant. Say goodbye to sad, store-bought herbs and hello to a constant supply of fresh, flavorful basil right at your fingertips. Ready to get your hands dirty (just a little bit!) and transform your kitchen into a mini-herb haven? Let’s dive in!
Basil Bliss in the Kitchen: Your DIY Guide for Fresh Greens
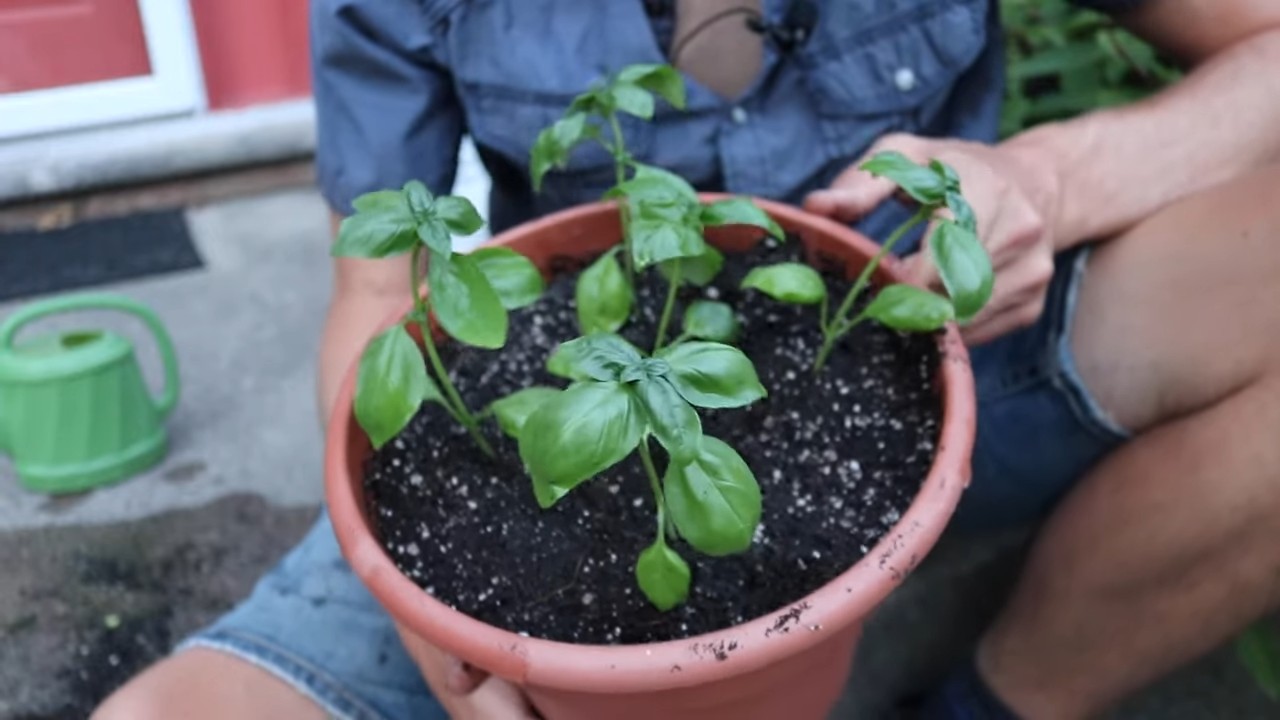
Hey plant friend! Are you tired of wilted basil from the supermarket that droops its leaves after two days? I know the feeling! That’s why today I’m showing you how you can easily grow your own basil in the kitchen—and with minimal effort. Believe me, it’s easier than you think, and you’ll be rewarded with a lush, aromatic basil bush that will take your pasta and pesto to a new level.
What You Need: The Ingredients for Your Basil Success
Before we get started, let’s make sure you have everything ready. Don’t worry, you probably have most of these things at home already!
- Basil seeds: You can buy them at a garden center, hardware store, or online. Make sure they are of good quality so that germination is successful. There are various basil varieties, such as Genovese, Thai, or lemon basil. Just choose your favorite!
- Seed-starting mix: Regular potting soil is often too nutrient-rich for the delicate seedlings. Seed-starting mix is finer and contains less fertilizer, which is perfect for the start.
- Starter pots or a seed tray: Small pots (approx. 5-8 cm / 2-3 inches in diameter) or a seed tray with multiple compartments are ideal. You can also use yogurt cups or egg cartons if you want to get creative. Just make sure they have holes in the bottom so water can drain out.
- A spray bottle: This allows you to gently moisten the soil without washing the seeds away.
- Plastic wrap or a mini-greenhouse: This creates a warm, humid climate that promotes germination.
- A warm, bright location: Basil loves the sun! A south-facing windowsill is perfect.
- Patience: Basil takes a little time to grow. But the effort is worth it!
Step by Step to Your Own Basil: The Sowing
Now let’s get down to it! Follow these steps, and soon the first green leaves will sprout.
- Prepare the starter pots: Fill the starter pots or seed tray with seed-starting mix. Press the soil down lightly, but not too firmly. It should remain loose and airy.
- Sow the seeds: Sprinkle the basil seeds evenly over the soil. They are very small, so be careful not to sow them too densely. A few seeds per pot are plenty.
- Cover the seeds: Cover the seeds with a thin layer of seed-starting mix (about 0.5 cm / 0.2 inches). Press the soil down lightly again.
- Water: Gently moisten the soil with the spray bottle. The soil should be damp, but not wet. Avoid washing the seeds away.
- Cover: Cover the starter pots or seed tray with plastic wrap or a mini-greenhouse. This creates a warm, humid climate that promotes germination.
- Location: Place the starter pots or seed tray in a warm, bright location. A south-facing windowsill is ideal. The temperature should be between 20 and 25 degrees Celsius (68-77°F).
- Be patient: Now it’s time to wait! Germination usually takes 5-10 days. Make sure the soil always stays moist. Briefly ventilate the cover daily to prevent mold.
Caring for the Little Basil Seedlings: From Sprout to Bush
Once the first seedlings sprout, the next phase begins. Now it’s about caring for the small seedlings so they grow into strong basil bushes.
- Remove the cover: As soon as the seedlings touch the cover, you should remove it. Otherwise, mold can develop.
- Thin out the seedlings: If several seedlings have grown in one pot, you should thin them out. This means removing the weakest seedlings so the strongest have enough space to grow. Be careful not to damage the roots of the other seedlings.
- Watering: Water the basil seedlings regularly, but not too much. The soil should always be slightly moist. Avoid waterlogging, as this can lead to root rot. It’s best to water from the bottom by placing the pots in a tray of water and letting them soak it up.
- Fertilizing: After about 4 weeks, you can start fertilizing. Use an organic liquid fertilizer for herbs. Fertilize every 2-3 weeks according to the package instructions.
- Repotting: When the seedlings are large enough (approx. 10-15 cm / 4-6 inches high), you can transplant them into larger pots. Use regular potting soil for this. Make sure the pots are large enough (at least 15 cm / 6 inches in diameter) so the roots have enough space.
- Sunshine: Basil loves the sun! Place the pots in a sunny location. If you keep them indoors, make sure they get at least 6 hours of sunlight per day.
- Regular harvesting: This is the most important tip for a lush basil bush! Regularly cut off the shoot tips. This promotes growth and prevents the plant from flowering. When basil flowers, it loses its aroma. Cut the shoots just above a pair of leaves. This will cause the plant to branch out and become bushier.
Harvesting Basil Correctly: How to Keep Your Basil Fresh for a Long Time
Harvesting is not only important for growth but also for flavor. Here are a few tips on how to properly harvest and store your basil:
- The right time: It’s best to harvest basil in the morning when the essential oils are most concentrated.
- The right technique: Cut the shoots just above a pair of leaves. This will cause the plant to branch out and become bushier.
- The right storage: Basil is delicate and wilts quickly. It’s best to use it immediately. If you want to store it, you can wrap it in a damp cloth and keep it in the refrigerator. Or you can place the stems in a glass of water, like cut flowers. This will keep it for a few days. You can also freeze basil. Chop it finely and freeze it in ice cube trays with a little water or oil.
Common Problems and Solutions: What to Do When Things Go Wrong?
Sometimes things don’t go as smoothly as planned. Here are a few common problems and how you can solve them:
The leaves have brown spots: This can be due to a fungal infection. Ensure good ventilation and avoid wetting the leaves…
The seeds don’t germinate: This can have several causes. Maybe the seeds are too old, the soil is too dry, or it’s too cold. Make sure you use fresh seeds, keep the soil moist, and maintain the right temperature.
The seedlings are spindly: This is usually due to too little light. Move the seedlings to a brighter location.
The leaves turn yellow: This can be due to too much or too little water. Make sure the soil is always slightly moist, but avoid waterlogging. It can also be due to a nutrient deficiency. Fertilize the seedlings regularly.

Conclusion
So, there you have it! Mastering the art of growing basil in your kitchen is not only achievable but also incredibly rewarding. We’ve walked through the simple steps, debunked common myths, and armed you with the knowledge to cultivate a thriving basil plant right on your windowsill. Why is this DIY trick a must-try? Because fresh, fragrant basil is no longer a grocery store dependency. It’s a readily available ingredient, bursting with flavor, ready to elevate your culinary creations at a moment’s notice. Imagine the convenience of snipping off a few leaves for your pasta sauce, sprinkling some on your pizza, or adding a vibrant touch to your salad – all without leaving your home.
Beyond the convenience, growing your own basil offers a connection to nature, a sense of accomplishment, and the satisfaction of knowing exactly where your food comes from. It’s a small step towards a more sustainable lifestyle, reducing your reliance on commercially grown produce and minimizing your environmental footprint. Plus, let’s be honest, a lush green basil plant adds a touch of beauty and freshness to any kitchen.
But the possibilities don’t stop there! Feel free to experiment with different varieties of basil. Genovese basil is a classic choice for pesto, while Thai basil adds a unique anise-like flavor to Asian dishes. Lemon basil offers a citrusy twist, and purple basil brings a beautiful color and slightly different flavor profile to your culinary adventures. You can also explore different growing mediums, such as hydroponics, for a soilless approach. Consider using different types of containers, from terracotta pots to repurposed jars, to add a personal touch to your indoor garden.
Don’t be afraid to get creative with your basil harvest. Beyond the usual suspects like pesto and pasta sauce, try infusing olive oil with basil for a flavorful dipping sauce, adding basil to your cocktails for a refreshing twist, or even using it to make a soothing herbal tea. The options are endless!
We wholeheartedly encourage you to embark on this journey of growing basil in your kitchen. It’s a simple, affordable, and incredibly satisfying project that will transform your cooking and bring a touch of nature into your home. Once you experience the joy of harvesting your own fresh basil, you’ll never look at store-bought basil the same way again.
So, grab a pot, some soil, and a few basil seeds or a starter plant, and get started today! We’re confident that you’ll be amazed at how easy and rewarding it is to grow your own basil. And most importantly, we want to hear about your experience! Share your tips, tricks, and photos with us in the comments below. Let’s create a community of indoor basil growers and inspire others to discover the joy of fresh, homegrown herbs. Happy growing!
Frequently Asked Questions (FAQ)
What is the best location in my kitchen to grow basil?
Basil thrives in a sunny location, so aim for a spot that receives at least 6-8 hours of direct sunlight per day. A south-facing windowsill is often ideal. If you don’t have enough natural light, consider using a grow light to supplement. Rotate the plant regularly to ensure even growth on all sides. Also, avoid placing your basil plant near drafts or extreme temperature fluctuations, as this can stress the plant.
How often should I water my basil plant?
Water your basil plant when the top inch of soil feels dry to the touch. Avoid overwatering, as this can lead to root rot. Ensure that your pot has drainage holes to allow excess water to escape. During hotter months, you may need to water more frequently. A good rule of thumb is to check the soil moisture daily and water accordingly.
What kind of soil is best for growing basil indoors?
Use a well-draining potting mix that is rich in organic matter. A mix of peat moss, perlite, and vermiculite is a good option. Avoid using garden soil, as it can be too heavy and may contain pests or diseases. You can also add compost to your potting mix to provide extra nutrients.
How do I harvest basil without harming the plant?
The best way to harvest basil is to pinch or cut off the leaves just above a leaf node (the point where leaves grow from the stem). This encourages the plant to branch out and produce more leaves. Avoid removing more than one-third of the plant’s leaves at a time. Regularly pruning your basil plant will also help to prevent it from flowering, which can make the leaves taste bitter.
Why are my basil leaves turning yellow?
Yellowing basil leaves can be caused by several factors, including overwatering, underwatering, nutrient deficiencies, or pests. Check the soil moisture and adjust your watering accordingly. If the soil is consistently wet, allow it to dry out before watering again. If the leaves are pale green or yellow, consider fertilizing your plant with a balanced liquid fertilizer. Inspect your plant for pests, such as aphids or spider mites, and treat accordingly.
How do I prevent pests from attacking my basil plant?
Regularly inspect your basil plant for pests. If you find any, you can try washing them off with a strong stream of water or using insecticidal soap. Avoid using harsh chemicals, as they can harm your plant and make the leaves unsafe to eat. You can also try companion planting with herbs like marigolds or garlic, which can help to repel pests.
Can I grow basil from cuttings?
Yes, you can easily propagate basil from cuttings. Simply take a cutting from a healthy stem, about 4-6 inches long, and remove the lower leaves. Place the cutting in a glass of water, making sure that the leaves are above the water line. Change the water every few days. After a week or two, roots will begin to form. Once the roots are about an inch long, you can transplant the cutting into a pot with well-draining potting mix.
How often should I fertilize my basil plant?
Fertilize your basil plant every 2-4 weeks with a balanced liquid fertilizer. Follow the instructions on the fertilizer label. Avoid over-fertilizing, as this can burn the roots. You can also add compost to your potting mix to provide slow-release nutrients.
My basil plant is flowering. What should I do?
Once your basil plant starts to flower, the leaves will become bitter. To prevent this, pinch off the flower buds as soon as you see them. This will encourage the plant to produce more leaves and prolong its lifespan. If your plant has already flowered, you can still harvest the leaves, but they may not taste as good.
What are some creative ways to use my homegrown basil?
Beyond pesto and pasta sauce, there are many creative ways to use your homegrown basil. Try infusing olive oil with basil for a flavorful dipping sauce, adding basil to your cocktails for a refreshing twist, or using it to make a soothing herbal tea. You can also add basil to your salads, sandwiches, and soups. The possibilities are endless! Experiment and discover your favorite ways to enjoy the fresh, vibrant flavor of your homegrown basil.
Leave a Comment