
Grow Bag Potatoes: Imagine harvesting a bounty of delicious, homegrown potatoes right from your patio or balcony! No sprawling garden needed. That’s the magic of grow bag potatoes, and I’m here to show you how incredibly easy and rewarding it is to cultivate your own spuds using this simple DIY method.
The concept of container gardening, including using grow bags, has been around for centuries, with roots tracing back to ancient civilizations who utilized pots and vessels to cultivate plants in limited spaces. Today, it’s experiencing a massive resurgence, especially among urban dwellers and those with limited gardening space. But why the hype? Well, let’s face it, not everyone has access to acres of land, and traditional gardening can be intimidating. That’s where the beauty of grow bag potatoes comes in!
This DIY trick is a game-changer because it democratizes gardening. You don’t need to be an expert, and you don’t need a huge backyard. Grow bag potatoes offer a compact, manageable, and surprisingly productive way to enjoy fresh, organic potatoes. Plus, the process is incredibly satisfying – from planting the seed potatoes to carefully unearthing your harvest, it’s a truly rewarding experience. So, if you’re looking for a fun, easy, and space-saving way to grow your own food, let’s dive into the world of grow bag potatoes!
Grow Your Own Spuds: A Beginner’s Guide to Growing Potatoes in Grow Bags
Hey there, fellow gardening enthusiasts! Ever dreamed of digging up your own fresh, flavorful potatoes right in your backyard (or even on your balcony)? Well, I’m here to tell you it’s easier than you think! Growing potatoes in grow bags is a fantastic way to enjoy homegrown goodness, even if you’re short on space. It’s a simple, rewarding project that’s perfect for beginners, and I’m going to walk you through every step.
Why Grow Potatoes in Grow Bags?
Before we dive in, let’s talk about why grow bags are such a great option for potatoes:
* Space-Saving: Perfect for small gardens, patios, balconies, or even decks. You don’t need a huge plot of land!
* Easy to Move: Need to chase the sun or protect your plants from a sudden frost? Just pick up the bag and move it!
* Excellent Drainage: Grow bags are typically made of breathable fabric, which prevents waterlogging and promotes healthy root growth.
* Fewer Pests and Diseases: Growing in containers can help reduce the risk of soilborne pests and diseases.
* Easy Harvesting: No more digging around in the dirt! Just tip the bag over and harvest your potatoes.
* Great for Beginners: It’s a relatively low-maintenance way to grow potatoes, making it ideal for those new to gardening.
What You’ll Need
Okay, let’s gather our supplies. Here’s what you’ll need to get started:
* Grow Bags: I recommend using grow bags that are at least 10 gallons in size. 15-20 gallon bags are even better, as they’ll give your potatoes plenty of room to grow. Fabric grow bags are the best choice because they allow for good drainage and aeration.
* Seed Potatoes: These aren’t seeds in the traditional sense. They are actually small potatoes that have “eyes” (buds) on them. You can buy seed potatoes from your local garden center or online. Choose a variety that you like to eat! Popular choices include Yukon Gold, Russet, and Red Pontiac.
* Potting Mix: Use a high-quality potting mix that’s well-draining. Avoid using garden soil, as it can become compacted in containers. I like to use a mix of compost, peat moss, and perlite.
* Fertilizer: Potatoes are heavy feeders, so you’ll need to fertilize them regularly. Use a balanced fertilizer (e.g., 10-10-10) or a fertilizer specifically formulated for potatoes.
* Watering Can or Hose: You’ll need a way to water your potatoes regularly.
* Optional:
* Chitting Tray: For sprouting your seed potatoes before planting.
* Gloves: To keep your hands clean.
* Trowel: For planting.
Preparing Your Seed Potatoes (Chitting)
This step is optional, but I highly recommend it! Chitting, or sprouting, your seed potatoes before planting can give them a head start and result in an earlier harvest.
1. A few weeks before planting: Place your seed potatoes in a cool, bright location (but not in direct sunlight). An egg carton or a chitting tray works well for this.
2. Let them sprout: Over the next few weeks, the seed potatoes will develop small, green sprouts (eyes).
3. Ready to plant: Once the sprouts are about 1/2 to 1 inch long, they’re ready to be planted.
Planting Your Seed Potatoes
Alright, let’s get our hands dirty!
1. Fill the grow bag: Fill the grow bag with about 4-6 inches of potting mix.
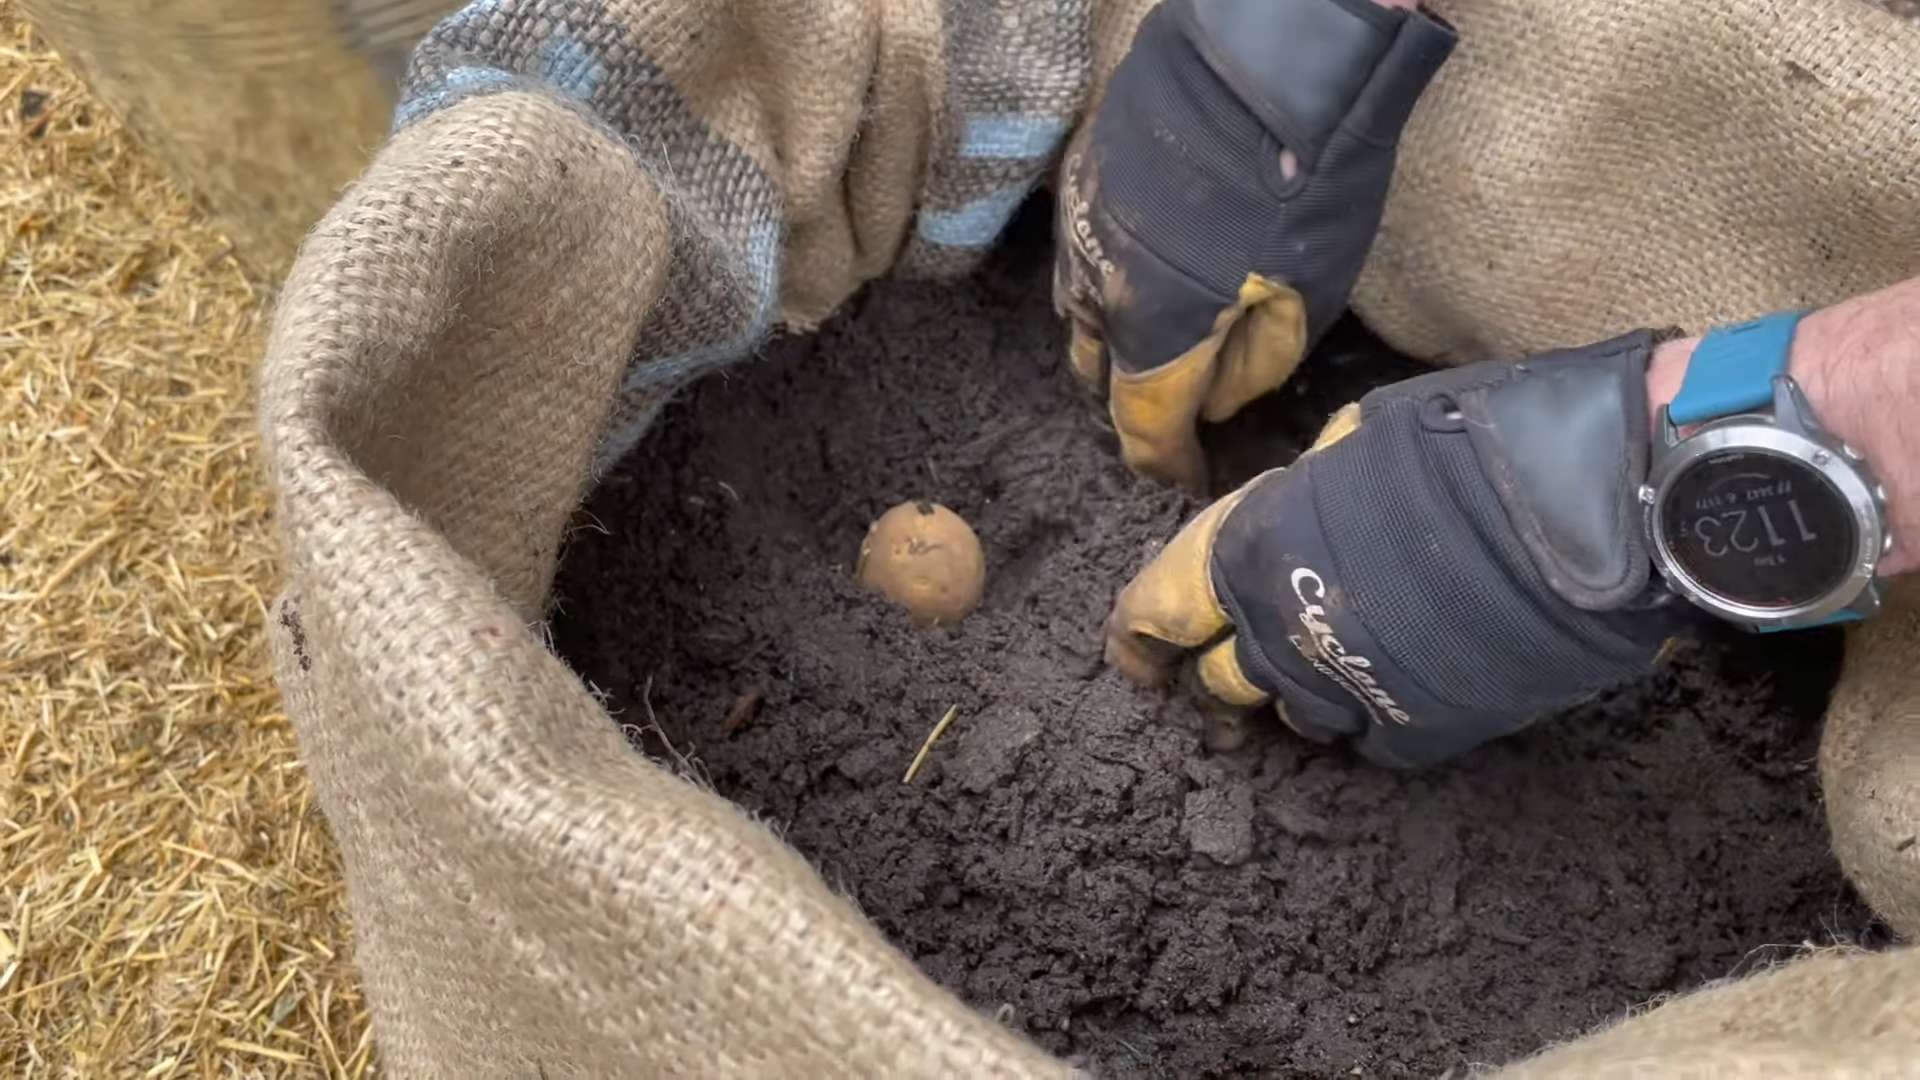
2. Plant the seed potatoes: Place 2-3 seed potatoes in the bag, spacing them evenly apart. Make sure the sprouts are facing upwards.
3. Cover the potatoes: Cover the seed potatoes with another 4-6 inches of potting mix.
4. Water thoroughly: Water the soil well until it’s evenly moist.
Hilling Your Potatoes
This is a crucial step for growing potatoes in grow bags. As the potato plants grow, you’ll need to “hill” them by adding more soil to the bag. This encourages the plants to produce more potatoes along the stems.
1. Wait for growth: Once the potato plants have grown about 6-8 inches tall, it’s time to hill them.
2. Add more soil: Add more potting mix to the grow bag, covering the stems of the plants, leaving only the top few leaves exposed.
3. Repeat: Repeat this process every few weeks as the plants continue to grow, until the grow bag is almost full.
Caring for Your Potato Plants
Now that your potatoes are planted, it’s important to provide them with the care they need to thrive.
1. Watering: Water your potato plants regularly, especially during hot, dry weather. The soil should be consistently moist, but not waterlogged. Check the soil moisture by sticking your finger into the soil. If it feels dry an inch or two below the surface, it’s time to water.
2. Fertilizing: Fertilize your potato plants every 2-3 weeks with a balanced fertilizer or a fertilizer specifically formulated for potatoes. Follow the instructions on the fertilizer package.
3. Sunlight: Potatoes need at least 6-8 hours of sunlight per day. Place your grow bags in a sunny location.
4. Pest Control: Keep an eye out for pests such as aphids, potato beetles, and flea beetles. If you notice any pests, you can try hand-picking them off the plants or using an organic insecticide.
5. Disease Prevention: To prevent diseases, make sure your potato plants have good air circulation and avoid overwatering. If you notice any signs of disease, such as yellowing leaves or spots, remove the affected leaves immediately.
Harvesting Your Potatoes
The most exciting part! You’ll know your potatoes are ready to harvest when the plants start to flower and the foliage begins to die back. This usually takes about 80-100 days after planting.
1. Stop watering: A week or two before harvesting, stop watering the plants. This will help the potatoes to cure and develop a thicker skin.
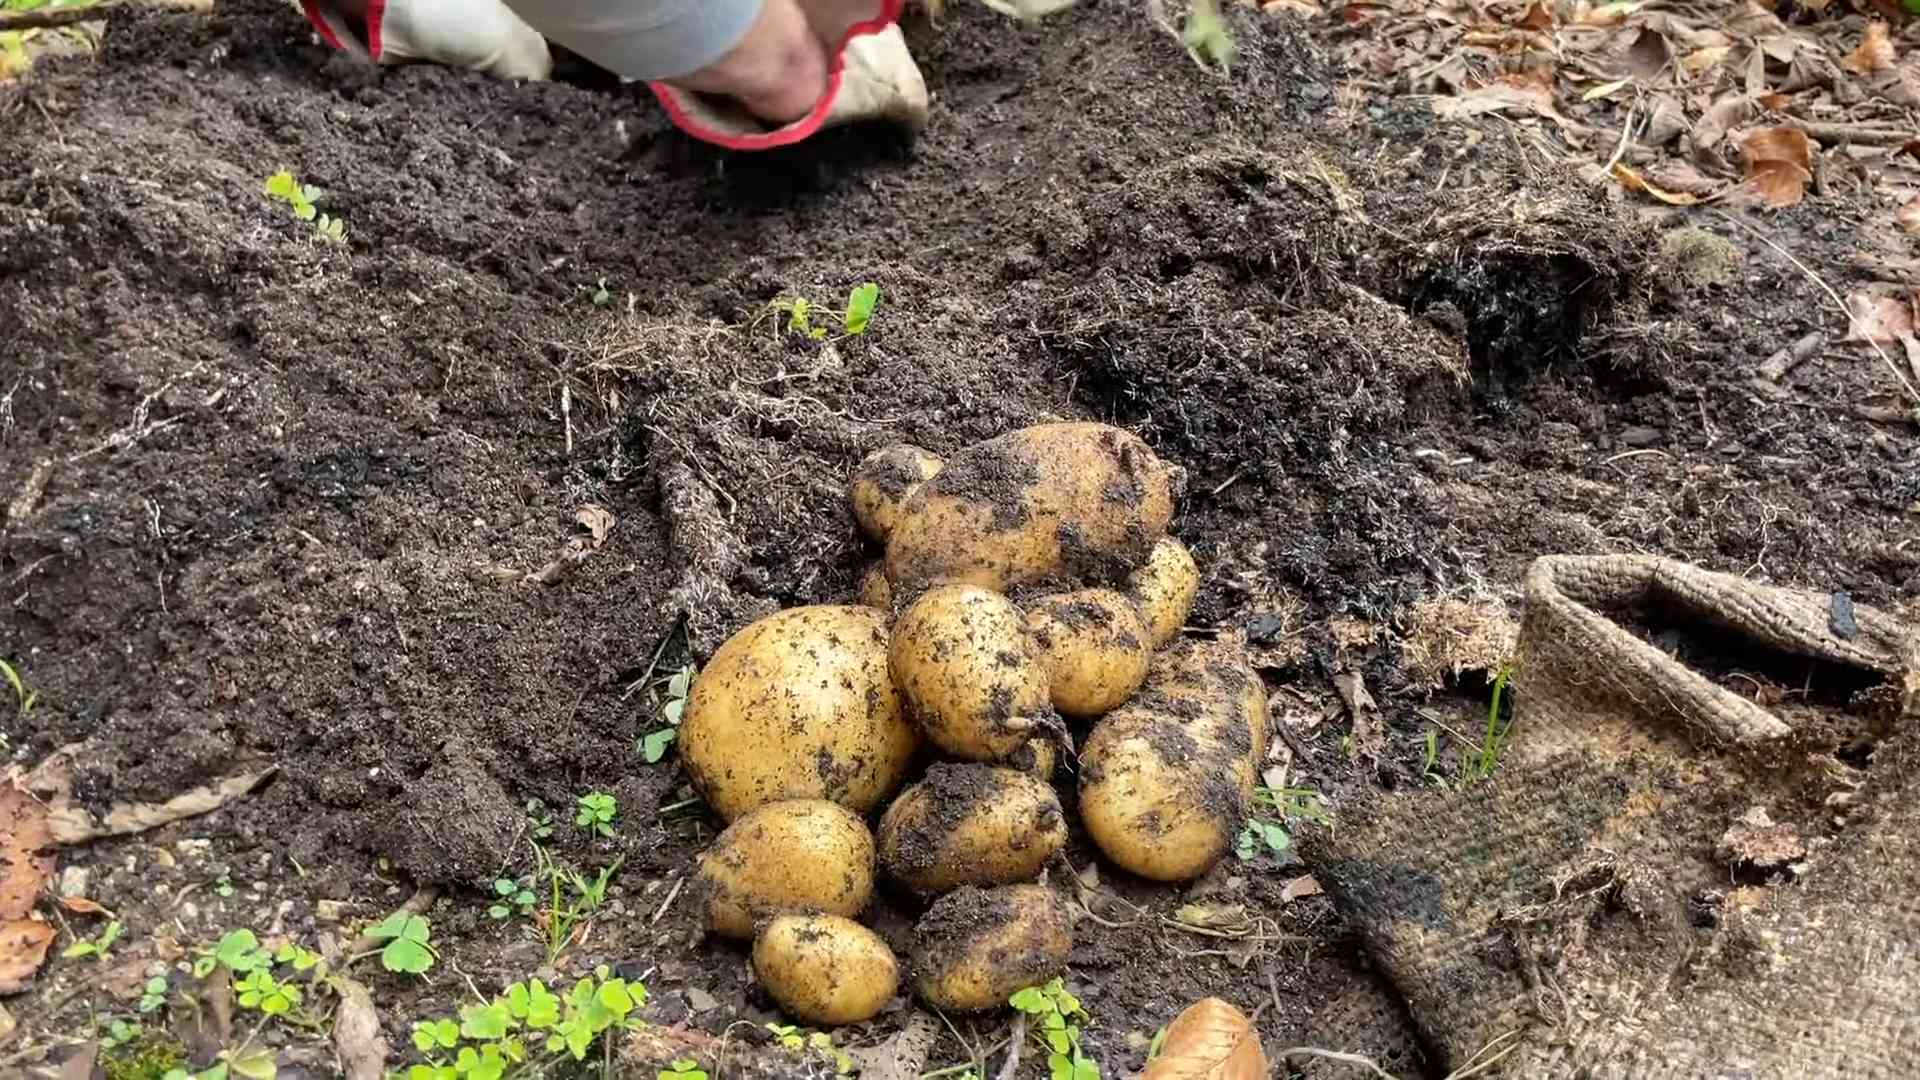
2. Harvesting: To harvest your potatoes, simply tip the grow bag over and gently remove the potatoes from the soil. You can also reach into the bag and carefully dig around for the potatoes.
3. Curing: After harvesting, cure your potatoes by placing them in a cool, dark, and well-ventilated place for about a week. This will help them to develop a thicker skin and prevent them from rotting.
4. Storing: Store your cured potatoes in a cool, dark, and dry place. They should last for several months.
Troubleshooting
Even with the best care, you might encounter some problems along the way. Here are a few common issues and how to address them:
* Yellowing Leaves: This could be caused by overwatering, underwatering, nutrient deficiencies, or disease. Check the soil moisture and adjust your watering accordingly. Fertilize your plants regularly. If you suspect disease, remove the affected leaves.
* Potato Beetles: These pests can quickly defoliate your potato plants. Hand-pick them off the plants or use an organic insecticide.
* Scab: This is a common potato disease that causes rough, scabby patches on the skin of the potatoes. To prevent scab, avoid overwatering and maintain a slightly acidic soil pH.
* Small Potatoes: This could be caused by insufficient sunlight, overcrowding, or nutrient deficiencies. Make sure your plants are getting enough sunlight and space them properly. Fertilize your plants regularly.
Choosing the Right Potato Variety
Selecting the right potato variety is key to a successful harvest. Here’s a quick rundown of some popular choices:
* Yukon Gold: These are known for their creamy texture and buttery flavor. They’re great for boiling, mashing, and roasting.
* Russet: These are the classic baking potato. They have a fluffy texture and a mild flavor.
* Red Pontiac: These have a thin, red skin and a waxy texture. They’re great for boiling, salads, and roasting.
* Fingerling Potatoes: These are small, elongated potatoes with a firm texture and a nutty flavor. They’re great for roasting and salads.
* Purple Potatoes: These have a vibrant purple flesh and a slightly sweet flavor. They’re great for adding color to your dishes.
Tips for Success
Here are a few extra tips to help you grow the best potatoes possible:
* Use certified seed potatoes: These are disease-free and will give
Conclusion
So, there you have it! Growing your own potatoes in grow bags is not just a gardening trend; it’s a genuinely rewarding and practical way to enjoy fresh, homegrown produce, even if you’re short on space. We’ve walked through the simple steps, highlighted the benefits, and hopefully, dispelled any initial hesitations you might have had.
Why is this DIY trick a must-try? Because it offers a level of control and convenience that traditional in-ground potato farming simply can’t match. Imagine harvesting only the potatoes you need for tonight’s dinner, leaving the rest to continue growing. Think about the satisfaction of knowing exactly where your food comes from and what went into growing it. And consider the sheer joy of watching those little green shoots emerge from the soil, transforming into a thriving potato plant right before your eyes.
Beyond the practical advantages, growing potatoes in grow bags is also incredibly accessible. You don’t need acres of land or specialized equipment. A sunny patio, a balcony, or even a well-lit deck can become your personal potato patch. The grow bags themselves are relatively inexpensive and reusable, making this a sustainable and budget-friendly gardening option.
But the best part? The possibilities are endless! Feel free to experiment with different potato varieties. Russets, Yukon Golds, red potatoes – each will bring its unique flavor and texture to your table. You can also try companion planting, adding herbs like rosemary or thyme to your grow bags to deter pests and enhance the flavor of your potatoes.
For a fun twist, consider using different colored grow bags to easily identify the potato variety planted within. This is especially helpful if you’re growing multiple types simultaneously. You could also try succession planting, staggering your planting dates to ensure a continuous harvest throughout the growing season. Plant one grow bag in early spring, another a few weeks later, and so on.
Don’t be afraid to get creative with your soil mix, either. While a standard potting mix works well, you can also add compost, aged manure, or even coffee grounds to enrich the soil and provide your potatoes with extra nutrients. Just be sure to maintain good drainage to prevent waterlogging.
We wholeheartedly encourage you to give this DIY grow bag potatoes method a try. It’s a fun, educational, and ultimately delicious experience. And once you’ve harvested your first crop of homegrown potatoes, we’re confident you’ll be hooked!
But don’t just take our word for it. We want to hear about your experiences! Share your photos, tips, and triumphs with us in the comments section below. Let us know what potato varieties you tried, what challenges you faced, and what you learned along the way. Together, we can create a community of grow bag potato enthusiasts, sharing our knowledge and inspiring others to get their hands dirty. So, grab a grow bag, some seed potatoes, and get ready to embark on a rewarding gardening adventure! Happy growing!
Frequently Asked Questions (FAQ)
What size grow bag is best for growing potatoes?
The ideal size grow bag for potatoes is typically between 10 and 20 gallons. A 10-gallon bag is sufficient for a few potato plants, while a 20-gallon bag provides more space for larger harvests and allows for more hilling as the plants grow. The larger the bag, the more room the potatoes have to develop. Consider the space you have available and the number of potatoes you want to grow when choosing your grow bag size.
How often should I water my potato grow bags?
Watering frequency depends on several factors, including the weather, the size of the grow bag, and the type of soil you’re using. Generally, you should water your potato grow bags when the top inch of soil feels dry to the touch. During hot, dry weather, you may need to water daily, while in cooler, wetter conditions, you may only need to water every few days. Be careful not to overwater, as this can lead to root rot. Ensure your grow bags have adequate drainage to prevent water from pooling at the bottom. A good rule of thumb is to water deeply until you see water draining from the bottom of the bag.
What kind of soil should I use for growing potatoes in grow bags?
A well-draining, nutrient-rich soil mix is essential for growing healthy potatoes in grow bags. A good option is a mix of equal parts potting mix, compost, and perlite or vermiculite. The potting mix provides a good base, the compost adds nutrients, and the perlite or vermiculite improves drainage and aeration. Avoid using garden soil, as it can be too heavy and compact, hindering root growth. You can also amend your soil with slow-release fertilizer to provide a steady supply of nutrients throughout the growing season.
How do I know when my potatoes are ready to harvest?
The timing of your potato harvest depends on the variety you’re growing and when you planted them. Generally, early-season potatoes are ready to harvest about 70-80 days after planting, while late-season potatoes take 90-100 days. You can start harvesting “new potatoes” (small, tender potatoes) when the plants begin to flower. To harvest, reach into the grow bag and gently pull out a few potatoes. For a larger harvest, wait until the foliage starts to die back. At this point, stop watering and allow the potatoes to cure in the soil for a week or two before harvesting the entire crop.
Can I reuse the soil from my potato grow bags?
Yes, you can reuse the soil from your potato grow bags, but it’s important to replenish the nutrients and address any potential disease issues. After harvesting your potatoes, remove any remaining plant debris and amend the soil with fresh compost, aged manure, or a slow-release fertilizer. You can also add a soil amendment like mycorrhizae to help improve nutrient uptake. If you suspect any disease problems, consider sterilizing the soil by baking it in the oven or solarizing it in the sun. Alternatively, you can use the old soil for other plants that are not susceptible to the same diseases as potatoes.
What are some common pests and diseases that affect potatoes grown in grow bags?
Some common pests that can affect potatoes grown in grow bags include aphids, potato beetles, and flea beetles. Diseases include early blight, late blight, and potato scab. To prevent pest and disease problems, choose disease-resistant potato varieties, practice good sanitation (remove plant debris), and monitor your plants regularly for signs of infestation or disease. You can use organic pest control methods like insecticidal soap or neem oil to control pests. For diseases, ensure good air circulation and avoid overwatering. If you encounter serious disease problems, consult with your local agricultural extension office for advice.
Can I grow potatoes in grow bags in a shady area?
Potatoes need at least 6-8 hours of direct sunlight per day to thrive. While they can tolerate some partial shade, growing them in a shady area will result in smaller yields and weaker plants. If you don’t have a sunny spot, consider using grow lights to supplement the natural sunlight.
How do I hill potatoes in grow bags?
Hilling is the process of covering the potato stems with soil as they grow. This encourages the development of more potatoes along the buried stems. To hill potatoes in grow bags, start by filling the bag about one-third full with soil. Plant your seed potatoes and water them well. As the plants grow, gradually add more soil to the bag, covering the stems up to the bottom set of leaves. Repeat this process every few weeks until the bag is full.
What are the benefits of growing potatoes in grow bags compared to traditional gardening?
Growing potatoes in grow bags offers several advantages over traditional gardening, including:
* **Space-saving:** Grow bags are ideal for small spaces like patios, balconies, and decks.
* **Improved drainage:** Grow bags provide excellent drainage, preventing waterlogging and root rot.
* **Easy harvesting:** Harvesting potatoes from grow bags is much easier than digging them up from the ground.
* **Portability:** Grow bags can be easily moved to different locations to take advantage of sunlight or protect plants from frost.
* **Soil control:** You have complete control over the soil mix in grow bags, ensuring optimal growing conditions.
* **Pest and disease control:** Grow bags can help reduce the risk of soilborne pests and diseases.
Can I grow different varieties of potatoes in the same grow bag?
It’s generally not recommended to grow different varieties of potatoes in the same grow bag. Each variety has its own growth habits and maturity times, which can make it difficult to manage the plants and harvest the potatoes at the right time. Additionally, different varieties may have different susceptibility to pests and diseases, which could increase the risk of problems. If you want to grow multiple varieties, it’s best to plant them in separate grow bags.


Leave a Comment