
Grow Asparagus at Home and unlock the secrets to a thriving, delicious garden right outside your door! Have you ever dreamed of harvesting your own tender, green spears of asparagus, knowing exactly where they came from and how they were grown? Well, dream no more! This DIY guide will empower you to cultivate this perennial vegetable, bringing a touch of gourmet goodness to your table year after year.
Asparagus has a rich history, dating back to ancient Greece and Rome, where it was prized for its medicinal properties and culinary delights. Emperors and commoners alike savored its unique flavor. Today, while you can easily find asparagus at the grocery store, there’s something incredibly rewarding about nurturing your own patch.
Why should you embark on this gardening adventure? Because grow asparagus at home is not only a cost-effective way to enjoy this delectable vegetable, but it also allows you to control the growing process, ensuring you’re consuming fresh, organic produce free from harmful pesticides. Plus, imagine the satisfaction of serving a dish featuring asparagus you personally cultivated! This guide provides simple, step-by-step instructions and insider tips to help you succeed, even if you’re a beginner gardener. Let’s get started and transform your backyard into an asparagus haven!
Growing Asparagus: A Beginner’s Guide to a Bountiful Harvest
Asparagus, that delicious and elegant spring vegetable, might seem intimidating to grow at home. But trust me, with a little patience and the right approach, you can enjoy fresh, homegrown asparagus for years to come! It’s a long-term investment, as asparagus takes a few years to mature, but the rewards are well worth the wait. I’m going to walk you through everything you need to know to successfully cultivate your own asparagus patch.
Choosing Your Asparagus Variety
Before you even think about digging, you need to decide which asparagus variety is right for you. There are male and female varieties, and some newer hybrids that are all-male. Male varieties are generally preferred because they don’t produce seeds, which means they put more energy into spear production. Here are a few popular choices:
* Jersey Knight: This is a widely recommended all-male hybrid known for its high yields and disease resistance. It’s a great choice for beginners.
* Jersey Giant: Another all-male hybrid, similar to Jersey Knight but slightly larger spears.
* Purple Passion: This variety produces beautiful purple spears that turn green when cooked. It’s a bit sweeter than green varieties.
* Mary Washington: An older, open-pollinated variety that’s still popular for its reliability. However, it produces both male and female plants, so you’ll need to remove the female plants to maximize spear production.
I personally recommend starting with Jersey Knight or Jersey Giant. They’re reliable and productive, and you’ll be less likely to run into problems.
Preparing Your Asparagus Bed
Asparagus needs a permanent home, so choosing the right location and preparing the soil is crucial. This is where the real work comes in, but it’s an investment that will pay off for years to come.
* Sunlight: Asparagus needs at least 6-8 hours of direct sunlight per day.
* Soil: Well-drained soil is essential. Asparagus crowns will rot in soggy soil. Aim for a sandy loam soil that’s rich in organic matter.
* pH: Asparagus prefers a soil pH between 6.5 and 7.5.
* Space: Give each plant plenty of room to grow. Asparagus ferns can get quite large.
Step-by-Step Bed Preparation:
1. Choose Your Location: Select a sunny spot with well-drained soil. Remember, this is a long-term commitment, so choose wisely!
2. Clear the Area: Remove all weeds, grass, rocks, and debris from the area. This is important to prevent competition for nutrients and water.
3. Soil Testing: I highly recommend getting your soil tested. This will tell you the pH and nutrient levels, so you can amend the soil accordingly. You can usually get a soil test kit from your local garden center or agricultural extension office.
4. Amend the Soil: Based on your soil test results, amend the soil with compost, well-rotted manure, or other organic matter. Asparagus is a heavy feeder, so you want to make sure the soil is rich in nutrients. If your soil is acidic, add lime to raise the pH. If it’s alkaline, add sulfur to lower the pH.
5. Dig a Trench: Dig a trench that is about 12-18 inches deep and 12 inches wide. The length of the trench will depend on how many asparagus crowns you’re planting.
6. Add Compost to the Trench: Fill the bottom of the trench with a 4-6 inch layer of compost or well-rotted manure. This will provide nutrients for the asparagus roots as they grow.
7. Create a Ridge: Create a ridge of soil down the center of the trench. This is where you’ll place the asparagus crowns.
Planting Your Asparagus Crowns
Now comes the exciting part – planting your asparagus! You can purchase asparagus crowns from a reputable nursery or online retailer. I prefer to buy one-year-old crowns, as they’re more likely to establish quickly.
* Timing: Plant asparagus crowns in early spring, as soon as the soil can be worked.
* Spacing: Space the crowns about 12-18 inches apart in the trench.
* Depth: Place the crowns on the ridge with the roots spread out. The top of the crown should be about 6-8 inches below the soil surface.
Step-by-Step Planting:
1. Soak the Crowns: Before planting, soak the asparagus crowns in water for about an hour. This will help rehydrate the roots.
2. Place the Crowns: Place the crowns on the ridge in the trench, spacing them 12-18 inches apart. Make sure the roots are spread out evenly.
3. Cover the Crowns: Gently cover the crowns with about 2-3 inches of soil.
4. Water Thoroughly: Water the newly planted asparagus crowns thoroughly.
5. Gradually Fill the Trench: As the asparagus spears emerge, gradually fill in the trench with soil. This will encourage the crowns to develop a strong root system. Over the growing season, you’ll completely fill the trench.
Caring for Your Asparagus Patch
Once your asparagus is planted, it’s important to provide proper care to ensure a healthy and productive patch.
* Watering: Water regularly, especially during dry periods. Asparagus needs consistent moisture to thrive.
* Weeding: Keep the asparagus patch free of weeds. Weeds compete with asparagus for nutrients and water.
* Fertilizing: Fertilize in early spring with a balanced fertilizer. You can also side-dress with compost or well-rotted manure.
* Mulching: Mulch around the asparagus plants with straw, wood chips, or other organic material. This will help retain moisture, suppress weeds, and regulate soil temperature.
* Pest and Disease Control: Keep an eye out for pests and diseases. Asparagus beetles are a common pest. Handpick them off the plants or use an insecticidal soap. Rust is a common fungal disease. Ensure good air circulation and avoid overhead watering to prevent rust.
The Waiting Game: Patience is Key!
This is the hardest part! Don’t harvest any spears during the first two years after planting. This allows the plants to develop a strong root system. Harvesting too early can weaken the plants and reduce future yields.
* Year 1: Let the ferns grow and mature. They will provide energy for the crowns to develop.
* Year 2: Continue to let the ferns grow and mature. You can harvest a few spears for a very short period (1-2 weeks) if the plants are vigorous.
* Year 3 and Beyond: You can begin to harvest asparagus spears for a longer period (6-8 weeks) each spring.
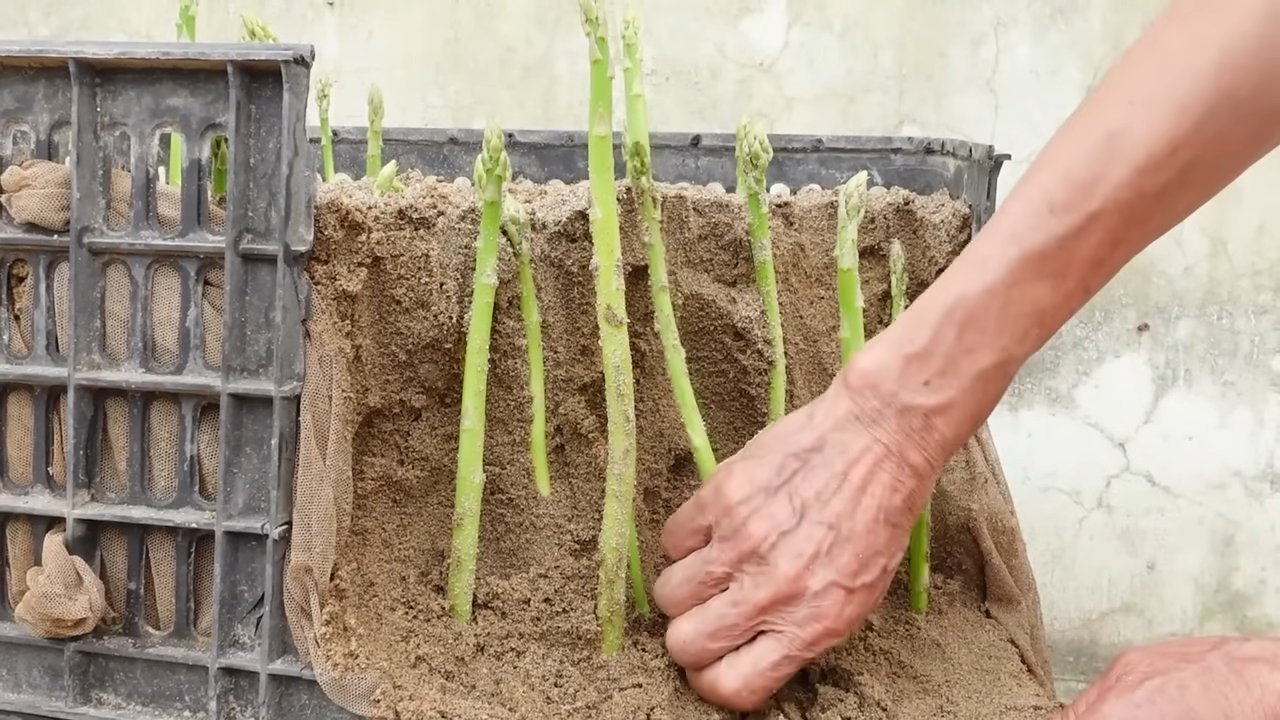
Harvesting Your Asparagus
Finally, the moment you’ve been waiting for! Harvesting your own asparagus is incredibly rewarding.
* Timing: Harvest asparagus spears when they are about 6-8 inches tall and about as thick as your finger.
* Method: Snap off the spears at ground level. You can also use a sharp knife to cut the spears, but be careful not to damage the crowns.
* Frequency: Harvest asparagus spears every day or two during the peak of the season.
* Stop Harvesting: Stop harvesting when the spears become thin and spindly. This indicates that the plants are starting to put their energy into fern growth.
Post-Harvest Care
After you’ve finished harvesting asparagus for the season, it’s important to continue to care for the plants.
* Let the Ferns Grow: Allow the ferns to grow and mature. They will provide energy for the crowns to develop for the next year’s harvest.
* Fertilize: Fertilize the asparagus patch again in late spring or early summer.
* Water: Continue to water regularly, especially during dry periods.
* Cut Back the Ferns: In late fall or early winter, after the ferns have turned brown, cut them back to about 2 inches above the ground. This will help prevent disease and pests from overwintering in the ferns.
Troubleshooting
Even with the best care, you might encounter some problems with your asparagus patch. Here are a few common issues and how to address them:
* Thin Spears: This can be caused by over-harvesting, nutrient deficiencies, or lack of water. Make sure you’re not harvesting too much, fertilize regularly, and water consistently.
* Yellowing Ferns: This can be caused by nutrient deficiencies, pests, or diseases. Check for pests and diseases, and fertilize if necessary.
* Asparagus Beetles: These pests can damage the spears and ferns. Handpick them off the plants or use an
Conclusion
So, there you have it! Growing asparagus at home isn’t just a gardening project; it’s an investment in years of delicious, healthy harvests. Forget those limp, expensive spears from the grocery store. Imagine stepping into your backyard and picking plump, vibrant asparagus, bursting with flavor, ready to be grilled, roasted, or steamed. This DIY trick transforms your garden into a source of culinary delight and offers a connection to your food that’s both satisfying and rewarding.
Why is this a must-try? Because it’s more than just growing a vegetable. It’s about sustainability, reducing your carbon footprint, and knowing exactly where your food comes from. It’s about the joy of nurturing something from a tiny seed or crown into a thriving plant. And, let’s be honest, it’s about bragging rights when you serve your homegrown asparagus to friends and family!
But the benefits don’t stop there. Asparagus is a nutritional powerhouse, packed with vitamins, minerals, and antioxidants. Growing your own ensures you’re getting the freshest, most nutrient-rich spears possible. Plus, established asparagus beds are incredibly low-maintenance, providing years of harvests with minimal effort.
Ready to take your asparagus growing to the next level? Consider these variations:
* Experiment with different varieties: ‘Jersey Knight’ is a popular choice for its high yields and disease resistance, but explore other options like ‘Purple Passion’ for its unique color and sweeter flavor, or ‘Mary Washington’ for a classic, reliable variety.
* Companion planting: Plant asparagus alongside herbs like basil, parsley, and marigolds to deter pests and attract beneficial insects. Tomatoes are also excellent companions, as they help protect asparagus from asparagus beetles.
* Vertical gardening: If you’re short on space, consider training your asparagus plants to grow up a trellis or fence. This not only saves space but also improves air circulation and reduces the risk of fungal diseases.
* Soil Amendments: While asparagus loves well-drained soil, adding compost or well-rotted manure each year can significantly improve your yield and the overall health of your plants. Consider testing your soil’s pH and amending it with lime if it’s too acidic.
Don’t be intimidated by the initial investment of time and effort. Growing asparagus at home is a long-term project, but the rewards are well worth it. The satisfaction of harvesting your own fresh asparagus, year after year, is unparalleled.
We encourage you to give this DIY trick a try. Start small, learn as you go, and don’t be afraid to experiment. And most importantly, share your experience with us! We’d love to hear about your successes, challenges, and any tips you’ve discovered along the way. Post pictures of your asparagus beds, share your favorite recipes, and let’s build a community of home asparagus growers. Let’s cultivate a love for fresh, homegrown food, one spear at a time.
Frequently Asked Questions (FAQ)
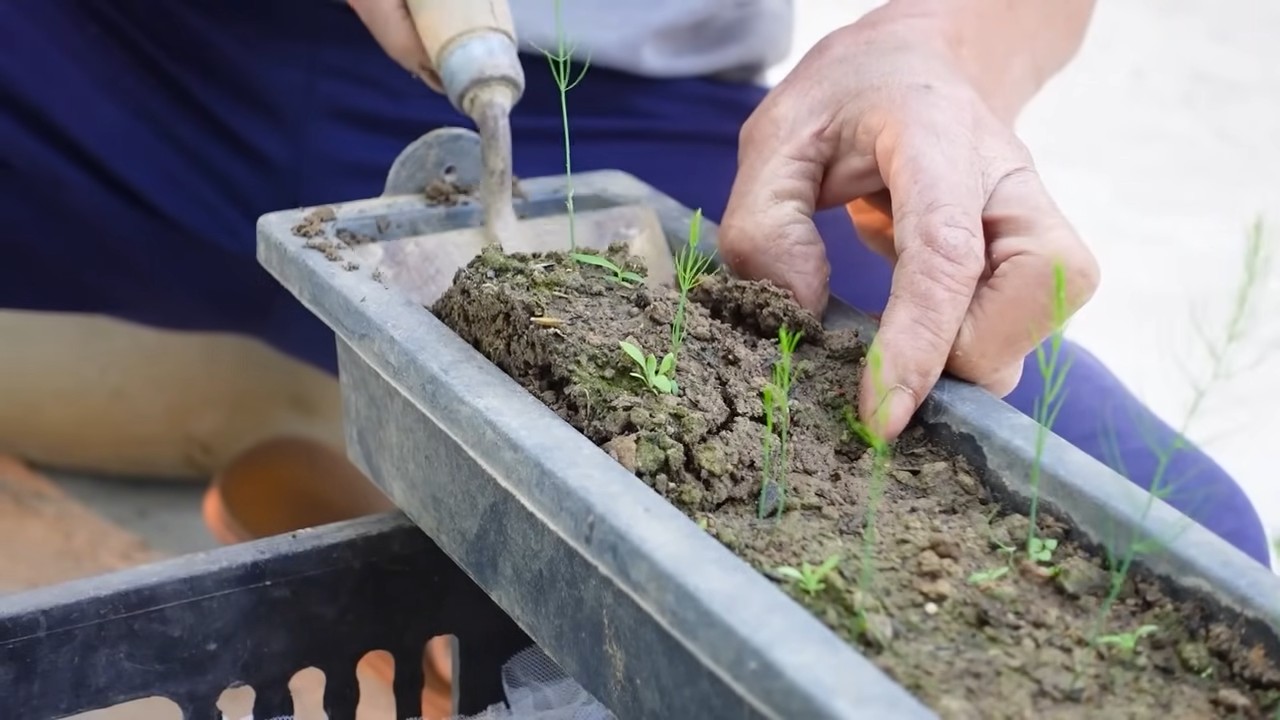
How long does it take to grow asparagus from seed?
Growing asparagus from seed requires patience. It typically takes 2-3 years from seed to harvestable spears. The first year focuses on developing a strong root system. You can start seeds indoors in late winter or early spring, transplanting them outdoors after the last frost. Be prepared for a longer wait compared to planting crowns, but starting from seed can be more economical.
What are asparagus crowns, and why are they recommended?
Asparagus crowns are one-year-old or two-year-old dormant roots. They offer a head start compared to seeds, reducing the time to harvest by about a year. When planting crowns, dig trenches, spread the roots, and cover them with soil. As the plants grow, gradually fill in the trench. Crowns are a popular choice for gardeners who want to harvest asparagus sooner.
What kind of soil is best for growing asparagus?
Asparagus thrives in well-drained, sandy loam soil with a pH between 6.5 and 7.5. Good drainage is crucial to prevent root rot. Before planting, amend the soil with plenty of organic matter, such as compost or well-rotted manure, to improve drainage and fertility. Avoid heavy clay soils, or amend them extensively with organic matter and sand to improve drainage.
How often should I water my asparagus plants?
Water asparagus plants regularly, especially during dry periods. Aim for consistent moisture, but avoid overwatering, which can lead to root rot. Water deeply and less frequently, rather than shallowly and often. A good rule of thumb is to water when the top inch of soil feels dry to the touch. Mulching around the plants can help retain moisture and suppress weeds.
When is the best time to harvest asparagus?
Harvest asparagus spears in the spring, typically starting in the second or third year after planting crowns (or the third or fourth year after planting seeds). Harvest when the spears are about 6-8 inches tall and the tips are still tightly closed. Use a sharp knife to cut the spears at ground level. In the first few years of harvesting, limit the harvest period to 4-6 weeks to allow the plants to build up their energy reserves. As the plants mature, you can extend the harvest period.
How do I care for asparagus plants after the harvest season?
After the harvest season ends, allow the asparagus ferns to grow and mature. These ferns are essential for photosynthesis and help the plants store energy for the next year’s growth. Fertilize the plants with a balanced fertilizer in late spring or early summer. Remove any weeds that compete with the asparagus for nutrients and water. In the fall, after the ferns have turned brown, cut them back to a few inches above the ground.
What are some common pests and diseases that affect asparagus?
Asparagus beetles are a common pest that can damage the spears and ferns. Handpicking the beetles or using insecticidal soap can help control them. Asparagus rust is a fungal disease that can cause orange pustules on the ferns. Ensure good air circulation and avoid overhead watering to prevent rust. Fusarium wilt is another fungal disease that can cause the plants to wilt and die. Choose disease-resistant varieties and practice crop rotation to minimize the risk of Fusarium wilt.
Can I grow asparagus in containers?
Yes, you can grow asparagus in containers, but it requires a large container (at least 18 inches in diameter and 24 inches deep) to accommodate the extensive root system. Use a well-draining potting mix and provide regular watering and fertilization. Container-grown asparagus may not be as productive as plants grown in the ground, but it’s a viable option for gardeners with limited space.
How long will my asparagus plants last?
With proper care, asparagus plants can last for 15-20 years or even longer. Regular fertilization, weed control, and pest and disease management are essential for maintaining the health and productivity of your asparagus bed.
Is it safe to eat asparagus that has gone to seed?
Asparagus doesn’t technically “go to seed” in the way that some other vegetables do. The spears that you harvest are the young shoots of the plant. If you allow some of these shoots to grow into ferns, they will eventually produce small red berries. These berries contain seeds, but they are not edible and can be toxic if ingested. The spears themselves remain edible as long as they are harvested before they become too tough and woody.


Leave a Comment