
Dollar Tree Rack Hacks: Unleash your inner gardener without breaking the bank! Have you ever dreamed of a lush, organized garden but felt intimidated by the cost? I know I have! Well, get ready to transform your outdoor space with these incredibly clever and budget-friendly DIY solutions using items you can find at your local Dollar Tree.
Gardening, in its essence, is a timeless practice, dating back to ancient civilizations where cultivating the land was not just a necessity but a way of life. From the Hanging Gardens of Babylon to the meticulously designed gardens of Versailles, humans have always sought to connect with nature and create beautiful, functional spaces. But let’s be honest, achieving that idyllic garden can sometimes feel like an expensive endeavor.
That’s where these Dollar Tree rack hacks come in! We’re talking about maximizing space, organizing your tools, and creating stunning displays, all while keeping your wallet happy. Think vertical planters, clever tool storage, and even mini greenhouses – all crafted from simple, affordable racks.
Why do you need these hacks? Because gardening should be accessible to everyone! These DIY tricks will not only save you money but also empower you to create a personalized garden that reflects your style and passion. Plus, who doesn’t love a good upcycling project? So, grab your shopping list, head to the Dollar Tree, and let’s get gardening!
Dollar Tree Rack Hacks: Organize Your Life on a Budget!
Hey there, fellow DIY enthusiasts! I’m always on the lookout for ways to organize my home without breaking the bank. And guess what? The Dollar Tree is a goldmine for affordable organization solutions! Today, I’m going to share some of my favorite Dollar Tree rack hacks that will transform your cluttered spaces into organized havens. Get ready to be amazed at what you can achieve with just a few dollars and a little creativity!
Hack 1: The Ultimate Pantry Organizer
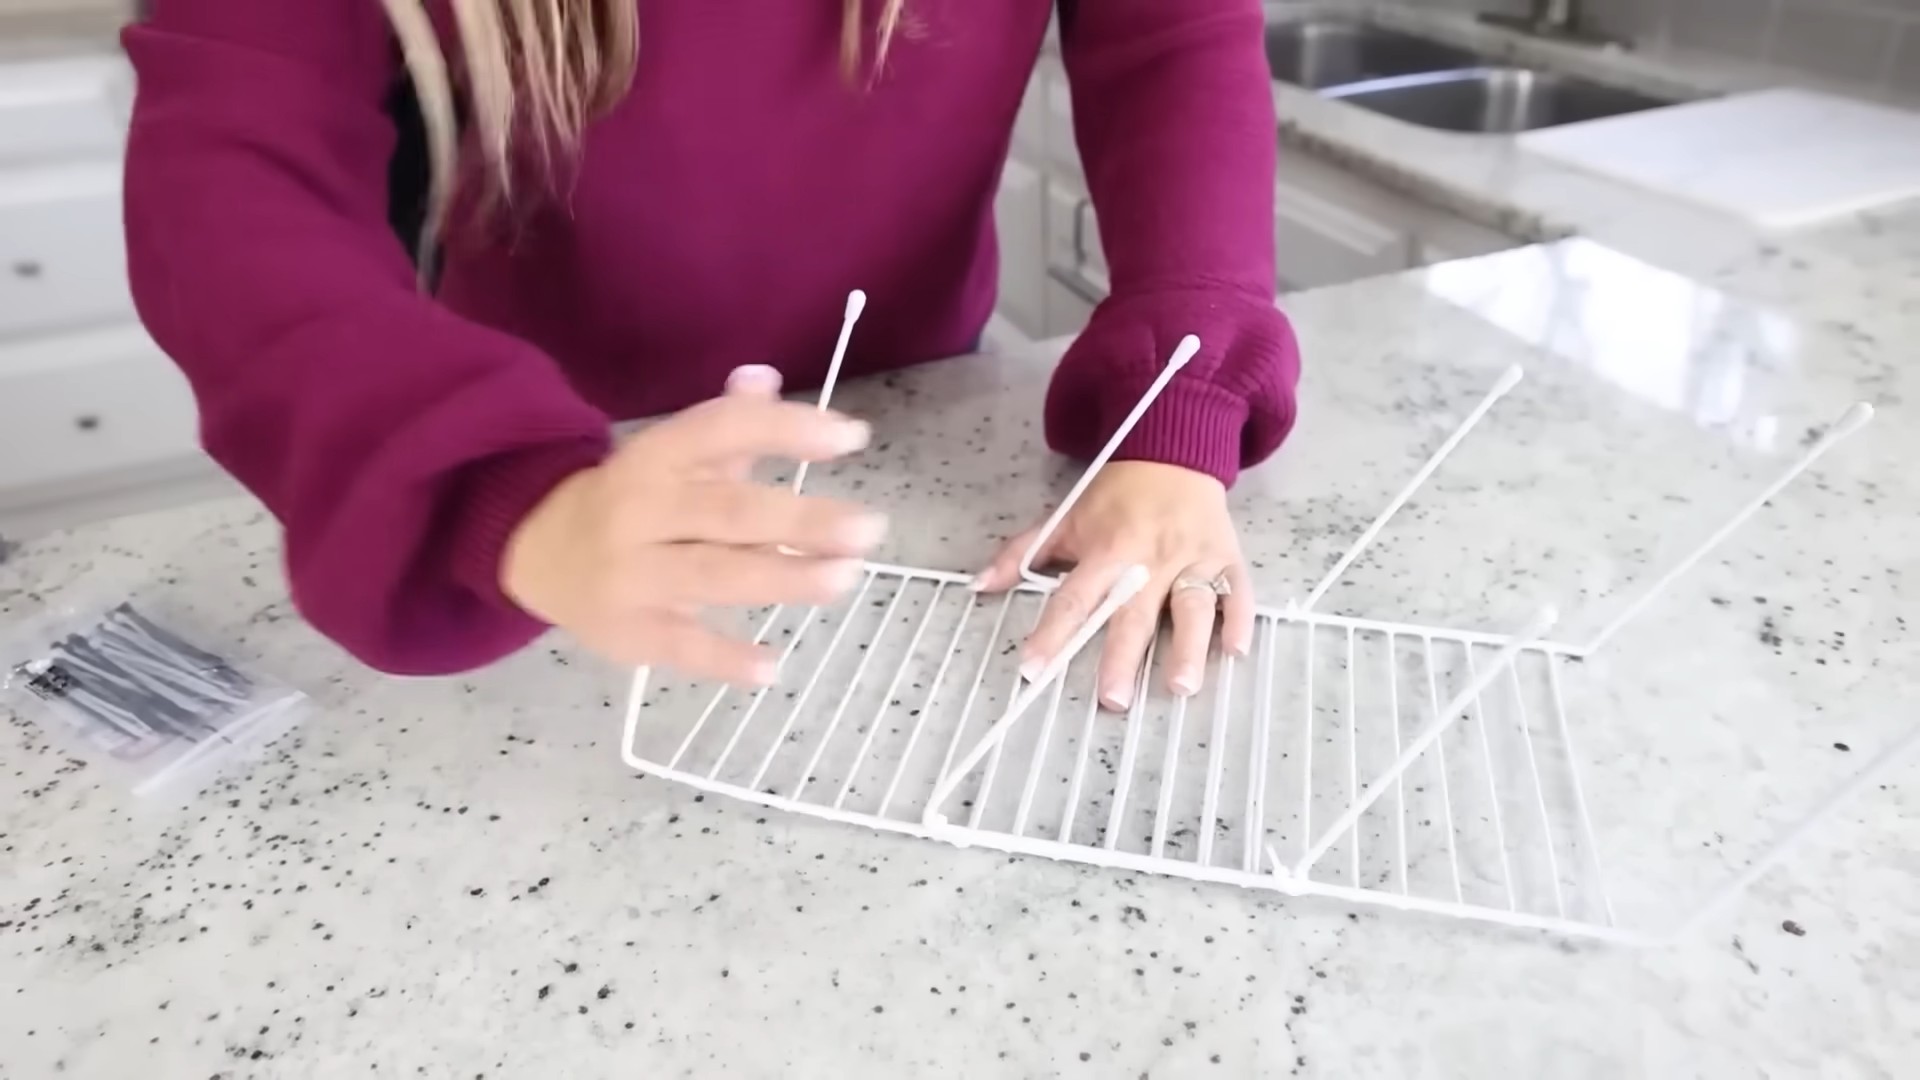
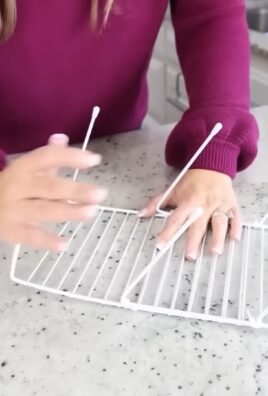
This hack is all about maximizing vertical space in your pantry. We’ll be using wire racks to create tiered shelving, making it easier to see and access all your goodies.
Materials You’ll Need:
* Several Dollar Tree wire racks (the rectangular kind work best)
* Zip ties (clear or matching your pantry color)
* Optional: Shelf liner (to prevent items from slipping)
Step-by-Step Instructions:
1. Plan Your Layout: Before you start assembling, take a good look at your pantry. Decide how many tiers you want and where you want to place them. Consider the height of your tallest items to ensure everything fits comfortably. I usually sketch out a quick plan on paper to visualize the final result.
2. Assemble the Base: Take two wire racks and stand them upright, parallel to each other. These will be the sides of your first shelf. The distance between them will determine the width of your shelf.
3. Attach the First Shelf: Place a third wire rack horizontally across the top of the two upright racks. This will form the first shelf. Secure it to the upright racks using zip ties. Make sure the shelf is level and the zip ties are tight. I like to use at least four zip ties per corner for extra stability.
4. Create Additional Tiers: Repeat steps 2 and 3 to create additional shelves. Remember to leave enough space between each shelf to accommodate your items. I usually measure the height of my tallest cans and boxes to determine the optimal spacing.
5. Reinforce the Structure: For added stability, you can add extra zip ties to all the connections. You can also use small pieces of cardboard or foam to level the racks if your pantry floor is uneven.
6. Add Shelf Liner (Optional): Cut the shelf liner to fit the shelves and place it on top. This will prevent items from slipping and make it easier to clean.
7. Organize Your Pantry: Now comes the fun part! Start filling your newly organized pantry with your food items. Group similar items together and place the most frequently used items within easy reach.
Hack 2: Under-Sink Storage Solution
The space under the sink is often a chaotic mess of cleaning supplies. This hack will help you tame the clutter and create a functional storage area.
Materials You’ll Need:
* Dollar Tree wire racks (again, the rectangular ones are ideal)
* Small plastic storage bins (various sizes)
* Command hooks (optional, for hanging items)
Step-by-Step Instructions:
1. Measure Your Space: Before you buy anything, measure the width, depth, and height of the space under your sink. This will help you determine how many racks you can fit and what size bins to purchase.
2. Assemble the Racks: Depending on the size of your under-sink space, you can either use the wire racks as they are or cut them down to size using wire cutters. If you’re cutting them, be sure to wear safety glasses and gloves.
3. Create Shelves: Similar to the pantry organizer, you can use zip ties to create tiered shelves using the wire racks. Alternatively, you can simply place the racks on the bottom of the cabinet to create a raised platform.
4. Organize with Bins: Use the plastic storage bins to group similar items together. For example, you can have a bin for cleaning sprays, a bin for sponges and scrub brushes, and a bin for dish soap.
5. Utilize Vertical Space: If you have enough height, you can use Command hooks to hang spray bottles or other items on the inside of the cabinet door. This will free up even more space on the shelves.
6. Label Everything: Labeling the bins will make it easy to find what you’re looking for and will help you maintain the organization.
Hack 3: DIY Jewelry Organizer
Tired of tangled necklaces and missing earrings? This hack will help you create a stylish and functional jewelry organizer using Dollar Tree racks.
Materials You’ll Need:
* Dollar Tree wire racks (the smaller, square ones work well)
* Small S-hooks (or earring hooks)
* Spray paint (optional, to match your decor)
* Fabric scraps (optional, for lining the racks)
* Hot glue gun (optional, for attaching fabric)
Step-by-Step Instructions:
1. Prepare the Racks: If you want to customize the look of your jewelry organizer, spray paint the wire racks in your desired color. Let them dry completely before proceeding.
2. Add Fabric Lining (Optional): Cut the fabric scraps to fit the inside of the wire racks. Use a hot glue gun to attach the fabric to the racks. This will prevent your jewelry from snagging on the wires.
3. Attach S-Hooks: Hang the S-hooks (or earring hooks) onto the wire racks. These will be used to hang your necklaces, bracelets, and earrings.
4. Arrange Your Jewelry: Start hanging your jewelry on the hooks. Arrange them in a way that is both visually appealing and easy to access.
5. Mount the Organizer: You can either hang the jewelry organizer on the wall using Command strips or lean it against a dresser or vanity.
Hack 4: Craft Supply Storage
If you’re a crafter like me, you know how quickly your supplies can accumulate. This hack will help you organize your craft room without spending a fortune.
Materials You’ll Need:
* Dollar Tree wire racks (various sizes)
* Plastic storage containers (with lids)
* Binder clips
* Labels
Step-by-Step Instructions:
1. Assess Your Supplies: Take inventory of all your craft supplies and group them into categories (e.g., paints, brushes, yarn, beads).
2. Choose Your Racks: Select the wire racks that are best suited for storing your different types of supplies. For example, you might use a larger rack for storing rolls of fabric and smaller racks for storing paint bottles.
3. Organize with Containers: Place your craft supplies into the plastic storage containers. Be sure to label each container so you know what’s inside.
4. Create Shelves: Use the wire racks to create shelves for your storage containers. You can either stack the racks on top of each other or hang them on the wall using Command strips.
5. Utilize Binder Clips: Use binder clips to hang spools of ribbon or yarn from the wire racks. This will keep them organized and prevent them from unraveling.
Hack 5: Vertical Garden Support
This hack is for all my plant-loving friends! Use Dollar Tree racks to create a simple and affordable vertical garden.
Materials You’ll Need:
* Dollar Tree wire racks (the sturdier the better)
* Zip ties
* Potted plants
* Optional: Coco liner or burlap
Step-by-Step Instructions:
1. Build the Frame: Use zip ties to connect the wire racks together to create a vertical frame. You can make it as tall and wide as you like, depending on the space you have available.
2. Add Coco Liner (Optional): If you want to plant directly into the racks, line them with coco liner or burlap. This will help retain moisture and prevent the soil from falling out.
3. Place Your Plants: Arrange your potted plants on the racks. Make sure to choose plants that are suitable for vertical gardening, such as herbs, succulents, or trailing flowers.
4. Secure the Plants: Use zip ties to secure the pots to the racks. This will prevent them from falling off in windy conditions.
5. Water and Enjoy: Water your plants regularly and enjoy your beautiful vertical garden!
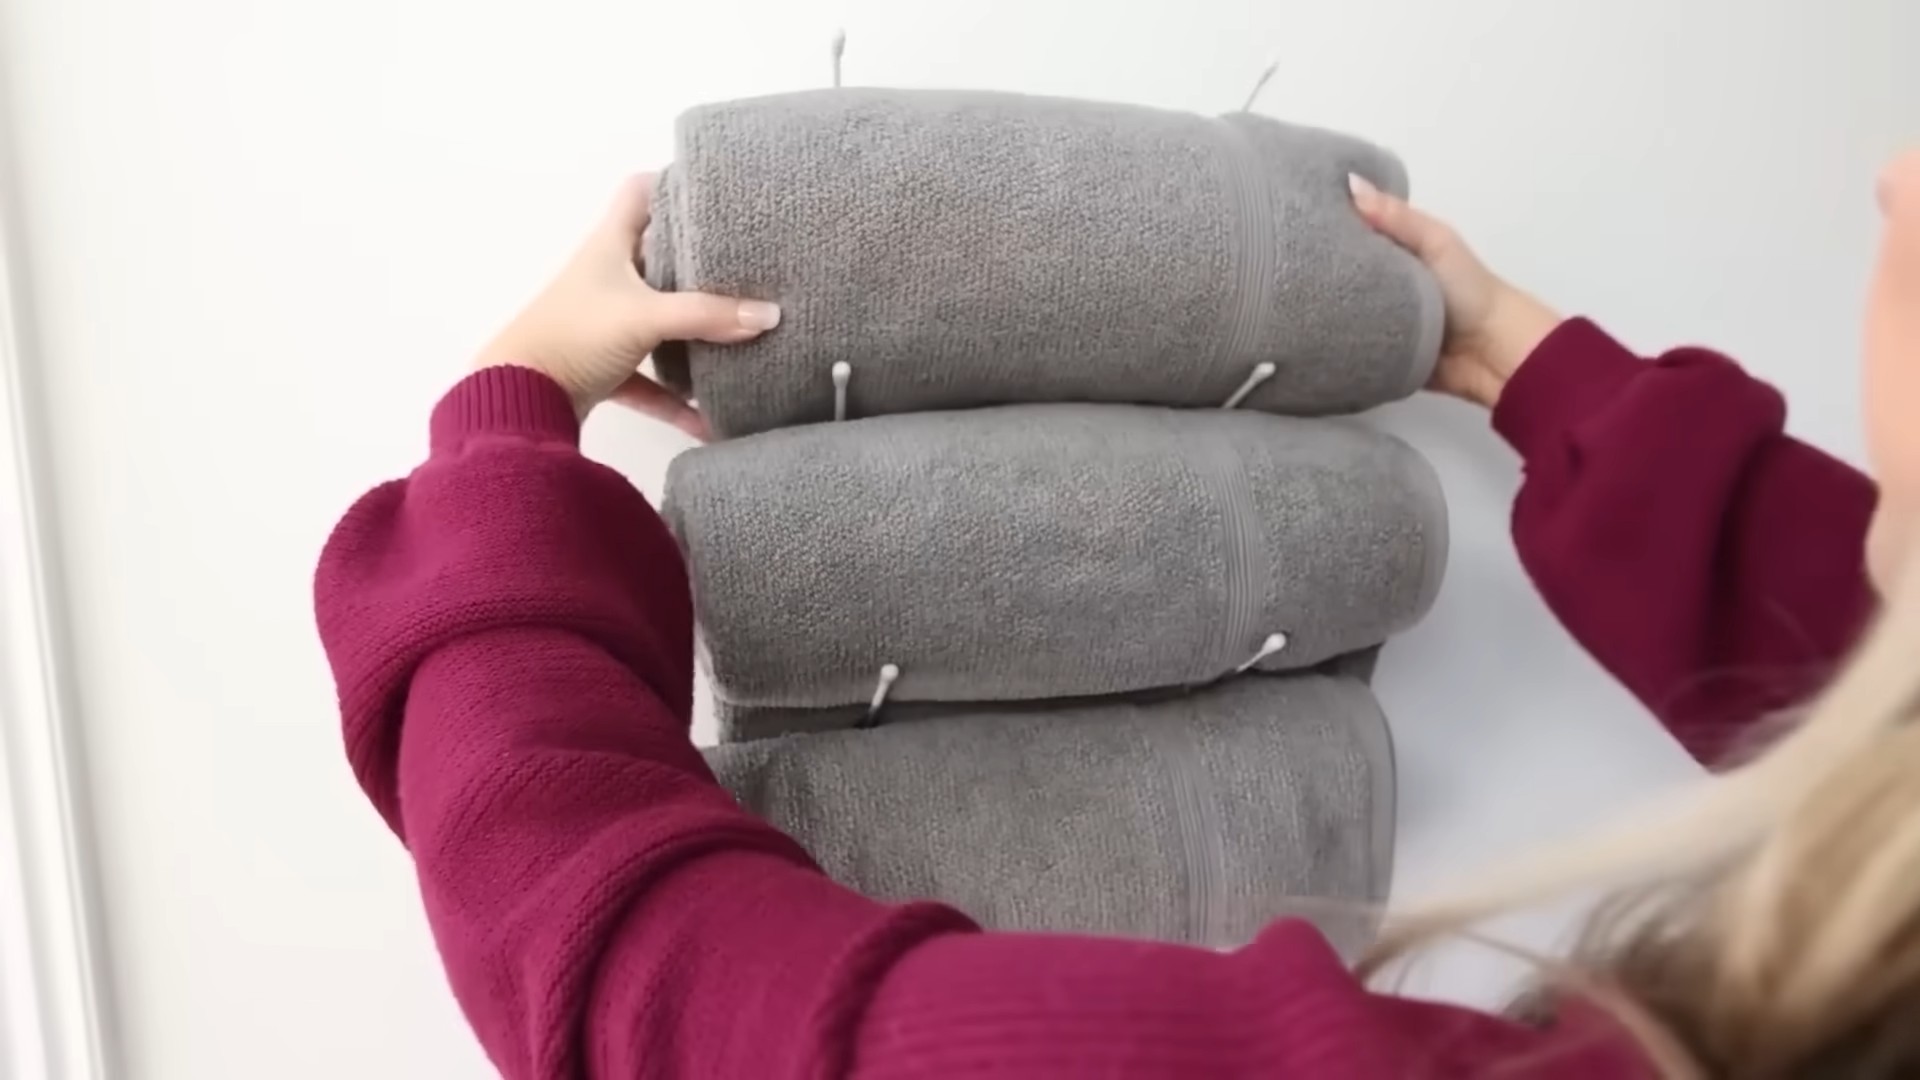
These are just a few of the many ways you can use Dollar Tree racks to organize your home. With a little creativity and some elbow grease, you can transform your cluttered spaces into organized havens without breaking the bank. Happy organizing!
Conclusion
So, there you have it! Growing carrots at home isn’t some mystical gardening feat reserved for green-thumbed gurus. It’s an achievable, rewarding, and surprisingly simple process that anyone can undertake, even with limited space or experience. We’ve walked you through the essential steps, from selecting the right carrot varieties and preparing your soil to sowing seeds, nurturing seedlings, and finally, harvesting your own vibrant, homegrown carrots.
Why is this DIY trick a must-try? Because the difference between store-bought and homegrown carrots is truly remarkable. The flavor is sweeter, the texture is crisper, and the satisfaction of pulling a perfectly formed carrot from the earth, knowing you nurtured it from a tiny seed, is unparalleled. Plus, you have complete control over what goes into your carrots – no pesticides, no herbicides, just pure, natural goodness.
Beyond the basic method, there’s a world of variations to explore. Consider experimenting with different carrot varieties. Nantes carrots are known for their sweetness and cylindrical shape, while Chantenay carrots are shorter and sturdier, ideal for heavier soils. Rainbow carrots, with their vibrant hues of purple, yellow, and red, add a splash of color to your garden and your plate. You can also try succession planting, sowing seeds every few weeks to ensure a continuous harvest throughout the growing season. For those with limited space, container gardening is an excellent option. Choose a deep container and follow the same principles of soil preparation and watering. You can even grow carrots indoors under grow lights, extending your harvest into the colder months.
Don’t be afraid to get your hands dirty and embrace the learning process. Gardening is all about experimentation and adaptation. You might encounter challenges along the way, but each hurdle is an opportunity to learn and improve your skills. Remember to observe your plants closely, paying attention to their needs and adjusting your care accordingly.
Ultimately, the goal is to enjoy the journey and reap the rewards of your labor. Imagine the delicious meals you can create with your homegrown carrots – from simple roasted carrots with herbs to hearty stews and vibrant salads. The possibilities are endless.
We wholeheartedly encourage you to try growing carrots at home. It’s a fun, educational, and incredibly rewarding experience. And most importantly, we want to hear about your adventures! Share your successes, your challenges, and your tips with us in the comments below. Let’s create a community of home gardeners, sharing our knowledge and inspiring each other to grow our own food. So, grab your seeds, prepare your soil, and get ready to experience the joy of homegrown carrots. Happy gardening!
Frequently Asked Questions (FAQ)
What is the best time of year to plant carrots?
The best time to plant carrots depends on your climate. In general, carrots are a cool-season crop, meaning they thrive in temperatures between 60°F and 70°F (15°C and 21°C). For most regions, this means planting in early spring or late summer/early fall. Spring plantings should occur as soon as the soil can be worked, typically a few weeks before the last expected frost. Fall plantings should be timed so that the carrots have enough time to mature before the first hard frost. Check your local climate data for specific planting dates.
What kind of soil is best for growing carrots?
Carrots need loose, well-drained soil that is free of rocks and debris. Rocky or compacted soil can cause the carrots to become stunted, forked, or misshapen. Sandy loam soil is ideal, as it provides good drainage and allows the carrots to easily penetrate the soil. Amend heavy clay soil with compost, aged manure, or other organic matter to improve drainage and aeration. The ideal soil pH for carrots is between 6.0 and 6.8.
How deep should I plant carrot seeds?
Carrot seeds are very small and should be planted shallowly. Sow the seeds about ¼ to ½ inch deep and space them about 1 to 2 inches apart. Gently cover the seeds with soil and water thoroughly. Keep the soil consistently moist until the seeds germinate, which typically takes 7 to 21 days.
How often should I water my carrots?
Carrots need consistent moisture to thrive. Water deeply and regularly, especially during dry periods. Aim to keep the soil consistently moist but not waterlogged. Overwatering can lead to root rot, while underwatering can cause the carrots to become tough and bitter. A good rule of thumb is to water when the top inch of soil feels dry to the touch.
Why are my carrots forked or misshapen?
Forked or misshapen carrots are often caused by compacted soil, rocks, or other obstacles in the soil. When the carrot root encounters an obstruction, it will split or grow around it, resulting in a deformed shape. To prevent this, make sure to prepare your soil thoroughly, removing any rocks or debris. Amend heavy clay soil with organic matter to improve drainage and aeration.
How do I thin my carrot seedlings?
Thinning is essential for giving your carrots enough space to grow. Once the seedlings are a few inches tall, thin them to about 2 to 3 inches apart. Gently pull out the extra seedlings, being careful not to disturb the roots of the remaining plants. Thinning allows the carrots to develop properly and prevents overcrowding.
What are some common pests and diseases that affect carrots?
Some common pests that affect carrots include carrot rust flies, aphids, and nematodes. Carrot rust flies lay their eggs near the base of the plants, and the larvae burrow into the roots, causing damage. Aphids suck the sap from the leaves, weakening the plants. Nematodes are microscopic worms that can damage the roots. Common diseases include leaf blight and root rot. Practice good garden hygiene, such as removing plant debris and rotating crops, to prevent pest and disease problems. You can also use organic pest control methods, such as insecticidal soap or neem oil.
When are carrots ready to harvest?
Carrots are typically ready to harvest 60 to 80 days after planting, depending on the variety. You can harvest them when they reach the desired size. Gently loosen the soil around the carrots and pull them out of the ground. If the soil is dry, water it thoroughly before harvesting to make it easier to pull the carrots.
Can I grow carrots in containers?
Yes, you can definitely grow carrots in containers! Choose a deep container that is at least 12 inches deep to accommodate the carrot roots. Use a well-draining potting mix and follow the same principles of soil preparation and watering as you would for growing carrots in the ground. Container-grown carrots may need more frequent watering than those grown in the ground.
How do I store my harvested carrots?
To store your harvested carrots, remove the green tops and gently brush off any excess soil. Store the carrots in a cool, dark, and humid place, such as a refrigerator or root cellar. You can wrap them in a damp cloth or store them in a plastic bag with a few holes for ventilation. Carrots can typically be stored for several weeks or even months under the right conditions.


Leave a Comment