
DIY Stainless Steel Cleaner: Are you tired of battling fingerprints, smudges, and water spots on your beautiful stainless steel appliances? I know I was! It felt like a never-ending cycle of wiping and polishing, only to have them looking dull again within minutes. But what if I told you there’s a simple, effective, and incredibly affordable solution hiding in your pantry right now?
For generations, resourceful homemakers have relied on homemade remedies to keep their homes sparkling. Think about it – before the age of specialized cleaning products, people used readily available ingredients like vinegar, baking soda, and lemon juice to tackle all sorts of household chores. This tradition of resourcefulness is not only cost-effective but also environmentally friendly, reducing our reliance on harsh chemicals.
Let’s face it, commercially available stainless steel cleaners can be expensive and often contain ingredients we’d rather avoid. That’s why I’m so excited to share this amazing DIY Stainless Steel Cleaner recipe with you. It’s quick to make, uses ingredients you probably already have, and delivers fantastic results. Say goodbye to streaks and hello to a gleaming, fingerprint-free kitchen! Ready to unlock the secret to sparkling stainless steel? Let’s get started!
DIY Stainless Steel Cleaner: Shine Like New!
Okay, friends, let’s talk stainless steel. We all love the sleek look, but those fingerprints, water spots, and general grime? Not so much. Store-bought stainless steel cleaners can be pricey and often filled with chemicals I’d rather avoid. So, I’m going to share my go-to DIY stainless steel cleaner recipe and method that’s not only effective but also uses ingredients you probably already have in your pantry! Get ready to say goodbye to smudges and hello to a sparkling kitchen!
What You’ll Need
Before we dive in, let’s gather our supplies. This is a super simple recipe, so the list is short and sweet:
* **White Vinegar:** This is our star ingredient! Vinegar’s acidity helps cut through grease and grime.
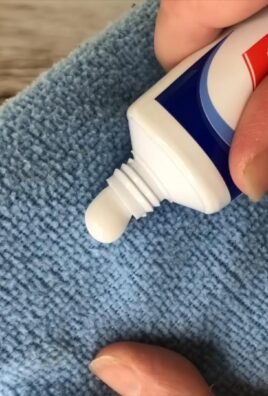
* **Olive Oil:** Yes, olive oil! It adds a beautiful shine and helps protect the stainless steel surface.
* **Spray Bottle:** A clean, empty spray bottle is essential for easy application.
* **Microfiber Cloths:** These are the best for cleaning stainless steel because they’re gentle and won’t leave streaks. You’ll want at least two – one for cleaning and one for buffing.
* **Optional: Essential Oil (Lemon or Orange):** A few drops can help mask the vinegar smell and add a fresh scent.
The Magic Ratio: Mixing Your Cleaner
The key to a great DIY cleaner is getting the proportions right. Here’s what I’ve found works best:
* **1/2 cup White Vinegar:** This is the base of our cleaner.
* **1 teaspoon Olive Oil:** Just a touch is all you need for that gorgeous shine.
* **Optional: 5-10 drops Essential Oil:** If you’re using essential oil, add it now.
Step-by-Step Cleaning Guide
Alright, let’s get down to business! Follow these steps for sparkling stainless steel:
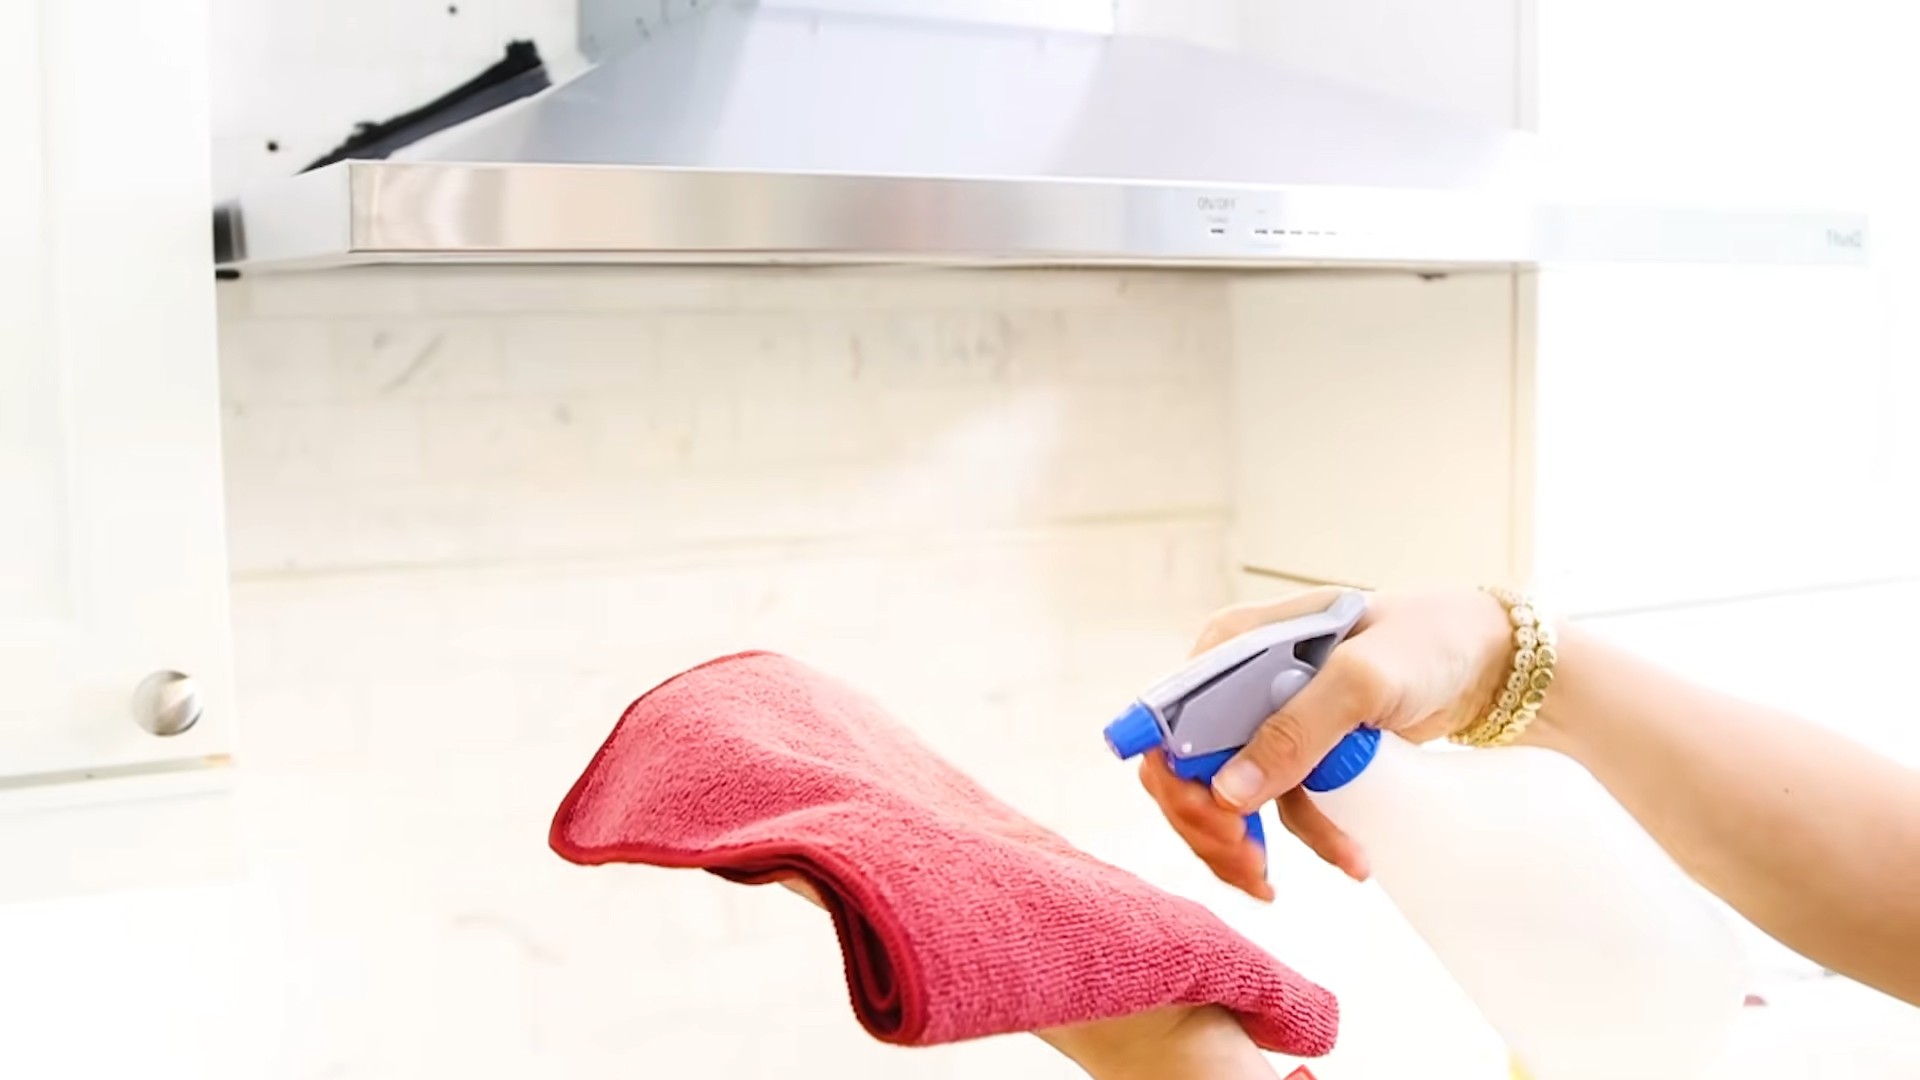
1. **Prepare Your Spray Bottle:** Pour the white vinegar and olive oil into your clean spray bottle. If you’re using essential oil, add it now.
2. **Shake Well:** Give the bottle a good shake to combine the ingredients. The olive oil and vinegar will separate a bit, so you’ll need to shake it before each use.
3. **Spray Lightly:** Lightly spray the stainless steel surface with the cleaner. Don’t overdo it! A little goes a long way. You want a light mist, not a soaking.
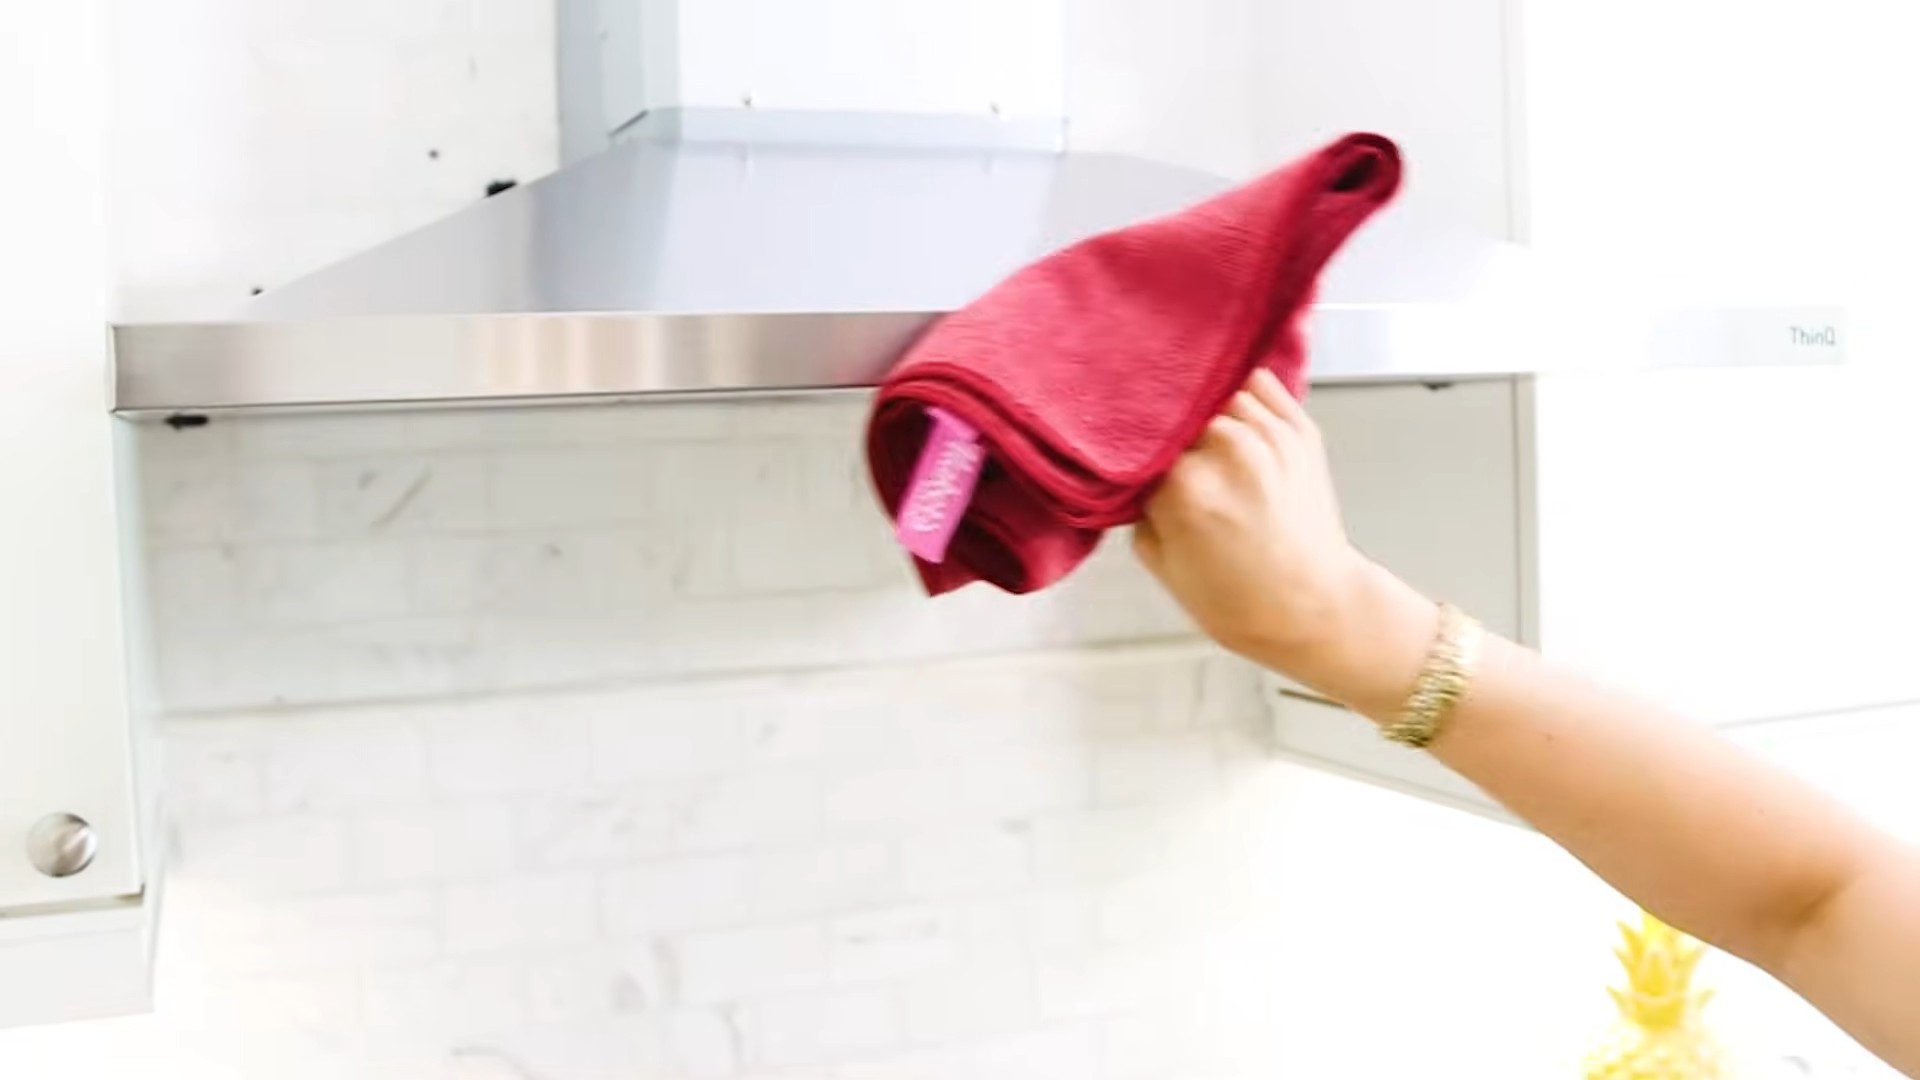
4. **Wipe with the Grain:** This is crucial! Always wipe stainless steel *with* the grain. Look closely at your appliance or surface – you’ll see faint lines running in one direction. Wiping against the grain can leave streaks. Use one of your microfiber cloths to wipe the surface thoroughly.
5. **Buff to a Shine:** Now, grab your second clean, dry microfiber cloth. Buff the surface in a circular motion to remove any remaining residue and bring out the shine. This step is what really makes the difference!
6. **Repeat as Needed:** For stubborn spots or heavily soiled areas, you may need to repeat the process.
Tackling Different Types of Stainless Steel
Not all stainless steel is created equal! Here’s how to adjust your cleaning approach based on the type of surface:
* **Appliances (Refrigerators, Dishwashers, Ovens):** These usually have a brushed finish. Be extra careful to wipe with the grain to avoid streaks. Pay special attention to handles and areas that get touched frequently.
* **Sinks:** Stainless steel sinks can be prone to water spots. After cleaning, be sure to dry the sink thoroughly with a clean microfiber cloth to prevent spots from forming. You can also use a small amount of baking soda sprinkled in the sink for extra cleaning power before spraying with the vinegar mixture. Rinse well after using baking soda.
* **Pots and Pans:** For burnt-on food, try soaking the pot or pan in hot, soapy water before cleaning with the vinegar mixture. You can also use a paste of baking soda and water to gently scrub away stubborn residue.
* **Small Appliances (Toasters, Coffee Makers):** Unplug these appliances before cleaning. Spray the cleaner onto a microfiber cloth instead of directly onto the appliance to avoid getting liquid inside.
Troubleshooting Common Issues
Sometimes, even with the best intentions, things don’t go perfectly. Here are some common issues and how to fix them:
* **Streaks:** Streaks are usually caused by wiping against the grain or using too much cleaner. Make sure you’re wiping with the grain and using a clean, dry microfiber cloth to buff the surface. If streaks persist, try diluting the vinegar mixture with a little water.
* **Dull Finish:** A dull finish can be caused by using too much olive oil. Use a very small amount of olive oil (1 teaspoon is usually enough for a 1/2 cup of vinegar). If your stainless steel looks dull, try wiping it down with a clean, damp microfiber cloth to remove excess oil.
* **Lingering Vinegar Smell:** The vinegar smell should dissipate quickly. If it lingers, try adding a few more drops of essential oil to your cleaner. You can also open a window to ventilate the area.
* **Rust Spots:** While stainless steel is rust-resistant, it’s not completely rust-proof. If you notice rust spots, try using a stainless steel cleaner specifically designed to remove rust. You can also try a paste of baking soda and water. Gently scrub the rust spot with a soft cloth or sponge. Rinse well and dry thoroughly.
Extra Tips and Tricks for Sparkling Stainless Steel
Here are a few extra tips to keep your stainless steel looking its best:
* Prevention is Key: Wipe up spills and splatters immediately to prevent them from drying and becoming harder to remove.
* Avoid Abrasive Cleaners: Never use abrasive cleaners, steel wool, or scouring pads on stainless steel. These can scratch the surface.
* Test in an Inconspicuous Area: Before cleaning a large area, test the cleaner in a small, inconspicuous area to make sure it doesn’t damage the finish.
* Regular Cleaning: Clean your stainless steel regularly to prevent buildup of grime and fingerprints. A quick wipe-down once a week is usually sufficient.
* Use Distilled Water:** If you have hard water, consider using distilled water to make your cleaner. Hard water can leave mineral deposits on stainless steel.
* Lemon Juice Alternative:** If you don’t have white vinegar, you can use lemon juice as a substitute. Lemon juice is also acidic and can help cut through grease and grime. Use the same amount of lemon juice as you would vinegar.
* Baking Soda Paste for Stubborn Stains: For really stubborn stains, make a paste of baking soda and water. Apply the paste to the stain, let it sit for a few minutes, and then gently scrub with a soft cloth or sponge. Rinse well and dry thoroughly.
* Consider a Stainless Steel Polish: For an extra layer of protection and shine, consider using a stainless steel polish after cleaning. Follow the instructions on the polish carefully.
* Don’t Forget the Details: Pay attention to the details, such as the edges of appliances and the seams between panels. These areas can often accumulate dirt and grime.
* Dry Thoroughly: Always dry stainless steel thoroughly after cleaning to prevent water spots.
A Note on Safety
While this DIY cleaner is generally safe, it’s always a good idea to take a few precautions:
* **Avoid Contact with Eyes:** Vinegar can irritate the eyes. If you get vinegar in your eyes, rinse them thoroughly with water.
* **Keep Out of Reach of Children:** Store the cleaner in a safe place out of reach of children.
* **Ventilation:** When cleaning, make sure the area is well-ventilated.
Why This Works: The Science Behind the Shine
So, why does this simple recipe work so well? It’s all about the chemistry!
* **Vinegar’s Acidity:** White vinegar is a mild acid that helps to dissolve grease, grime, and hard water stains. It’s also a natural disinfectant.
* **Olive Oil’s Protective Layer:** Olive oil creates a thin, protective layer on the stainless steel surface, which helps to repel fingerprints and water spots. It also adds a beautiful shine.
* **Microfiber Cloth’s Gentle Cleaning:** Microfiber cloths are made of tiny fibers that are incredibly effective at lifting dirt and grime without scratching the surface.
By combining these three simple ingredients, you create a powerful and effective stainless steel cleaner that’s safe, affordable, and environmentally friendly.
So there you have it! My tried-and-true method for keeping my stainless steel sparkling. Give it a try, and let me know what you think! I’m confident you’ll be amazed at the results. Happy cleaning!
Conclusion
So, there you have it! Ditching the expensive, chemical-laden store-bought cleaners and embracing this simple, effective DIY stainless steel cleaner is a game-changer for your kitchen and beyond. We’ve walked you through the easy steps, highlighting the cost-effectiveness and eco-friendliness of this method. But more than just saving money and reducing your environmental impact, this DIY trick delivers sparkling results.
Why is this a must-try? Because it works! It effortlessly cuts through grease, removes fingerprints, and leaves your stainless steel appliances gleaming without any harsh residue. Think about the satisfaction of knowing exactly what ingredients you’re using in your home, avoiding potentially harmful chemicals that can linger on surfaces and affect your family’s health. This isn’t just about cleaning; it’s about creating a healthier, more sustainable living space.
Beyond the basic recipe, feel free to experiment and personalize it to your liking. For a boost of disinfecting power, add a few drops of tea tree oil or eucalyptus oil. If you prefer a thicker consistency, incorporate a small amount of cornstarch to create a paste that clings to vertical surfaces. For a pleasant scent, infuse your vinegar with citrus peels for a few days before using it in the recipe. The possibilities are endless!
This DIY stainless steel cleaner is not just a cleaner; it’s a statement. It’s a statement about your commitment to a healthier home, a cleaner planet, and a smarter budget. It’s a testament to the power of simple ingredients and a little bit of elbow grease.
We are confident that once you try this DIY stainless steel cleaner, you’ll never go back to store-bought alternatives. The results speak for themselves, and the peace of mind knowing you’re using a safe, natural solution is priceless.
Don’t just take our word for it, though. We encourage you to give this DIY stainless steel cleaner a try and see the difference for yourself. Share your experiences with us in the comments below! Let us know what variations you tried, what surfaces you cleaned, and how satisfied you were with the results. Your feedback is invaluable and helps us continue to improve and refine our recipes. Let’s build a community of DIY enthusiasts who are passionate about creating a cleaner, healthier, and more sustainable world, one sparkling stainless steel appliance at a time. We can’t wait to hear your success stories!
Frequently Asked Questions (FAQ)
Is this DIY stainless steel cleaner safe for all types of stainless steel?
Generally, yes, this DIY cleaner is safe for most stainless steel surfaces. However, it’s always a good idea to test it on a small, inconspicuous area first, especially if you have antique or very delicate stainless steel items. Look for any discoloration or etching after a few minutes. If you notice anything unusual, discontinue use. For brushed stainless steel, always wipe in the direction of the grain to avoid streaks.
Can I use this cleaner on other surfaces besides stainless steel?
While this recipe is specifically formulated for stainless steel, some users have found it effective on other surfaces like chrome and porcelain. However, we strongly recommend testing it in an inconspicuous area first. Avoid using it on natural stone surfaces like granite or marble, as the vinegar can etch these materials. Also, avoid using it on painted surfaces, as it may dull the finish.
How often should I clean my stainless steel appliances with this DIY cleaner?
The frequency of cleaning depends on how often you use your appliances and how prone they are to fingerprints and smudges. For high-traffic areas like refrigerator doors and stovetops, cleaning once or twice a week is usually sufficient. For less frequently used appliances, cleaning once a month may be enough. Regular cleaning will prevent buildup and make it easier to maintain a sparkling finish.
What kind of vinegar should I use?
White distilled vinegar is the best choice for this DIY cleaner. It’s inexpensive, readily available, and has a high acidity level, making it effective at cutting through grease and grime. Avoid using other types of vinegar, such as apple cider vinegar or balsamic vinegar, as they may contain sugars or pigments that can leave a residue on your stainless steel.
Can I use essential oils other than tea tree or eucalyptus?
Yes, you can experiment with other essential oils to customize the scent and add additional cleaning benefits. Lemon, orange, and grapefruit essential oils are all excellent choices for cutting through grease and leaving a fresh, citrusy aroma. Lavender and peppermint essential oils have antibacterial properties and can add a calming or invigorating scent, respectively. Just be sure to use pure, high-quality essential oils and add them sparingly, as some oils can be irritating to the skin.
How should I store the leftover cleaner?
Store any leftover cleaner in a clean, airtight spray bottle. Label the bottle clearly with the contents and date. Keep it in a cool, dark place away from direct sunlight and heat. The cleaner should last for several months, but it’s always a good idea to check for any signs of spoilage, such as discoloration or a foul odor, before using it.
My stainless steel has stubborn water spots. Will this cleaner remove them?
This DIY cleaner can help remove mild water spots. For more stubborn water spots, try making a paste of baking soda and water. Gently rub the paste onto the affected area in the direction of the grain, then rinse thoroughly with water and dry with a clean cloth. You can also try using a commercial stainless steel cleaner specifically designed for removing water spots.
Is it necessary to use a microfiber cloth?
While you can use other types of cloths, a microfiber cloth is highly recommended for cleaning stainless steel. Microfiber cloths are ultra-soft and non-abrasive, which means they won’t scratch or damage the surface. They also have excellent absorbent properties, which helps to remove dirt and grime effectively. Plus, they leave a streak-free finish, ensuring your stainless steel appliances look their best.
Can I use this cleaner on my stainless steel cookware?
Yes, this cleaner can be used on stainless steel cookware. However, be sure to rinse the cookware thoroughly with water after cleaning to remove any residue. For burnt-on food, try soaking the cookware in a solution of baking soda and water before cleaning.
What if I don’t have any vinegar? Can I use something else?
While vinegar is the key ingredient in this recipe, you can try substituting it with lemon juice in a pinch. Lemon juice has similar acidic properties and can help cut through grease and grime. However, it may not be as effective as vinegar, and it’s important to rinse the surface thoroughly after cleaning to remove any sticky residue.


Leave a Comment