
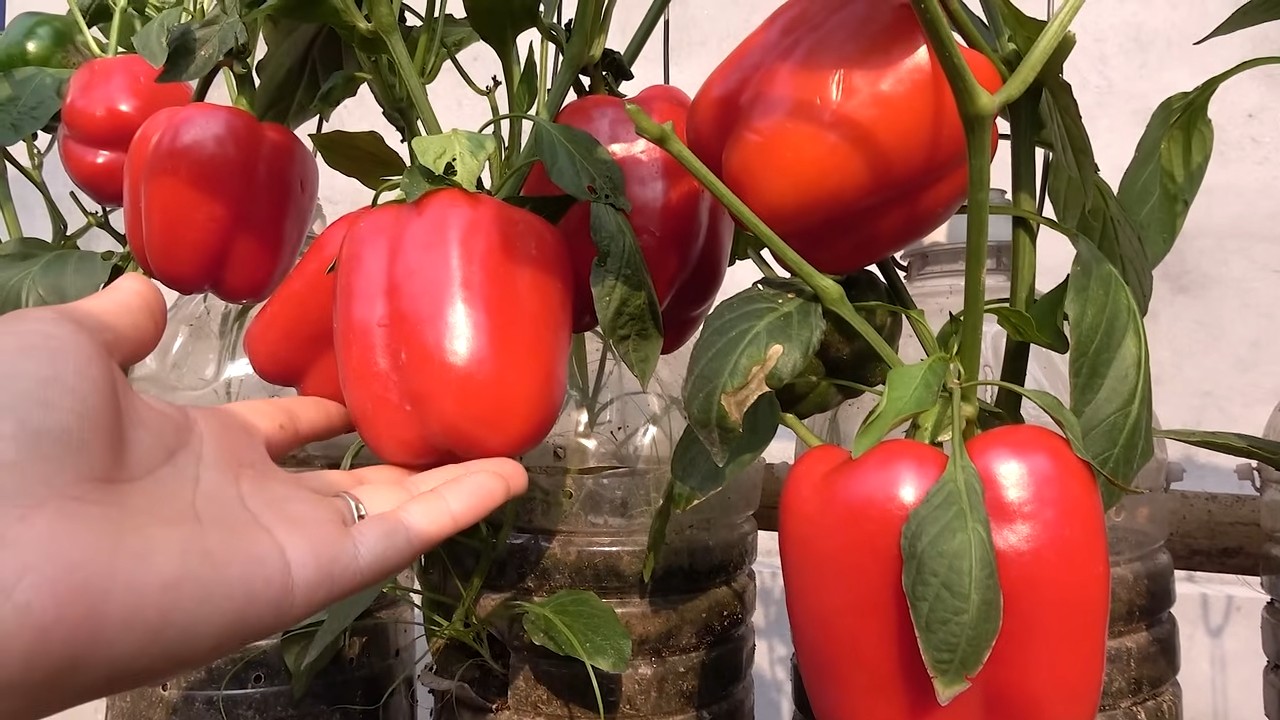
DIY bell pepper recycling: Did you know that those seemingly useless bell pepper scraps can actually be transformed into something amazing for your garden? I’m not talking about just tossing them into the compost bin (though that’s great too!). We’re diving into a clever, cost-effective, and surprisingly simple way to propagate new bell pepper plants from the peppers you already enjoy.
For centuries, resourceful gardeners have sought ways to maximize their yields and minimize waste. While the exact origins of this particular recycling method are hard to pinpoint, the spirit of seed saving and propagation has been a cornerstone of agricultural practices across cultures. Think about the ancient Egyptians carefully preserving grain seeds or the indigenous communities passing down heirloom varieties through generations. This DIY bell pepper recycling trick taps into that same resourceful spirit.
Why should you bother with this DIY project? Well, for starters, it’s incredibly budget-friendly! Instead of buying new seedlings every year, you can essentially create your own supply from the bell peppers you buy at the grocery store. Plus, it’s a fantastic way to extend your growing season and experiment with different bell pepper varieties. Imagine the satisfaction of nurturing a plant from a tiny seed extracted from a pepper you ate just weeks before! This guide will walk you through each step, ensuring you can successfully implement this DIY bell pepper recycling method and enjoy a bountiful harvest. Let’s get started!
Paprika-Recycling: So ziehst du neue Pflanzen aus deinen Küchenabfällen!
Hey Leute! Habt ihr euch jemals gefragt, ob man aus den Kernen einer Paprika, die man gerade zum Kochen verwendet hat, eine neue Pflanze ziehen kann? Die Antwort ist: Ja, absolut! Und ich zeige euch, wie es geht. Es ist einfacher, als ihr denkt, und eine super Möglichkeit, eure Küchenabfälle sinnvoll zu nutzen und euren grünen Daumen zu beweisen. Außerdem ist es total befriedigend, zu sehen, wie aus ein paar kleinen Kernen eine ganze Paprikapflanze wächst. Los geht’s!
Was du brauchst:
* Eine reife Paprika (am besten Bio, da diese oft unbehandelt sind)
* Küchenpapier oder ein sauberes Tuch
* Ein kleines Gefäß mit Deckel (z.B. eine leere Joghurtbecher oder eine kleine Plastikdose)
* Anzuchterde oder Kokosfaser-Quelltabletten
* Kleine Töpfe oder Anzuchtschalen
* Eine Sprühflasche mit Wasser
* Ein warmer, heller Standort (z.B. eine Fensterbank)
* Geduld!
Schritt-für-Schritt-Anleitung: Paprikakerne gewinnen und vorbereiten
1. Paprika vorbereiten: Schneidet eure Paprika auf und entfernt die Kerne. Achtet darauf, die Kerne nicht zu beschädigen. Am besten nehmt ihr eine reife Paprika, da die Kerne dann meistens vitaler sind.
2. Kerne reinigen: Spült die Kerne unter fließendem Wasser ab, um Fruchtfleischreste zu entfernen. Das ist wichtig, damit sie später nicht schimmeln.
3. Kerne trocknen: Legt die gereinigten Kerne auf ein Stück Küchenpapier oder ein sauberes Tuch und lasst sie gut trocknen. Das kann ein paar Tage dauern. Achtet darauf, dass sie nicht zusammenkleben. Die Kerne sollten wirklich trocken sein, bevor ihr sie einlagert oder weiterverarbeitet.
4. Kerne lagern (optional): Wenn ihr die Kerne nicht sofort aussäen wollt, könnt ihr sie in einem kleinen Gefäß mit Deckel an einem kühlen, dunklen und trockenen Ort aufbewahren. So bleiben sie bis zur nächsten Aussaat haltbar. Beschriftet das Gefäß am besten mit der Paprikasorte und dem Datum.
Aussaat der Paprikakerne: Der Start ins Paprikaleben
1. Anzuchtgefäße vorbereiten: Füllt eure Anzuchttöpfe oder -schalen mit Anzuchterde oder Kokosfaser-Quelltabletten. Anzuchterde ist nährstoffarm und locker, was ideal für die Keimung ist. Kokosfaser-Quelltabletten sind eine saubere und praktische Alternative.
2. Erde befeuchten: Befeuchtet die Erde oder die Quelltabletten mit einer Sprühflasche. Die Erde sollte feucht, aber nicht nass sein.
3. Kerne aussäen: Verteilt die Paprikakerne gleichmäßig auf der Erde. Pro Topf oder Zelle reichen 2-3 Kerne. Drückt die Kerne leicht an, aber bedeckt sie nicht zu tief mit Erde. Eine dünne Schicht (ca. 0,5 cm) reicht aus.
4. Feuchtigkeit halten: Besprüht die Erde erneut mit Wasser und deckt die Anzuchtgefäße mit Frischhaltefolie oder einem Deckel ab. Das sorgt für ein feuchtwarmes Klima, das die Keimung fördert. Achtet darauf, dass die Folie oder der Deckel nicht direkt auf der Erde aufliegt.
5. Warm und hell stellen: Stellt die Anzuchtgefäße an einen warmen und hellen Ort. Eine Fensterbank über der Heizung ist ideal. Die optimale Keimtemperatur liegt bei 22-28°C.
6. Geduld haben: Paprikakerne brauchen etwas Zeit zum Keimen. Es kann 1-3 Wochen dauern, bis die ersten Keimlinge zu sehen sind. Achtet darauf, dass die Erde während dieser Zeit immer feucht bleibt. Lüftet die Anzuchtgefäße regelmäßig, um Schimmelbildung zu vermeiden.
Pikieren: Den kleinen Pflänzchen mehr Raum geben
1. Wann pikieren? Sobald die Keimlinge ihre ersten richtigen Blätter (nach den Keimblättern) entwickelt haben, ist es Zeit zum Pikieren. Das bedeutet, dass ihr die kleinen Pflänzchen vorsichtig in größere Töpfe umpflanzt.
2. Vorbereitung: Füllt größere Töpfe (ca. 8-10 cm Durchmesser) mit Anzuchterde oder einer Mischung aus Anzuchterde und Blumenerde.
3. Pikieren: Löst die Keimlinge vorsichtig mit einem Pikierstab oder einem Löffel aus der Anzuchtschale. Achtet darauf, die Wurzeln nicht zu beschädigen.
4. Einpflanzen: Setzt die Keimlinge in die vorbereiteten Töpfe und füllt die Töpfe mit Erde auf. Drückt die Erde leicht an.
5. Angießen: Gießt die pikierten Pflänzchen vorsichtig an.
6. Heller Standort: Stellt die pikierten Pflänzchen an einen hellen Standort, aber vermeidet direkte Sonneneinstrahlung.
Pflege der Paprikapflanzen: Damit sie groß und stark werden
1. Gießen: Gießt die Paprikapflanzen regelmäßig, aber vermeidet Staunässe. Die Erde sollte immer leicht feucht sein.
2. Düngen: Beginnt etwa 2-3 Wochen nach dem Pikieren mit dem Düngen. Verwendet einen organischen Gemüsedünger oder eine verdünnte Brennnesseljauche. Düngt die Pflanzen regelmäßig, aber überdüngt sie nicht.
3. Lüften: Sorgt für eine gute Belüftung, um Pilzkrankheiten vorzubeugen.
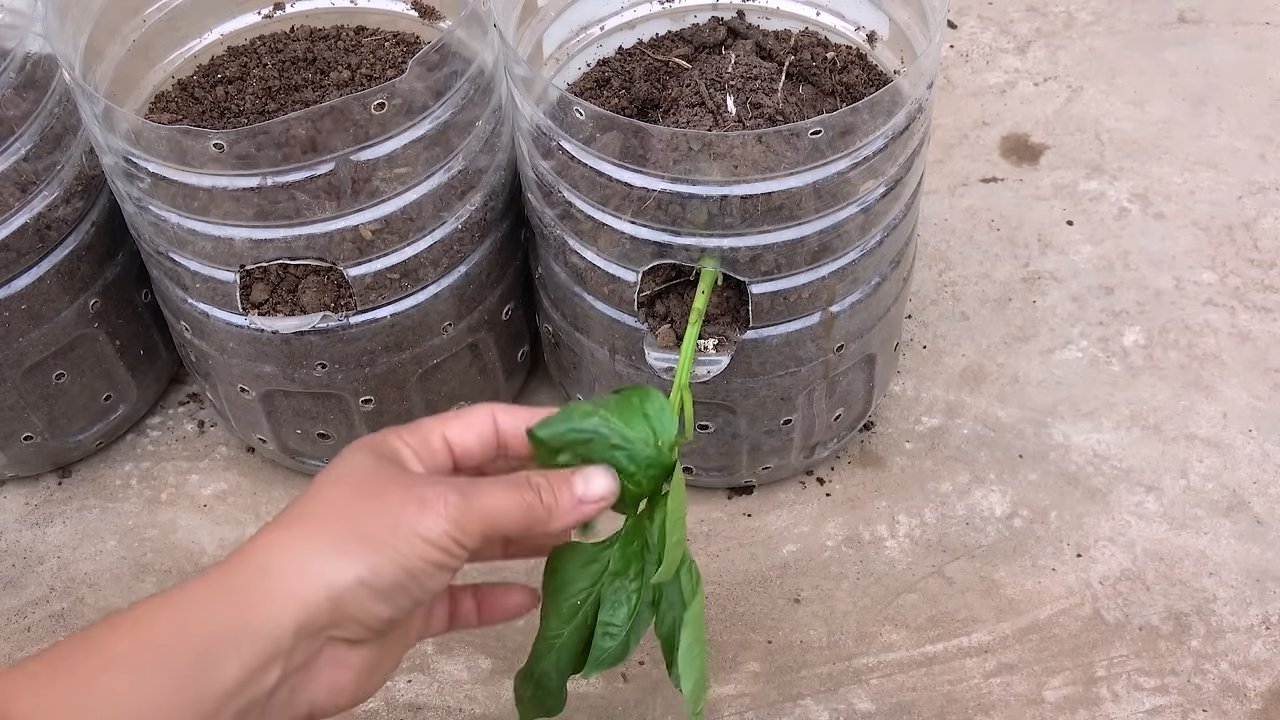
4. Umpflanzen: Wenn die Pflanzen zu groß für ihre Töpfe werden, müsst ihr sie in größere Töpfe umpflanzen.
5. Aushärten: Bevor ihr die Paprikapflanzen ins Freie pflanzt, müsst ihr sie abhärten. Das bedeutet, dass ihr sie langsam an die Bedingungen im Freien gewöhnt. Stellt die Pflanzen tagsüber für ein paar Stunden ins Freie und holt sie abends wieder rein. Steigert die Zeit im Freien allmählich.
6. Ausgeizen: Paprikapflanzen bilden sogenannte Geiztriebe in den Blattachseln. Diese Triebe solltet ihr regelmäßig entfernen, damit die Pflanze ihre Energie in die Fruchtbildung steckt.
7. Stützen: Wenn die Paprikapflanzen Früchte tragen, kann es sein, dass sie eine Stütze benötigen, um nicht umzuknicken.
Auspflanzen ins Freie oder in den Kübel: Endlich raus in die Sonne!
1. Wann auspflanzen? Paprikapflanzen sind frostempfindlich. Pflanzt sie erst ins Freie, wenn keine Frostgefahr mehr besteht (nach den Eisheiligen Mitte Mai).
2. Standort: Wählt einen sonnigen und windgeschützten Standort für eure Paprikapflanzen.
3. Boden vorbereiten: Lockert den Boden auf und reichert ihn mit Kompost oder anderem organischen Material an.
4. Pflanzen: Pflanzt die Paprikapflanzen in einem Abstand von ca. 40-50 cm.
5. Angießen: Gießt die Pflanzen nach dem Pflanzen gut an.
6. Mulchen: Mulcht den Boden um die Pflanzen herum mit Stroh oder Rasenschnitt. Das hält den Boden feucht und unterdrückt Unkraut.
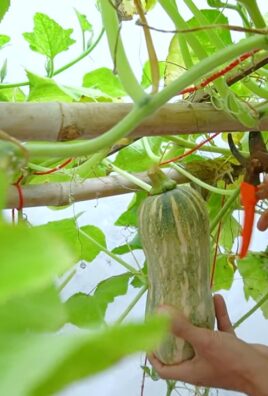
Erntezeit: Die Früchte eurer Arbeit genießen!
1. Wann ernten? Paprika können geerntet werden, sobald sie ihre endgültige Farbe erreicht haben. Grüne Paprika sind unreif, aber essbar. Rote, gelbe oder orange Paprika sind reif und haben einen süßeren Geschmack.
2. Wie ernten? Schneidet die Paprika mit einem scharfen Messer oder einer Schere ab.
3. Genießen: Verwendet eure selbstgezogenen Paprika in euren Lieblingsgerichten. Sie schmecken garantiert besser als gekaufte!
Zusätzliche Tipps und Tricks:
Conclusion
So, there you have it! Transforming those seemingly useless bell pepper scraps into vibrant, flavorful plants is not only incredibly rewarding but also a fantastic way to reduce waste and connect with nature. This DIY bell pepper recycling method is a game-changer for home gardeners, budget-conscious cooks, and anyone looking to add a touch of green to their lives.
Why is this a must-try? Because it’s simple, sustainable, and surprisingly effective. Instead of tossing those pepper tops and seed cores into the compost bin (or worse, the trash!), you’re giving them a second life, turning them into a source of fresh produce. Imagine the satisfaction of harvesting bell peppers grown from the very scraps you would have otherwise discarded! It’s a small act with a big impact, contributing to a more eco-friendly lifestyle and reducing your reliance on store-bought produce.
But the fun doesn’t stop there. Feel free to experiment with different varieties of bell peppers. Try saving the seeds from red, yellow, orange, and even purple peppers to create a rainbow of colors in your garden. You can also explore different growing mediums. While we’ve focused on starting the seeds in soil, you could also try using coco coir or a hydroponic system for a different approach.
Consider the climate in your area when deciding when to start your seeds. If you live in a colder region, you may need to start them indoors several weeks before the last expected frost. If you live in a warmer climate, you can likely start them directly outdoors.
Don’t be afraid to get creative with your containers, too. Upcycle old yogurt containers, plastic cups, or even egg cartons to give your seedlings a head start. Just make sure they have adequate drainage.
We encourage you to embark on this DIY bell pepper recycling adventure and witness the magic for yourself. It’s a truly fulfilling experience to nurture a plant from seed to harvest, knowing that you played a part in its journey.
And most importantly, we want to hear about your experiences! Share your successes, your challenges, and any tips or tricks you discover along the way. Post photos of your bell pepper seedlings, your thriving plants, and your bountiful harvests on social media using #DIYBellPepperRecycling. Let’s create a community of resourceful gardeners who are passionate about sustainability and growing their own food. Together, we can inspire others to embrace this simple yet powerful way to reduce waste and cultivate a greener world. So, grab those bell pepper scraps, get your hands dirty, and let the growing begin!
Frequently Asked Questions (FAQ)
What kind of bell peppers work best for seed saving?
Any bell pepper can be used for seed saving, but the best results come from using fully ripe peppers. This means allowing the pepper to stay on the plant until it reaches its mature color (red, yellow, orange, or purple). These peppers will have the most viable seeds. Avoid using peppers that are diseased or show signs of rot, as the seeds may be compromised. Also, if you are buying bell peppers from the store, try to buy organic ones. Non-organic bell peppers might be hybrid and the seeds might not grow true to type.
How long does it take for bell pepper seeds to germinate?
Bell pepper seeds typically take 7-21 days to germinate, depending on factors such as temperature, moisture, and seed quality. To speed up germination, keep the soil consistently moist and maintain a temperature of around 75-85°F (24-29°C). Using a heat mat can be helpful, especially in cooler climates.
What kind of soil is best for growing bell peppers?
Bell peppers thrive in well-draining, fertile soil that is rich in organic matter. A slightly acidic to neutral pH (6.0-7.0) is ideal. Amend your soil with compost, aged manure, or other organic materials to improve drainage, fertility, and water retention. If you’re growing in containers, use a high-quality potting mix specifically formulated for vegetables.
How much sunlight do bell peppers need?
Bell peppers require at least 6-8 hours of direct sunlight per day to produce a good yield. Choose a sunny location in your garden or provide supplemental lighting if growing indoors. Insufficient sunlight can result in leggy plants with fewer peppers.
How often should I water my bell pepper plants?
Water bell pepper plants deeply and regularly, especially during hot, dry weather. Aim to keep the soil consistently moist but not waterlogged. Water at the base of the plant to avoid wetting the foliage, which can increase the risk of fungal diseases. Mulching around the plants can help retain moisture and suppress weeds.
When should I transplant my bell pepper seedlings?
Transplant your bell pepper seedlings outdoors when the danger of frost has passed and the soil has warmed up to at least 60°F (16°C). Harden off the seedlings by gradually exposing them to outdoor conditions for a week or two before transplanting. This will help them adjust to the sun, wind, and temperature changes.
How do I prevent pests and diseases from affecting my bell pepper plants?
To prevent pests and diseases, practice good garden hygiene. Remove any diseased or dead leaves promptly. Use organic pest control methods such as insecticidal soap, neem oil, or companion planting to deter pests. Ensure good air circulation around the plants to prevent fungal diseases. Crop rotation can also help reduce the buildup of soilborne pathogens.
Can I grow bell peppers in containers?
Yes, bell peppers can be successfully grown in containers. Choose a container that is at least 12 inches in diameter and has good drainage. Use a high-quality potting mix and provide regular watering and fertilization. Container-grown bell peppers may require more frequent watering and feeding than those grown in the ground.
How do I know when my bell peppers are ready to harvest?
Bell peppers are typically ready to harvest when they are firm, glossy, and have reached their mature color (red, yellow, orange, or purple). You can also harvest green bell peppers, but they will be less sweet and flavorful. Use a sharp knife or pruning shears to cut the pepper from the plant, leaving a short stem attached.
What are some common problems when growing bell peppers and how can I fix them?
Some common problems include blossom end rot (caused by calcium deficiency), aphids, and fungal diseases. Blossom end rot can be prevented by ensuring consistent watering and adding calcium to the soil. Aphids can be controlled with insecticidal soap or neem oil. Fungal diseases can be prevented by ensuring good air circulation and avoiding overhead watering.
Can I save seeds from bell peppers I grew myself to plant next year?
Yes, you can save seeds from your own bell peppers to plant next year. Allow the peppers to fully ripen on the plant, then remove the seeds and dry them thoroughly. Store the dried seeds in an airtight container in a cool, dark, and dry place. Remember that if your peppers were hybrids, the seeds may not produce plants that are true to type.
How can I encourage more bell pepper production?
To encourage more bell pepper production, ensure your plants receive adequate sunlight, water, and nutrients. Fertilize regularly with a balanced fertilizer or one specifically formulated for vegetables. Pruning the lower leaves can also improve air circulation and encourage fruit production. Pinching off the first few blossoms can also encourage the plant to focus on vegetative growth, resulting in a stronger plant and more peppers later in the season.
Leave a Comment