
Clean Moldy Shower got you down? I totally get it! There’s nothing quite as frustrating as stepping into your bathroom, ready for a refreshing shower, only to be greeted by unsightly mold and mildew. It’s not just an eyesore; it can also impact your health and the overall cleanliness of your home.
For centuries, humans have battled mold in their dwellings. From ancient Roman bathhouses to modern apartments, the damp environment of a shower provides the perfect breeding ground for these unwelcome guests. But fear not! You don’t need harsh chemicals or expensive professional services to reclaim your shower.
This DIY guide is your ultimate weapon against a clean moldy shower nightmare. I’m going to share simple, effective, and budget-friendly tricks and hacks that will transform your shower from a moldy mess to a sparkling sanctuary. We’ll explore natural solutions, preventative measures, and easy-to-follow steps that will leave your shower looking and smelling fresh. Say goodbye to scrubbing endlessly and hello to a clean, healthy, and inviting shower space! Let’s dive in and get rid of that mold for good!
DIY Mold Removal: Revive Your Shower Like a Pro!
Okay, let’s face it, nobody likes a moldy shower. It’s gross, it’s unsightly, and frankly, it can be a bit concerning for your health. But don’t despair! You don’t need to call in expensive professionals. I’m going to walk you through a super effective DIY method to banish that mold and get your shower sparkling again. This method combines the power of readily available household ingredients and a little elbow grease. Trust me, you’ll be amazed at the results!
What You’ll Need: The Arsenal Against Mold
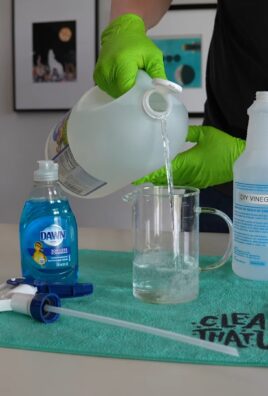
Before we dive in, let’s gather our supplies. Having everything ready will make the process much smoother. Here’s what you’ll need:
* White Vinegar: This is our star player! Vinegar is a natural disinfectant and mold killer.
* Baking Soda: A gentle abrasive that helps scrub away stubborn mold and grime.
* Hydrogen Peroxide (3%): Another powerful disinfectant and bleaching agent. Use with caution on colored surfaces.
* Dish Soap: Helps to break down grease and grime, making it easier to remove mold.
* Spray Bottles (2): One for vinegar and one for hydrogen peroxide.
* Scrub Brush: A stiff-bristled brush is essential for scrubbing grout and other textured surfaces. An old toothbrush works great for tight corners.
* Sponge: For wiping down smooth surfaces.
* Rubber Gloves: Protect your hands from harsh chemicals and mold spores.
* Face Mask: Protect your lungs from mold spores, especially if you have allergies or asthma.
* Eye Protection: Safety first! Protect your eyes from splashes.
* Old Rags or Paper Towels: For wiping and drying.
* Caulk (Optional): If the caulk is severely damaged or moldy, you might need to replace it.
* Caulk Gun (Optional): If you’re replacing the caulk.
* Caulk Remover Tool (Optional): Makes removing old caulk easier.
* Putty Knife or Scraper: For scraping away stubborn mold or caulk residue.
* Ventilation: Open a window or turn on the bathroom fan to ensure good ventilation.
Phase 1: The Vinegar Assault
Vinegar is our first line of defense. It’s a natural acid that effectively kills mold and mildew.
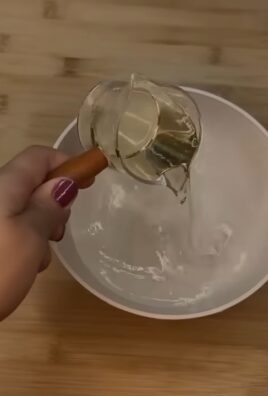
1. Prepare the Vinegar Solution: Pour undiluted white vinegar into one of your spray bottles. No need to dilute it – we want the full strength!
2. Spray the Moldy Areas: Generously spray all the moldy areas in your shower with the vinegar. Focus on grout lines, corners, and any areas where you see visible mold.
3. Let it Soak: This is crucial! Allow the vinegar to sit on the mold for at least one hour. The longer it sits, the more effectively it will kill the mold. I usually let it sit for 2-3 hours, or even overnight if the mold is really bad.
4. Scrub, Scrub, Scrub: After the soaking period, grab your scrub brush and get to work! Scrub all the treated areas thoroughly. You should see the mold starting to loosen and lift away. For stubborn areas, apply more vinegar and scrub again.
5. Rinse with Water: Once you’ve scrubbed all the moldy areas, rinse the shower thoroughly with clean water. Make sure to remove all traces of vinegar and loosened mold.
Phase 2: Baking Soda Power-Up
Baking soda is a fantastic natural cleaner and deodorizer. It will help to remove any remaining mold and leave your shower smelling fresh.
1. Create a Baking Soda Paste: Mix baking soda with a small amount of water to create a thick paste. The consistency should be similar to toothpaste.
2. Apply the Paste: Apply the baking soda paste to any areas where mold is still visible, or where you had particularly stubborn mold growth.
3. Let it Sit: Allow the baking soda paste to sit for about 30 minutes. This will give it time to absorb any remaining mold and grime.
4. Scrub Again: After 30 minutes, scrub the areas with the baking soda paste using your scrub brush or sponge.
5. Rinse Thoroughly: Rinse the shower thoroughly with clean water to remove all traces of baking soda.
Phase 3: Hydrogen Peroxide for the Final Blow
Hydrogen peroxide is a powerful disinfectant and bleaching agent. It’s great for killing any remaining mold spores and brightening grout lines.
1. Prepare the Hydrogen Peroxide: Pour 3% hydrogen peroxide into your second spray bottle.
2. Spray the Shower: Spray all the surfaces of your shower with hydrogen peroxide, focusing on grout lines and areas where you suspect mold might still be lurking.
3. Let it Sit: Allow the hydrogen peroxide to sit for at least 10 minutes.
4. Rinse Again: Rinse the shower thoroughly with clean water.
Important Note: Hydrogen peroxide can have a bleaching effect, so test it on an inconspicuous area first, especially if you have colored grout or tiles.
Phase 4: Dish Soap Deep Clean
This step helps remove any lingering residue and ensures a sparkling clean finish.
1. Apply Dish Soap: Apply a small amount of dish soap to a sponge or cloth.
2. Wash All Surfaces: Wash all the surfaces of your shower with the dish soap, paying attention to areas that tend to accumulate soap scum.
3. Rinse Thoroughly: Rinse the shower thoroughly with clean water until all traces of dish soap are gone.
Phase 5: Drying and Prevention
Drying your shower after each use is crucial for preventing mold growth.
1. Dry the Shower: Use a clean towel or squeegee to dry all the surfaces of your shower. Pay special attention to grout lines and corners.
2. Improve Ventilation: Leave the bathroom door open or turn on the bathroom fan to allow the shower to air dry completely.
Preventative Measures:
* Wipe down your shower after each use: This is the single most effective way to prevent mold growth.
* Improve ventilation: Run the bathroom fan during and after showers.
* Fix leaks promptly: Leaks create the perfect environment for mold growth.
* Clean your shower regularly: A quick cleaning once a week can prevent mold from taking hold.
* Consider using a mold-resistant shower cleaner: These cleaners contain ingredients that inhibit mold growth.
Dealing with Stubborn Caulk Mold
Sometimes, mold gets deeply embedded in the caulk, and no amount of cleaning will remove it. In these cases, you might need to replace the caulk.
1. Remove the Old Caulk: Use a caulk remover tool or a putty knife to carefully remove the old caulk. Be careful not to damage the surrounding tiles.
2. Clean the Area: Clean the area where the caulk was removed with a mixture of bleach and water (1 part bleach to 10 parts water). This will kill any remaining mold spores.
3. Dry Thoroughly: Allow the area to dry completely before applying new caulk.
4. Apply New Caulk: Use a caulk gun to apply a bead of new caulk along the joint. Smooth the caulk with your finger or a caulk smoothing tool.
5. Allow to Cure: Allow the caulk to cure according to the manufacturer’s instructions before using the shower.
A Few Extra Tips and Tricks
* Sunlight is your friend: If possible, open a window to let sunlight into your shower. Sunlight is a natural disinfectant and can help to kill mold.
* Tea Tree Oil: Tea tree oil is a natural antifungal agent. Add a few drops to a spray bottle filled with water and spray it on mold-prone areas after cleaning.
* Citrus Power: Lemon juice is another natural cleaner and disinfectant. You can use it in the same way as vinegar.
* Don’t mix bleach and vinegar: This creates toxic fumes!
* Be patient: Mold removal can take time and effort. Don’t get discouraged if you don’t see results immediately. Keep at it, and you’ll eventually get rid of the mold.
I hope this guide helps you get your shower sparkling clean and mold-free! Remember, prevention is key, so make sure to follow the preventative measures to keep the mold from coming back. Good luck!
Conclusion
So, there you have it! A simple, effective, and budget-friendly way to tackle that unsightly mold in your shower. We’ve walked you through the steps, explained the science (a little!), and hopefully, convinced you that banishing mold doesn’t require harsh chemicals or expensive professional services. This DIY method for cleaning moldy showers is a game-changer for anyone looking to maintain a sparkling clean and healthy bathroom environment.
Why is this a must-try? Because it works! It’s a powerful combination of readily available ingredients that penetrate and eliminate mold at its source, preventing it from returning as quickly as it would with surface-level cleaning. Plus, you’re avoiding the harsh fumes and potential health risks associated with commercial mold removers. Think about it: a cleaner shower, a healthier home, and a happier you – all thanks to a little DIY ingenuity.
But don’t stop there! Feel free to experiment and adapt this method to suit your specific needs and preferences. For instance, if you have particularly stubborn mold, you can increase the concentration of vinegar or hydrogen peroxide. You could also add a few drops of essential oils like tea tree or eucalyptus for their antifungal properties and a pleasant scent. Just be sure to test any new additions in an inconspicuous area first to ensure they don’t damage your shower surfaces. Another variation is to use baking soda paste for grout lines, letting it sit for a longer period before scrubbing. Remember, the key is to find what works best for your shower and your cleaning style.
We’re confident that this DIY trick will transform your shower cleaning routine. It’s not just about removing the mold; it’s about creating a healthier and more enjoyable space. So, grab your supplies, roll up your sleeves, and get ready to say goodbye to that stubborn mold.
We’re eager to hear about your experiences! Did this method work for you? Did you try any variations? Share your tips, tricks, and before-and-after photos in the comments below. Let’s build a community of clean shower enthusiasts and help each other conquer the battle against mold! Your feedback is invaluable and will help us refine and improve this guide for future readers. Don’t be shy – let us know how you tackled your moldy shower!
Frequently Asked Questions (FAQs)
What exactly causes mold to grow in the shower?
Mold thrives in damp, dark, and poorly ventilated environments. Showers provide the perfect breeding ground due to the constant moisture, warmth, and organic matter (like soap scum and dead skin cells) that accumulate. Inadequate ventilation allows moisture to linger, creating ideal conditions for mold spores to germinate and grow.
Is mold in the shower dangerous?
Yes, mold can be dangerous, especially for individuals with allergies, asthma, or weakened immune systems. Mold exposure can trigger allergic reactions such as sneezing, coughing, runny nose, skin rashes, and watery eyes. In more severe cases, it can lead to respiratory problems, asthma attacks, and even fungal infections. Certain types of mold, like Stachybotrys chartarum (black mold), can produce mycotoxins, which are toxic substances that can pose serious health risks. Therefore, it’s crucial to address mold growth promptly and effectively.
How often should I clean my shower to prevent mold growth?
Ideally, you should wipe down your shower walls and door after each use to remove excess moisture. A more thorough cleaning should be done at least once a week, or more frequently if you notice signs of mold growth. Regular cleaning, combined with proper ventilation, is the best way to prevent mold from taking hold.
What types of showers is this DIY cleaning method suitable for?
This DIY cleaning method is generally safe for most types of showers, including those with tile, fiberglass, acrylic, and glass doors. However, it’s always a good idea to test the cleaning solution in an inconspicuous area first to ensure it doesn’t damage the surface. Avoid using abrasive scrub brushes on delicate surfaces like acrylic or fiberglass, as they can scratch the material.
Can I use bleach instead of vinegar or hydrogen peroxide?
While bleach is a powerful disinfectant, it’s not the best choice for removing mold. Bleach only kills mold on the surface and doesn’t penetrate porous materials like grout or drywall. This means the mold can quickly return. Additionally, bleach can be harmful to your health and the environment. Vinegar and hydrogen peroxide are safer and more effective alternatives for killing mold at its roots.
How long should I leave the cleaning solution on the mold before scrubbing?
For best results, allow the cleaning solution to sit on the mold for at least 15-20 minutes. This gives the vinegar or hydrogen peroxide time to penetrate the mold and kill it. For stubborn mold, you can leave the solution on for up to an hour. Just be sure to keep the area well-ventilated.
What kind of scrub brush should I use?
A stiff-bristled brush is ideal for scrubbing mold from shower surfaces. You can use a regular scrub brush, a grout brush, or even an old toothbrush for hard-to-reach areas. Avoid using abrasive scrub brushes on delicate surfaces like acrylic or fiberglass, as they can scratch the material.
How can I improve ventilation in my shower to prevent mold growth?
Proper ventilation is crucial for preventing mold growth in the shower. If you have a bathroom exhaust fan, be sure to use it during and after showering. If you don’t have a fan, consider installing one. You can also open a window or door to allow fresh air to circulate. Leaving the shower door or curtain open after showering can also help to dry out the area more quickly.
What if the mold keeps coming back even after cleaning?
If the mold keeps returning despite your best efforts, it could indicate a more serious underlying problem, such as a leaky pipe or inadequate ventilation. In this case, it’s best to consult with a professional mold remediation specialist to identify and address the root cause of the problem. They can also help you safely remove the mold and prevent it from returning.
Is it safe to mix vinegar and hydrogen peroxide?
While vinegar and hydrogen peroxide are both effective cleaning agents, it’s generally not recommended to mix them directly in the same container. When mixed, they can react to form peracetic acid, which can be irritating to the skin, eyes, and respiratory system. It’s best to use them separately, applying one after the other.
Can I use this method on colored grout?
Yes, you can use this method on colored grout, but it’s important to test the cleaning solution in an inconspicuous area first to ensure it doesn’t discolor the grout. Vinegar, in particular, can sometimes lighten colored grout, so use it sparingly and rinse thoroughly.
What are some natural ways to prevent mold growth in the shower?
Besides regular cleaning and proper ventilation, there are several natural ways to prevent mold growth in the shower. These include:
* Using a squeegee to remove excess water from shower walls and doors after each use.
* Hanging up wet towels and washcloths to dry properly.
* Using a dehumidifier in the bathroom to reduce moisture levels.
* Planting moisture-absorbing plants like peace lilies or snake plants in the bathroom.
* Regularly cleaning shower curtains or liners.
What safety precautions should I take when cleaning mold?
When cleaning mold, it’s important to protect yourself from exposure to mold spores. Wear gloves, a mask, and eye protection to prevent mold from coming into contact with your skin, eyes, and respiratory system. Be sure to ventilate the area well by opening windows or using a fan. If you have a large area of mold growth, it’s best to consult with a professional mold remediation specialist.
Leave a Comment