
Growing Celery at Home might seem like a challenge reserved for seasoned gardeners, but I’m here to tell you it’s totally achievable, even if you’re a beginner! Forget those bland, store-bought stalks – imagine the crisp, refreshing taste of homegrown celery gracing your salads, soups, and snacks.
Celery has a rich history, dating back to ancient times where it was used medicinally before becoming a culinary staple. From the Mediterranean to modern-day kitchens, this crunchy vegetable has always held a special place. But let’s be honest, buying celery can be a gamble. Sometimes it’s limp, sometimes it’s bitter, and sometimes you only need a few stalks, leaving the rest to wilt in the fridge. That’s where the magic of DIY comes in!
This article is packed with easy-to-follow tricks and hacks that will empower you to successfully grow your own celery, no matter your space or experience level. We’ll cover everything from choosing the right variety to troubleshooting common problems. Why spend money on subpar celery when you can have a thriving, delicious crop right in your backyard (or even on your windowsill)? Let’s ditch the grocery store celery and embark on this exciting journey of growing celery at home together!
Growing Celery from Kitchen Scraps: A Beginner’s Guide
Hey there, fellow gardening enthusiasts! Have you ever looked at the celery stalks you’re about to toss in the compost and thought, “Hmm, could I grow more celery from this?” Well, I’m here to tell you that you absolutely can! It’s a fun, easy, and surprisingly rewarding way to reduce waste and get a little extra green in your life. This guide will walk you through the entire process, from rescuing that celery base to harvesting your own homegrown stalks.
What You’ll Need
Before we dive in, let’s gather our supplies. This is a pretty low-key project, so you probably have most of this stuff already:
* A celery stalk base (about 2 inches from the bottom, with the roots intact if possible)
* A shallow dish or glass
* Water (tap water is fine)
* Potting soil
* A pot (at least 6 inches in diameter)
* A sunny spot (a windowsill works great!)
* Optional: Liquid fertilizer
Phase 1: Re-growing the Celery Base in Water
This is where the magic begins! We’re going to coax that celery base back to life.
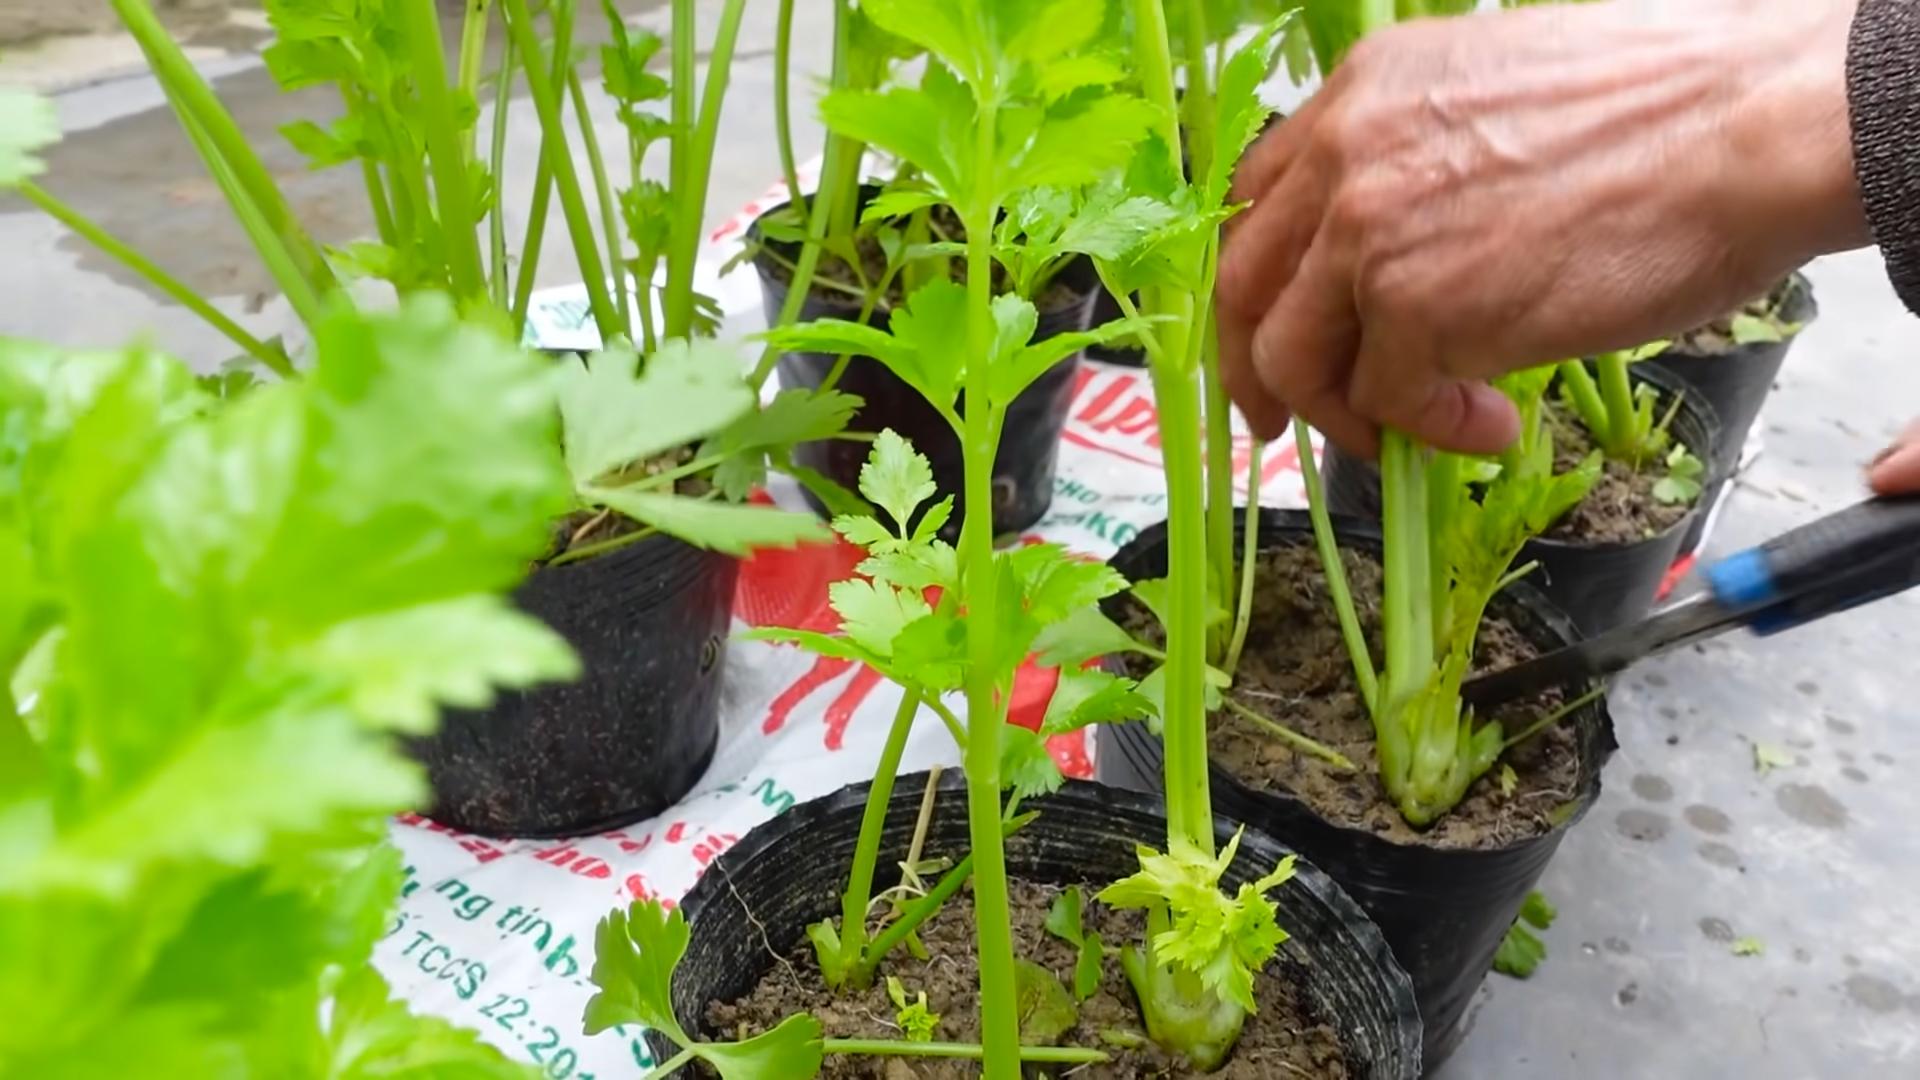
1. Prepare the Celery Base: Carefully cut off the celery stalks, leaving about 2 inches of the base intact. Try to keep the root end as undisturbed as possible. If there are any dead or mushy outer stalks, gently peel them away.
2. Place in Water: Put the celery base in your shallow dish or glass. Add enough water to cover the bottom inch or so of the base. You don’t want to submerge the entire thing, just the bottom where the roots will eventually sprout.
3. Find a Sunny Spot: Place the dish on a sunny windowsill or another location that gets plenty of indirect sunlight. Direct sunlight can sometimes scorch the delicate new growth.
4. Change the Water Regularly: This is crucial! Change the water every 1-2 days to prevent bacteria growth and keep the celery base happy. I usually do this first thing in the morning.
5. Observe and Wait: Within a few days, you should start to see small leaves sprouting from the center of the celery base. This is a sign that it’s working! Be patient; it can take up to a week or two for significant growth to appear.
Phase 2: Planting Your Celery Sprout
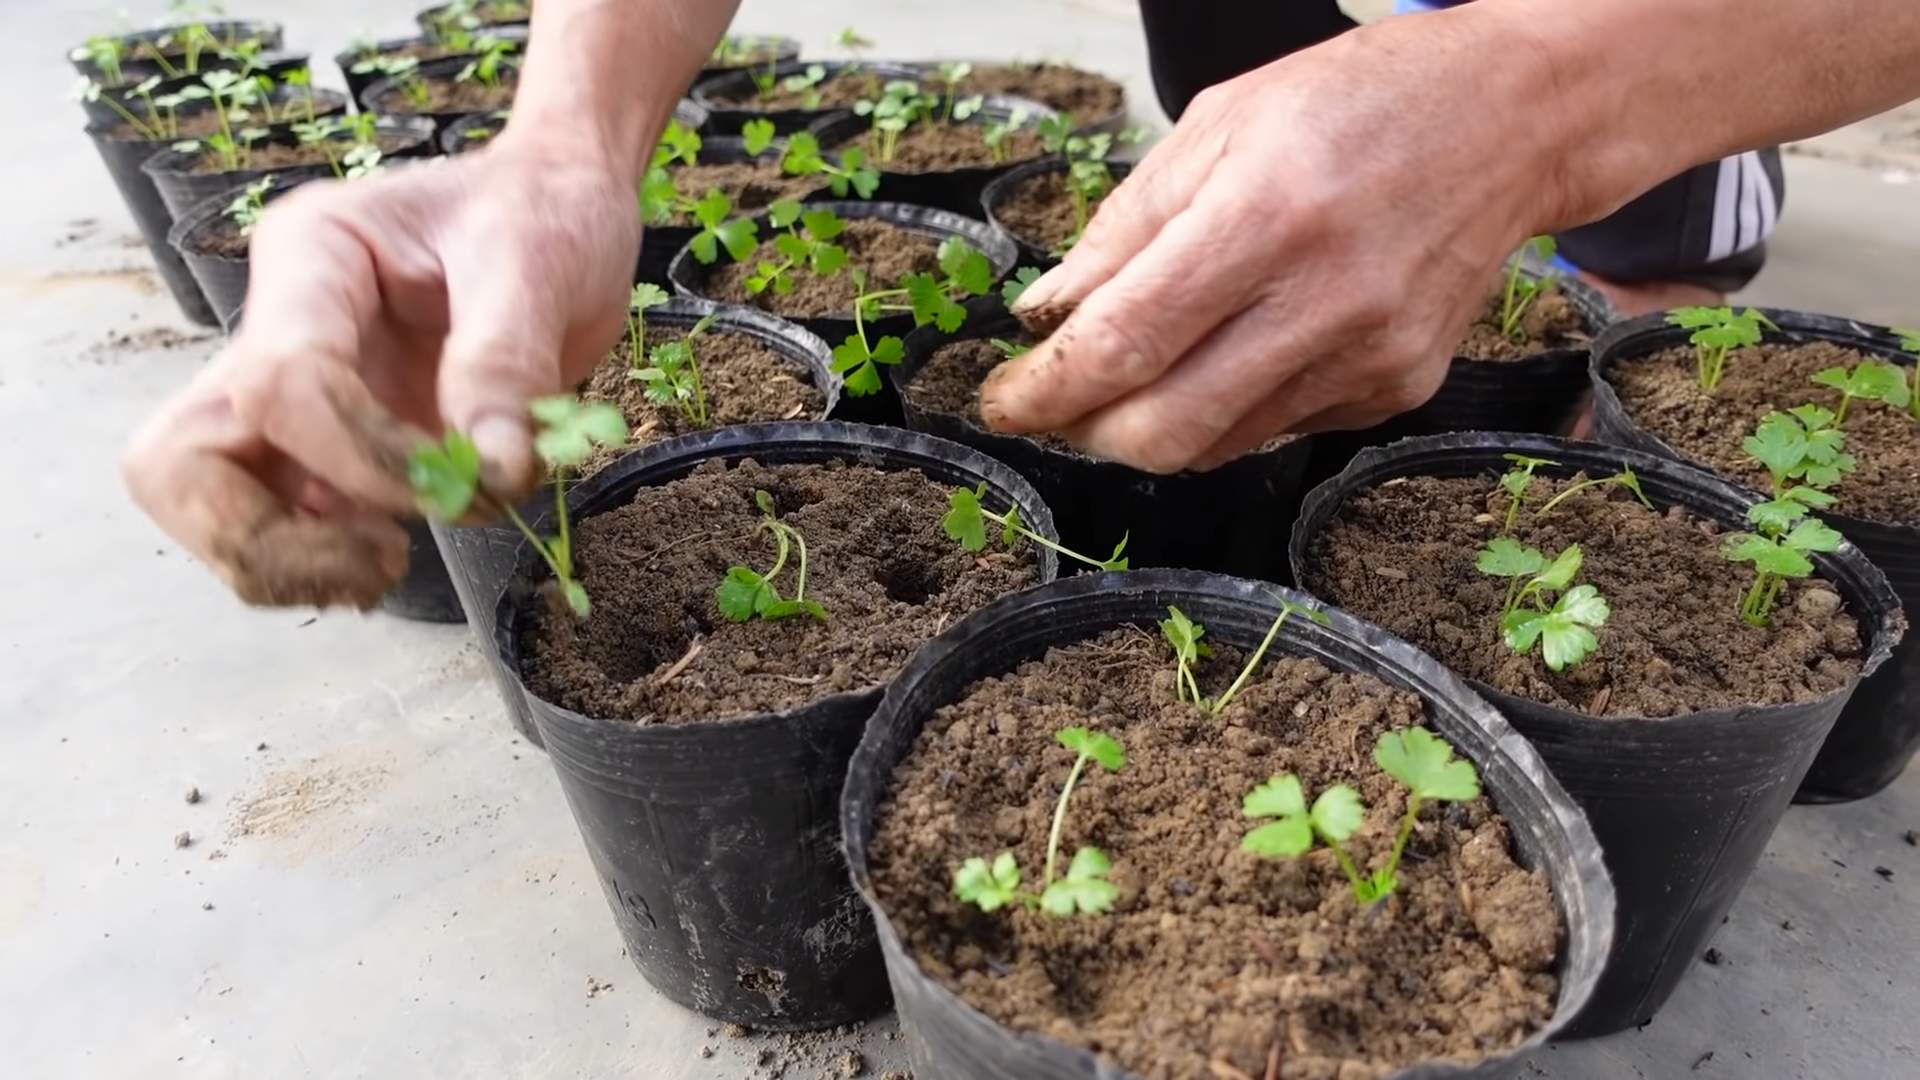
Once your celery base has sprouted some healthy new leaves and maybe even some small roots, it’s time to move it to a pot with soil.
1. Prepare the Pot: Fill your pot with good-quality potting soil. Make sure the pot has drainage holes to prevent waterlogging. I like to use a mix of potting soil and compost for extra nutrients.
2. Create a Hole: Make a hole in the center of the soil large enough to accommodate the celery base.
3. Carefully Transplant: Gently remove the celery base from the water. Be careful not to damage the new roots. Place the celery base in the hole, making sure the top of the base is level with the soil surface.
4. Fill and Water: Fill in the hole around the celery base with soil, gently patting it down. Water thoroughly until the water drains out of the bottom of the pot.
5. Return to Sunny Spot: Place the pot back in your sunny spot.
Phase 3: Caring for Your Growing Celery
Now that your celery is planted, it’s time to give it the TLC it needs to thrive.
1. Watering: Celery loves moisture, so keep the soil consistently moist but not soggy. Water whenever the top inch of soil feels dry to the touch. I usually water every other day, but this will depend on your climate and the pot size.
2. Sunlight: Celery needs at least 6 hours of sunlight per day. If you don’t have a sunny windowsill, you might need to supplement with a grow light.
3. Fertilizing (Optional): To give your celery a boost, you can fertilize it every few weeks with a liquid fertilizer diluted to half strength. Look for a fertilizer that’s balanced, meaning it has equal parts nitrogen, phosphorus, and potassium.
4. Hilling (Optional): Some gardeners like to “hill” their celery, which means mounding soil around the base of the stalks as they grow. This helps to blanch the stalks, making them more tender and less bitter. If you want to try this, start hilling when the stalks are about 6 inches tall.
5. Pest Control: Keep an eye out for pests like aphids and slugs. If you spot any, you can try spraying them with a mixture of water and dish soap or using an organic insecticide.
Phase 4: Harvesting Your Homegrown Celery
The moment you’ve been waiting for! Harvesting your own celery is incredibly satisfying.
1. When to Harvest: You can start harvesting celery stalks when they are about 6-8 inches tall. The exact time will depend on the variety of celery and your growing conditions.
2. How to Harvest: To harvest, simply cut off the outer stalks near the base of the plant with a sharp knife. Leave the inner stalks to continue growing. You can harvest stalks as needed.
3. Enjoy Your Harvest: Wash your freshly harvested celery stalks and enjoy them in salads, soups, or as a healthy snack.
Troubleshooting
Even with the best care, sometimes things don’t go as planned. Here are a few common problems and how to fix them:
* Celery base doesn’t sprout: Make sure the celery base is fresh and hasn’t started to rot. Also, ensure it’s getting enough sunlight and the water is being changed regularly.
* Leaves turn yellow: This could be a sign of overwatering or underwatering. Check the soil moisture and adjust your watering accordingly. It could also be a sign of nutrient deficiency, so try fertilizing.
* Stalks are bitter: This can be caused by too much heat or not enough water. Make sure your celery is getting enough water and is protected from extreme heat. Hilling can also help to reduce bitterness.
* Pests: Regularly inspect your celery for pests and take action as soon as you spot them.
Tips for Success
Here are a few extra tips to help you grow the best celery possible:
* Start with a healthy celery base: Choose a celery stalk with a firm, healthy base and no signs of rot.
* Use good-quality potting soil: This will provide your celery with the nutrients it needs to grow.
* Don’t overwater: Soggy soil can lead to root rot.
* Be patient: Celery takes time to grow, so don’t get discouraged if you don’t see results immediately.
* Experiment: Try different varieties of celery to see which ones grow best in your area.
Why Grow Celery from Scraps?
Besides being a fun and rewarding project, growing celery from scraps has several benefits:
* Reduces Waste: You’re giving a new life to something that would otherwise end up in the trash.
* Saves Money: You’ll have fresh celery on hand without having to buy it from the store.
* It’s Educational: It’s a great way to learn about plant propagation and gardening.
* It’s a Great Project for Kids: It’s a simple and engaging activity that can teach kids about where their food comes from.
So, there you have it! Growing celery from kitchen scraps is a simple and rewarding way to add some green to your life. With a little patience and care, you can enjoy fresh, homegrown celery all season long. Happy gardening!
Conclusion
So, there you have it! Growing celery at home, while it might seem daunting at first, is a surprisingly rewarding experience. It’s not just about saving money at the grocery store; it’s about connecting with your food, understanding the growing process, and enjoying the unparalleled freshness of homegrown produce. Think about it: no more limp, store-bought celery that’s been sitting in the crisper drawer for weeks. Instead, you’ll have crisp, vibrant stalks ready to add a burst of flavor and crunch to your salads, soups, and snacks.
The beauty of this DIY trick lies in its simplicity and sustainability. By regrowing celery from a leftover base, you’re reducing food waste and minimizing your environmental impact. Plus, it’s a fantastic project for kids, teaching them about plant life cycles and the importance of responsible consumption. Imagine the excitement on their faces as they watch a new celery plant emerge from what was once considered kitchen scraps!
But the benefits don’t stop there. Homegrown celery often boasts a more intense flavor than its commercially grown counterpart. This is because you have complete control over the growing conditions, ensuring optimal sunlight, water, and nutrients. You can even experiment with different varieties of celery to find your personal favorite.
Ready to take your celery game to the next level? Consider these variations:
* **Experiment with different celery varieties:** From the classic Pascal celery to the more delicate Golden Self-Blanching variety, there’s a whole world of celery flavors waiting to be explored.
* **Hydroponic celery:** For those with limited space or a penchant for modern gardening techniques, growing celery hydroponically is a viable and efficient option.
* **Companion planting:** Celery thrives alongside certain plants, such as onions, garlic, and tomatoes. Research companion planting strategies to maximize your garden’s yield and health.
* **Celery Juice Focus:** If you are into juicing, growing your own celery ensures you have a constant supply of fresh, organic celery for your daily juice.
Don’t be afraid to get your hands dirty and embrace the learning process. Growing celery at home is an adventure, and every success (and even every setback) is a valuable lesson. The satisfaction of harvesting your own celery, knowing that you nurtured it from a humble base, is truly unmatched.
We wholeheartedly encourage you to try this DIY trick and experience the joys of homegrown celery. It’s a simple, sustainable, and incredibly rewarding way to enhance your culinary creations and connect with nature.
Once you’ve given it a try, we’d love to hear about your experience! Share your tips, tricks, and triumphs in the comments below. Let’s build a community of celery-growing enthusiasts and inspire others to embrace the joys of homegrown produce. Happy growing!
Frequently Asked Questions (FAQ)
1. How long does it take to regrow celery from a base?
The time it takes to regrow celery from a base can vary depending on several factors, including the variety of celery, the growing conditions (sunlight, water, temperature), and the overall health of the base. Generally, you can expect to see new growth within a week or two after placing the base in water. However, it may take several weeks or even months to grow a fully mature celery plant that is ready for harvest. Be patient and consistent with your care, and you’ll eventually be rewarded with fresh, homegrown celery.
2. What kind of water should I use to regrow celery?
It’s best to use filtered or dechlorinated water to regrow celery. Tap water often contains chlorine and other chemicals that can inhibit root growth. If you don’t have access to filtered water, you can let tap water sit out in an open container for 24 hours to allow the chlorine to evaporate. Change the water every one to two days to prevent bacterial growth and keep the celery base healthy.
3. How much sunlight does celery need?
Celery thrives in full sun, which means it needs at least six hours of direct sunlight per day. However, in hotter climates, it can benefit from some afternoon shade to prevent the leaves from scorching. If you’re growing celery indoors, place it near a sunny window or supplement with grow lights. Insufficient sunlight can result in leggy growth and a less flavorful harvest.
4. What kind of soil is best for growing celery?
Celery prefers rich, well-draining soil that is high in organic matter. Before planting, amend your soil with compost, aged manure, or other organic materials to improve its fertility and drainage. Celery also prefers a slightly acidic soil pH, ideally between 6.0 and 6.8. You can test your soil pH with a home testing kit and adjust it accordingly.
5. How often should I water my celery plants?
Celery needs consistent moisture to thrive. Water your plants deeply whenever the top inch of soil feels dry to the touch. Avoid overwatering, as this can lead to root rot. During hot, dry weather, you may need to water your celery plants daily. Mulching around the plants can help retain moisture and suppress weeds.
6. How do I know when my celery is ready to harvest?
Celery is typically ready to harvest when the stalks are at least 6-8 inches long and have reached a desirable thickness. The exact harvesting time will depend on the variety of celery and your personal preference. You can harvest individual stalks as needed, or you can harvest the entire plant at once. To harvest, simply cut the stalks at the base of the plant with a sharp knife.
7. Can I grow celery indoors year-round?
Yes, you can grow celery indoors year-round, provided you have adequate light and space. Choose a large pot or container with good drainage and fill it with a rich, well-draining potting mix. Place the pot near a sunny window or supplement with grow lights. Water regularly and fertilize every few weeks with a balanced fertilizer.
8. What are some common pests and diseases that affect celery?
Celery can be susceptible to several pests and diseases, including aphids, celery leaf tiers, celery blight, and pink rot. Regularly inspect your plants for signs of infestation or disease and take appropriate action. Organic pest control methods, such as insecticidal soap or neem oil, can be effective against aphids and other pests. Proper watering and good air circulation can help prevent fungal diseases.
9. Can I freeze celery for later use?
Yes, you can freeze celery for later use, but it’s best to blanch it first to preserve its flavor and texture. To blanch celery, cut it into small pieces and boil it in water for 2-3 minutes. Then, immediately transfer it to an ice bath to stop the cooking process. Drain the celery well and freeze it in a single layer on a baking sheet. Once frozen, transfer it to a freezer bag or container. Frozen celery is best used in soups, stews, and other cooked dishes.
10. Is homegrown celery more nutritious than store-bought celery?
Homegrown celery can be more nutritious than store-bought celery, as it is often fresher and has not been subjected to long periods of storage and transportation. When you grow your own celery, you have complete control over the growing conditions, ensuring that the plants receive optimal nutrients and are not exposed to harmful pesticides or herbicides. This can result in a more nutrient-dense and flavorful product.


Leave a Comment