
Clean Kitchen Sink: Is your kitchen sink looking less than sparkling? Let’s face it, the kitchen sink is the unsung hero of our homes, tirelessly battling food scraps, grease, and grime. But all that hard work can leave it looking, well, a little worse for wear. I’m here to tell you that you don’t need harsh chemicals or expensive cleaners to restore your sink to its former glory.
For generations, resourceful homemakers have relied on simple, natural ingredients to keep their homes clean. Think about it – before the age of commercial cleaning products, our grandmothers used things like vinegar, baking soda, and lemon juice to tackle even the toughest messes. These time-tested methods are not only effective but also eco-friendly and budget-friendly.
In this DIY guide, I’m going to share some of my favorite tricks and hacks for achieving a clean kitchen sink using items you probably already have in your pantry. From banishing stubborn stains to eliminating unpleasant odors, these simple steps will help you maintain a sparkling clean and hygienic kitchen sink. Why spend a fortune on store-bought cleaners when you can achieve amazing results with a little elbow grease and some clever DIY solutions? Let’s get started and transform your sink from drab to fab!
DIY Sparkling Clean Kitchen Sink: A Comprehensive Guide
Okay, let’s face it, the kitchen sink is a battlefield. Food scraps, greasy pans, coffee grounds – it sees it all! And let’s be honest, sometimes cleaning it feels like a chore we put off. But a clean sink is a happy sink (and a happy kitchen!). So, I’m going to walk you through my tried-and-true method for getting your kitchen sink sparkling clean, naturally and effectively. Get ready to say goodbye to grime and hello to shine!
What You’ll Need: Your Arsenal of Cleaning Supplies
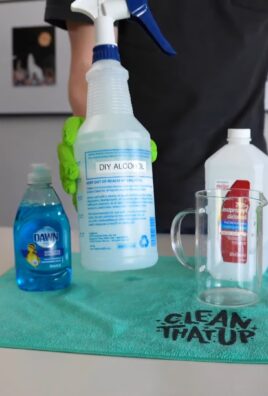
Before we dive in, let’s gather our supplies. I prefer using natural ingredients whenever possible, but I’ll also include some stronger options for those extra stubborn stains.
* Baking Soda: This is our gentle abrasive and deodorizer. A true kitchen cleaning staple!
* White Vinegar: The acid in vinegar helps break down grease and grime. Plus, it’s a natural disinfectant.
* Dish Soap: Choose your favorite – I like a plant-based option.
* Lemon (Optional): For a fresh scent and extra cleaning power.
* Salt (Optional): Another gentle abrasive, great for scrubbing.
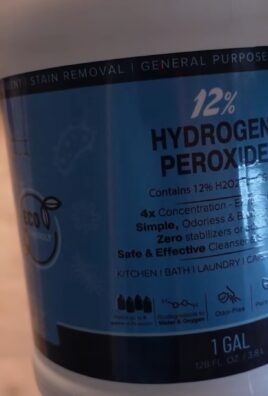
* Hydrogen Peroxide (Optional): For disinfecting and removing stains. Use with caution and never mix with vinegar!
* Borax (Optional): A stronger cleaning agent for tough stains. Use with caution and follow safety instructions.
* Soft Cloths or Sponges: Microfiber cloths are my go-to.
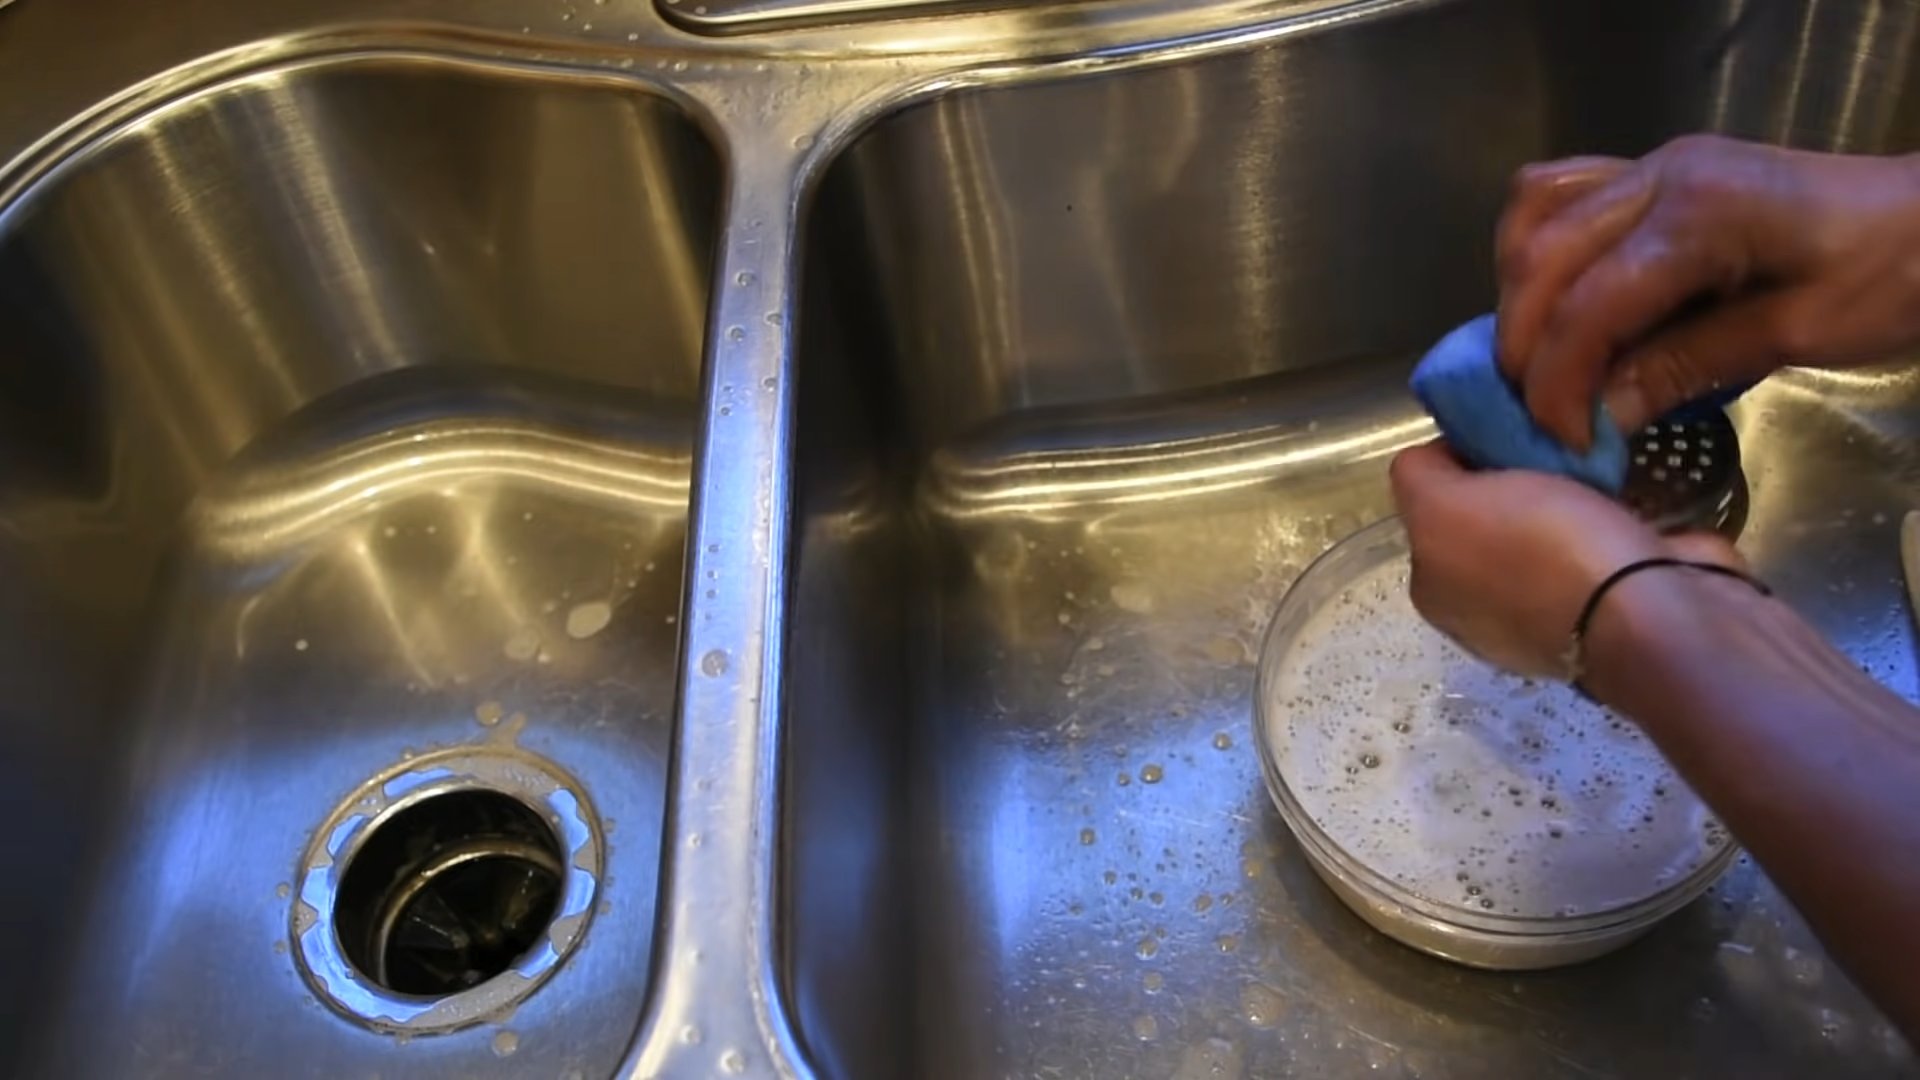
* Old Toothbrush: Perfect for getting into those hard-to-reach areas around the drain and faucet.
* Rubber Gloves: To protect your hands, especially if you’re using stronger cleaning agents.
* Spray Bottle: For easy application of vinegar or hydrogen peroxide.
* Kettle or Pot: For boiling water.
* Sink Stopper or Plug: To hold water in the sink.
Phase 1: The Initial Scrub Down
This is where we tackle the surface grime and loose debris.
1. Clear the Sink: Remove everything from the sink – dishes, sponges, dish rack, everything! We need a clean slate to work with.
2. Rinse Thoroughly: Give the sink a good rinse with warm water to remove any loose food particles or debris.
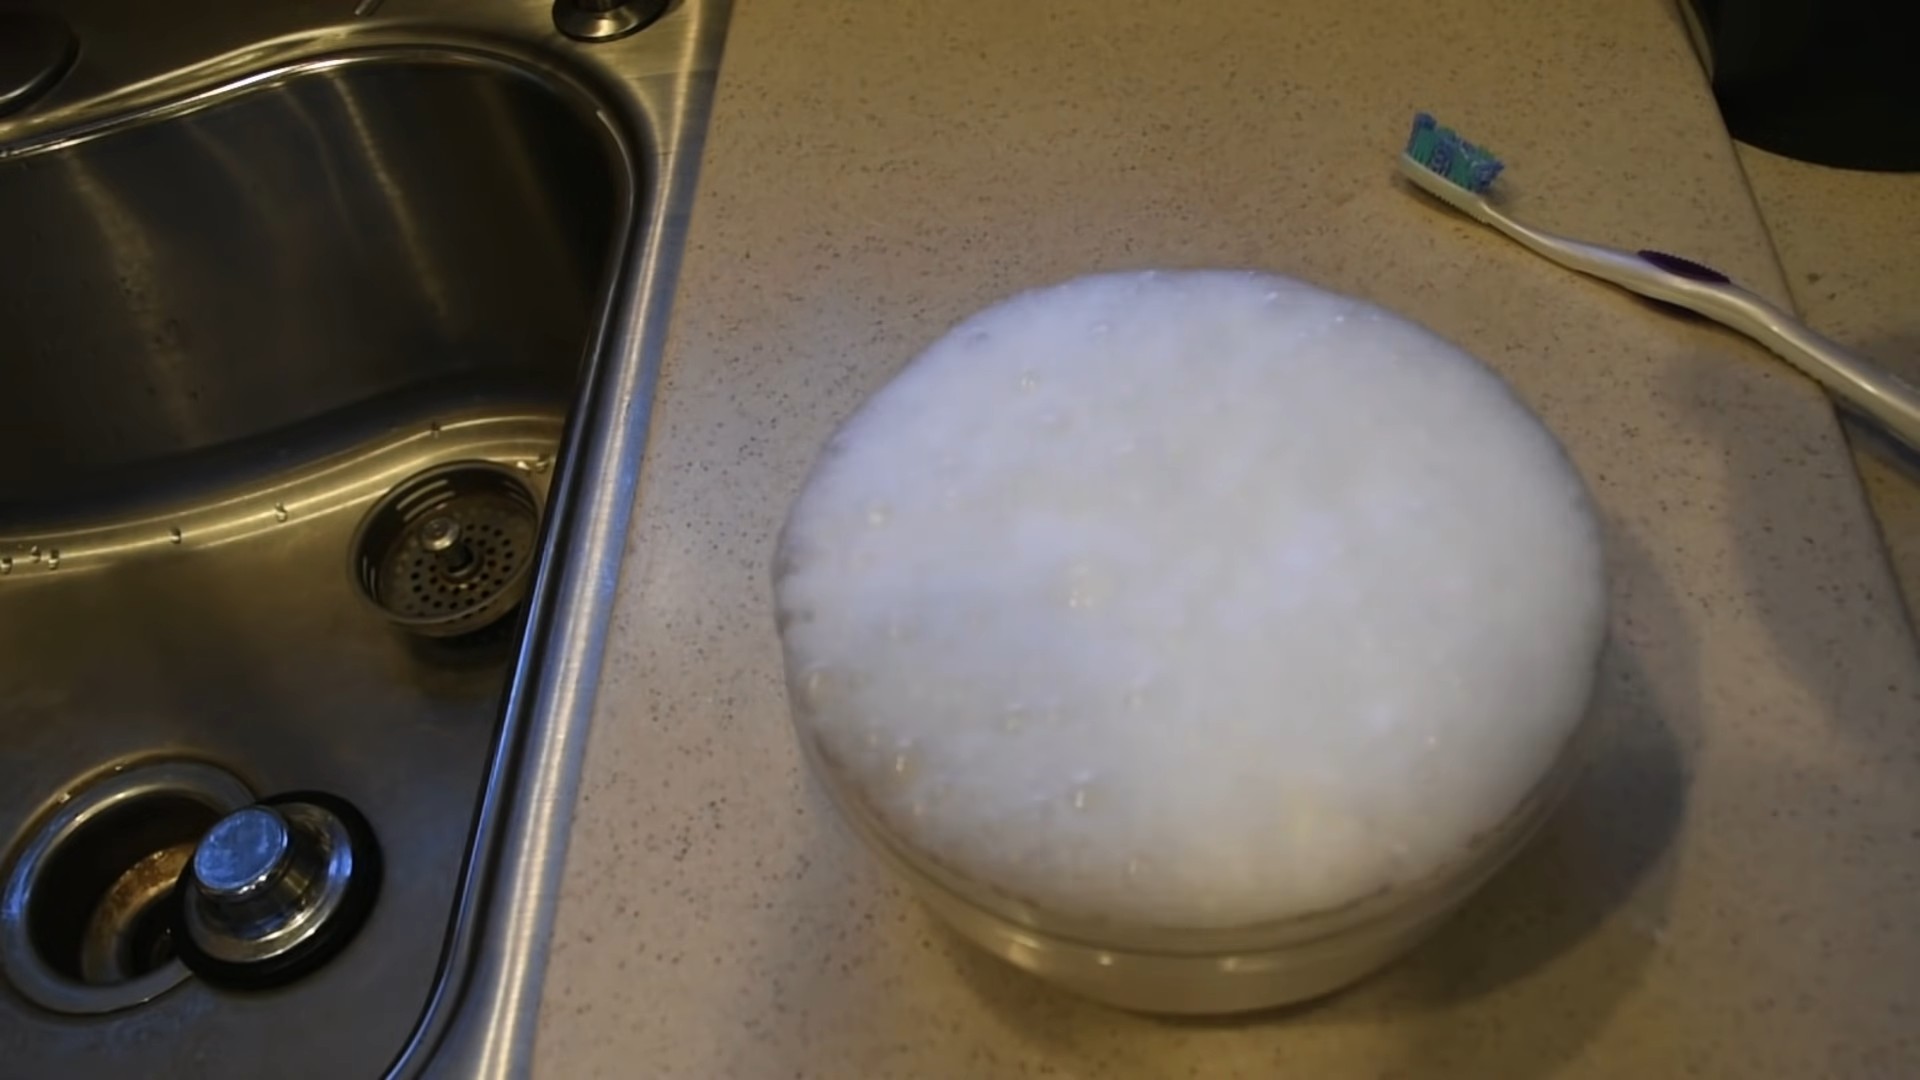
3. Apply Baking Soda: Generously sprinkle baking soda all over the sink surface, including the sides and around the drain. Don’t be shy!
4. Scrub Gently: Using a damp sponge or cloth, gently scrub the baking soda into the sink surface. Focus on areas with visible stains or grime. The baking soda acts as a mild abrasive to lift away dirt without scratching.
5. Rinse Again: Rinse the sink thoroughly with warm water to remove the baking soda residue.
Phase 2: Vinegar Power – Breaking Down Grease and Grime
Now, let’s unleash the power of vinegar!
1. Spray with Vinegar: Fill a spray bottle with white vinegar and generously spray the entire sink surface, including the faucet and drain area. You’ll notice the vinegar reacting with any remaining baking soda – it will fizz! This is a good thing!
2. Let it Sit: Allow the vinegar to sit for about 15-20 minutes. This gives it time to break down grease and grime.
3. Scrub Again: After the vinegar has had time to work its magic, use a sponge or cloth to scrub the sink again. Pay special attention to areas that are particularly greasy or stained.
4. Rinse Thoroughly: Rinse the sink thoroughly with warm water to remove all traces of vinegar.
Phase 3: Targeting the Drain – Eliminating Odors and Clogs
A clean sink isn’t complete without a clean drain! This is where we tackle those lingering odors and potential clogs.
1. Boil Water: Boil a kettle or pot of water.
2. Pour Down the Drain: Carefully pour the boiling water down the drain. This helps to flush out any grease or debris that may be clinging to the pipes.
3. Baking Soda and Vinegar Flush: Pour about 1/2 cup of baking soda down the drain, followed by 1 cup of white vinegar.
4. Let it Fizz: Let the mixture fizz and bubble for about 30 minutes. Don’t be alarmed by the sound – it’s just the chemical reaction working to break down clogs.
5. Flush with Hot Water: After 30 minutes, flush the drain with hot water for several minutes to clear out any remaining debris.
Phase 4: Polishing and Shine – The Finishing Touches
Now for the final touches that will leave your sink looking brand new!
1. Lemon Power (Optional): Cut a lemon in half and rub it all over the sink surface, including the faucet. The lemon juice will help to remove any remaining stains and leave a fresh, citrusy scent.
2. Salt Scrub (Optional): For extra polishing power, sprinkle a small amount of salt onto a damp sponge and gently scrub the sink surface.
3. Hydrogen Peroxide Disinfect (Optional): If you want to disinfect your sink, spray it with hydrogen peroxide and let it sit for about 10 minutes before rinsing. Important: Never mix hydrogen peroxide with vinegar!
4. Dry Thoroughly: Use a clean, dry cloth to thoroughly dry the sink. This will prevent water spots and keep it looking shiny.
5. Polish the Faucet: Use a clean, dry cloth to polish the faucet. You can also use a commercial stainless steel cleaner for extra shine.
Dealing with Stubborn Stains
Sometimes, you’ll encounter stains that just won’t budge with the standard cleaning routine. Here are a few tips for tackling those stubborn spots:
* For Hard Water Stains: Soak a cloth in white vinegar and place it over the stain for several hours or overnight. Then, scrub with baking soda and rinse.
* For Rust Stains: Make a paste of lemon juice and salt and apply it to the stain. Let it sit for a few hours, then scrub and rinse.
* For Coffee or Tea Stains: Try using a paste of baking soda and hydrogen peroxide. Apply it to the stain, let it sit for a few minutes, then scrub and rinse.
* For Scratches: For minor scratches on stainless steel sinks, you can try using a stainless steel polish or a paste of baking soda and water. Rub gently in the direction of the grain.
Maintaining Your Sparkling Clean Sink
The key to keeping your sink clean is to maintain it regularly. Here are a few tips:
* Rinse After Each Use: Rinse the sink with water after each use to prevent food particles from drying and sticking.
* Wipe Down Regularly: Wipe down the sink with a damp cloth and a little dish soap every day or two.
* Clean the Drain Regularly: Flush the drain with hot water and baking soda/vinegar once a week to prevent clogs and odors.
* Avoid Harsh Chemicals: Avoid using harsh chemicals or abrasive cleaners, as they can damage the sink surface.
* Use a Sink Strainer: A sink strainer will catch food particles and prevent them from going down the drain.
Choosing the Right Cleaning Method for Your Sink Material
It’s important to consider the material of your sink when choosing cleaning methods. Here’s a quick guide:
* Stainless Steel: Stainless steel is generally durable and can withstand most cleaning methods. However, avoid using abrasive cleaners that can scratch the surface. Always wipe in the direction of the grain.
* Porcelain: Porcelain sinks are prone to staining and chipping. Use gentle cleaners and avoid abrasive scrubbers.
* Composite: Composite sinks are made from a mixture of materials, such as granite or quartz. Follow the manufacturer’s instructions for cleaning.
* Cast Iron: Cast iron sinks are durable but can rust if the enamel coating is damaged. Avoid using abrasive cleaners and dry the sink thoroughly after each use.
Safety First!
When using any cleaning products, always follow these safety precautions:
* Wear Rubber Gloves: Protect your hands from harsh chemicals.
* Ventilate the Area: Open windows or turn on a fan to ensure proper ventilation.
* Never Mix Chemicals: Mixing certain chemicals, such as bleach and ammonia, can create dangerous fumes.
* Keep Out of Reach of Children and Pets: Store cleaning products in a safe place where children and pets cannot access them.
And there you have it! A comprehensive guide to getting your kitchen sink sparkling clean. With a little elbow grease and these simple tips, you can transform your sink from a battlefield to a beautiful and hygienic space. Happy cleaning!
Conclusion
So, there you have it! A simple, effective, and surprisingly satisfying way to achieve a sparkling clean kitchen sink using ingredients you likely already have in your pantry. Forget harsh chemicals and expensive cleaning solutions; this DIY approach is not only budget-friendly but also gentler on the environment and your skin.
Why is this DIY trick a must-try? Because it delivers results. Stubborn stains, lingering odors, and that general grimy feeling that accumulates in even the most well-maintained sinks are no match for the power of baking soda, vinegar, and a little elbow grease. You’ll be amazed at how quickly your sink transforms from dull and dingy to gleaming and fresh. Plus, the satisfaction of knowing you’ve achieved this with natural ingredients is an added bonus.
But the benefits don’t stop there. This method is incredibly versatile. Feel free to experiment with variations to suit your specific needs and preferences. For instance, if you’re dealing with particularly tough stains, try creating a paste of baking soda and hydrogen peroxide and letting it sit on the affected area for a longer period before scrubbing. Or, if you prefer a more fragrant clean, add a few drops of your favorite essential oil, such as lemon or tea tree, to the baking soda mixture. These oils not only provide a pleasant scent but also offer additional antibacterial properties.
Another variation involves using a lemon half instead of a sponge to scrub the sink after applying the baking soda paste. The citric acid in the lemon will help to further break down grime and leave your sink smelling incredibly fresh. You can even use the lemon half to clean your garbage disposal by running it with the lemon inside.
For stainless steel sinks, be sure to follow the grain when scrubbing to avoid scratching the surface. A soft cloth or sponge is generally recommended for stainless steel to prevent damage. If you have a porcelain sink, avoid using abrasive cleaners or scrub brushes, as these can scratch the surface. A gentle sponge and a non-abrasive cleaner are best for porcelain.
Ultimately, the key to a consistently clean kitchen sink is regular maintenance. Incorporate this DIY cleaning routine into your weekly cleaning schedule, and you’ll find that your sink stays cleaner for longer, requiring less effort each time. A quick wipe-down after each use can also help to prevent the buildup of grime and stains.
We are confident that this DIY method for a clean kitchen sink will become a staple in your cleaning arsenal. It’s easy, affordable, and effective – what’s not to love?
Now, it’s your turn! We encourage you to give this DIY trick a try and see the amazing results for yourself. Don’t be afraid to experiment with different variations and find what works best for you. And most importantly, we want to hear about your experience! Share your before-and-after photos, tips, and tricks in the comments below. Let’s create a community of sparkling clean kitchen sinks! We can’t wait to see your results and learn from your experiences. Happy cleaning!
Frequently Asked Questions (FAQ)
Q: How often should I clean my kitchen sink using this DIY method?
A: The frequency depends on how often you use your sink and how quickly it gets dirty. However, a good rule of thumb is to clean it thoroughly using this DIY method at least once a week. For high-use sinks, you might consider doing it twice a week. Additionally, a quick daily wipe-down with a damp cloth and a mild dish soap can help prevent the buildup of grime and stains between deep cleans.
Q: Can I use this method on all types of kitchen sinks?
A: This method is generally safe for most types of kitchen sinks, including stainless steel, porcelain, and composite sinks. However, it’s essential to take precautions depending on the material of your sink. For stainless steel, always scrub in the direction of the grain to avoid scratching. For porcelain, avoid using abrasive cleaners or scrub brushes, as these can also scratch the surface. For composite sinks, test the cleaning solution in an inconspicuous area first to ensure it doesn’t discolor or damage the material.
Q: What if I don’t have vinegar? Can I use something else?
A: While vinegar is a key ingredient in this DIY cleaning method due to its acidity and disinfecting properties, you can substitute it with lemon juice in a pinch. Lemon juice also contains citric acid, which can help break down grime and kill bacteria. However, vinegar is generally more effective and affordable. If you don’t have either vinegar or lemon juice, you can try using a diluted solution of bleach, but be extremely cautious when using bleach and always wear gloves and eye protection. Ensure proper ventilation and never mix bleach with other cleaning products, as this can create dangerous fumes.
Q: My sink has a really bad odor. Will this DIY method get rid of it?
A: Yes, this DIY method can help eliminate bad odors in your sink. The baking soda acts as a natural deodorizer, while the vinegar helps to kill odor-causing bacteria. For particularly stubborn odors, you can pour a cup of baking soda down the drain, followed by a cup of vinegar. Let it fizz for about 30 minutes, then flush with hot water. You can also add a few drops of essential oils, such as lemon or tea tree oil, to the baking soda mixture for a more pleasant scent and added antibacterial benefits. If the odor persists, it could be coming from your garbage disposal, which may require separate cleaning.
Q: How do I clean my garbage disposal?
A: Cleaning your garbage disposal is essential for preventing odors and maintaining its functionality. There are several ways to clean it. One simple method is to run cold water while dropping in a few lemon or lime wedges. The citrus will help to freshen the disposal and break down any food particles. Another method is to pour a cup of baking soda down the drain, followed by a cup of vinegar. Let it fizz for about 30 minutes, then flush with hot water. You can also purchase commercial garbage disposal cleaners, but be sure to follow the instructions carefully. Avoid putting grease, bones, or other hard materials down the disposal, as these can damage it.
Q: Can I use this method to clean other areas of my kitchen?
A: Yes, the ingredients used in this DIY method, such as baking soda and vinegar, are versatile and can be used to clean other areas of your kitchen. Baking soda can be used as a gentle abrasive cleaner for countertops, stovetops, and ovens. Vinegar can be used to clean windows, mirrors, and floors. However, it’s essential to test the cleaning solution in an inconspicuous area first to ensure it doesn’t damage the surface. Avoid using vinegar on natural stone surfaces, such as granite or marble, as it can etch the stone.
Q: What if I have hard water stains in my sink?
A: Hard water stains can be particularly stubborn to remove. For hard water stains, try soaking a paper towel in vinegar and placing it over the stained area for several hours or overnight. The vinegar will help to dissolve the mineral deposits. You can also use a commercial hard water stain remover, but be sure to follow the instructions carefully. To prevent hard water stains from forming, try drying your sink after each use and installing a water softener.
Q: Is this DIY method safe for septic systems?
A: Yes, this DIY method is generally safe for septic systems. Baking soda and vinegar are natural ingredients that won’t harm the bacteria in your septic tank. However, it’s essential to avoid pouring large amounts of grease or harsh chemicals down the drain, as these can disrupt the balance of your septic system.
Q: What are some other tips for keeping my kitchen sink clean?
A: In addition to regular cleaning, there are several other things you can do to keep your kitchen sink clean. Rinse your sink after each use to remove any food particles or debris. Avoid letting food scraps accumulate in the drain. Use a sink strainer to catch food particles and prevent them from clogging the drain. Dry your sink after each use to prevent water spots and hard water stains. And finally, regularly clean your garbage disposal to prevent odors and maintain its functionality. By following these simple tips, you can keep your kitchen sink sparkling clean and fresh.

Leave a Comment