
Bush Bean Home Growing: Ever dreamt of stepping into your backyard and harvesting a bounty of fresh, crisp beans for dinner? I know I have! There’s something incredibly satisfying about growing your own food, and bush beans are the perfect place to start, especially if you’re new to gardening or have limited space.
For centuries, beans have been a staple crop in cultures around the world, providing essential nutrients and playing a vital role in sustainable agriculture. From ancient civilizations to modern-day gardens, the humble bean has nourished communities and connected people to the land. Now, you can join this rich tradition by cultivating your own bush bean patch right at home!
But let’s be honest, sometimes gardening can feel a little daunting. That’s why I’ve put together this guide packed with easy-to-follow tricks and DIY hacks to help you achieve a thriving bush bean home growing experience. Whether you’re struggling with germination, pest control, or simply want to maximize your yield, I’ve got you covered. Imagine the joy of sharing your homegrown beans with family and friends, knowing you nurtured them from seed to table. Let’s get our hands dirty and unlock the secrets to a successful bush bean harvest!
Growing Bush Beans at Home: A Beginner’s Guide
Hey there, fellow gardening enthusiasts! I’m so excited to share my experience with growing bush beans at home. It’s a surprisingly easy and rewarding project, perfect for beginners and seasoned gardeners alike. Bush beans are compact, productive, and don’t require trellising, making them ideal for small gardens, raised beds, or even containers. Let’s dive in!
Choosing Your Bush Bean Variety
Before we get our hands dirty, let’s talk about bean varieties. There are tons of different bush bean types, each with its own unique flavor, color, and growth habit. Here are a few of my favorites:
* Provider: This is a classic, reliable variety that produces early and abundantly. The beans are tender and delicious.
* Blue Lake Bush: Known for its exceptional flavor and smooth texture, Blue Lake is a popular choice for canning and freezing.
* Contender: As the name suggests, this variety is a strong performer, even in less-than-ideal conditions. It’s also resistant to some common bean diseases.
* Roma II: If you love flat, Italian-style beans, Roma II is a must-try. They’re incredibly flavorful and perfect for salads or sautéing.
* Golden Wax: For a pop of color, try Golden Wax beans. They have a mild, buttery flavor and are great for adding visual appeal to your dishes.
Consider your taste preferences and growing conditions when choosing your variety. Seed packets usually provide helpful information about each type.
Preparing for Planting
Okay, now that we’ve picked our beans, let’s get ready to plant! Here’s what you’ll need:
* Bush bean seeds: Obviously!
* Well-draining soil: Bush beans prefer soil that’s rich in organic matter and drains well.
* Compost or aged manure: To enrich the soil and provide essential nutrients.
* Gardening tools: A trowel, garden fork, and watering can will come in handy.
* Sunlight: Bush beans need at least 6-8 hours of sunlight per day.
* Optional: Row covers to protect seedlings from pests and frost.
Soil Preparation
Good soil is the foundation of a successful bean crop. Here’s how I prepare my soil:
1. Clear the area: Remove any weeds, rocks, or debris from the planting area.
2. Loosen the soil: Use a garden fork or tiller to loosen the soil to a depth of at least 12 inches. This will improve drainage and allow the bean roots to penetrate easily.
3. Amend the soil: Mix in a generous amount of compost or aged manure. This will add nutrients and improve the soil’s structure. I usually aim for a ratio of about 1 part compost to 3 parts soil.
4. Level the surface: Rake the soil to create a smooth, even surface.
Planting Your Bush Beans
Bush beans are typically planted directly in the garden after the last frost. They don’t transplant well, so starting them indoors isn’t recommended.
1. Check the soil temperature: Bush beans germinate best when the soil temperature is at least 60°F (16°C). You can use a soil thermometer to check the temperature.
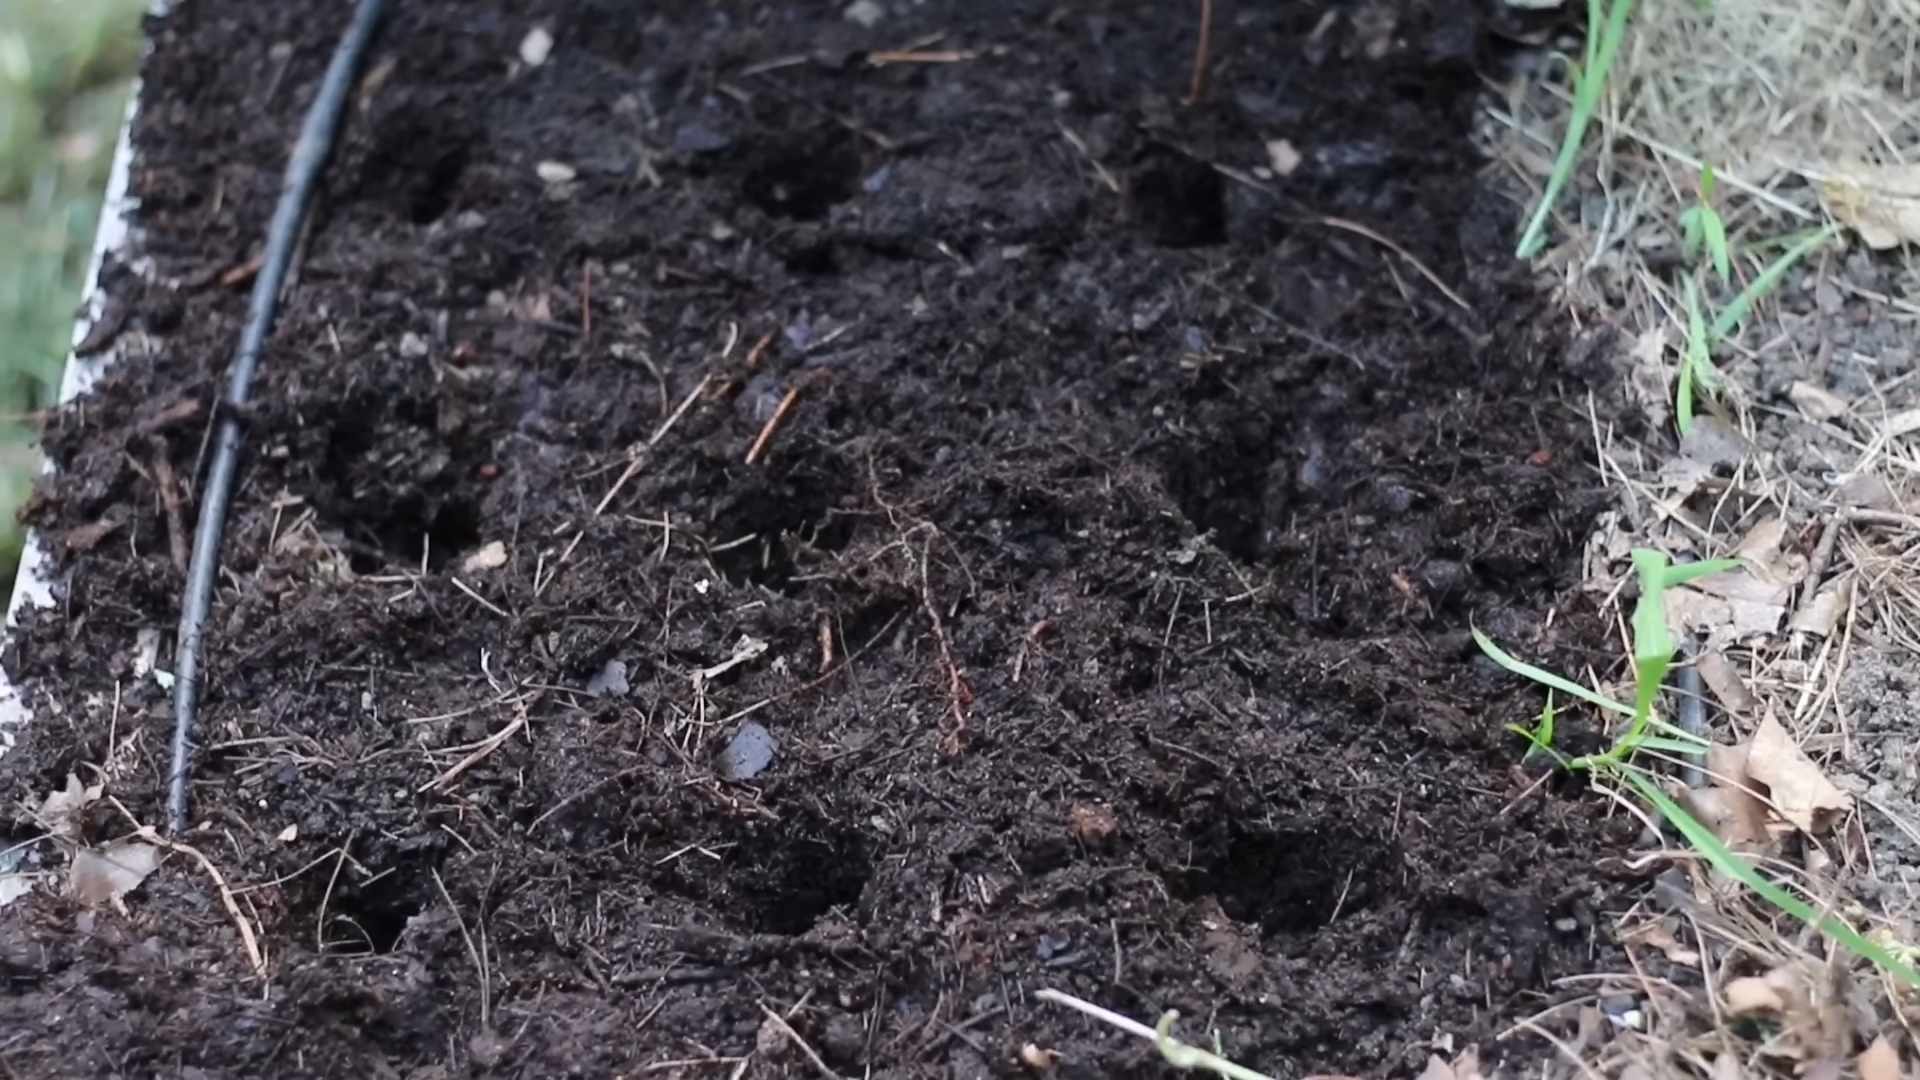
2. Sow the seeds: Plant the seeds about 1 inch deep and 2-3 inches apart in rows that are 18-24 inches apart. I like to use my finger to create small holes for the seeds.
3. Cover the seeds: Gently cover the seeds with soil and pat it down lightly.
4. Water thoroughly: Water the planting area gently but thoroughly. The soil should be moist but not soggy.
5. Optional: If you’re concerned about pests or frost, you can cover the planting area with row covers.
Caring for Your Bush Beans
Once your bush beans are planted, it’s important to provide them with the care they need to thrive.
1. Watering: Bush beans need consistent moisture, especially during flowering and pod development. Water deeply whenever the top inch of soil feels dry. Avoid overhead watering, as this can promote fungal diseases. Soaker hoses or drip irrigation are ideal.
2. Weeding: Keep the planting area free of weeds, which can compete with the beans for nutrients and water. Hand-pull weeds carefully to avoid disturbing the bean roots.
3. Fertilizing: Bush beans don’t require a lot of fertilizer, but a side dressing of compost or a balanced organic fertilizer can be beneficial. Apply fertilizer according to the package instructions. I usually fertilize about 3-4 weeks after planting.
4. Pest control: Keep an eye out for common bean pests, such as aphids, bean beetles, and spider mites. You can control these pests with insecticidal soap, neem oil, or by hand-picking them off the plants.
5. Disease prevention: To prevent fungal diseases, avoid overhead watering, provide good air circulation, and remove any infected leaves promptly.
Harvesting Your Bush Beans
The best part of growing bush beans is, of course, harvesting them! Bush beans are typically ready to harvest about 50-60 days after planting.
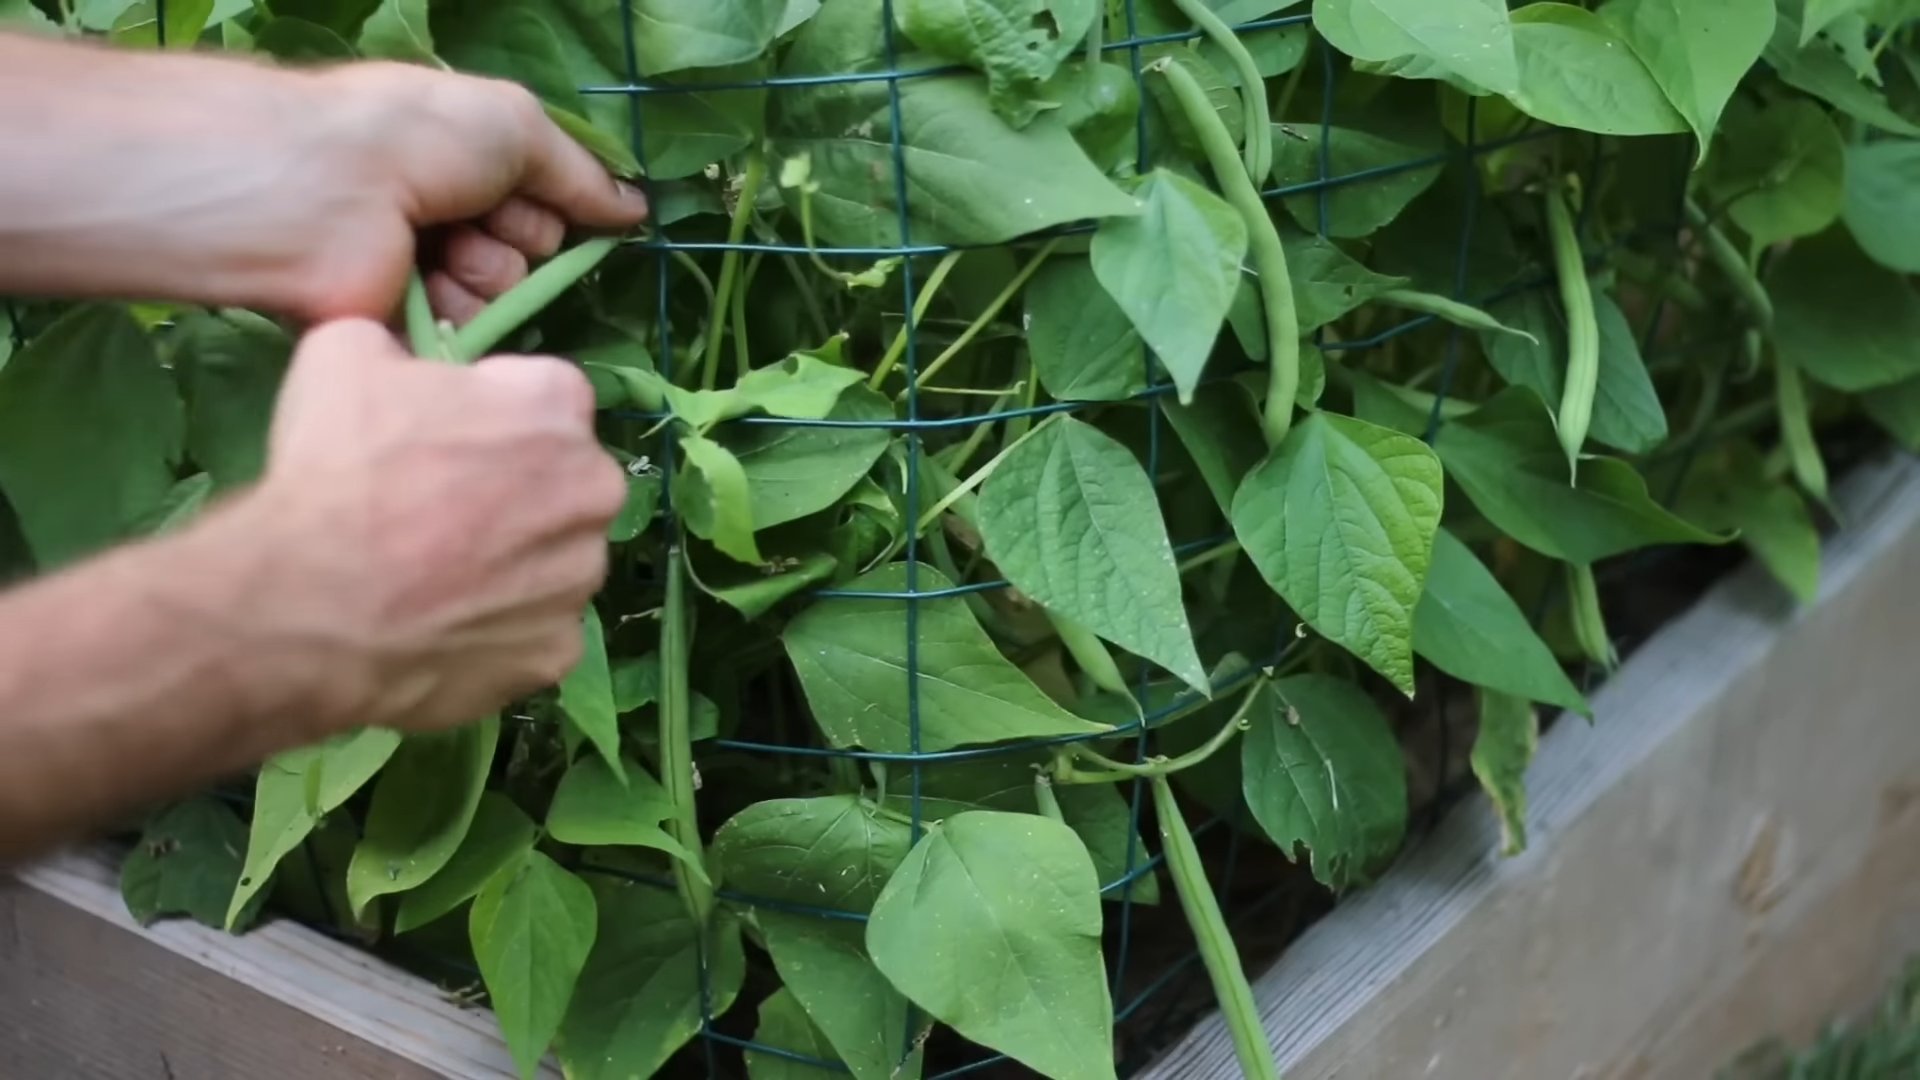
1. Check for ripeness: The beans should be firm, plump, and snap easily when bent. They shouldn’t be bulging or overly mature.
2. Harvest regularly: Pick the beans every few days to encourage continued production.
3. Harvesting technique: Gently snap the beans off the plant, being careful not to damage the stems or leaves.
4. Enjoy your harvest: Bush beans are delicious fresh, steamed, sautéed, or added to soups and stews. You can also freeze or can them for later use.
Troubleshooting Common Problems
Even with the best care, you might encounter some problems when growing bush beans. Here are a few common issues and how to address them:
* Poor germination: If your bean seeds aren’t germinating, the soil might be too cold or too wet. Make sure the soil temperature is at least 60°F (16°C) and avoid overwatering.
* Yellowing leaves: Yellowing leaves can be a sign of nutrient deficiency, overwatering, or disease. Check the soil drainage and consider adding a balanced fertilizer.
* Pest infestations: As mentioned earlier, aphids, bean beetles, and spider mites can be a problem. Use insecticidal soap, neem oil, or hand-picking to control these pests.
* Disease: Fungal diseases, such as powdery mildew and bean rust, can affect bush beans. Prevent these diseases by providing good air circul
Hey there, fellow gardening enthusiasts! I’m so excited to share my experience with growing bush beans at home. It’s a surprisingly easy and rewarding project, perfect for beginners and seasoned gardeners alike. Bush beans are compact, productive, and don’t require trellising, making them ideal for small gardens, raised beds, or even containers. Let’s dive in!
Choosing Your Bush Bean Variety
Before we get our hands dirty, let’s talk about bean varieties. There are tons of different bush bean types, each with its own unique flavor, color, and growth habit. Here are a few of my favorites:
* Provider: This is a classic, reliable variety that produces early and abundantly. The beans are tender and delicious.
* Blue Lake Bush: Known for its exceptional flavor and smooth texture, Blue Lake is a popular choice for canning and freezing.
* Contender: As the name suggests, this variety is a strong performer, even in less-than-ideal conditions. It’s also resistant to some common bean diseases.
* Roma II: If you love flat, Italian-style beans, Roma II is a must-try. They’re incredibly flavorful and perfect for salads or sautéing.
* Golden Wax: For a pop of color, try Golden Wax beans. They have a mild, buttery flavor and are great for adding visual appeal to your dishes.
Consider your taste preferences and growing conditions when choosing your variety. Seed packets usually provide helpful information about each type.
Preparing for Planting
Okay, now that we’ve picked our beans, let’s get ready to plant! Here’s what you’ll need:
* Bush bean seeds: Obviously!
* Well-draining soil: Bush beans prefer soil that’s rich in organic matter and drains well.
* Compost or aged manure: To enrich the soil and provide essential nutrients.
* Gardening tools: A trowel, garden fork, and watering can will come in handy.
* Sunlight: Bush beans need at least 6-8 hours of sunlight per day.
* Optional: Row covers to protect seedlings from pests and frost.
Soil Preparation
Good soil is the foundation of a successful bean crop. Here’s how I prepare my soil:
1. Clear the area: Remove any weeds, rocks, or debris from the planting area.
2. Loosen the soil: Use a garden fork or tiller to loosen the soil to a depth of at least 12 inches. This will improve drainage and allow the bean roots to penetrate easily.
3. Amend the soil: Mix in a generous amount of compost or aged manure. This will add nutrients and improve the soil’s structure. I usually aim for a ratio of about 1 part compost to 3 parts soil.
4. Level the surface: Rake the soil to create a smooth, even surface.
Planting Your Bush Beans
Bush beans are typically planted directly in the garden after the last frost. They don’t transplant well, so starting them indoors isn’t recommended.
1. Check the soil temperature: Bush beans germinate best when the soil temperature is at least 60°F (16°C). You can use a soil thermometer to check the temperature.
2. Sow the seeds: Plant the seeds about 1 inch deep and 2-3 inches apart in rows that are 18-24 inches apart. I like to use my finger to create small holes for the seeds.
3. Cover the seeds: Gently cover the seeds with soil and pat it down lightly.
4. Water thoroughly: Water the planting area gently but thoroughly. The soil should be moist but not soggy.
5. Optional: If you’re concerned about pests or frost, you can cover the planting area with row covers.
Caring for Your Bush Beans
Once your bush beans are planted, it’s important to provide them with the care they need to thrive.
1. Watering: Bush beans need consistent moisture, especially during flowering and pod development. Water deeply whenever the top inch of soil feels dry. Avoid overhead watering, as this can promote fungal diseases. Soaker hoses or drip irrigation are ideal.
2. Weeding: Keep the planting area free of weeds, which can compete with the beans for nutrients and water. Hand-pull weeds carefully to avoid disturbing the bean roots.
3. Fertilizing: Bush beans don’t require a lot of fertilizer, but a side dressing of compost or a balanced organic fertilizer can be beneficial. Apply fertilizer according to the package instructions. I usually fertilize about 3-4 weeks after planting.
4. Pest control: Keep an eye out for common bean pests, such as aphids, bean beetles, and spider mites. You can control these pests with insecticidal soap, neem oil, or by hand-picking them off the plants.
5. Disease prevention: To prevent fungal diseases, avoid overhead watering, provide good air circulation, and remove any infected leaves promptly.
Harvesting Your Bush Beans
The best part of growing bush beans is, of course, harvesting them! Bush beans are typically ready to harvest about 50-60 days after planting.
1. Check for ripeness: The beans should be firm, plump, and snap easily when bent. They shouldn’t be bulging or overly mature.
2. Harvest regularly: Pick the beans every few days to encourage continued production.
3. Harvesting technique: Gently snap the beans off the plant, being careful not to damage the stems or leaves.
4. Enjoy your harvest: Bush beans are delicious fresh, steamed, sautéed, or added to soups and stews. You can also freeze or can them for later use.
Troubleshooting Common Problems
Even with the best care, you might encounter some problems when growing bush beans. Here are a few common issues and how to address them:
* Poor germination: If your bean seeds aren’t germinating, the soil might be too cold or too wet. Make sure the soil temperature is at least 60°F (16°C) and avoid overwatering.
* Yellowing leaves: Yellowing leaves can be a sign of nutrient deficiency, overwatering, or disease. Check the soil drainage and consider adding a balanced fertilizer.
* Pest infestations: As mentioned earlier, aphids, bean beetles, and spider mites can be a problem. Use insecticidal soap, neem oil, or hand-picking to control these pests.
* Disease: Fungal diseases, such as powdery mildew and bean rust, can affect bush beans. Prevent these diseases by providing good air circulation, avoiding overhead watering, and removing any infected leaves.
Extending Your Harvest
Want to enjoy fresh bush beans for as long as possible? Here are a few tips for extending your harvest:
* Succession planting: Plant a new batch of bush beans every 2-3 weeks to ensure a continuous supply.
* Choose early-maturing varieties: Some bush bean varieties mature earlier than others. Choose early-maturing varieties for your first planting.
* Protect from frost: If frost is a concern, cover your bean plants with row covers or blankets.
Container Gardening with Bush Beans
Don’t have a garden? No problem! Bush beans can also be grown in containers. Here’s what you’ll need:
* A large container: Choose a container that’s at least 12 inches deep and wide.
* Well-draining potting mix: Use a high-quality potting mix that drains well.
* Sunlight: Place the container in a location that receives at least 6-8 hours of sunlight per day.
* Water: Water the container regularly, especially during hot weather.
* Fertilizer: Fertilize the beans every 2-3 weeks with a balanced liquid fertilizer.
Follow the same planting and care instructions as for garden-grown bush beans.
Saving Bean Seeds
If you want to save seeds from your bush beans for next year, here’s how:
1. Choose healthy plants: Select healthy, vigorous plants that produce high-quality beans.
2. Allow pods to dry: Allow some of the bean pods to dry completely on the plant. The pods should be brown and brittle.
3. Harvest the pods: Harvest the dried pods and remove the beans.
4. Dry the beans: Spread the beans out on a screen or tray and allow them to dry completely in a cool, dry place.
5. Store the seeds: Store the dried beans in an airtight container in a cool, dry place.
And there you have it! Growing bush beans at home is a simple and rewarding experience. With a little bit of planning and care, you can enjoy a bountiful harvest of fresh, delicious beans. Happy
Conclusion
So, there you have it! Growing your own bush beans at home is not only achievable but also incredibly rewarding. From the satisfaction of nurturing a plant from seed to the delicious taste of freshly harvested beans, this DIY project offers a unique connection to your food. We’ve walked you through the essential steps, from selecting the right variety and preparing your soil to providing adequate sunlight and consistent watering.
But why is this DIY trick a must-try? Beyond the obvious benefits of fresh, organic produce, growing your own bush beans empowers you to control the entire process. You know exactly what goes into your food, avoiding potentially harmful pesticides and herbicides. Plus, it’s a fantastic way to reduce your carbon footprint by minimizing transportation and packaging. And let’s not forget the sheer joy of watching your garden flourish!
Ready to take your bush bean growing to the next level? Consider these variations:
* Succession Planting: Plant new seeds every two to three weeks for a continuous harvest throughout the growing season. This ensures a steady supply of fresh beans for your table.
* Companion Planting: Plant bush beans alongside other beneficial plants like carrots, cucumbers, or marigolds. These companions can help deter pests and improve soil health.
* Vertical Growing: While bush beans are naturally compact, you can still utilize vertical space by providing them with a small trellis or support structure. This can improve air circulation and prevent disease.
* Container Gardening: If you’re short on space, bush beans thrive in containers. Choose a pot that’s at least 12 inches deep and wide to accommodate their root system.
* Different Varieties: Experiment with different varieties of bush beans to find your favorites. Some popular choices include Blue Lake, Contender, and Provider. Each variety offers a unique flavor and texture.
We wholeheartedly encourage you to give this DIY bush bean growing trick a try. It’s a simple, affordable, and incredibly satisfying way to connect with nature and enjoy fresh, delicious produce. Don’t be afraid to experiment and adapt the techniques to suit your specific environment and preferences.
Once you’ve harvested your first batch of homegrown bush beans, we’d love to hear about your experience! Share your tips, tricks, and photos in the comments below. Let’s create a community of thriving home gardeners! Happy growing!
Frequently Asked Questions (FAQ)
What are the best varieties of bush beans to grow at home?
Choosing the right variety is crucial for a successful harvest. Some of the most popular and reliable bush bean varieties for home gardens include:
* Blue Lake: Known for its excellent flavor and stringless pods, Blue Lake is a classic choice for canning and freezing.
* Contender: This early-maturing variety is highly productive and disease-resistant, making it a great option for beginners.
* Provider: As the name suggests, Provider is a reliable and prolific producer, even in less-than-ideal conditions.
* Derby: Derby beans are known for their straight, dark green pods and excellent flavor. They are also relatively early to mature.
* Roma II: If you prefer flat, Italian-style beans, Roma II is an excellent choice. They have a rich, buttery flavor and are perfect for sautéing or grilling.
* Royal Burgundy: For a visually appealing option, try Royal Burgundy. These beans have beautiful purple pods that turn green when cooked.
Consider your local climate and growing conditions when selecting a variety. Check with your local garden center or extension office for recommendations specific to your area.
How much sunlight do bush beans need?
Bush beans require at least 6-8 hours of direct sunlight per day to thrive. Choose a planting location that receives full sun throughout the growing season. If you’re growing beans in containers, make sure to place them in a sunny spot. Insufficient sunlight can lead to stunted growth, reduced yields, and increased susceptibility to diseases.
What type of soil is best for growing bush beans?
Bush beans prefer well-drained soil that is rich in organic matter. Before planting, amend your soil with compost or other organic materials to improve its fertility and drainage. The ideal soil pH for bush beans is between 6.0 and 7.0. You can test your soil pH using a home testing kit or by sending a sample to your local extension office. Avoid planting bush beans in heavy clay soil, as this can lead to root rot.
How often should I water my bush beans?
Bush beans need consistent moisture to thrive. Water them deeply and regularly, especially during hot, dry weather. Aim to keep the soil consistently moist but not waterlogged. A good rule of thumb is to water when the top inch of soil feels dry to the touch. Avoid overhead watering, as this can promote fungal diseases. Instead, water at the base of the plants using a soaker hose or watering can.
How do I prevent pests and diseases from affecting my bush beans?
Several pests and diseases can affect bush beans, including aphids, bean beetles, and fungal diseases like powdery mildew. Here are some tips for preventing these problems:
* Choose disease-resistant varieties: Select varieties that are known to be resistant to common bean diseases.
* Practice crop rotation: Avoid planting beans in the same location year after year.
* Provide good air circulation: Space your plants properly to allow for good air circulation, which can help prevent fungal diseases.
* Water at the base of the plants: Avoid overhead watering, as this can promote fungal diseases.
* Inspect plants regularly: Check your plants regularly for signs of pests or diseases.
* Use organic pest control methods: If you find pests on your plants, try using organic pest control methods like insecticidal soap or neem oil.
* Remove infected plants: If a plant becomes severely infected with a disease, remove it from the garden to prevent the spread of the disease to other plants.
When is the best time to harvest bush beans?
Bush beans are typically ready to harvest about 50-60 days after planting. Harvest them when the pods are firm, plump, and snap easily. Avoid letting the pods become too large or tough, as this can affect their flavor and texture. Harvest regularly to encourage continued production. The more you pick, the more the plant will produce.
Can I grow bush beans in containers?
Yes, bush beans are well-suited for container gardening. Choose a pot that is at least 12 inches deep and wide to accommodate their root system. Use a high-quality potting mix that is well-draining. Make sure the container has drainage holes to prevent waterlogging. Place the container in a sunny location that receives at least 6-8 hours of direct sunlight per day. Water regularly and fertilize as needed.
How do I store harvested bush beans?
Freshly harvested bush beans can be stored in the refrigerator for up to a week. Place them in a plastic bag or container to prevent them from drying out. For longer storage, you can freeze or can your bush beans. To freeze them, blanch them in boiling water for 2-3 minutes, then cool them in ice water. Drain them well and store them in freezer bags or containers. To can them, follow a tested canning recipe to ensure food safety.
Can I save seeds from my bush bean plants?
Yes, you can save seeds from your bush bean plants, but only if you are growing heirloom or open-pollinated varieties. Hybrid varieties will not produce true-to-type seeds. To save seeds, allow some of the pods to dry completely on the plant. Once the pods are dry and brittle, shell the beans and store them in an airtight container in a cool, dry place. Label the container with the variety name and the date.

Leave a Comment