
Bucket Grown Water Spinach: Imagine harvesting fresh, crisp, and delicious water spinach right from your own backyard, even if you don’t have a sprawling garden! That’s the magic we’re unlocking today with a simple, effective, and incredibly rewarding DIY project. Forget those expensive grocery store trips for wilted greens; we’re bringing the farm to your doorstep, one bucket at a time.
Water spinach, also known as Ong Choy, has a rich history, deeply rooted in Asian cuisine and culture. For centuries, it’s been a staple in stir-fries, soups, and salads, prized for its mild flavor and impressive nutritional benefits. Growing your own allows you to connect with this culinary heritage and enjoy a taste of tradition.
But why bucket grown water spinach, you ask? Well, let’s face it, not everyone has the space or the time for a traditional garden. This DIY trick is perfect for apartment dwellers, balcony gardeners, or anyone looking for a low-maintenance, high-yield way to grow their own food. Plus, it’s incredibly satisfying to nurture a plant from seed to harvest, knowing you’re providing yourself and your family with fresh, healthy produce. I’m excited to share this easy and fun method with you, so let’s get started and transform those buckets into thriving water spinach gardens!
Growing Water Spinach in a Bucket: A Beginner’s Guide
Hey there, fellow gardening enthusiasts! I’m super excited to share my experience with growing water spinach (also known as Ong Choy or Kang Kong) in a bucket. It’s a fantastic way to enjoy fresh, leafy greens, even if you don’t have a traditional garden. Water spinach is incredibly easy to grow, thrives in warm weather, and is packed with nutrients. Plus, it’s a fun and rewarding project! So, let’s dive in!
What You’ll Need
Before we get started, let’s gather all the necessary materials. This will make the process smooth and enjoyable.
* A Large Bucket: I recommend a 5-gallon bucket or larger. Make sure it’s food-grade if you’re using a recycled bucket.
* Water Spinach Seeds or Cuttings: You can find seeds online or at your local garden center. Cuttings can be obtained from a friend who already grows water spinach or sometimes from Asian grocery stores.
* Potting Mix: A good quality potting mix is essential for healthy growth.
* Slow-Release Fertilizer: This will provide your water spinach with the nutrients it needs over time.
* Water: Obviously!
* Sunlight: Water spinach loves sunshine, so choose a sunny spot.
* Optional:
* A drill (if you want to add drainage holes, though it’s not always necessary).
* A tray to place under the bucket (to catch any spills).
* A small amount of compost (to enrich the potting mix).
Preparing Your Bucket
This step is crucial for setting the stage for healthy water spinach growth.
1. Clean the Bucket: If you’re using a recycled bucket, thoroughly clean it with soap and water to remove any dirt or residue.
2. Drill Drainage Holes (Optional): This is a bit of a debate among water spinach growers. Some prefer drainage holes to prevent the soil from becoming waterlogged, while others grow it hydroponically without any drainage. I personally prefer a few small drainage holes (about ¼ inch in diameter) at the bottom of the bucket, just to be safe. If you choose to drill holes, do so now.
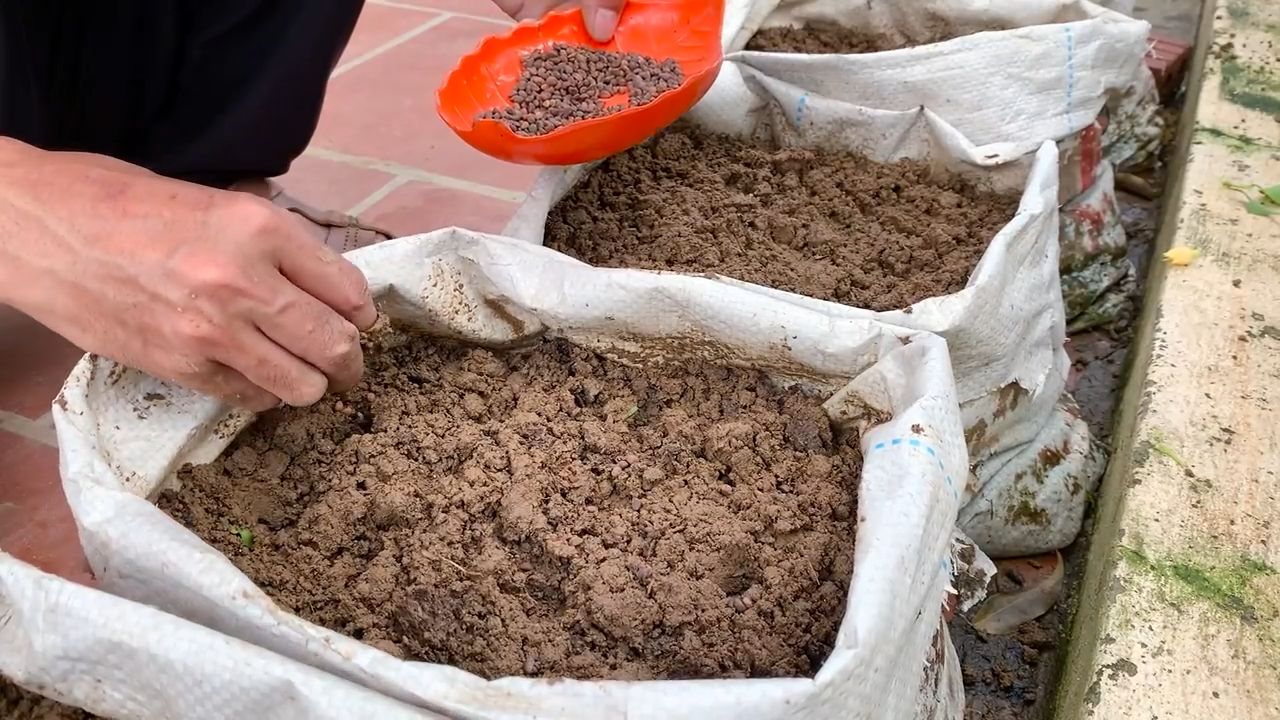
3. Add Potting Mix: Fill the bucket with potting mix, leaving about 2-3 inches of space at the top. This space will allow you to water the plants without overflowing the bucket.
4. Mix in Fertilizer: Incorporate the slow-release fertilizer into the potting mix according to the package instructions. This will provide a steady supply of nutrients to your water spinach. If you’re using compost, mix a small amount into the potting mix as well.
Planting Your Water Spinach
Now for the fun part – planting! Whether you’re using seeds or cuttings, the process is relatively straightforward.
Planting from Seeds
1. Moisten the Soil: Water the potting mix thoroughly until it’s evenly moist but not soggy.
2. Sow the Seeds: Sprinkle the water spinach seeds evenly over the surface of the soil.
3. Cover the Seeds: Lightly cover the seeds with a thin layer of potting mix (about ¼ inch).
4. Water Gently: Gently water the surface of the soil to ensure good seed-to-soil contact. Avoid overwatering, which can wash away the seeds.
5. Keep Moist: Keep the soil consistently moist by watering regularly. You can also cover the bucket with a clear plastic bag or plastic wrap to create a humid environment, which will help with germination. Remove the cover once the seedlings emerge.
6. Wait for Germination: Water spinach seeds typically germinate within 5-10 days.
Planting from Cuttings
1. Prepare the Cuttings: If you’re using cuttings, choose healthy stems that are about 6-8 inches long. Remove the lower leaves from the cuttings, leaving only a few leaves at the top.
2. Rooting Hormone (Optional): Dipping the cut end of the cuttings in rooting hormone can help promote root development, but it’s not essential.
3. Plant the Cuttings: Make small holes in the potting mix and insert the cuttings, burying about 2-3 inches of the stem. Space the cuttings about 4-6 inches apart.
4. Water Thoroughly: Water the cuttings thoroughly to help them establish roots.
5. Keep Moist: Keep the soil consistently moist by watering regularly. You can also cover the bucket with a clear plastic bag or plastic wrap to create a humid environment, which will help with root development. Remove the cover once the cuttings start to show new growth.
Caring for Your Water Spinach
Consistent care is key to a bountiful harvest. Water spinach is relatively low-maintenance, but here are a few things to keep in mind.
1. Sunlight: Water spinach needs at least 6 hours of sunlight per day. Place your bucket in a sunny location where it will receive plenty of light.
2. Watering: Water spinach loves water, so keep the soil consistently moist. Check the soil moisture daily and water whenever the top inch of soil feels dry. In hot weather, you may need to water more frequently.
3. Fertilizing: The slow-release fertilizer you added at planting should provide enough nutrients for the first few weeks. After that, you can supplement with a liquid fertilizer every 2-3 weeks. Follow the instructions on the fertilizer package.
4. Weeding: Keep the bucket free of weeds, which can compete with your water spinach for nutrients and water.
5. Pest Control: Water spinach is generally pest-resistant, but occasionally aphids or other pests may appear. If you notice any pests, you can try spraying them with insecticidal soap or neem oil.
6. Support (Optional): As your water spinach grows, it may start to trail. You can provide support by inserting bamboo stakes or a small trellis into the bucket.
Harvesting Your Water Spinach
The best part! Harvesting is easy and encourages more growth.
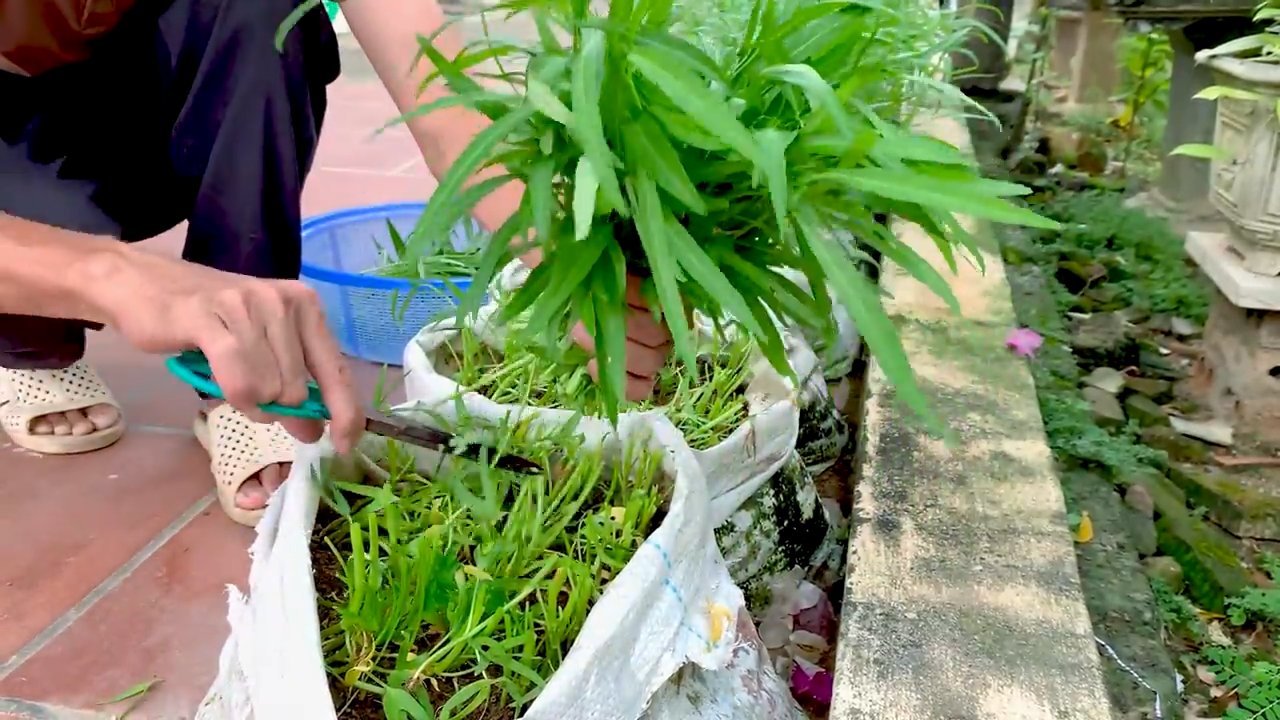
1. When to Harvest: You can start harvesting your water spinach about 4-6 weeks after planting, when the stems are about 8-12 inches long.
2. How to Harvest: Use scissors or a sharp knife to cut the stems about 2-3 inches above the soil line. This will encourage the plant to produce new shoots.
3. Harvest Regularly: Harvest your water spinach regularly to encourage continued growth. You can harvest as much as you need for your meals.
4. Enjoy Your Harvest: Water spinach is delicious stir-fried, steamed, or added to soups and salads.
Troubleshooting
Even with the best care, you might encounter a few challenges. Here are some common issues and how to address them.
* Yellowing Leaves: This could be a sign of overwatering, underwatering, or nutrient deficiency. Check the soil moisture and adjust your watering accordingly. If the soil is consistently moist, you may be overwatering. If the soil is dry, you may be underwatering. If the leaves are yellowing despite proper watering, try fertilizing with a liquid fertilizer.
* Slow Growth: This could be due to insufficient sunlight, poor soil, or lack of nutrients. Make sure your water spinach is getting at least 6 hours of sunlight per day. If the soil is poor, try amending it with compost or other organic matter. If the plants are not getting enough nutrients, fertilize with a liquid fertilizer.
* Pests: Aphids, spider mites, and other pests can sometimes attack water spinach. If you notice any pests, try spraying them with insecticidal soap or neem oil. You can also try hand-picking the pests off the plants.
* Bolting: Bolting (premature flowering) can occur in hot weather. To prevent bolting, try providing your water spinach with some shade during the hottest part of the day. You can also try harvesting the leaves more frequently, which can help to delay bolting.
Tips for Success
Here are a few extra tips to help you grow the best water spinach possible.
* Choose the Right Variety: There are several varieties of water spinach available, so choose one that is well-suited to your climate.
* Start with Healthy Seeds or Cuttings: Using high-quality seeds or cuttings will give your water spinach a head start.
* Provide Adequate Drainage: If you’re growing water spinach in a container with drainage holes, make sure the holes are not blocked.
* Water Deeply: When you water your water spinach, water deeply so that the water reaches the roots.
* Mulch the Soil: Mulching the soil around your water spinach can help to retain moisture and suppress weeds.
* Rotate Your Crops: If you’re growing water spinach in the same location year after year, rotate your crops to prevent soilborne diseases.
Growing water spinach
Conclusion
So, there you have it! Growing your own water spinach in a bucket is not just a fun project; it’s a gateway to incredibly fresh, delicious, and nutritious greens right at your fingertips. We’ve walked you through the simple steps, from selecting the right bucket and soil to nurturing your plants and harvesting your bounty. But why is this DIY trick a must-try?
Firstly, consider the unparalleled freshness. Store-bought water spinach, even when available, can’t compare to the vibrant flavor and crisp texture of freshly harvested greens. Imagine adding these tender leaves to your stir-fries, soups, or salads, knowing they were picked just moments before. The difference is truly remarkable.
Secondly, think about the cost savings. While the initial investment in a bucket, soil, and seeds might seem like a small expense, it pales in comparison to the ongoing cost of purchasing water spinach regularly. Over time, you’ll be amazed at how much money you save, all while enjoying a constant supply of this delicious vegetable.
Thirdly, and perhaps most importantly, growing your own water spinach gives you complete control over the growing process. You can choose organic soil, avoid harmful pesticides, and ensure that your plants are grown in a healthy and sustainable way. This is especially important if you’re concerned about the quality and safety of the food you consume.
But the possibilities don’t end there! Feel free to experiment with different variations to suit your preferences and growing conditions. Try adding a slow-release fertilizer to the soil for an extra boost of nutrients. Or, if you live in a cooler climate, consider moving your bucket indoors during the colder months to extend your growing season. You can even try growing different varieties of water spinach to discover your favorite flavor profile.
Don’t be afraid to get creative and personalize your bucket garden!
We’ve found that adding companion plants like basil or mint around the base of the water spinach can help deter pests and attract beneficial insects. Another fun variation is to create a tiered bucket garden, allowing you to grow multiple plants in a small space.
Ultimately, the best way to discover the joys of bucket-grown water spinach is to simply give it a try. It’s a rewarding and fulfilling experience that will connect you with nature and provide you with a constant supply of fresh, healthy greens.
We are confident that you’ll find this DIY project to be both enjoyable and beneficial. So, grab a bucket, some soil, and some seeds, and get ready to embark on your own water spinach growing adventure.
We encourage you to share your experiences with us! Post photos of your bucket gardens on social media using the hashtag #BucketGrownWaterSpinach and let us know how your plants are thriving. We’d love to see your creations and hear your tips and tricks. Happy growing!
Frequently Asked Questions (FAQ)
What kind of bucket should I use for growing water spinach?
The ideal bucket should be food-grade, meaning it’s safe for growing edible plants. A 5-gallon bucket is a good starting point, but you can use larger sizes if you prefer. Make sure the bucket has drainage holes at the bottom to prevent waterlogging. If you’re using a recycled bucket, thoroughly clean it with soap and water to remove any residue. Avoid using buckets that have previously contained chemicals or pesticides.
What type of soil is best for bucket-grown water spinach?
Water spinach thrives in rich, well-draining soil. A good mix would be a combination of potting soil, compost, and perlite. The potting soil provides a base for the plants to grow, the compost adds nutrients and improves soil structure, and the perlite enhances drainage. You can also add a slow-release fertilizer to the soil to provide a steady supply of nutrients throughout the growing season. Avoid using garden soil, as it can be too heavy and compacted for container gardening.
How often should I water my bucket-grown water spinach?
Water spinach loves moisture, so it’s important to keep the soil consistently moist. Water your plants deeply whenever the top inch of soil feels dry to the touch. During hot weather, you may need to water them more frequently, even daily. Be careful not to overwater, as this can lead to root rot. Ensure that the bucket has adequate drainage to prevent water from pooling at the bottom.
How much sunlight does water spinach need?
Water spinach needs at least 6 hours of direct sunlight per day to thrive. Choose a sunny location for your bucket garden, such as a patio, balcony, or backyard. If you don’t have a sunny spot, you can supplement with grow lights.
How long does it take for water spinach to grow in a bucket?
Water spinach is a fast-growing vegetable. You can expect to start harvesting leaves within 4-6 weeks of planting. The exact time will depend on the growing conditions, such as temperature, sunlight, and soil fertility.
How do I harvest water spinach from a bucket?
Harvest water spinach by cutting the stems about 4-6 inches from the base of the plant. This will encourage new growth and allow you to harvest multiple times. You can harvest the leaves as needed, or you can harvest the entire plant at once.
What are some common pests and diseases that affect water spinach?
Water spinach is generally resistant to pests and diseases, but it can be susceptible to aphids, spider mites, and fungal diseases. To prevent pests, inspect your plants regularly and remove any affected leaves. You can also use insecticidal soap or neem oil to control pests. To prevent fungal diseases, ensure that the plants have good air circulation and avoid overwatering.
Can I grow water spinach indoors in a bucket?
Yes, you can grow water spinach indoors in a bucket, but you’ll need to provide adequate light. Place the bucket near a sunny window or use grow lights to supplement the natural light. You’ll also need to ensure that the plants have good air circulation and that the soil is kept consistently moist.
What are some ways to use water spinach in cooking?
Water spinach is a versatile vegetable that can be used in a variety of dishes. It’s commonly used in stir-fries, soups, salads, and curries. You can also steam, boil, or sauté the leaves. Water spinach has a mild, slightly sweet flavor that pairs well with garlic, ginger, soy sauce, and chili peppers.
Is bucket-grown water spinach organic?
Whether your bucket-grown water spinach is organic depends on the materials and methods you use. If you use organic soil, organic fertilizer, and avoid using pesticides, then your water spinach can be considered organic. Always check the labels of your soil and fertilizer to ensure that they are certified organic.
Can I grow water spinach from cuttings?
Yes, you can easily propagate water spinach from cuttings. Simply take a stem cutting about 6-8 inches long and remove the lower leaves. Place the cutting in a glass of water and wait for roots to develop. Once the roots are about an inch long, you can transplant the cutting into a bucket of soil.
How do I store harvested water spinach?
Store harvested water spinach in the refrigerator in a plastic bag or container. It will stay fresh for several days. You can also blanch and freeze water spinach for longer storage.
What if my water spinach leaves are turning yellow?
Yellowing leaves can indicate several issues. It could be due to overwatering, underwatering, nutrient deficiency, or lack of sunlight. Check the soil moisture, ensure adequate drainage, and consider adding a balanced fertilizer. Make sure your plant is receiving enough sunlight. If the problem persists, check for pests or diseases.
My water spinach isn’t growing very fast. What can I do?
Slow growth can be attributed to several factors. Ensure your plant is receiving at least 6 hours of direct sunlight daily. Check the soil pH; water spinach prefers slightly acidic to neutral soil. Fertilize regularly with a balanced fertilizer or compost tea. Also, make sure the plant isn’t root-bound in the bucket. If it is, consider transplanting it to a larger container.


Leave a Comment