
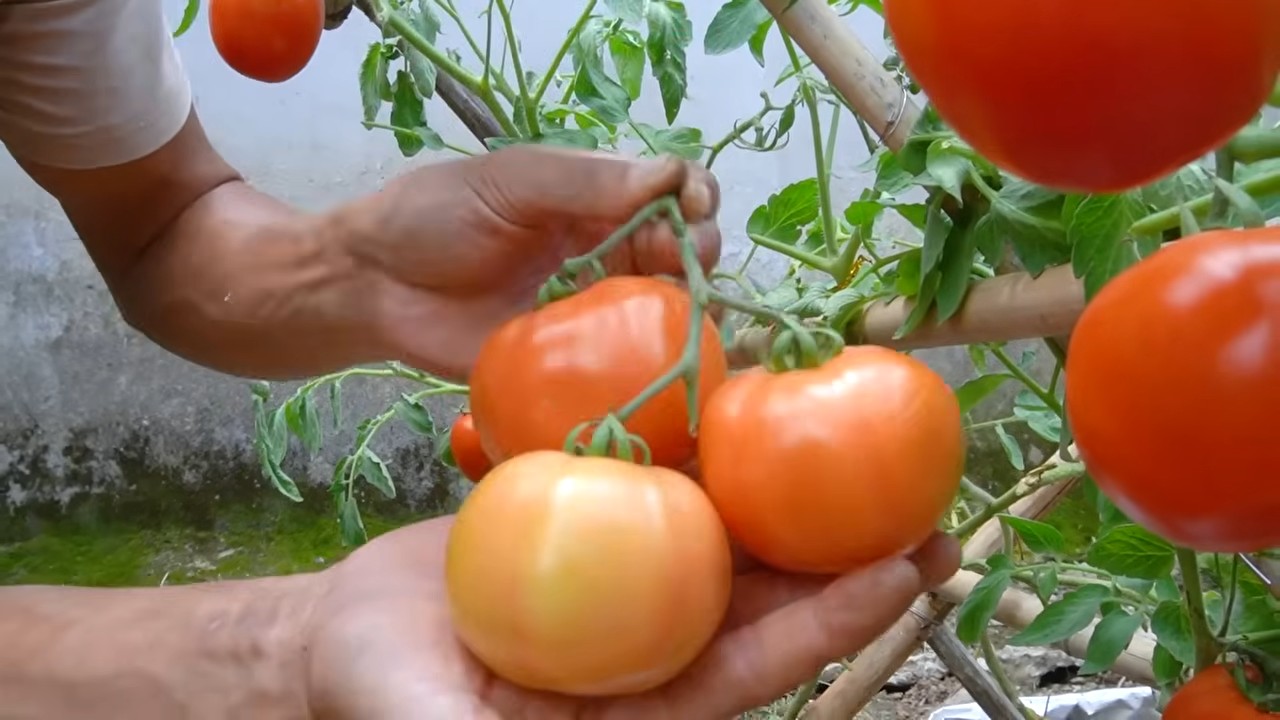
Boost Tomato Harvest: Dreaming of juicy, sun-ripened tomatoes bursting with flavor, straight from your own backyard? I know I am! There’s nothing quite like the taste of a homegrown tomato, but sometimes, getting a truly bountiful harvest can feel like a challenge. We’ve all been there, staring at our tomato plants, willing them to produce more of those delicious red gems.
For centuries, gardeners have sought the secrets to maximizing their tomato yields. From ancient civilizations carefully cultivating their crops to modern-day enthusiasts experimenting with new techniques, the quest for the perfect tomato harvest is a time-honored tradition. Think about the Italian Nonnas, passing down generations of tomato-growing wisdom, or the victory gardens of the World Wars, where every tomato counted. This isn’t just about gardening; it’s about connecting with a rich history of self-sufficiency and deliciousness!
That’s why I’ve put together this guide packed with simple, yet effective, DIY tricks and hacks to help you boost tomato harvest significantly. Whether you’re a seasoned gardener or just starting out, these tips will empower you to unlock the full potential of your tomato plants. Imagine the satisfaction of sharing your abundant harvest with friends and family, knowing you nurtured those tomatoes from tiny seedlings to plump, flavorful fruits. Let’s dive in and discover the secrets to a tomato-filled summer!
DIY: Supercharge Your Tomato Harvest with These Simple Tricks!
Hey fellow gardeners! Are you dreaming of a bumper crop of juicy, red tomatoes this year? I know I am! And after years of experimenting, I’ve discovered some amazing DIY hacks that can seriously boost your tomato harvest. Forget those tiny, lackluster yields – we’re going for tomato abundance! Let’s dive in and get our hands dirty!
Understanding Tomato Needs: The Foundation for Success
Before we jump into the hacks, it’s crucial to understand what tomatoes crave. Think of it as knowing your audience before you put on a show! Tomatoes are sun-loving, nutrient-hungry plants that need consistent watering and support. Neglecting any of these areas can significantly impact your harvest.
* Sunlight: Tomatoes need at least 6-8 hours of direct sunlight per day. The more, the merrier!
* Watering: Consistent and deep watering is key, especially during fruit development. Aim for about 1-2 inches of water per week, depending on your climate.
* Soil: Well-draining soil rich in organic matter is essential. Tomatoes are heavy feeders, so amending your soil with compost or aged manure is a must.
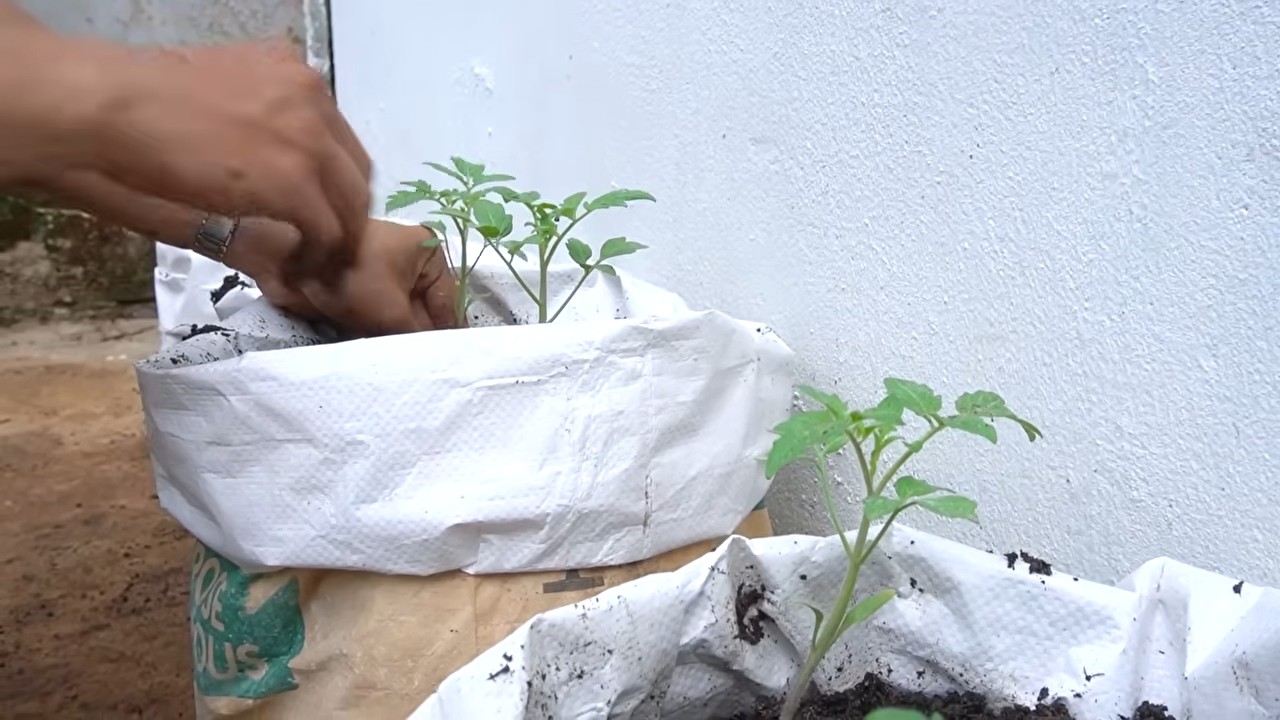
* Support: As they grow, tomato plants need support to prevent them from sprawling on the ground and becoming susceptible to pests and diseases. Cages, stakes, or trellises are all great options.
* Nutrients: Tomatoes need a balanced diet of nutrients, including nitrogen, phosphorus, and potassium. A good tomato fertilizer can provide these essential elements.
Hack #1: The Epsom Salt Boost – Sweetness and Vigor!
Epsom salt (magnesium sulfate) is a gardener’s secret weapon! Magnesium helps tomatoes absorb phosphorus and potassium, which are crucial for fruit development and overall plant health. It also helps prevent blossom-end rot, a common tomato problem caused by calcium deficiency.
Why this works: Magnesium deficiency can hinder nutrient uptake, leading to smaller, less flavorful tomatoes. Epsom salt provides a readily available source of magnesium, boosting plant vigor and fruit sweetness.
How to use it:
1. Soil Application: When planting your tomato seedlings, add a tablespoon of Epsom salt to the bottom of the planting hole. Mix it in with the soil before placing the seedling.
2. Foliar Spray: Mix 1 tablespoon of Epsom salt per gallon of water. Spray the foliage of your tomato plants every 2-3 weeks, starting when the first blossoms appear. Be sure to spray in the early morning or late evening to avoid burning the leaves.
3. Watering Solution: Dissolve 1 tablespoon of Epsom salt in a gallon of water and use it to water your tomato plants every 2-3 weeks.
Important Note: Don’t overdo it with the Epsom salt! Too much magnesium can interfere with calcium uptake. Stick to the recommended dosages.
Hack #2: The Baking Soda Solution – Fighting Fungus and Sweetening Tomatoes!
Baking soda (sodium bicarbonate) is another kitchen staple that can work wonders in the garden. It acts as a natural fungicide, helping to prevent common tomato diseases like early blight and powdery mildew. Plus, some gardeners swear it can make your tomatoes sweeter!
Why this works: Baking soda creates an alkaline environment on the leaf surface, making it less hospitable to fungal spores. It may also increase the pH of the soil slightly, which some believe can enhance tomato sweetness.
How to use it:
1. Foliar Spray: Mix 1 teaspoon of baking soda, 1 teaspoon of horticultural oil (or a few drops of dish soap), and 1 gallon of water. Spray the foliage of your tomato plants every 7-10 days, especially during humid weather. Again, spray in the early morning or late evening.
2. Soil Amendment (Use with Caution): While some gardeners recommend adding baking soda to the soil, I advise caution. Excessive baking soda can raise the soil pH too much, harming your plants. If you choose to try this, only add a very small amount (a pinch or two) around the base of each plant, and monitor your soil pH regularly.
Important Note: Always test the baking soda spray on a small area of the plant first to make sure it doesn’t cause any damage. And remember, moderation is key!
Hack #3: Pruning for Productivity – Directing Energy Where It Matters!
Pruning tomato plants can seem intimidating, but it’s essential for maximizing your harvest. By removing suckers (the small shoots that grow in the “armpit” between the main stem and branches), you’re directing the plant’s energy towards fruit production instead of foliage growth.
Why this works: Suckers consume valuable energy that could be used to develop larger, more abundant tomatoes. Pruning them encourages the plant to focus on ripening the existing fruit.
How to do it:
1. Identify Suckers: Look for small shoots growing in the “armpit” between the main stem and branches. They’ll look like miniature tomato plants sprouting from the junction.
2. Prune Regularly: Start pruning when the suckers are small (2-3 inches long). This is easier on the plant and prevents them from becoming too large.
3. Pinch or Cut: You can either pinch off the suckers with your fingers or use clean pruning shears to cut them off.
4. Focus on Determinate Varieties: Determinate tomato varieties (those that grow to a certain size and then stop) generally require less pruning than indeterminate varieties (those that continue to grow and produce fruit throughout the season). However, even determinate varieties can benefit from removing suckers below the first flower cluster.
5. Indeterminate Varieties: For indeterminate varieties, focus on removing suckers below the first flower cluster and any that are growing densely and blocking sunlight from reaching the fruit.
Important Note: Don’t prune too heavily, especially in hot climates. The foliage provides shade and helps protect the fruit from sunscald.
Hack #4: The Coffee Grounds Compost – Nitrogen Boost and Pest Deterrent!
Don’t throw away those coffee grounds! They’re a fantastic amendment for your tomato plants. Coffee grounds are rich in nitrogen, which is essential for healthy foliage growth. They also help improve soil drainage and can deter some pests.
Why this works: Nitrogen is a key nutrient for plant growth, and coffee grounds provide a slow-release source of this essential element. The acidity of coffee grounds can also help deter slugs and snails.
How to use it:
1. Composting: Add coffee grounds to your compost pile. They’re a great source of “green” material.
2. Soil Amendment: Sprinkle coffee grounds around the base of your tomato plants. Gently work them into the soil.
3. Coffee Ground Tea: Brew a weak “tea” by soaking coffee grounds in water overnight. Use this tea to water your tomato plants.
Important Note: Coffee grounds are acidic, so don’t use them excessively, especially if your soil is already acidic. Also, make sure to use used coffee grounds, as fresh grounds can be too acidic and may harm your plants.
Hack #5: Companion Planting Power – Natural Pest Control and Enhanced Growth!
Companion planting involves growing different plants together to benefit each other. Certain plants can repel pests, attract beneficial insects, or improve soil conditions for your tomatoes.
Why this works: Companion plants can create a more diverse and balanced ecosystem in your garden, reducing the need for chemical pesticides and fertilizers.
Great Tomato Companions:
* Basil: Repels tomato hornworms and whiteflies. It’s also said to improve the flavor of tomatoes.
* Marigolds: Repel nematodes and other soil pests.
* Garlic: Repels aphids and other pests.
* Onions: Repel aphids and other pests.
* Carrots: Improve soil drainage and aeration.
* Nasturtiums: Attract aphids away from your tomatoes.
How to do it:
1. Plant Strategically: Plant companion plants around your tomato plants, either in the same bed or in nearby containers.
2. Observe and Adjust: Pay attention to how your plants are interacting and adjust your planting strategy as needed.
Important Note: Avoid planting tomatoes near brassicas (cabbage, broccoli, cauliflower) or fennel, as these plants can inhibit tomato growth.
Hack #6: Blossom Set Spray – Encouraging Early Fruit Set!
Sometimes, tomatoes struggle to set fruit, especially during hot weather. Blossom set spray contains plant hormones that can help encourage fruit development, even when conditions aren’t ideal.
Why this works: High temperatures can interfere with pollination, preventing tomatoes from setting fruit. Blossom set spray provides the hormones needed to initiate fruit development, even without pollination.
How to use it:
1. Follow Instructions: Carefully follow the instructions on the blossom set spray label.
2. Spray Blossoms: Spray the blossoms of your tomato plants according to the label instructions.
3
Conclusion
So, there you have it! This simple yet incredibly effective DIY trick to boost tomato harvest is a game-changer for any gardener, whether you’re a seasoned pro or just starting out with your first tomato plants. We’ve explored the science behind why this method works, providing your tomato plants with the specific nutrients they crave at the most crucial time. Forget expensive fertilizers and complicated feeding schedules; this is about harnessing the power of readily available resources and applying them strategically for maximum impact.
Why is this a must-try? Because it’s cost-effective, environmentally friendly, and delivers tangible results. Imagine the satisfaction of harvesting baskets overflowing with juicy, ripe tomatoes, all thanks to a simple, homemade solution. This isn’t just about growing tomatoes; it’s about cultivating a deeper connection with your garden and understanding the needs of your plants. It’s about empowering yourself to create a thriving ecosystem right in your backyard.
But the beauty of this DIY trick lies in its adaptability. Feel free to experiment with variations to suit your specific needs and preferences. For instance, if you’re growing organic tomatoes, ensure that all your ingredients are certified organic. You could also try adding a small amount of Epsom salts to the mixture for an extra boost of magnesium, which is known to enhance fruit production. Another variation is to adjust the frequency of application based on your soil type and the overall health of your plants. If your soil is already rich in nutrients, you might only need to apply the solution every two weeks.
Don’t be afraid to get creative and tailor this method to your unique gardening situation. The key is to observe your plants closely and adjust accordingly. Remember, gardening is a journey of learning and discovery, and every experiment is a valuable opportunity to gain new insights.
We are confident that this DIY trick will significantly improve your tomato harvest. It’s a simple, effective, and sustainable way to nourish your plants and reap the rewards of your hard work. But don’t just take our word for it – try it out for yourself and see the difference it makes.
We encourage you to embark on this gardening adventure and share your experiences with us. Let us know how this DIY trick worked for you, what variations you tried, and any tips or tricks you discovered along the way. Your feedback is invaluable and will help us refine this method even further. Together, we can create a community of passionate gardeners who are dedicated to growing healthy, delicious tomatoes using sustainable and effective techniques. So, grab your gardening gloves, gather your ingredients, and get ready to witness a tomato harvest like never before! Let’s all work together to **boost tomato harvest** and enjoy the fruits (or vegetables!) of our labor.
Frequently Asked Questions (FAQ)
Q: What exactly is this DIY trick, and how does it work?
A: This DIY trick involves creating a homemade fertilizer solution using readily available ingredients to provide your tomato plants with essential nutrients during the fruiting stage. The specific ingredients and their ratios are designed to deliver a balanced blend of nitrogen, phosphorus, and potassium, along with micronutrients, which are crucial for fruit development, size, and overall yield. The solution is typically applied directly to the soil around the base of the plants, allowing the roots to absorb the nutrients quickly and efficiently. This targeted approach ensures that the plants receive the nourishment they need precisely when they need it most, leading to a significant increase in tomato production.
Q: How often should I apply this DIY fertilizer solution to my tomato plants?
A: The frequency of application depends on several factors, including your soil type, the age and size of your plants, and the overall growing conditions. As a general guideline, we recommend applying the solution every 7-10 days during the peak fruiting season. However, if your soil is already rich in nutrients, you may only need to apply it every two weeks. Conversely, if your plants are showing signs of nutrient deficiency, such as yellowing leaves or stunted growth, you may need to apply it more frequently. Always observe your plants closely and adjust the frequency accordingly. It’s better to err on the side of caution and avoid over-fertilizing, which can damage your plants.
Q: Can I use this DIY trick on other types of plants besides tomatoes?
A: While this DIY trick is specifically formulated for tomato plants, it can also be beneficial for other fruiting vegetables, such as peppers, eggplants, and cucumbers. These plants have similar nutrient requirements to tomatoes, particularly during the fruiting stage. However, it’s important to note that the optimal nutrient ratios may vary slightly depending on the specific plant species. We recommend researching the specific nutrient needs of your plants before applying the solution. You may also want to start with a diluted solution and observe how your plants respond before increasing the concentration.
Q: What if I don’t have all the ingredients listed in the recipe? Can I substitute them with something else?
A: While it’s best to use the exact ingredients listed in the recipe for optimal results, you can make some substitutions if necessary. For example, if you don’t have access to a particular type of fertilizer, you can try using a similar product with a comparable nutrient analysis. However, be sure to adjust the quantity accordingly to ensure that you’re providing the correct amount of each nutrient. You can also use compost tea as a substitute for some of the liquid fertilizers. Compost tea is a nutrient-rich liquid that is made by steeping compost in water. It’s a great way to add beneficial microbes and nutrients to your soil.
Q: Is this DIY fertilizer solution safe for organic gardening?
A: Yes, this DIY fertilizer solution can be safe for organic gardening, provided that you use certified organic ingredients. Look for fertilizers and other amendments that are labeled as “OMRI listed,” which means that they have been reviewed and approved for use in organic production. Avoid using synthetic fertilizers or other products that contain harmful chemicals. You can also make your own organic fertilizers using compost, manure, and other natural materials.
Q: My tomato plants are already producing fruit, but they are small and not ripening properly. Will this DIY trick help?
A: Yes, this DIY trick can definitely help improve the size and ripening of your existing tomatoes. The nutrient boost provided by the solution will help your plants allocate more resources to fruit development, leading to larger, more flavorful tomatoes. However, it’s important to note that the results may not be immediate. It may take a few weeks for you to see a noticeable difference in the size and quality of your tomatoes. Be patient and continue to apply the solution regularly, and you should start to see improvements over time.
Q: Can I use this DIY trick on tomato plants grown in containers?
A: Absolutely! This DIY trick is just as effective for tomato plants grown in containers as it is for those grown in the ground. In fact, container-grown tomatoes may benefit even more from this solution, as they tend to deplete nutrients from the soil more quickly. Be sure to adjust the frequency of application based on the size of your container and the overall health of your plants. You may also want to consider using a potting mix that is specifically formulated for tomatoes.
Q: I’ve tried this DIY trick, but I’m not seeing any results. What could be the problem?
A: There could be several reasons why you’re not seeing results from this DIY trick. First, make sure that you’re applying the solution correctly and at the recommended frequency. Second, check your soil pH to ensure that it’s within the optimal range for tomato growth (6.0-6.8). If your soil pH is too high or too low, your plants may not be able to absorb the nutrients properly. Third, make sure that your plants are getting enough sunlight and water. Tomatoes need at least 6-8 hours of sunlight per day and consistent watering to thrive. Finally, consider the possibility that your plants may be suffering from a disease or pest infestation. Inspect your plants carefully for any signs of problems and take appropriate action.
Q: How should I store the leftover DIY fertilizer solution?
A: Store any leftover DIY fertilizer solution in a cool, dark place in a tightly sealed container. This will help prevent the nutrients from degrading and keep the solution fresh for longer. You can typically store the solution for up to two weeks. Before using the stored solution, give it a good shake to ensure that the ingredients are evenly distributed. If the solution develops a foul odor or shows signs of spoilage, discard it and make a fresh batch.


Leave a Comment