
Bitter Gourd Cooking Tips: Are you ready to transform the notoriously bitter gourd into a culinary delight? I know, I know, the name itself doesn’t exactly scream “delicious,” but trust me, with the right techniques, you can actually enjoy this incredibly healthy vegetable! For generations, bitter gourd, also known as karela, has been a staple in Asian and African cuisines, celebrated not just for its unique flavor profile, but also for its impressive medicinal properties. From lowering blood sugar to boosting immunity, this unassuming vegetable packs a powerful punch.
But let’s be honest, that bitterness can be a real hurdle. That’s why I’ve compiled this ultimate guide to bitter gourd cooking tips and DIY hacks that will help you conquer the bitterness and unlock the true potential of this nutritional powerhouse. Imagine serving up a bitter gourd dish that even the pickiest eaters will enjoy! We’ll explore everything from preparation techniques to flavor pairings, ensuring that you can confidently incorporate bitter gourd into your weekly meals. So, ditch the dread and get ready to embrace the deliciousness – let’s turn that bitter frown upside down!
Conquering the Bitter: My Guide to Delicious Bitter Gourd
Okay, let’s be honest. Bitter gourd, or karela as it’s often called, has a reputation. And it’s not exactly a glowing one. Most people associate it with intense bitterness, and that’s often enough to scare them away. But I’m here to tell you that with the right techniques, you can transform this nutritional powerhouse into a truly delicious dish. I’ve spent years experimenting, and I’m excited to share my secrets to minimizing bitterness and maximizing flavor.
Understanding the Enemy: Why is Bitter Gourd So Bitter?
Before we dive into the cooking process, it’s helpful to understand why bitter gourd is, well, bitter. The bitterness comes from compounds called cucurbitacins. The higher the concentration of these compounds, the more intense the bitterness. Factors like the variety of bitter gourd, its maturity, and even the growing conditions can influence the level of cucurbitacins.
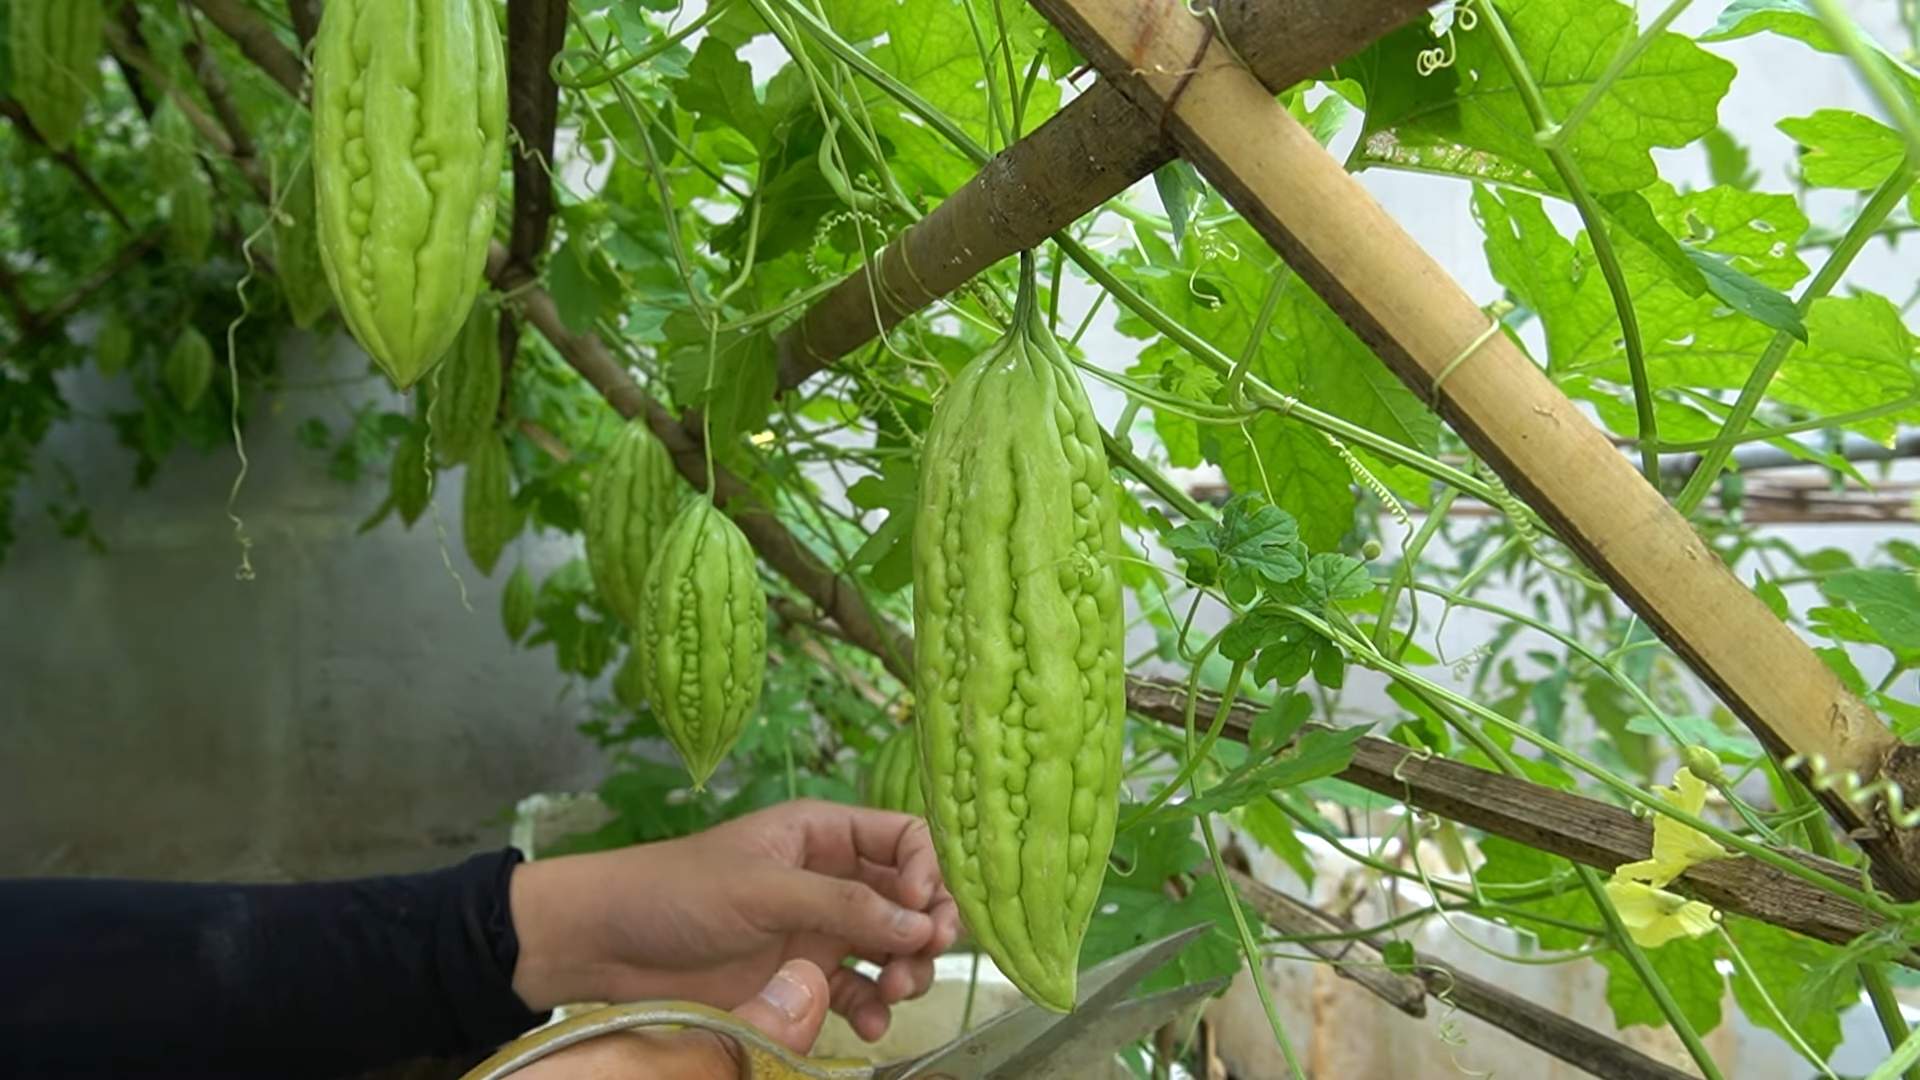
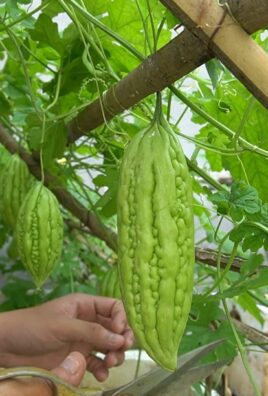
Choosing Your Weapon: Selecting the Right Bitter Gourd
The first step to a less bitter experience is choosing the right bitter gourd. Here’s what I look for:
* **Color:** Opt for bitter gourds that are a vibrant green. Avoid those that are yellowish or have blemishes, as these tend to be more mature and therefore, more bitter.
* **Firmness:** The gourd should feel firm to the touch. If it’s soft or mushy, it’s likely overripe.
* **Size:** Smaller bitter gourds tend to be less bitter than larger ones.
* **Variety:** Different varieties have varying levels of bitterness. Chinese bitter melon, for example, is generally considered less bitter than Indian varieties. If you have access to different types, experiment to find your preference.
The Pre-Cooking Ritual: Preparing Bitter Gourd for Success
This is where the magic happens! Proper preparation is crucial for reducing bitterness. I use a combination of techniques, and I’ll walk you through each one.
Step 1: Washing and Cutting
1. **Wash thoroughly:** Start by washing the bitter gourd under cold running water to remove any dirt or debris.
2. **Trim the ends:** Cut off both ends of the bitter gourd.
3. **Slice it up:** Now, you have a few options for slicing. You can slice it into thin rounds, lengthwise halves, or even dice it. The thinner the slices, the more surface area is exposed, which helps in reducing bitterness. I personally prefer thin rounds for stir-fries and lengthwise halves for stuffing.
4. **Remove the seeds and pith:** This is a crucial step! The seeds and the white pith inside the bitter gourd are major contributors to the bitterness. Use a spoon or your fingers to scoop them out completely. Make sure you get all of it!
Step 2: The Salt Bath (My Secret Weapon!)
1. **Salt generously:** Place the sliced bitter gourd in a bowl and sprinkle it generously with salt. Don’t be shy! The salt helps to draw out the bitter compounds.
2. **Massage it in:** Gently massage the salt into the bitter gourd slices, ensuring that each piece is coated.
3. **Let it sit:** Allow the salted bitter gourd to sit for at least 30 minutes, or even up to an hour. You’ll notice that the bitter gourd will start to release moisture. This moisture contains the bitter compounds we’re trying to get rid of.
Step 3: The Squeeze and Rinse
1. **Squeeze out the bitterness:** After the salt bath, take a handful of the salted bitter gourd and squeeze it firmly to remove as much moisture as possible. You’ll be surprised by how much liquid comes out!
2. **Rinse thoroughly:** Rinse the squeezed bitter gourd under cold running water to remove any remaining salt and bitter residue. Repeat this process until the water runs clear.
3. **Pat dry:** Gently pat the bitter gourd slices dry with a paper towel. This will help them to brown nicely when you cook them.
Cooking Methods: Taming the Bitter Beast
Now that your bitter gourd is prepped and ready, it’s time to cook it! There are several cooking methods that work well for bitter gourd, and I’ll share my favorites.
Method 1: Stir-Frying for a Quick and Easy Meal
Stir-frying is a great way to cook bitter gourd quickly and retain its slightly crunchy texture.
1. **Prepare your ingredients:** In addition to the prepared bitter gourd, gather your other stir-fry ingredients. I like to use onions, garlic, ginger, chili peppers, and a protein source like tofu or chicken.
2. **Heat the oil:** Heat a wok or large skillet over medium-high heat. Add a tablespoon or two of cooking oil.
3. **Sauté aromatics:** Add the onions, garlic, and ginger to the hot oil and sauté until fragrant, about 1-2 minutes.
4. **Add the bitter gourd:** Add the prepared bitter gourd to the wok and stir-fry for 5-7 minutes, or until it’s slightly softened and starting to brown.
5. **Add protein and other vegetables:** Add your protein source and any other vegetables you’re using to the wok. Stir-fry for another 3-5 minutes, or until the protein is cooked through and the vegetables are tender-crisp.
6. **Season to taste:** Season the stir-fry with soy sauce, oyster sauce (optional), salt, pepper, and any other seasonings you like.
7. **Serve hot:** Serve the bitter gourd stir-fry hot with rice or noodles.
Method 2: Stuffing for a Flavorful and Impressive Dish
Stuffed bitter gourd is a more elaborate dish, but it’s well worth the effort. The stuffing helps to balance the bitterness and adds a ton of flavor.
1. **Prepare the bitter gourd:** Follow the preparation steps outlined above, but instead of slicing the bitter gourd into rounds, cut it lengthwise into halves.
2. **Prepare the stuffing:** There are many different variations for the stuffing. I like to use a mixture of ground meat (chicken, pork, or beef), onions, garlic, ginger, spices (turmeric, cumin, coriander), and herbs (cilantro, mint). You can also add cooked rice or lentils to the stuffing for extra bulk.
3. **Stuff the bitter gourd:** Carefully stuff the bitter gourd halves with the prepared filling.
4. **Cook the stuffed bitter gourd:** You can cook the stuffed bitter gourd in a variety of ways. You can steam it, bake it, or pan-fry it.
* **Steaming:** Steam the stuffed bitter gourd for 20-30 minutes, or until the bitter gourd is tender and the filling is cooked through.
* **Baking:** Bake the stuffed bitter gourd in a preheated oven at 375°F (190°C) for 30-40 minutes, or until the bitter gourd is tender and the filling is cooked through.
* **Pan-frying:** Heat some oil in a skillet over medium heat. Place the stuffed bitter gourd in the skillet and pan-fry for 10-15 minutes per side, or until the bitter gourd is tender and the filling is cooked through.
5. **Serve hot:** Serve the stuffed bitter gourd hot with rice or roti.
Method 3: Braising for a Tender and Flavorful Result
Braising is a slow cooking method that results in incredibly tender and flavorful bitter gourd.
1. **Prepare the bitter gourd:** Follow the preparation steps outlined above, slicing the bitter gourd into rounds or chunks.
2. **Sear the bitter gourd:** Heat some oil in a Dutch oven or heavy-bottomed pot over medium-high heat. Add the bitter gourd and sear it on all sides until lightly browned. This step adds depth of flavor to the dish.
3. **Add aromatics and liquid:** Add onions, garlic, ginger, and any other aromatics you like to the pot. Sauté for a few minutes until fragrant. Then, add a liquid such as broth, coconut milk, or tomato sauce.
4. **Simmer:** Bring the liquid to a simmer, then reduce the heat to low, cover the pot, and simmer for at least 30 minutes, or until the bitter gourd is very tender. The longer it simmers, the less bitter it will become.
5. **Season to taste:** Season the braised bitter gourd with salt, pepper, and any other seasonings you like.
6. **Serve hot:** Serve the braised bitter gourd hot with rice or roti.
Tips and Tricks for Extra Flavor and Reduced Bitterness
* **Add acidity:** A squeeze of lemon or lime juice can help to balance the bitterness and brighten the flavor of bitter gourd dishes.
* **Use strong flavors:** Incorporating strong flavors like garlic, ginger, chili peppers, and spices can help to mask the bitterness.
* **Pair with sweet ingredients:** Adding a touch of sweetness, such as a small amount of sugar or honey, can also help to balance the bitterness.
* **Cook with potatoes:** Some people believe that cooking bitter gourd with potatoes helps
Conclusion
So, there you have it! Mastering the art of cooking bitter gourd doesn’t have to be a bitter experience. By employing these simple yet effective DIY tricks, you can transform this notoriously challenging vegetable into a palatable and even enjoyable dish. We’ve explored the power of pre-soaking, the magic of salt, and the balancing act of complementary flavors, all designed to minimize bitterness and maximize deliciousness.
But why is this DIY approach a must-try? Because it empowers you to take control of your cooking and customize the flavor profile to your liking. No more settling for overly bitter dishes or avoiding bitter gourd altogether. This method unlocks the potential of this incredibly nutritious vegetable, allowing you to reap its health benefits without sacrificing taste. Think of the possibilities! You can finally incorporate bitter gourd into your stir-fries, curries, soups, and even juices with confidence.
This isn’t just about making bitter gourd edible; it’s about making it exceptional.
Consider these variations to further personalize your bitter gourd cooking:
* **Spice it up:** Experiment with different spices like turmeric, cumin, coriander, or chili powder to add depth and complexity to the flavor. A touch of heat can often mask the bitterness effectively.
* **Sweeten the deal:** A small amount of jaggery, honey, or even a few drops of maple syrup can balance the bitter notes and create a more harmonious flavor profile. Be careful not to overdo it, as you want to complement the bitterness, not eliminate it entirely.
* **Add some acid:** A squeeze of lemon or lime juice, or a splash of vinegar, can brighten the flavor and cut through the bitterness. This is especially effective in stir-fries and salads.
* **Roast it:** Roasting bitter gourd brings out its natural sweetness and creates a crispy texture. Toss it with olive oil, salt, and pepper, and roast at 400°F (200°C) until tender and slightly browned.
* **Stuff it:** Hollow out the bitter gourd and stuff it with a mixture of ground meat, vegetables, and spices. This is a great way to create a hearty and flavorful meal.
Ultimately, the best way to discover your favorite way to cook bitter gourd is to experiment and find what works best for your taste buds. Don’t be afraid to try new things and get creative in the kitchen.
We are confident that these DIY tricks will revolutionize your bitter gourd cooking experience. We encourage you to try them out and share your results with us! Let us know in the comments below which method you found most effective, what variations you tried, and any other tips you have for reducing bitterness. Your feedback will help other readers on their bitter gourd journey.
So, go ahead, embrace the challenge, and unlock the delicious potential of bitter gourd. You might just surprise yourself with how much you enjoy it! Remember, mastering the art of cooking bitter gourd is within your reach, and with these DIY tricks, you’ll be well on your way to creating flavorful and healthy dishes that you and your family will love. Don’t forget to share your bitter gourd cooking tips with us!
Frequently Asked Questions (FAQs)
Why is my bitter gourd still bitter even after trying these methods?
Even with pre-soaking, salting, and other techniques, some bitter gourds can retain a degree of bitterness. This can depend on the variety of bitter gourd, its maturity, and even the growing conditions. If you find that your bitter gourd is still too bitter, try extending the soaking time or using a combination of methods. For example, you could soak it in salted water for a longer period and then blanch it briefly before cooking. Also, ensure you are removing the pith and seeds thoroughly, as these are the most bitter parts of the vegetable. Another factor could be the freshness of the bitter gourd; older ones tend to be more bitter.
Can I use a different type of salt for pre-soaking?
While regular table salt works well for drawing out bitterness, you can experiment with other types of salt. Sea salt or kosher salt can be used in the same way, but be mindful of the grain size. Coarse salt may take longer to dissolve and penetrate the bitter gourd. Himalayan pink salt can also be used, but it doesn’t offer any significant advantage over regular salt in terms of reducing bitterness. The key is the sodium chloride content, which helps to draw out the bitter compounds.
How long should I soak the bitter gourd? Is there a risk of over-soaking?
The ideal soaking time is typically between 30 minutes to 1 hour. While over-soaking is unlikely to cause harm, it can make the bitter gourd lose some of its texture and flavor. If you’re using a particularly strong salt solution, it’s best to err on the side of caution and check the bitter gourd after 30 minutes. You’re looking for a slight softening of the texture and a noticeable reduction in bitterness when you taste a small piece. If you’re unsure, it’s better to start with a shorter soaking time and extend it if needed.
What are some good flavor pairings for bitter gourd?
Bitter gourd pairs well with a variety of flavors, including:
* **Spicy:** Chili peppers, ginger, garlic, and other spices can help to mask the bitterness and add depth of flavor.
* **Sour:** Lemon juice, lime juice, vinegar, and tamarind can balance the bitterness and create a more complex flavor profile.
* **Sweet:** Jaggery, honey, maple syrup, and other sweeteners can complement the bitterness and make the dish more palatable.
* **Savory:** Onions, tomatoes, potatoes, and other vegetables can add substance and flavor to bitter gourd dishes.
* **Protein:** Tofu, lentils, chickpeas, and meat can be added to bitter gourd dishes to create a complete and satisfying meal.
Can I freeze bitter gourd after pre-treating it?
Yes, you can freeze bitter gourd after pre-treating it. This is a great way to preserve it for later use. After soaking or blanching the bitter gourd, pat it dry thoroughly to remove excess moisture. Then, spread it out in a single layer on a baking sheet and freeze for a few hours until solid. Once frozen, transfer the bitter gourd to a freezer-safe bag or container. This will prevent it from clumping together. Frozen bitter gourd can be stored for up to 2-3 months. When you’re ready to use it, you can add it directly to your cooking without thawing.
Is bitter gourd good for health? What are the benefits?
Yes, bitter gourd is incredibly beneficial for health. It is packed with nutrients and antioxidants. Some of the key health benefits include:
* **Blood sugar control:** Bitter gourd contains compounds that can help to lower blood sugar levels, making it beneficial for people with diabetes or pre-diabetes.
* **Immune boosting:** It’s rich in Vitamin C, an antioxidant that helps boost the immune system.
* **Digestive health:** Bitter gourd is a good source of fiber, which can promote healthy digestion and prevent constipation.
* **Weight management:** It’s low in calories and high in fiber, making it a good choice for weight management.
* **Skin health:** The antioxidants in bitter gourd can help to protect the skin from damage and promote a healthy complexion.
Can I use baking soda instead of salt to reduce bitterness?
While some people suggest using baking soda, salt is generally more effective and preferred for reducing the bitterness of bitter gourd. Baking soda can alter the texture and flavor of the vegetable in a way that some find undesirable. Salt, on the other hand, primarily draws out the bitter compounds without significantly affecting the overall taste and texture. If you choose to experiment with baking soda, use it sparingly and be prepared for a slightly different result.
What is the best way to remove the seeds and pith from bitter gourd?
The easiest way to remove the seeds and pith is to cut the bitter gourd lengthwise in half. Then, using a spoon or a small knife, scrape out the seeds and the white, spongy pith. Be thorough in removing the pith, as this is one of the most bitter parts of the vegetable. You can also use a vegetable peeler to remove the outer skin if you prefer a less bitter taste.


Leave a Comment