
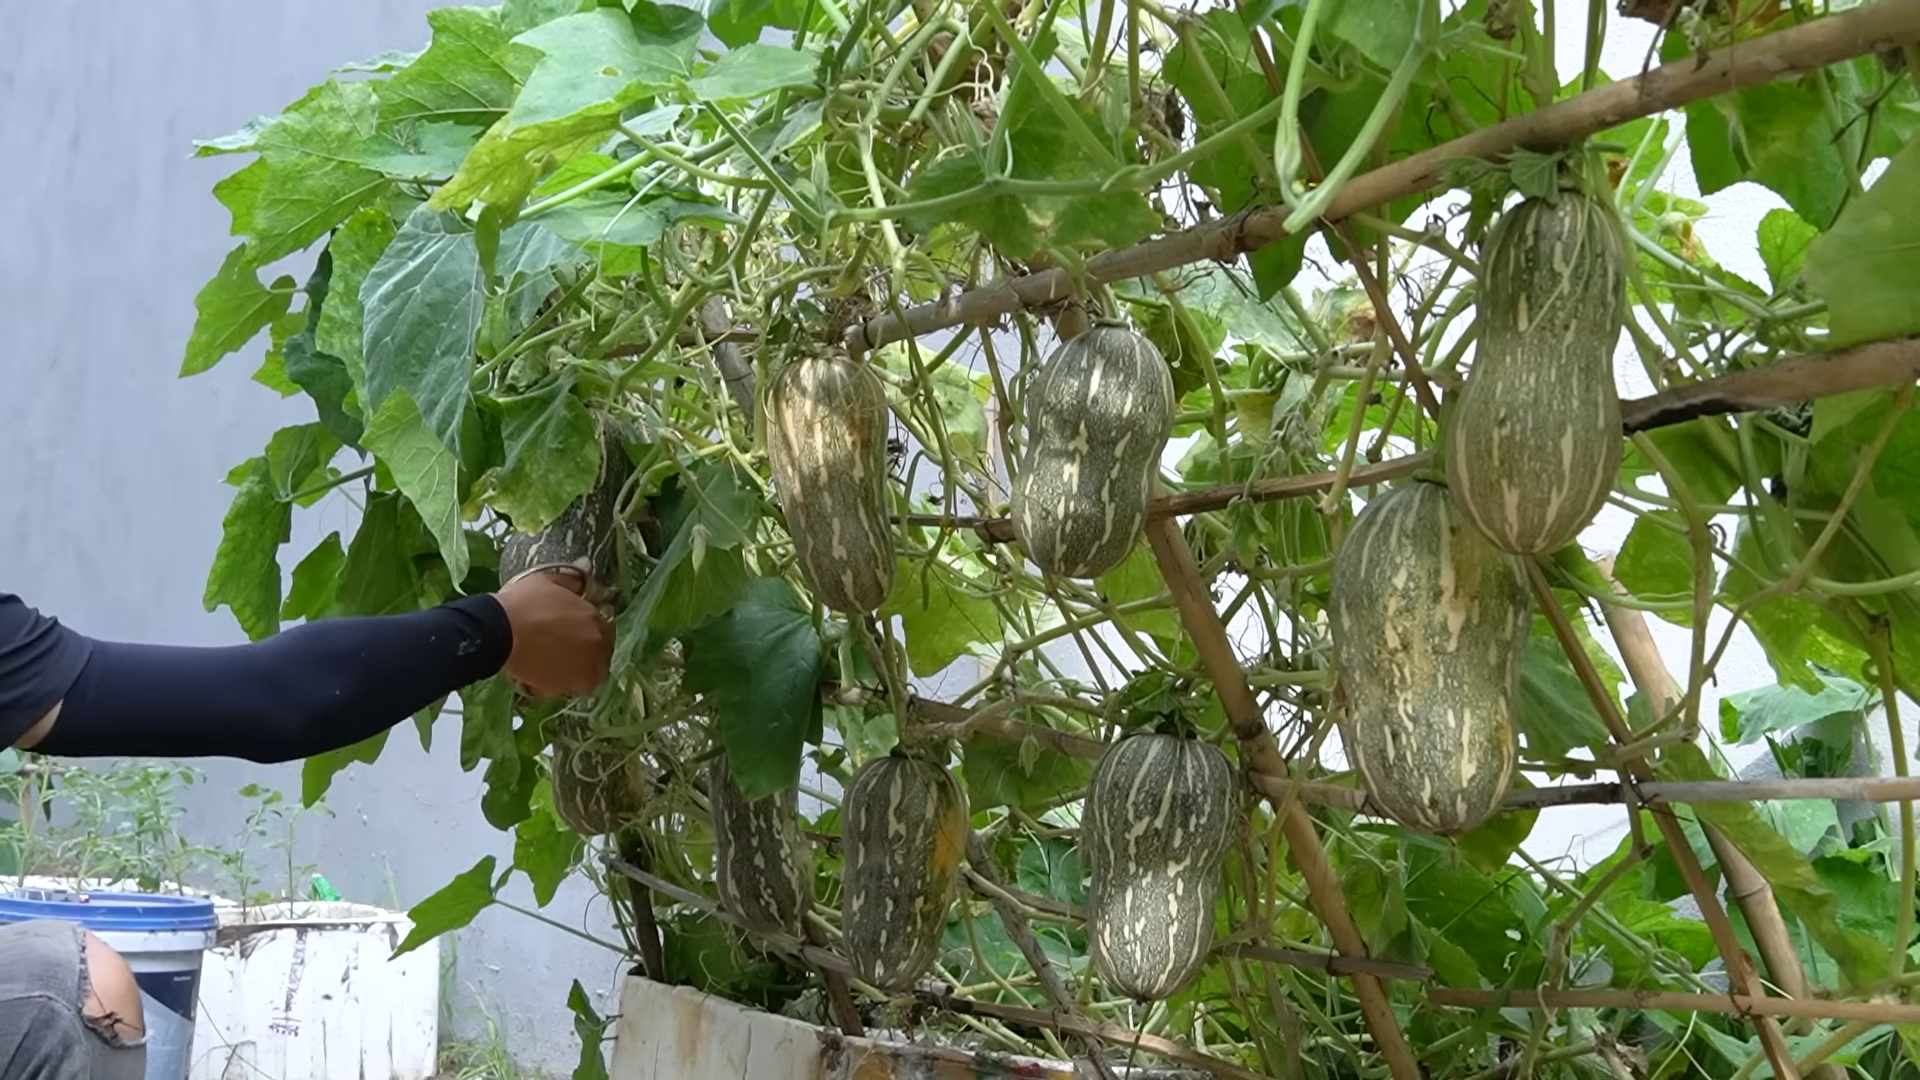
Biggest Pumpkin Harvest dreams are within your reach! Imagine your porch overflowing with vibrant orange pumpkins, ready for carving, baking, or simply adding a touch of autumnal charm to your home. I know, it sounds like a fairytale, but with a few clever DIY tricks and a little bit of elbow grease, you can significantly increase your chances of achieving a truly impressive pumpkin yield this year.
Pumpkins have a rich history, deeply intertwined with harvest festivals and folklore. From ancient Native American traditions where they were a staple food source to their modern-day role as Halloween icons, pumpkins hold a special place in our hearts and culture. But growing them can sometimes feel like a gamble, right? Pests, diseases, and unpredictable weather can all conspire to thwart your efforts.
That’s where these DIY home gardening hacks come in! I’m going to share some simple, yet effective, techniques that will help you nurture your pumpkin plants from tiny seedlings to robust, fruit-bearing vines. We’ll cover everything from soil preparation and pollination strategies to pest control and proper watering techniques. Why do you need these tricks? Because a biggest pumpkin harvest isn’t just about luck; it’s about understanding the needs of your plants and providing them with the optimal conditions to thrive. Let’s get started and turn your pumpkin patch dreams into a reality!
Growing Giant Pumpkins: My Secrets to a Record-Breaking Harvest
Okay, pumpkin fanatics! So you want to grow a pumpkin so big it needs its own zip code? I’m here to tell you, it’s totally achievable! It takes dedication, a little luck, and a whole lot of pumpkin love, but trust me, the bragging rights are worth it. I’ve spent years perfecting my technique, and I’m finally ready to share my secrets to help you grow the biggest pumpkin on the block.
Choosing the Right Seed and Location
This is where the magic begins! You can’t expect a giant pumpkin from just any old seed.
* Seed Selection: Look for seeds from pumpkins that have already proven themselves. These are usually Atlantic Giant pumpkin seeds from pumpkins that weighed over 1000 pounds. Check online forums and pumpkin growing clubs for reputable sellers. Don’t be afraid to spend a little extra on good genetics – it’s an investment!
* Starting Indoors: I always start my seeds indoors about 3-4 weeks before the last expected frost. This gives them a head start and protects them from early pests and unpredictable weather.
* Sunlight is Key: Pumpkins are sun worshippers! Choose a location that gets at least 8-10 hours of direct sunlight per day. The more sun, the bigger the pumpkin.
* Space, Space, Space: These plants are massive! Each plant needs at least 400-600 square feet of space to sprawl. Seriously, they’ll take over your yard if you let them.
* Soil Preparation: Giant pumpkins are heavy feeders. You need rich, well-drained soil. Amend your soil with plenty of compost, aged manure, and other organic matter. A soil test is a great idea to determine any nutrient deficiencies. Aim for a slightly acidic pH (around 6.0-6.8).
Step-by-Step Planting and Early Care
Alright, let’s get our hands dirty!
1. Germinating the Seed: Gently file the edges of the seed with a nail file or sandpaper. This helps water penetrate the seed coat. Then, soak the seed in warm water for 2-4 hours.
2. Planting Indoors: Fill a peat pot or biodegradable container with seed-starting mix. Plant the seed about 1 inch deep, pointy end down. Water gently and keep the soil consistently moist but not soggy.
3. Warmth is Essential: Use a heat mat to keep the soil temperature around 80-85°F (27-29°C). This will speed up germination.
4. Light it Up: Once the seedling emerges, provide plenty of light. A grow light is ideal, but a sunny windowsill can work too. Rotate the pot regularly to prevent the seedling from leaning towards the light.
5. Hardening Off: About a week before transplanting outdoors, gradually acclimate the seedling to outdoor conditions. Start by placing it outside for a few hours each day, increasing the time each day.
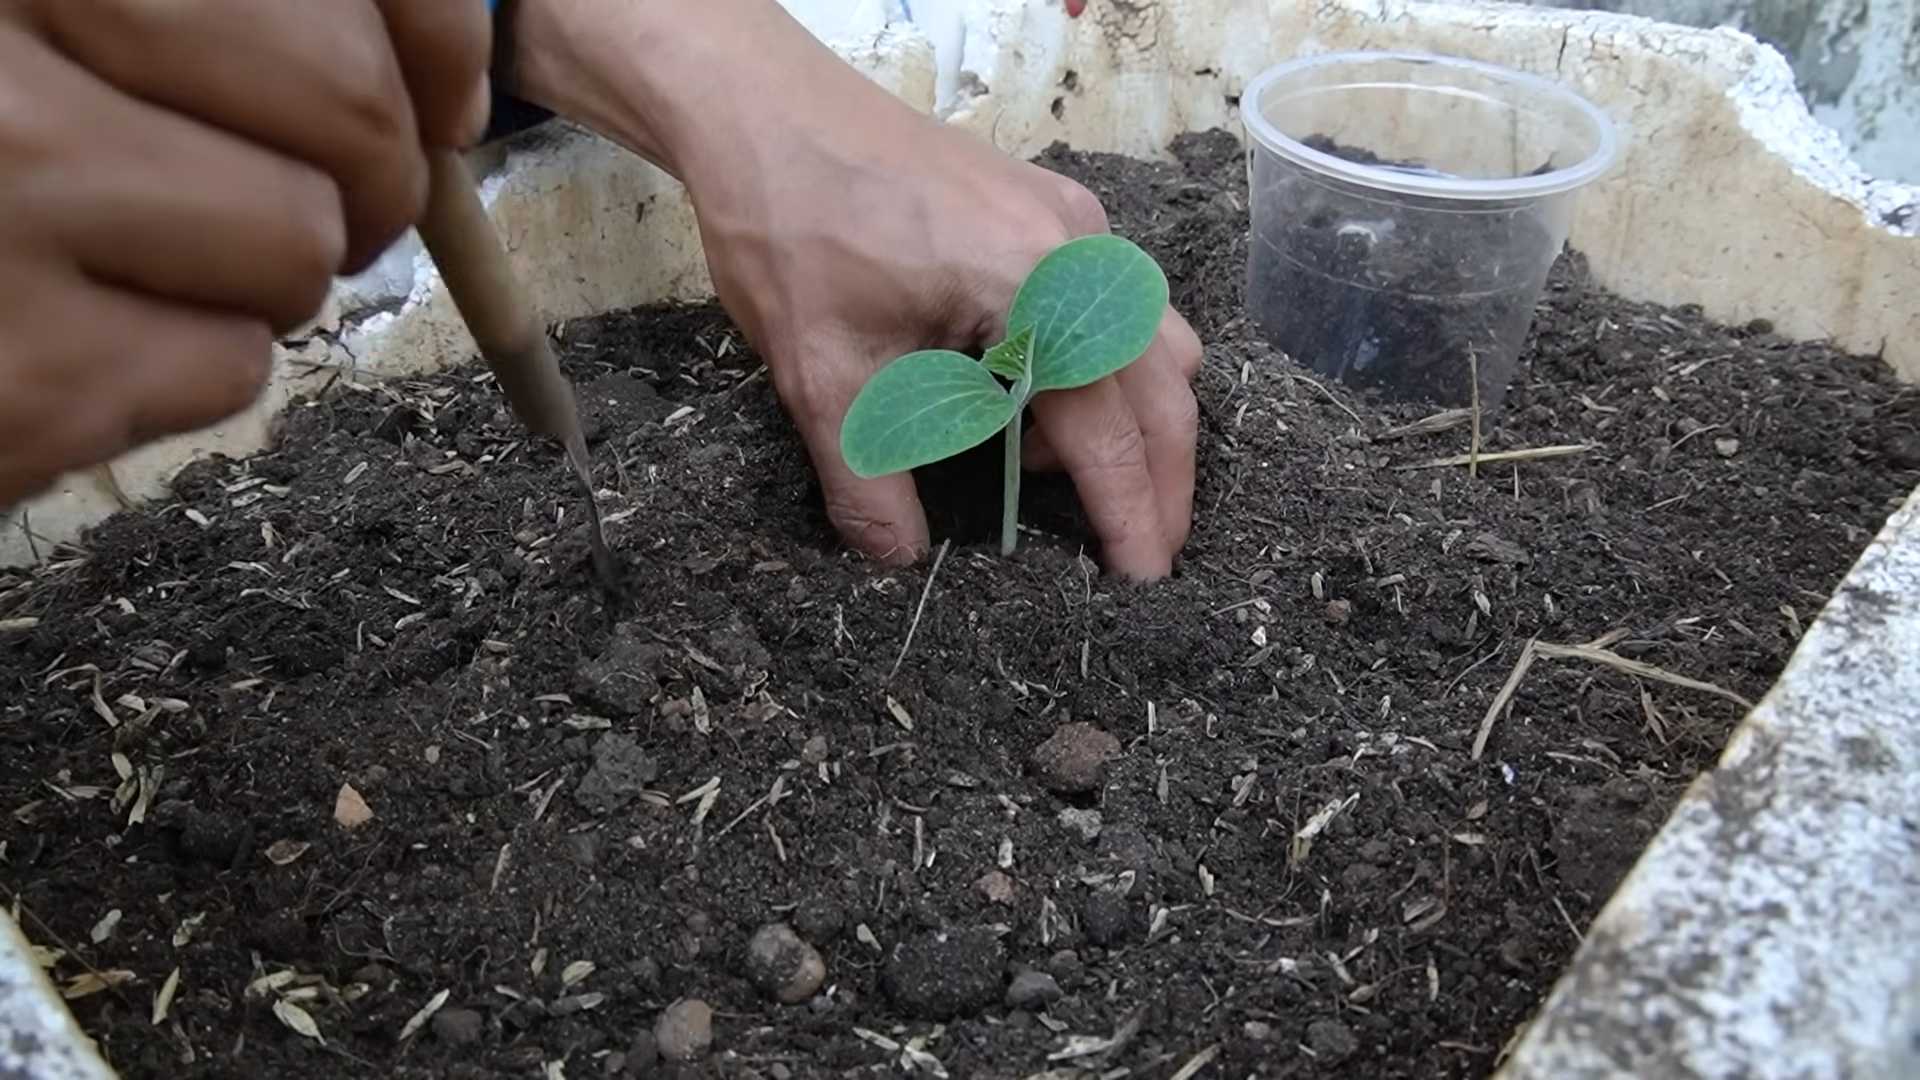
6. Transplanting: Choose a calm, overcast day to transplant. Dig a hole that’s twice as wide and as deep as the root ball. Gently remove the seedling from the pot and place it in the hole. Backfill with soil and water thoroughly.
7. Protect from Pests: Young seedlings are vulnerable to pests like squash bugs and cucumber beetles. Cover them with row covers to protect them until they’re larger and more resilient.
Training the Vine and Pollinating
This is where the real artistry comes in!
* Vine Training: As the vine grows, you’ll need to train it to grow in a specific direction. I usually train mine in a “herringbone” pattern, with one main vine and several secondary vines branching off. This helps to maximize sunlight exposure and prevent overcrowding.
* Pruning: Prune off any extra vines that are growing in unwanted directions. Also, remove any female flowers that appear before the main vine has reached a good size (around 10-15 feet). This will allow the plant to focus its energy on vegetative growth.
* Choosing the Right Pumpkin: Once the vine is established, allow a few female flowers to develop. Choose the one that’s closest to the main vine and has the best shape. Remove all other female flowers and any small pumpkins that start to develop.
* Hand Pollination: To ensure successful pollination, I always hand-pollinate my pumpkins. This involves transferring pollen from a male flower to a female flower. The best time to do this is early in the morning, before the bees get to them.
* Identifying Male and Female Flowers: Male flowers have a long, thin stem, while female flowers have a small, immature pumpkin at the base.
* The Pollination Process: Gently remove a male flower and peel back the petals to expose the pollen. Then, carefully rub the pollen onto the stigma of the female flower.
* Marking the Pollinated Flower: Use a piece of tape or ribbon to mark the pollinated flower. This will help you keep track of which pumpkins are developing.
Feeding and Watering Your Giant
These pumpkins are hungry and thirsty!
* Watering: Water deeply and regularly, especially during hot, dry weather. Aim for at least 1-2 inches of water per week. Use a soaker hose or drip irrigation to deliver water directly to the roots. Avoid overhead watering, as this can promote fungal diseases.
* Fertilizing: Feed your pumpkin regularly with a balanced fertilizer. I like to use a combination of organic and synthetic fertilizers. Start with a high-nitrogen fertilizer to promote vegetative growth, then switch to a high-phosphorus and potassium fertilizer to encourage fruit development.
* Foliar Feeding: Supplement your regular fertilizing with foliar feeding. This involves spraying the leaves with a diluted fertilizer solution. This can help to correct nutrient deficiencies and boost growth.
* Calcium is Crucial: Calcium is essential for strong cell walls and preventing blossom-end rot. Supplement your soil with calcium by adding bone meal or gypsum. You can also spray the leaves with a calcium chloride solution.
Protecting Your Pumpkin
Keep those pests and diseases at bay!
* Pest Control: Monitor your plants regularly for pests like squash bugs, vine borers, and cucumber beetles. Use organic pest control methods whenever possible, such as hand-picking, insecticidal soap, or neem oil.
* Disease Prevention: Pumpkins are susceptible to fungal diseases like powdery mildew and downy mildew. Prevent these diseases by providing good air circulation, avoiding overhead watering, and applying a fungicide if necessary.
* Sun Protection: As the pumpkin grows, it may need protection from the sun. Cover it with a blanket or tarp during the hottest part of the day to prevent sunburn.
* Supporting the Stem: The stem is the lifeline of your pumpkin. Protect it from damage by placing a board or pallet underneath it. This will also help to prevent the pumpkin from rotting.
* Weed Control: Keep the area around your pumpkin free of weeds. Weeds compete with the pumpkin for nutrients and water.
Monitoring Growth and Making Adjustments
It’s all about paying attention!
* Measuring Growth: Track the growth of your pumpkin by measuring its circumference regularly. This will help you to identify any problems early on.
* Adjusting Your Care: Based on the growth rate of your pumpkin, you may need to adjust your watering, fertilizing, or pest control practices.
* Listen to Your Plant: Pay attention to the overall health of your plant. If the leaves are wilting or turning yellow, it could be a sign of a problem.
Harvesting and Weighing Your Giant
The moment of truth!
1. Knowing When to Harvest: Your pumpkin is ready to harvest when the stem starts to dry out and the skin becomes hard.
2. Careful Lifting: Harvesting a giant pumpkin is a team effort! You’ll need several people to help you lift it. Use straps or a sling to distribute the weight evenly.
3. Protecting the Stem: Be extremely careful not to damage the stem during harvesting. A broken stem can cause the pumpkin to rot.
4. Weighing Your Pumpkin: The official weigh-off is the culmination of all your hard work! Find a local weigh-off event and bring your pumpkin.
5. Celebrating Your Success: Whether you win or not, be proud of what you’ve accomplished! Growing a giant pumpkin is a challenging but rewarding experience.
Troubleshooting Common Problems
Don’t panic! We’ve all been there.
* Blossom-End Rot: This is caused by a calcium deficiency. Add calcium to the soil and spray the leaves with a calcium chloride solution.
* Powdery Mildew: This is a fungal disease that causes a white, powdery coating on the leaves. Improve air circulation and apply a fungicide.
* Squash Bugs: These pests can suck the sap from
Conclusion
So, there you have it! Transforming your massive pumpkin harvest into delicious, long-lasting pumpkin puree is not only achievable but surprisingly simple with this DIY trick. Forget wrestling with oversized pumpkins and spending hours prepping them – this method streamlines the entire process, allowing you to enjoy the fruits (or rather, vegetables!) of your labor with minimal fuss.
Why is this a must-try? Because it’s efficient, cost-effective, and yields a superior product. Store-bought pumpkin puree often lacks the vibrant flavor and creamy texture of homemade. Plus, you have complete control over the ingredients, ensuring a pure, unadulterated pumpkin experience. Imagine the possibilities: pumpkin pies bursting with authentic flavor, creamy pumpkin soups that warm you from the inside out, and even pumpkin spice lattes that rival your favorite coffee shop.
But the benefits extend beyond taste. By making your own pumpkin puree, you’re reducing food waste and embracing a more sustainable approach to cooking. You’re also connecting with the source of your food, appreciating the journey from garden to table. And let’s be honest, there’s a certain satisfaction that comes from creating something delicious from scratch.
Looking for variations? Absolutely! For a richer, more intense flavor, try roasting your pumpkin halves cut-side down on a baking sheet lined with parchment paper. This caramelizes the sugars and adds a depth of flavor that’s simply irresistible. You can also experiment with different pumpkin varieties. While sugar pumpkins are the classic choice, butternut squash, Hubbard squash, and even certain types of gourds can be used to create unique and flavorful purees. Just be sure to adjust the cooking time accordingly.
Another variation is to add spices during the roasting process. A sprinkle of cinnamon, nutmeg, ginger, or cloves can infuse your pumpkin puree with warm, comforting aromas and flavors. You can also add a touch of maple syrup or brown sugar for a hint of sweetness.
Don’t be afraid to get creative and experiment with different flavor combinations. The possibilities are endless!
This DIY pumpkin puree trick is more than just a recipe; it’s an invitation to embrace the season, connect with your food, and create something truly special. It’s a way to celebrate the abundance of your biggest pumpkin harvest and share the joy of homemade goodness with your loved ones.
We wholeheartedly encourage you to try this method and experience the difference for yourself. Once you’ve tasted the rich, creamy flavor of homemade pumpkin puree, you’ll never go back to store-bought again.
So, grab your biggest pumpkin, gather your ingredients, and get ready to transform your harvest into a culinary masterpiece. And most importantly, don’t forget to share your experience with us! We’d love to hear your tips, variations, and delicious creations. Share your photos and stories on social media using #HomemadePumpkinPuree and let’s inspire others to embrace the joy of DIY cooking. Let us know how this **DIY pumpkin puree** trick worked for you!
Frequently Asked Questions
What kind of pumpkin is best for making puree?
The best pumpkins for making puree are generally smaller, sweeter varieties specifically bred for cooking. Sugar pumpkins, also known as pie pumpkins, are the most popular choice. They have a dense, flavorful flesh that yields a smooth and creamy puree. Other good options include Long Island Cheese pumpkins, Baby Pam pumpkins, and even some varieties of butternut squash. Avoid using carving pumpkins, as they tend to be stringy and watery, resulting in a less flavorful puree.
How do I know when the pumpkin is cooked through?
The pumpkin is cooked through when the flesh is easily pierced with a fork. It should be soft and tender, almost melting in your mouth. If you’re roasting the pumpkin halves, the edges may start to caramelize slightly, which is a good sign. If you’re steaming or boiling the pumpkin, make sure the water is simmering gently and check the tenderness frequently. Overcooking can result in a mushy puree, so it’s important to keep a close eye on it.
Can I freeze pumpkin puree?
Absolutely! Freezing pumpkin puree is a great way to preserve your harvest and enjoy it throughout the year. To freeze, allow the puree to cool completely. Then, portion it into freezer-safe bags or containers, leaving some headspace for expansion. Label each container with the date and contents. Pumpkin puree can be stored in the freezer for up to 12 months. When you’re ready to use it, thaw it in the refrigerator overnight or in the microwave on the defrost setting.
My pumpkin puree seems watery. What can I do?
If your pumpkin puree is watery, there are a few things you can do to thicken it up. One option is to strain the puree through a cheesecloth-lined sieve for several hours or overnight. This will remove excess moisture and result in a thicker, more concentrated puree. Another option is to simmer the puree in a saucepan over low heat, stirring occasionally, until it reaches your desired consistency. Be careful not to burn it. You can also add a thickening agent, such as cornstarch or arrowroot powder, but use it sparingly to avoid altering the flavor.
How long does homemade pumpkin puree last in the refrigerator?
Homemade pumpkin puree will last for about 3-5 days in the refrigerator. Be sure to store it in an airtight container to prevent it from drying out or absorbing odors. Before using, check for any signs of spoilage, such as mold or an off smell. If you’re unsure, it’s best to discard it.
Can I use this puree for anything?
Yes! Homemade pumpkin puree is incredibly versatile and can be used in a wide variety of recipes. It’s a classic ingredient in pumpkin pies, breads, muffins, and soups. You can also use it to make pumpkin spice lattes, smoothies, pancakes, waffles, and even pasta sauces. Get creative and experiment with different recipes to discover your favorite ways to use this delicious and nutritious ingredient.
What if I don’t have a food processor or blender?
If you don’t have a food processor or blender, you can still make pumpkin puree. After cooking the pumpkin, simply mash it thoroughly with a potato masher or fork. This will take a bit more effort, but it will still result in a delicious puree. You can also use a hand mixer to achieve a smoother consistency.
Can I add spices to the puree before freezing?
Yes, you can definitely add spices to the puree before freezing. This is a great way to infuse your puree with flavor and save time later on. Just be sure to use high-quality spices and adjust the amounts to your liking. Some popular spice combinations include cinnamon, nutmeg, ginger, cloves, and allspice.
Is it safe to eat the pumpkin seeds?
Yes, pumpkin seeds are perfectly safe to eat and are actually quite nutritious. They’re a good source of protein, fiber, and healthy fats. To roast pumpkin seeds, rinse them thoroughly and pat them dry. Toss them with a little olive oil, salt, and your favorite spices. Spread them in a single layer on a baking sheet and roast at 300°F (150°C) for 20-25 minutes, or until golden brown and crispy.
What are the nutritional benefits of pumpkin puree?
Pumpkin puree is packed with nutrients, making it a healthy and delicious addition to your diet. It’s a good source of vitamin A, which is important for vision, immune function, and skin health. It’s also rich in antioxidants, which help protect your cells from damage. Pumpkin puree is also a good source of fiber, which promotes digestive health and helps you feel full and satisfied. Plus, it’s low in calories and fat, making it a guilt-free treat.

Leave a Comment