
Bag Grown Cantaloupe Tips: Unlock the secrets to growing juicy, delicious cantaloupes right in your own backyard, even if you’re short on space! Have you ever dreamed of biting into a perfectly ripe, homegrown cantaloupe, bursting with sweetness? I know I have! But the thought of sprawling vines taking over my garden always seemed daunting. That’s where this DIY guide comes in – we’re ditching the traditional garden bed and embracing the power of bag gardening!
Growing cantaloupe has been a tradition for centuries, with roots tracing back to ancient Persia and Africa. These sweet melons were prized for their refreshing taste and nutritional benefits, eventually making their way across the globe. But you don’t need acres of land to enjoy this ancient delicacy.
Many people struggle with growing cantaloupe due to limited space, poor soil conditions, or simply the fear of the unknown. This DIY trick eliminates those hurdles! With these bag grown cantaloupe tips, you’ll learn how to create the perfect growing environment, manage watering and fertilization, and even support your growing melons for a bountiful harvest. Imagine the satisfaction of serving your family and friends cantaloupe you nurtured from seed to table – it’s easier than you think! So, let’s get started and transform your patio, balcony, or even a sunny corner into a cantaloupe paradise!
Growing Cantaloupe in a Bag: A DIY Guide to Sweet Success!
Hey there, fellow gardening enthusiasts! Ever dreamed of biting into a juicy, homegrown cantaloupe but thought you didn’t have the space? Well, I’m here to tell you that you absolutely can! I’ve been experimenting with growing cantaloupe in bags for a few seasons now, and I’m excited to share my secrets with you. It’s surprisingly easy, space-saving, and incredibly rewarding. Let’s get started!
Choosing the Right Bag and Location
Before we dive into the planting process, let’s talk about the foundation of our bag-grown cantaloupe adventure: the bag itself and where we’ll put it.
* Bag Size Matters: You’ll need a fairly large bag. I recommend a heavy-duty grow bag that’s at least 20 gallons in size. The bigger, the better, as cantaloupes need plenty of room for their roots to spread. Fabric grow bags are my personal favorite because they allow for excellent drainage and aeration, preventing root rot.
* Drainage is Key: Make sure your bag has drainage holes. If it doesn’t, you’ll need to create some. I usually poke about 4-5 holes in the bottom of the bag using a screwdriver or a sharp knife.
* Sun, Sun, Sun!: Cantaloupes are sun-worshippers! Choose a location that receives at least 6-8 hours of direct sunlight per day. This is crucial for healthy growth and sweet, flavorful fruit.
* Consider Support: Cantaloupes can get heavy, and the vines can sprawl. Think about where you’ll place your bag and how you’ll support the growing vines. A trellis, fence, or even a sturdy tomato cage can work wonders.
Preparing Your Planting Mix
The right soil mix is essential for healthy cantaloupe growth. You can’t just use any old dirt from your backyard!
* Well-Draining Mix: Cantaloupes need well-draining soil to prevent root rot. A mix of equal parts compost, potting soil, and perlite or vermiculite works perfectly.
* Compost Power: Compost provides essential nutrients and improves soil structure. I like to use a mix of homemade compost and store-bought compost for the best results.
* Perlite or Vermiculite: These materials improve drainage and aeration. Perlite is my go-to choice, but vermiculite works well too.
* Slow-Release Fertilizer: Incorporate a slow-release fertilizer into your soil mix. This will provide a steady supply of nutrients throughout the growing season. I usually use an organic fertilizer specifically formulated for vegetables.
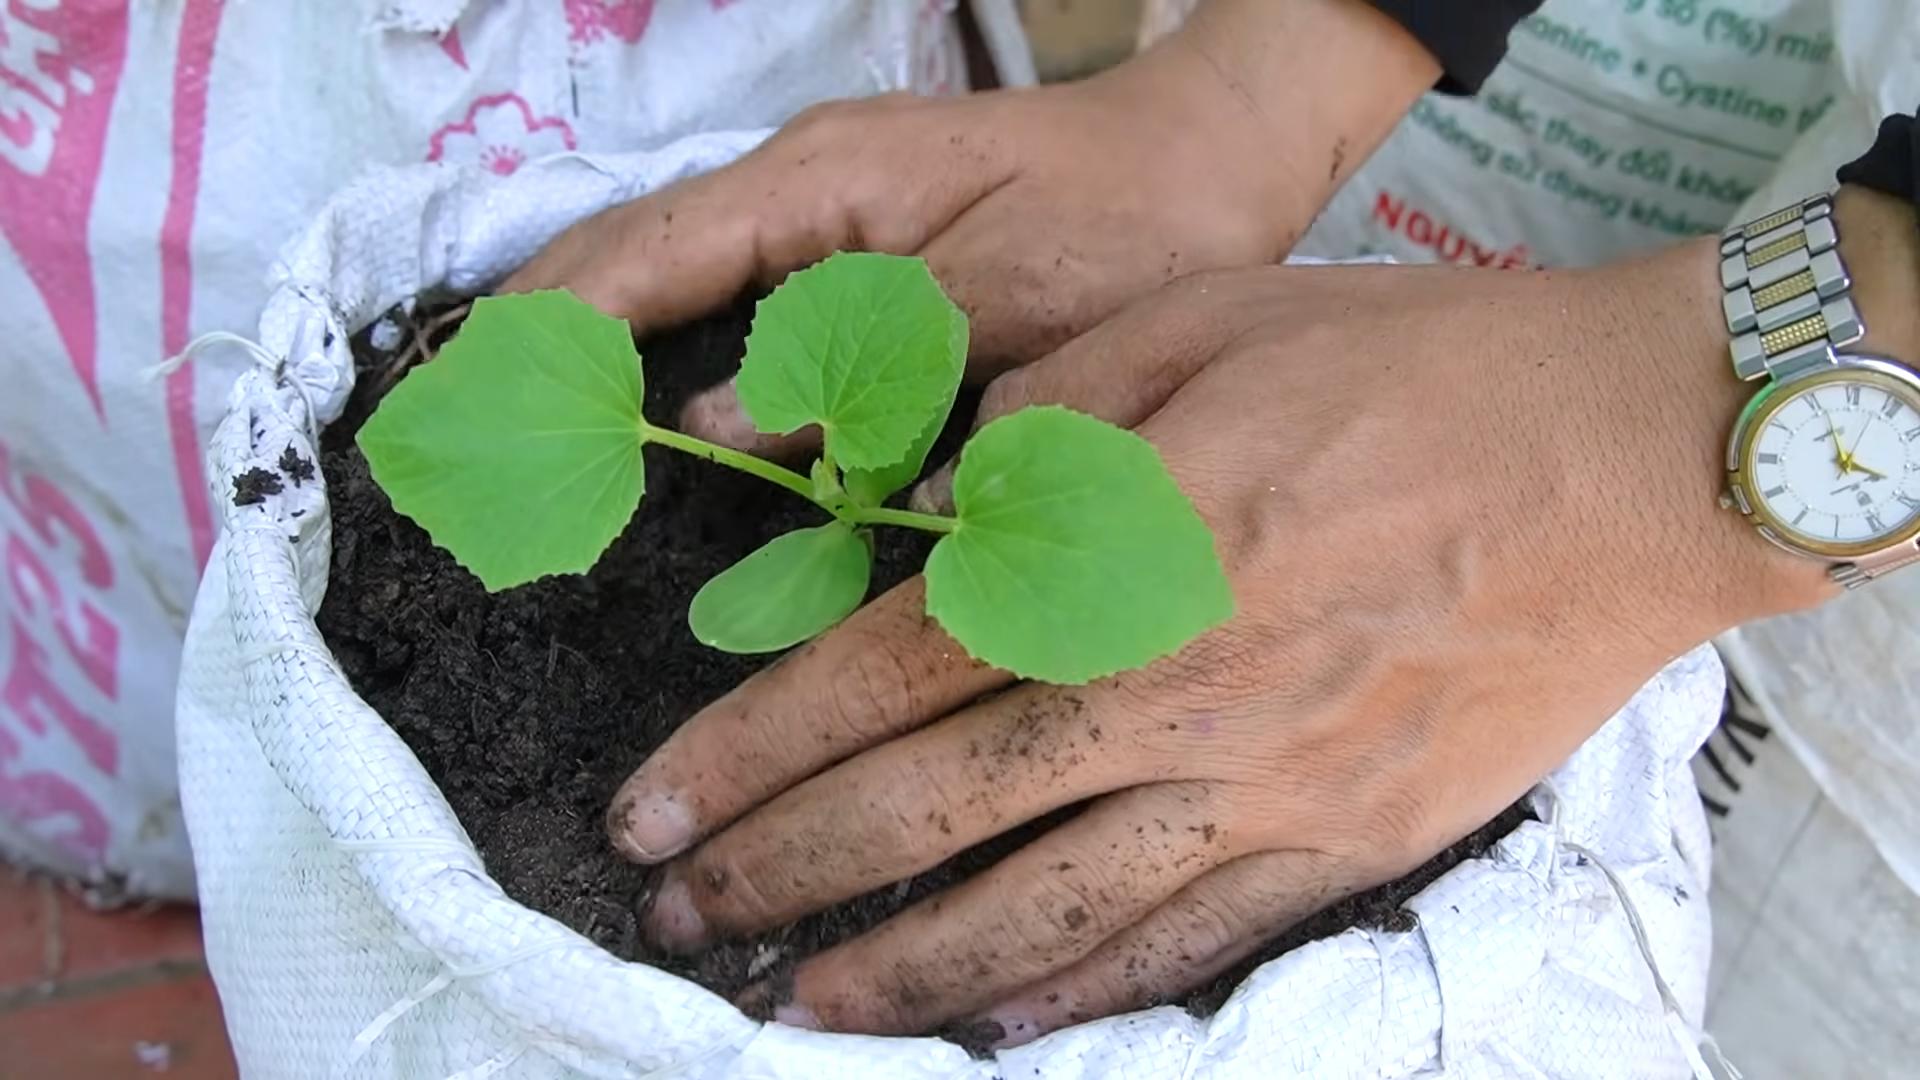
Planting Your Cantaloupe Seedlings
Now for the fun part: planting! You can either start your cantaloupe seeds indoors or purchase seedlings from a local nursery. I prefer starting my own seeds because it gives me more control over the variety and quality.
* Starting Seeds Indoors (Optional): If you’re starting seeds indoors, sow them about 4-6 weeks before the last expected frost. Use seed-starting trays or small pots filled with seed-starting mix. Keep the soil moist and warm (around 70-80°F). Once the seedlings have a few sets of true leaves, they’re ready to transplant.
* Choosing Seedlings: If you’re buying seedlings, choose healthy-looking plants with sturdy stems and vibrant green leaves. Avoid plants that are yellowed, wilted, or have signs of pests or diseases.
* Planting Time: Wait until the danger of frost has passed and the soil has warmed up before planting your cantaloupe seedlings.
* Planting Depth: Dig a hole in the center of your bag that’s large enough to accommodate the root ball of your seedling. Gently remove the seedling from its container and place it in the hole. Backfill with soil, making sure the top of the root ball is level with the soil surface.
* Spacing: If you’re planting multiple seedlings in the same bag (which I don’t recommend for a 20-gallon bag, one plant is best), space them at least 18-24 inches apart.
* Water Thoroughly: After planting, water the seedlings thoroughly to help them settle in.
Caring for Your Bag-Grown Cantaloupe
Once your cantaloupe seedlings are planted, it’s time to provide them with the care they need to thrive.
* Watering: Cantaloupes need consistent moisture, especially during hot weather. Water deeply whenever the top inch of soil feels dry to the touch. Avoid overwatering, as this can lead to root rot. I usually water every 2-3 days, depending on the weather.
* Fertilizing: Cantaloupes are heavy feeders, so regular fertilization is essential. In addition to the slow-release fertilizer you incorporated into the soil mix, you can also supplement with a liquid fertilizer every 2-3 weeks. I like to use a balanced fertilizer or one that’s slightly higher in phosphorus and potassium to promote fruit development.
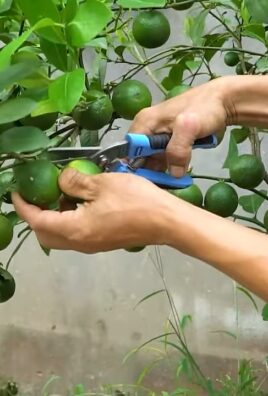
* Pruning: Pruning can help improve air circulation and encourage fruit production. Remove any yellowed or damaged leaves. You can also pinch off the tips of the vines to encourage branching.
* Supporting the Vines: As the cantaloupe vines grow, they’ll need support. Train them to grow up a trellis, fence, or tomato cage. You can use plant ties or twine to secure the vines to the support structure.
* Pollination: Cantaloupes rely on bees and other pollinators to produce fruit. If you’re not seeing a lot of bee activity in your garden, you may need to hand-pollinate the flowers. To hand-pollinate, use a small paintbrush to transfer pollen from the male flowers to the female flowers. Female flowers have a small fruit developing at the base of the flower.
* Pest and Disease Control: Keep an eye out for pests and diseases. Common cantaloupe pests include aphids, squash bugs, and cucumber beetles. Common diseases include powdery mildew and fusarium wilt. Treat any problems promptly with organic pest control methods or fungicides. I like to use neem oil to control pests and copper fungicide to prevent diseases.
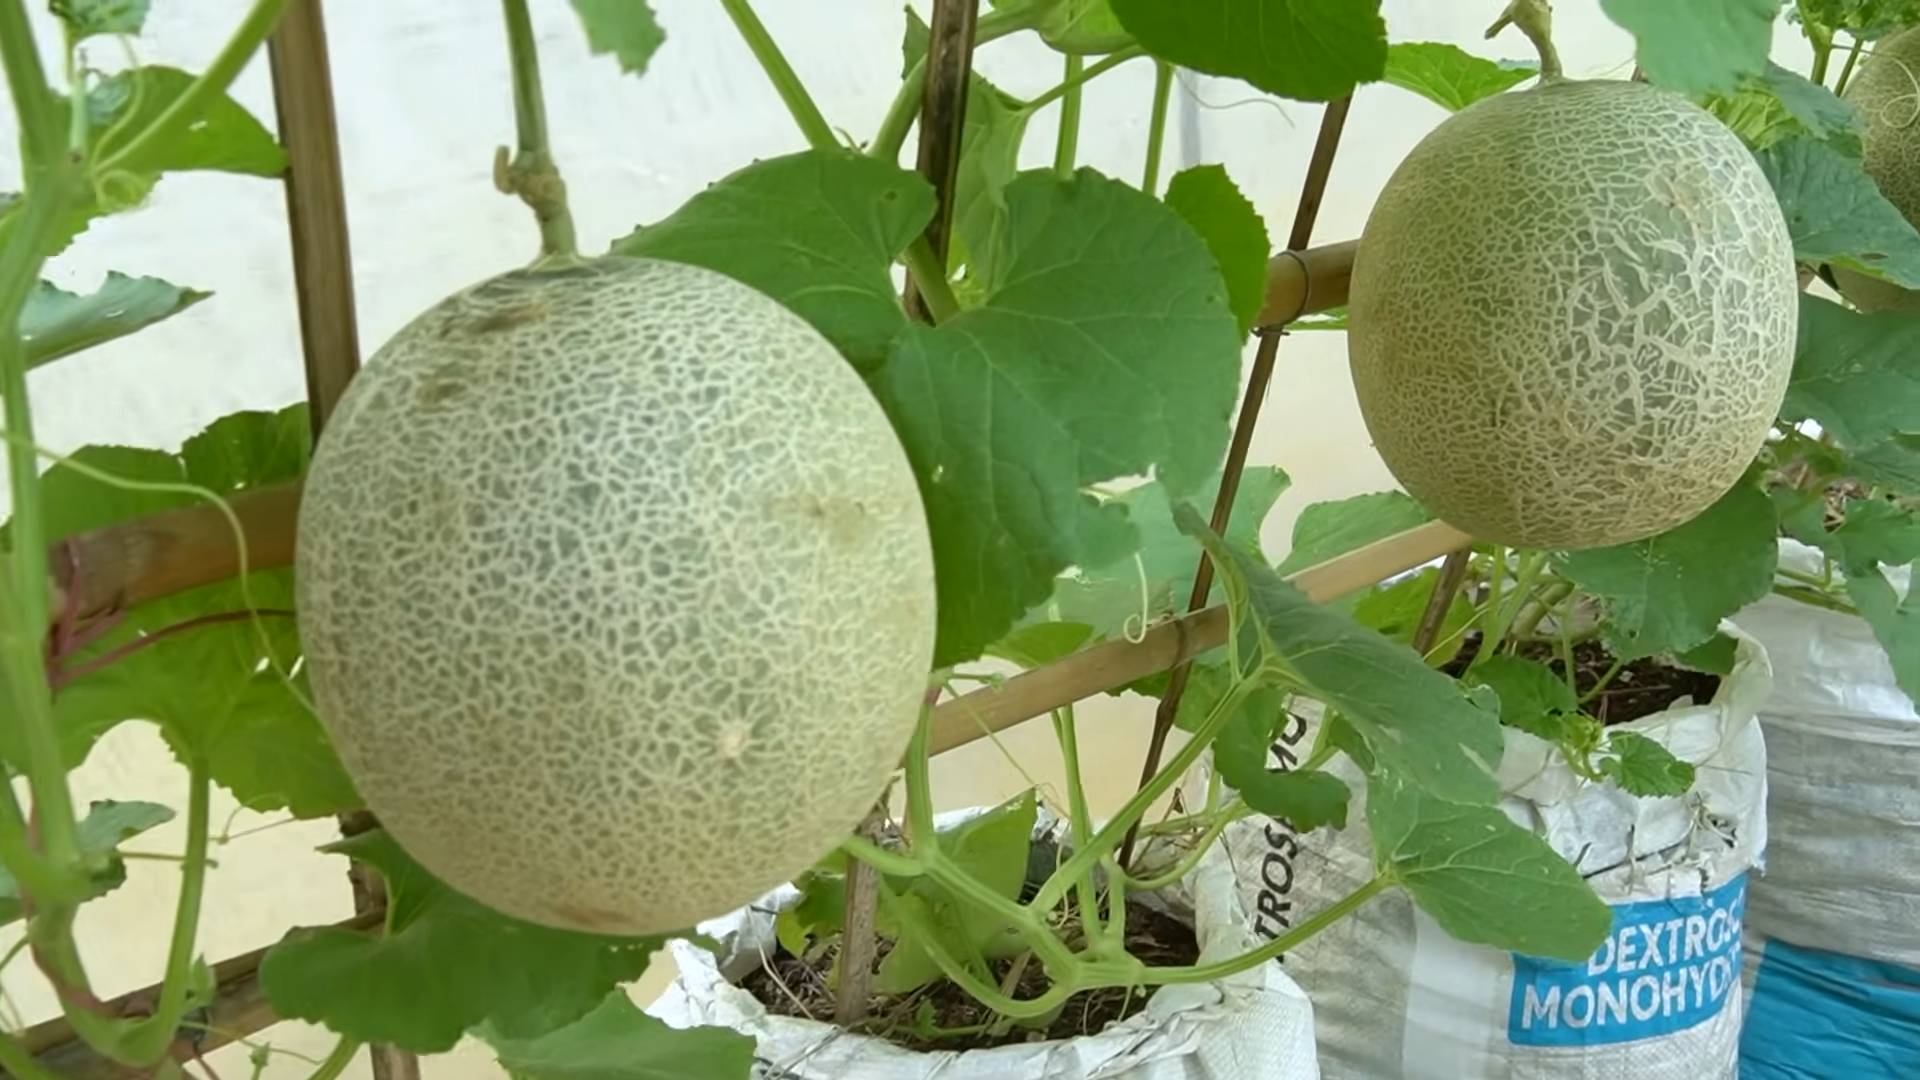
Harvesting Your Cantaloupe
The moment you’ve been waiting for: harvesting your homegrown cantaloupe!
* Ripeness Indicators: Knowing when to harvest a cantaloupe can be tricky. Here are a few signs that your cantaloupe is ripe:
* Color Change: The skin of the cantaloupe will change from green to a tan or yellowish color.
* Aroma: The cantaloupe will have a sweet, musky aroma.
* Stem Slip: The stem will begin to separate from the fruit. This is called “slipping.”
* Tendril: The tendril closest to the fruit will turn brown and dry.
* Harvesting Technique: Once your cantaloupe is ripe, gently twist it off the vine. If it doesn’t come off easily, it’s not quite ready.
* Enjoy!: Cut open your cantaloupe and enjoy the sweet, juicy flavor of your homegrown fruit!
Troubleshooting Tips
Even with the best care, you may encounter some challenges when growing cantaloupe in a bag. Here are a few troubleshooting tips:
* Yellowing Leaves: Yellowing leaves can be caused by a variety of factors, including nutrient deficiencies, overwatering, or pests. Check the soil moisture and nutrient levels. Treat any pest infestations promptly.
* Powdery Mildew: Powdery mildew is a fungal disease that causes a white, powdery coating on the leaves. Improve air circulation and treat with a fungicide.
* Lack of Fruit: Lack of fruit can be caused by poor pollination or nutrient deficiencies. Hand-pollinate the flowers and fertilize regularly.
* Fruit Rot: Fruit rot can be caused by overwatering or fungal diseases. Improve drainage and treat with a fungicide.
Extra Tips for Cantaloupe Success
Here are a few extra tips that I’ve learned over the years that can help you grow even better cantaloupes in bags:
* Choose the Right Variety: Some cantaloupe varieties are better suited for container growing than others. Look for compact or bush varieties.
* Rotate Your Crops: Avoid planting cantaloupes in the same bag year after year. This can help prevent soilborne diseases.
* Add Epsom Salts: Epsom salts can help improve fruit sweetness. Add a tablespoon of Epsom salts to the soil around your cantaloupe plants every few weeks.
* Mulch: Mulch around your cantaloupe plants to help retain moisture and suppress weeds. I like to use straw or wood chips.
* Protect from Pests: Use row covers or netting to protect your cantaloupe plants from pests.
Growing cantaloupe in a bag is a fun and rewarding experience. With a little bit of
Conclusion
So, there you have it! Growing your own cantaloupe in a bag might sound unconventional, but as we’ve explored, it’s a surprisingly effective method, especially for those with limited space or challenging soil conditions. This DIY approach offers a multitude of benefits, from better control over the growing environment to potentially earlier and more abundant harvests. It’s a fantastic way to enjoy the sweet, juicy flavor of homegrown cantaloupe without the constraints of a traditional garden.
Why is this a must-try? Because it democratizes cantaloupe cultivation! No longer is this delicious fruit reserved for those with sprawling gardens and green thumbs. The bag-growing method makes it accessible to apartment dwellers, balcony gardeners, and anyone who wants to experience the satisfaction of nurturing their own food. It’s also a fantastic learning experience, allowing you to observe the cantaloupe’s growth cycle up close and personal.
But the beauty of this DIY trick lies in its adaptability. Feel free to experiment with different types of grow bags. Fabric pots, for instance, offer excellent drainage and aeration. You can also adjust the soil mix to suit your specific climate and the needs of your cantaloupe variety. Consider adding slow-release fertilizer to the bag to provide a steady stream of nutrients throughout the growing season.
For those looking to take their bag-grown cantaloupe to the next level, consider vertical gardening techniques. By training the vines to climb a trellis or support structure, you can maximize space and improve air circulation, further reducing the risk of disease. You can also try companion planting, adding herbs like basil or marigolds to the bag to deter pests and attract beneficial insects.
Remember, success with bag-grown cantaloupe hinges on providing the right conditions: plenty of sunlight, consistent watering, and adequate nutrients. Don’t be afraid to adjust your approach as needed based on your observations. If the leaves start to yellow, it could be a sign of nutrient deficiency. If the fruit isn’t ripening properly, it might need more sunlight.
Ultimately, the best way to learn is by doing. So, we wholeheartedly encourage you to give this DIY trick a try. Embrace the challenge, experiment with different techniques, and most importantly, have fun! We are confident that you’ll be rewarded with a bountiful harvest of delicious, homegrown cantaloupe.
And now, we want to hear from you! Share your experiences, tips, and tricks in the comments below. Did you try a different type of grow bag? Did you encounter any challenges along the way? What was your favorite part of the process? Your feedback will not only help other readers but also contribute to our collective knowledge of this innovative growing method. Let’s create a community of bag-grown cantaloupe enthusiasts! We are eager to see your success stories and learn from your experiences. Let us know how your **bag grown cantaloupe** journey goes!
Frequently Asked Questions (FAQ)
What size grow bag is best for growing cantaloupe?
A grow bag of at least 10 gallons is recommended for growing cantaloupe. A 15-gallon bag is even better, as it provides ample space for the roots to develop and supports the vigorous growth of the plant. The larger the bag, the more moisture and nutrients it can retain, reducing the frequency of watering and fertilizing. Ensure the bag is sturdy and well-draining to prevent waterlogging.
What type of soil should I use in the grow bag?
A well-draining, nutrient-rich potting mix is ideal for growing cantaloupe in a bag. Avoid using garden soil, as it can be too heavy and compact, hindering root growth. A good mix consists of equal parts of compost, peat moss (or coconut coir), and perlite or vermiculite. Compost provides essential nutrients, peat moss or coconut coir retains moisture, and perlite or vermiculite improves drainage and aeration. You can also add slow-release fertilizer to the mix to provide a steady supply of nutrients throughout the growing season.
How often should I water my bag-grown cantaloupe?
Cantaloupe plants need consistent moisture, especially during fruit development. Water deeply whenever the top inch of soil feels dry to the touch. The frequency of watering will depend on the weather conditions, the size of the bag, and the drainage of the soil mix. In hot, sunny weather, you may need to water daily. Avoid overwatering, as this can lead to root rot. Check the drainage holes to ensure water is flowing freely.
How much sunlight does a bag-grown cantaloupe need?
Cantaloupe plants require at least 6-8 hours of direct sunlight per day to thrive and produce sweet, juicy fruit. Choose a location for your grow bag that receives ample sunlight throughout the day. If you live in a particularly hot climate, you may need to provide some afternoon shade to prevent the plants from overheating.
How do I fertilize my bag-grown cantaloupe?
Cantaloupe plants are heavy feeders and require regular fertilization to support their growth and fruit production. Start by incorporating slow-release fertilizer into the potting mix at planting time. Then, supplement with liquid fertilizer every 2-3 weeks, using a balanced formula (e.g., 10-10-10) during the vegetative growth stage and a fertilizer higher in phosphorus and potassium (e.g., 5-10-10) during flowering and fruiting. Follow the instructions on the fertilizer label carefully to avoid over-fertilizing.
How do I prevent pests and diseases in my bag-grown cantaloupe?
Growing cantaloupe in a bag can help reduce the risk of soilborne diseases, but it’s still important to take precautions to prevent pests and diseases. Inspect your plants regularly for signs of pests, such as aphids, squash bugs, and vine borers. Handpick pests or use insecticidal soap or neem oil to control infestations. To prevent fungal diseases, ensure good air circulation around the plants and avoid overhead watering. If you notice any signs of disease, such as powdery mildew or leaf spot, treat promptly with a fungicide.
How do I know when my cantaloupe is ripe?
Determining when a cantaloupe is ripe can be tricky, but there are a few telltale signs to look for. The most reliable indicator is the stem. When the cantaloupe is ripe, the stem will easily slip from the vine with a gentle tug. Other signs include a change in color from green to tan or yellow, a sweet aroma near the stem end, and a slightly softened rind. Avoid picking cantaloupes that are still hard and green, as they will not ripen properly off the vine.
Can I grow different varieties of cantaloupe in a bag?
Yes, you can grow different varieties of cantaloupe in a bag, but it’s important to choose varieties that are well-suited to container gardening. Smaller, bush-type varieties are generally a better choice than large, vining varieties. Some popular varieties for container gardening include ‘Sugar Cube,’ ‘Minnesota Midget,’ and ‘Bush Star.’ Be sure to provide adequate support for the vines, regardless of the variety you choose.
What are some common problems I might encounter when growing cantaloupe in a bag?
Some common problems you might encounter when growing cantaloupe in a bag include nutrient deficiencies, pest infestations, fungal diseases, and blossom-end rot. Nutrient deficiencies can be addressed by fertilizing regularly with a balanced fertilizer. Pest infestations can be controlled with insecticidal soap or neem oil. Fungal diseases can be prevented by ensuring good air circulation and avoiding overhead watering. Blossom-end rot, which is caused by calcium deficiency, can be prevented by adding lime to the soil and ensuring consistent watering.
Can I reuse the grow bag for another season?
Yes, you can reuse the grow bag for another season, but it’s important to clean and sterilize it first to prevent the spread of diseases. Remove any remaining plant debris and wash the bag thoroughly with soap and water. Then, soak the bag in a solution of 1 part bleach to 9 parts water for 30 minutes to kill any pathogens. Rinse the bag thoroughly with clean water and allow it to dry completely before storing it for the winter. You may also want to replace the soil mix with fresh potting mix for the next season.
Leave a Comment