
Asparagus growing tips – ever dreamt of harvesting those tender, delicious spears right from your own backyard? I know I have! There’s something incredibly satisfying about nurturing your own food, and asparagus, with its unique flavor and nutritional benefits, is a fantastic choice for the home gardener. For centuries, asparagus has been prized, not just for its taste, but also for its purported medicinal properties. The ancient Romans even considered it a delicacy!
But let’s be honest, getting those perfect spears can sometimes feel like a mystery. That’s where these DIY tricks and hacks come in. Whether you’re a seasoned gardener or just starting out, I’m here to share some simple, yet effective, methods to help you achieve a bountiful asparagus harvest. Imagine stepping outside and snipping fresh asparagus for your dinner – no more expensive grocery store trips!
This article is packed with practical advice, from preparing your soil to protecting your plants from pests. I’ll guide you through each step, ensuring you have all the asparagus growing tips you need to succeed. So, grab your gardening gloves, and let’s get started on creating your own asparagus patch! You’ll be amazed at how easy and rewarding it can be.
Growing Asparagus: A Beginner’s Guide to a Bountiful Harvest
Asparagus! Just the word conjures up images of spring, fresh flavors, and maybe even a little bit of garden envy. I know I used to feel that way, thinking asparagus was some kind of mystical vegetable only grown by seasoned pros. But guess what? It’s totally doable, even for a beginner like I was! This guide will walk you through everything you need to know to grow your own delicious asparagus patch.
Choosing Your Asparagus Variety
Before we even think about digging, let’s talk varieties. Different asparagus types thrive in different climates, so picking the right one is crucial.
* Jersey Knight: This is a popular choice for a reason! It’s disease-resistant, high-yielding, and adaptable to a wide range of climates. I’ve had great success with Jersey Knight in my own garden.
* Jersey Giant: Similar to Jersey Knight, but slightly larger spears. It’s also a good choice for beginners.
* Purple Passion: If you want something a little different, Purple Passion is a great option. It has a sweeter flavor than green asparagus and turns green when cooked. Plus, the purple color is just beautiful in the garden!
* Mary Washington: An heirloom variety that’s known for its flavor. It’s a bit more susceptible to disease than the Jersey varieties, but still a solid choice.
Preparing Your Asparagus Bed
Asparagus is a perennial, meaning it will come back year after year. So, you want to choose a location where it can happily live for 15-20 years! That’s why proper bed preparation is so important.
* Sunlight: Asparagus needs at least 6-8 hours of sunlight per day. The more sun, the better!
* Soil: Well-drained soil is essential. Asparagus crowns will rot if they sit in soggy soil. Aim for a slightly sandy loam.
* Soil pH: Asparagus prefers a soil pH between 6.5 and 7.0. You can test your soil with a kit from your local garden center. If your soil is too acidic, you can amend it with lime.
* Weed Control: This is HUGE. Asparagus hates competition from weeds. Clear the area thoroughly before planting. I recommend using a combination of hand-weeding and covering the area with black plastic or cardboard for a few weeks to kill off any existing weeds.
* Amending the Soil: Asparagus is a heavy feeder, so you’ll want to amend the soil with plenty of organic matter. I like to add compost, well-rotted manure, and bone meal. Dig these amendments into the soil to a depth of at least 12 inches.
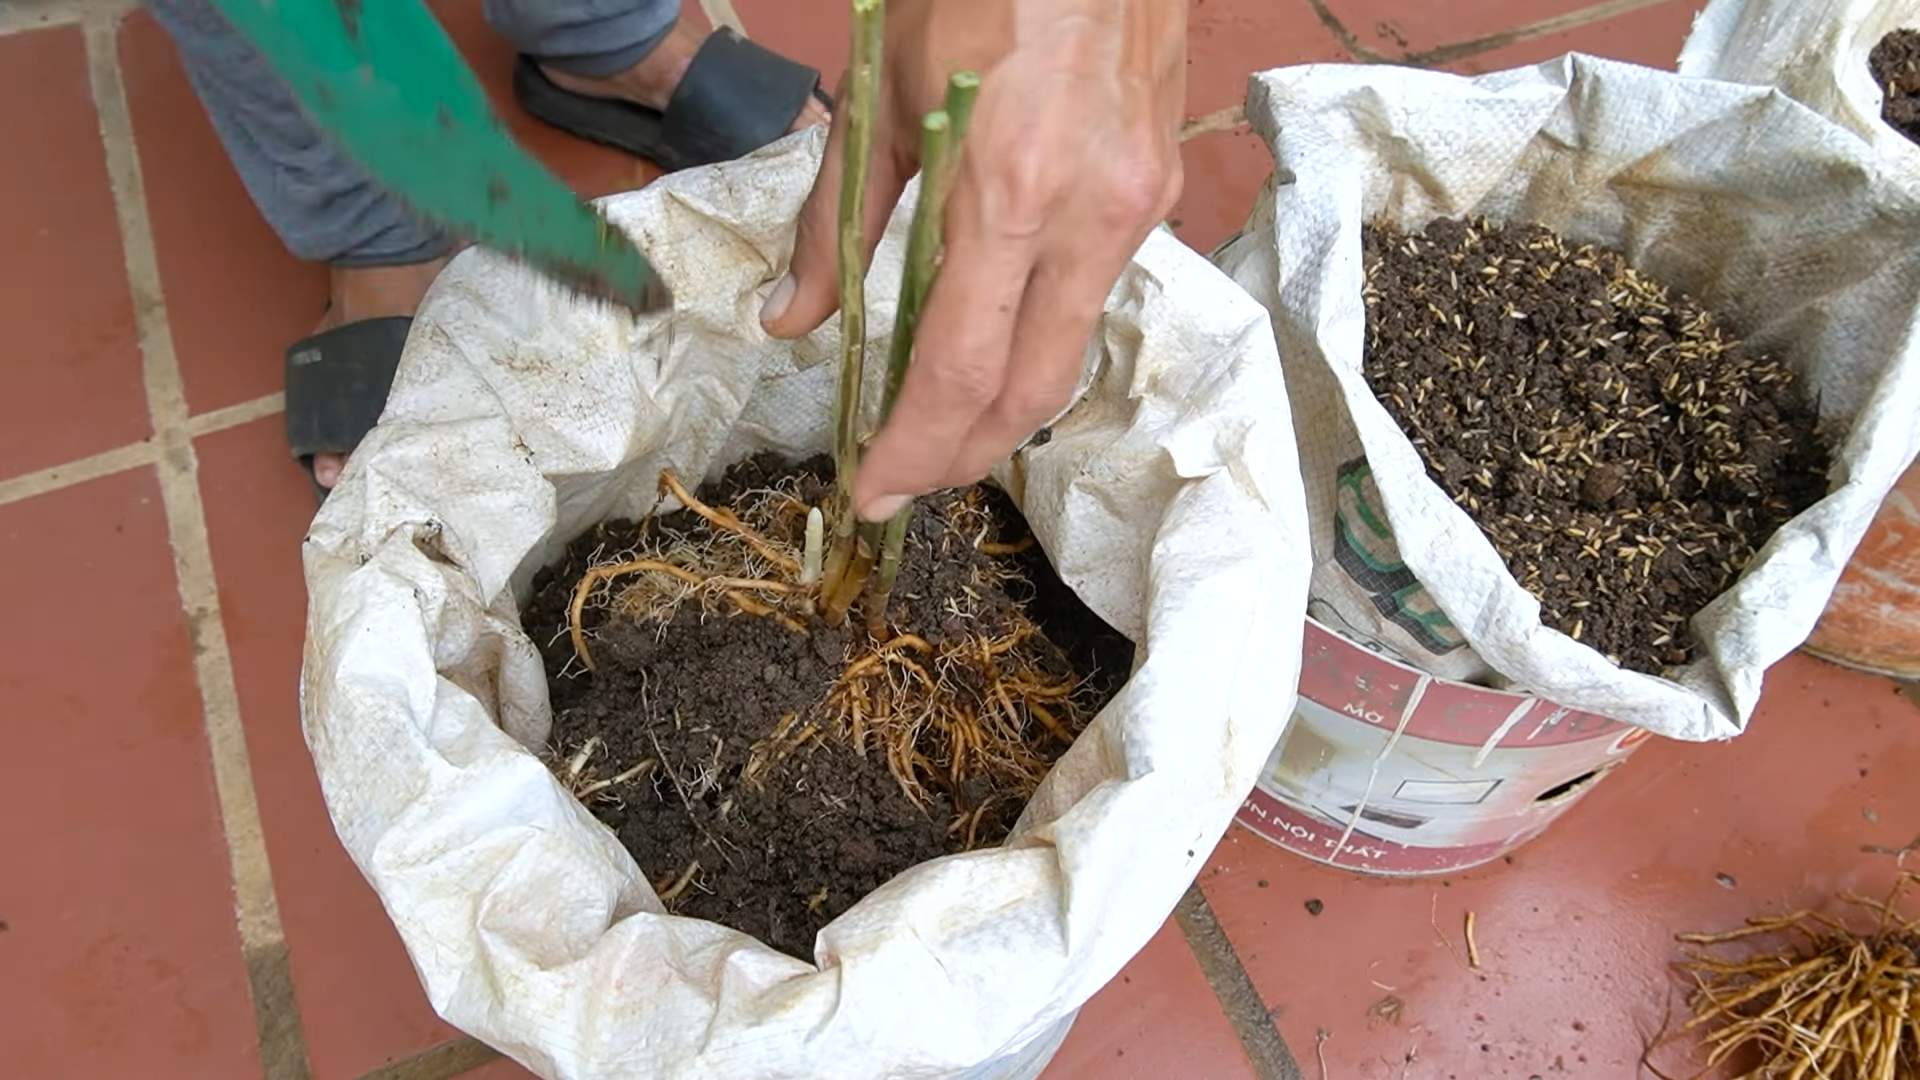
Planting Your Asparagus Crowns
Okay, now for the fun part – planting! You’ll be planting asparagus crowns, which are basically the root systems of the asparagus plants.
When to Plant:
* The best time to plant asparagus crowns is in early spring, as soon as the soil can be worked. In colder climates, you can also plant in the fall.
Step-by-Step Planting Instructions:
1. Dig Trenches: Dig trenches that are about 12 inches wide and 6-8 inches deep. Space the trenches about 4 feet apart. This spacing gives the asparagus plants plenty of room to grow.
2. Create Ridges: In the bottom of each trench, create a small ridge of soil. This ridge will support the asparagus crown and help with drainage.
3. Place the Crowns: Place the asparagus crowns on top of the ridges, spacing them about 12-18 inches apart. Make sure the roots are spread out evenly.
4. Cover the Crowns: Gently cover the crowns with about 2-3 inches of soil.
5. Water Thoroughly: Water the newly planted crowns thoroughly. This will help settle the soil and encourage root growth.
Caring for Your Asparagus Patch
Asparagus requires some patience, especially in the first few years. But trust me, it’s worth the wait!
* Watering: Water your asparagus patch regularly, especially during dry periods. Asparagus needs consistent moisture to thrive.
* Weeding: Keep your asparagus patch weed-free. Weeds will compete with the asparagus plants for nutrients and water. Hand-weeding is the best option, as you don’t want to damage the asparagus crowns with a hoe.
* Fertilizing: Fertilize your asparagus patch in early spring and again in mid-summer. I like to use a balanced fertilizer, such as 10-10-10. You can also use compost or well-rotted manure.
* Mulching: Mulch your asparagus patch with straw, wood chips, or shredded leaves. Mulch will help retain moisture, suppress weeds, and regulate soil temperature.
* Cutting Back Foliage: In the fall, after the foliage has turned yellow or brown, cut it back to the ground. This will help prevent disease and pests from overwintering in the asparagus patch.
Harvesting Your Asparagus
This is what we’ve been waiting for! But remember, patience is key.
* The First Year: Do NOT harvest any asparagus spears in the first year. This allows the plants to establish a strong root system.
* The Second Year: You can harvest a few spears in the second year, but only for a short period of time (about 2-3 weeks).
* The Third Year and Beyond: In the third year and beyond, you can harvest asparagus spears for a longer period of time (about 6-8 weeks).
How to Harvest:
1. Harvest When Spears Are 6-8 Inches Tall: Harvest the spears when they are about 6-8 inches tall and the tips are still tightly closed.
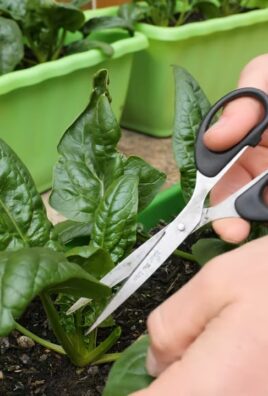
2. Cut or Snap the Spears: You can either cut the spears at ground level with a sharp knife or snap them off with your hands. I prefer to snap them off, as this is less likely to damage the crown.
3. Harvest Regularly: Harvest asparagus spears every day or two during the harvest season. This will encourage the plants to produce more spears.
Dealing with Asparagus Pests and Diseases
Asparagus is relatively pest and disease-resistant, but there are a few things to watch out for.
* Asparagus Beetles: These beetles can damage asparagus spears and foliage. Hand-picking the beetles is the best way to control them. You can also use an insecticide if the infestation is severe.
* Asparagus Rust: This fungal disease can cause orange or brown spots on the asparagus foliage. To prevent asparagus rust, choose disease-resistant varieties and provide good air circulation.
* Crown Rot: This fungal disease can cause the asparagus crowns to rot. To prevent crown rot, plant asparagus in well-drained soil and avoid overwatering.
Extending Your Asparagus Season
Want to enjoy fresh asparagus for even longer? Here are a few tips:
* Succession Planting: Plant different varieties of asparagus that mature at different times. This will extend your harvest season.
* Cold Frames: Use cold frames to protect your asparagus plants from frost in the early spring. This will allow you to start harvesting asparagus earlier.
* Freezing Asparagus: Freeze your excess asparagus to enjoy it throughout the year. To freeze asparagus, blanch it for 2-3 minutes, then plunge it into ice water. Drain the asparagus and freeze it in freezer bags.
Propagating Asparagus
While you can buy asparagus crowns, you can also propagate your own plants from seed. It takes longer, but it’s a rewarding process.
1. Collect Seeds: In the fall, collect the red berries from your asparagus plants.
2. Soak the Seeds: Soak the seeds in water for 24 hours.
3. Sow the Seeds: Sow the seeds indoors in early spring, about 8-10 weeks before the last frost.
4. Transplant the Seedlings: Transplant the seedlings outdoors after the last frost.
5. Care for the Seedlings: Care for the seedlings as you would mature asparagus plants.
Enjoying Your Homegrown Asparagus
Now that you’ve grown your own asparagus, it’s time to enjoy it! There are so many delicious ways to cook asparagus.
* Roasted Asparagus: Toss asparagus spears with olive oil, salt, and pepper, and roast them in the oven at 400 degrees Fahrenheit for 10-15 minutes.
* Grilled Asparagus: Grill asparagus spears over medium heat for 5-7 minutes.
* Steamed Asparagus: Steam asparagus spears for 5-7 minutes.
* Asparagus Soup: Make a creamy asparagus soup with asparagus
Conclusion
So, there you have it! Mastering the art of growing your own asparagus isn’t just about saving money; it’s about connecting with nature, enjoying the unparalleled flavor of freshly harvested spears, and taking pride in your own green thumb. This DIY asparagus growing trick, focusing on proper soil preparation and patient cultivation, is a game-changer for both novice and experienced gardeners alike. It’s a simple yet effective method that yields impressive results, transforming your backyard into a personal asparagus patch.
Why is this a must-try? Because store-bought asparagus simply can’t compare to the vibrant taste and crisp texture of homegrown. Plus, you have complete control over the growing process, ensuring your asparagus is free from harmful pesticides and chemicals. Imagine serving a dish featuring asparagus you nurtured from the very beginning – the satisfaction is truly unmatched.
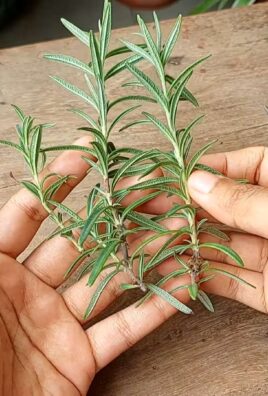
But don’t stop there! Feel free to experiment with different varieties of asparagus. ‘Jersey Knight’ is a popular choice for its high yield and disease resistance, while ‘Purple Passion’ offers a unique color and slightly sweeter flavor. Consider companion planting with herbs like parsley and basil, which can help deter pests and enhance the overall health of your asparagus bed. You can also try different mulching techniques, such as using straw or wood chips, to retain moisture and suppress weeds.
Remember, patience is key when growing asparagus. It takes a few years for the plants to mature and produce a substantial harvest, but the wait is well worth it. Think of it as an investment in years of delicious, homegrown asparagus to come.
We wholeheartedly encourage you to give this DIY asparagus growing trick a try. It’s a rewarding experience that will bring you closer to nature and provide you with a bounty of fresh, flavorful asparagus for years to come. Don’t be afraid to get your hands dirty and experiment along the way.
And most importantly, we want to hear about your experience! Share your tips, successes, and challenges in the comments below. Let’s build a community of asparagus enthusiasts and learn from each other. What variety did you choose? What challenges did you face, and how did you overcome them? Your insights could be invaluable to other aspiring asparagus growers. So, grab your gardening gloves, prepare your soil, and embark on this exciting journey of growing your own delicious asparagus. Happy gardening!
Frequently Asked Questions (FAQ)
Q: How long does it take to grow asparagus from seed?
A: Growing asparagus from seed is a longer process compared to starting with crowns. It typically takes about three years from seed to harvestable spears. The first year is dedicated to nurturing the seedlings in a protected environment, like a greenhouse or indoor setup. The second year involves transplanting the young plants to their permanent location in the garden and allowing them to establish a strong root system. By the third year, you can usually begin harvesting a small number of spears. While it requires more patience, growing from seed is a more economical option and allows you to select specific varieties that may not be readily available as crowns.
Q: What is the best time of year to plant asparagus crowns?
A: The best time to plant asparagus crowns is in early spring, typically a few weeks before the last expected frost. This allows the crowns to establish their root systems before the heat of summer arrives. In warmer climates, you can also plant asparagus crowns in the fall, giving them a head start before winter dormancy. The key is to ensure the soil is workable and not frozen. When planting, dig a trench about 6-8 inches deep and 12 inches wide. Place the crowns in the trench, spacing them about 12-18 inches apart. Cover the crowns with about 2 inches of soil initially, and gradually fill in the trench as the spears emerge.
Q: What kind of soil is best for growing asparagus?
A: Asparagus thrives in well-drained, sandy loam soil with a pH between 6.5 and 7.5. Good drainage is crucial to prevent root rot, which is a common problem for asparagus. Before planting, amend the soil with plenty of organic matter, such as compost or well-rotted manure, to improve drainage and fertility. Asparagus is a heavy feeder, so it’s also beneficial to incorporate a slow-release fertilizer into the soil at planting time. Avoid planting asparagus in heavy clay soil, as it can become waterlogged and inhibit root growth. If you have clay soil, consider amending it with sand and organic matter to improve drainage.
Q: How often should I water my asparagus plants?
A: Asparagus plants need consistent moisture, especially during the growing season. Water deeply and regularly, aiming for about 1-2 inches of water per week. Avoid overhead watering, as it can promote fungal diseases. Instead, water at the base of the plants, using a soaker hose or drip irrigation system. During dry spells, increase the frequency of watering to prevent the soil from drying out completely. In the fall, reduce watering as the plants enter dormancy.
Q: How do I fertilize my asparagus plants?
A: Asparagus plants benefit from regular fertilization to support their growth and productivity. In early spring, before the spears emerge, apply a balanced fertilizer, such as 10-10-10, at a rate of about 1 pound per 100 square feet. You can also use a fertilizer specifically formulated for vegetables. In mid-summer, after the harvest season, apply a second dose of fertilizer to replenish the nutrients used during spear production. Alternatively, you can side-dress the plants with compost or well-rotted manure. Avoid over-fertilizing, as it can lead to excessive foliage growth at the expense of spear production.
Q: How do I control weeds in my asparagus bed?
A: Weed control is essential for maintaining a healthy asparagus bed. Weeds compete with asparagus plants for nutrients, water, and sunlight, which can reduce spear production. Hand-pull weeds regularly, especially when they are small. Mulching with organic materials, such as straw or wood chips, can also help suppress weed growth. Be careful when using herbicides, as some can damage asparagus plants. If you choose to use herbicides, select one that is specifically labeled for use on asparagus and follow the instructions carefully.
Q: How do I harvest asparagus spears?
A: Asparagus spears are ready to harvest when they are about 6-8 inches tall and have tightly closed tips. Use a sharp knife to cut the spears at ground level. Avoid pulling the spears, as this can damage the crown. Harvest spears regularly throughout the harvest season, which typically lasts for 6-8 weeks. As the plants mature, you can extend the harvest season slightly. Stop harvesting when the spears become thin and spindly, as this indicates that the plants need to replenish their energy reserves.
Q: What are some common pests and diseases that affect asparagus?
A: Asparagus is susceptible to several pests and diseases, including asparagus beetles, asparagus rust, and Fusarium crown and root rot. Asparagus beetles are small, colorful insects that feed on asparagus spears and foliage. Hand-picking the beetles or using insecticidal soap can help control infestations. Asparagus rust is a fungal disease that causes orange pustules on the stems and foliage. Good air circulation and proper watering practices can help prevent rust. Fusarium crown and root rot is a soilborne disease that causes the plants to wilt and die. Planting asparagus in well-drained soil and avoiding overwatering can help prevent this disease.
Q: How do I overwinter my asparagus plants?
A: Asparagus plants are perennial, meaning they will come back year after year. In the fall, after the foliage has turned yellow and died back, cut the stems to ground level. Apply a layer of mulch, such as straw or leaves, to protect the crowns from freezing temperatures. In colder climates, you may need to provide additional protection, such as covering the plants with a tarp or blanket. In the spring, remove the mulch as the new spears begin to emerge.
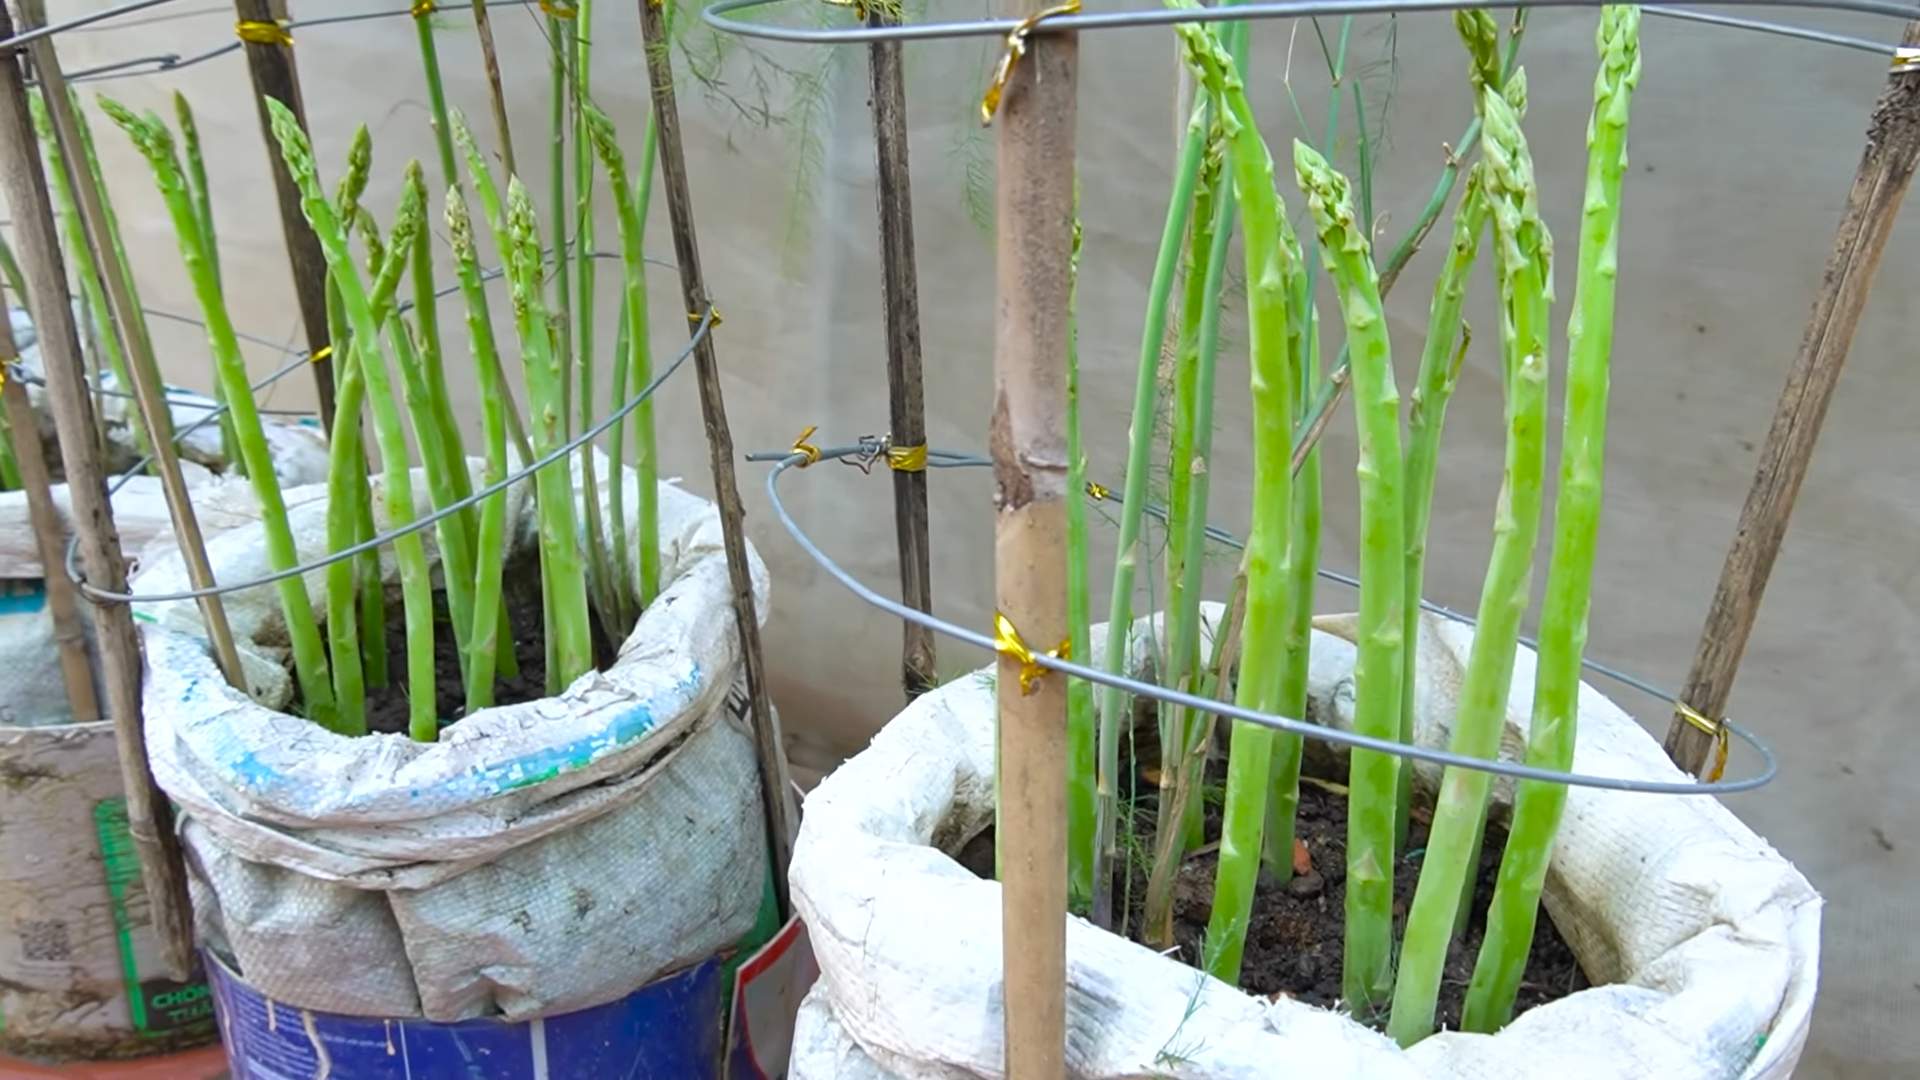
Q: Can I grow asparagus in containers?
A: Yes, you can grow asparagus in containers, but it requires a large container and careful attention to watering and fertilization. Choose a container that is at least 18 inches in diameter and 24 inches deep. Fill the container with a well-draining potting mix and plant one or two asparagus crowns per container. Water regularly and fertilize every few weeks with a balanced fertilizer. Container-grown asparagus may not produce as many spears as plants grown in the ground, but it can be a good option for gardeners with limited space.

Leave a Comment