
Harvesting peanuts without a garden? Sounds impossible, right? Well, get ready to ditch the “impossible” because I’m about to share some ingenious DIY tricks that will have you enjoying homegrown peanuts, even if you’re lacking a traditional garden plot! For centuries, peanuts, originally from South America, have been a staple food source and a symbol of resourcefulness. From ancient Incan offerings to modern-day snacks, their versatility is undeniable.
But what if you live in an apartment, have limited space, or simply don’t have the time for extensive gardening? That’s where these clever hacks come in. Imagine the satisfaction of pulling fresh, earthy peanuts from a container on your balcony or patio. It’s not just about the peanuts themselves; it’s about connecting with nature, learning new skills, and enjoying the fruits (or rather, legumes!) of your labor.
This DIY guide is perfect for anyone who wants to experience the joy of harvesting peanuts without a garden. We’ll explore container gardening techniques, soil preparation secrets, and even some clever ways to mimic the peanut’s unique growing environment. So, grab your gloves, and let’s get started on this exciting peanut-growing adventure! You’ll be amazed at how easy it is to enjoy fresh, homegrown peanuts, no matter where you live.
Harvesting Peanuts Indoors: From Seed to Snack Without a Garden
Okay, so you’re craving fresh peanuts but lack a garden? No problem! I’m going to walk you through a fun and surprisingly rewarding DIY project: growing and harvesting peanuts indoors. It might sound a little crazy, but trust me, it’s totally doable and a great way to get your hands dirty (literally!) even if you’re stuck inside.
What You’ll Need: The Peanut Growing Arsenal
Before we dive in, let’s gather our supplies. This is crucial for a smooth and successful peanut-growing adventure.
* Raw, Unshelled Peanuts: This is the most important ingredient! Make sure they are raw, unsalted, and *unshelled*. Roasted peanuts won’t sprout. Look for them at health food stores or online. I usually buy organic to avoid any unwanted chemicals.
* Large Container: We’re talking big! A container at least 12 inches deep and 12 inches wide is ideal. Peanuts need room to spread their roots and for the “pegs” (where the peanuts form) to bury themselves.
* Well-Draining Potting Mix: Regular garden soil is too heavy. You need a light and airy potting mix that drains well. I like to use a mix of peat moss, perlite, and vermiculite.
* Grow Lights (Optional but Recommended): While peanuts can grow indoors with natural light, they thrive with supplemental lighting, especially if you don’t have a super sunny window. A simple LED grow light will do the trick.
* Watering Can or Spray Bottle: For gentle watering.
* Small Shovel or Trowel: For planting and eventually harvesting.
* Heat Mat (Optional): Peanuts love warmth, so a heat mat can help with germination, especially in cooler climates.
* Spray Bottle with Water: For misting the seedlings.
* Patience: This is a long game! It takes several months to grow peanuts.
Phase 1: Germination – Waking Up the Peanuts
This is where the magic begins! We need to coax those dormant peanuts into sprouting.
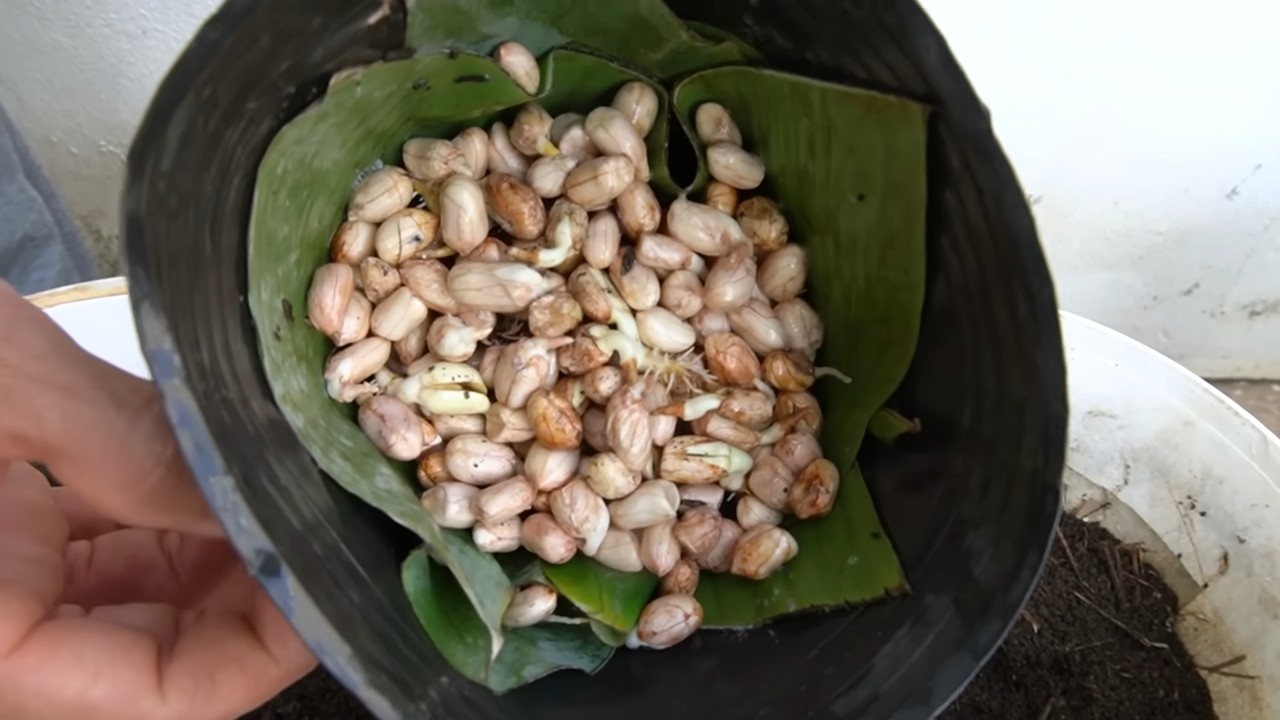
1. Soak the Peanuts: Place the raw, unshelled peanuts in a bowl of lukewarm water. Let them soak for 12-24 hours. This helps soften the shells and encourages germination. I usually do this overnight.
2. Prepare the Germination Setup: You have a couple of options here:
* Paper Towel Method: Moisten a paper towel and place the soaked peanuts on it. Fold the paper towel over the peanuts and place it in a plastic bag or container. Keep the paper towel moist but not soaking wet.
* Directly in Potting Mix: Fill a small container (like a seedling tray) with moistened potting mix. Plant the peanuts about an inch deep.
3. Provide Warmth: Place the germination setup in a warm location. If you’re using a heat mat, set it to a low setting. The ideal temperature is around 70-80°F (21-27°C).
4. Wait and Watch: Check the peanuts daily. Keep the paper towel or potting mix moist. You should see sprouts emerging in about 5-10 days. If you’re using the paper towel method, carefully transplant the sprouted peanuts into small pots filled with potting mix once the roots are about half an inch long.
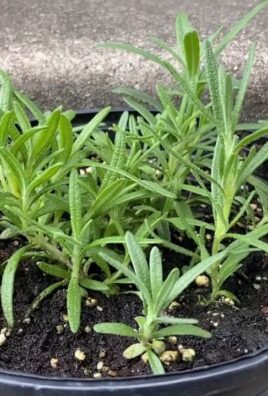
Phase 2: Planting and Early Growth – Nurturing the Seedlings
Now that we have sprouts, it’s time to give them a proper home.
1. Prepare the Large Container: Fill your large container with well-draining potting mix, leaving a couple of inches of space at the top.
2. Transplant the Seedlings: Gently remove the sprouted peanuts from their small pots or the paper towel. Be careful not to damage the roots. Plant them about 2-3 inches deep in the large container, spacing them about 6-8 inches apart.
3. Water Thoroughly: Water the newly planted seedlings gently but thoroughly. Make sure the water drains out of the bottom of the container.
4. Provide Light: Place the container in a sunny location or under grow lights. If using grow lights, keep them on for about 12-16 hours a day.
5. Maintain Moisture: Keep the soil consistently moist but not waterlogged. Water when the top inch of soil feels dry to the touch. I usually check the soil moisture every day.
6. Fertilize (Optional): Once the seedlings are a few inches tall, you can start fertilizing them with a balanced liquid fertilizer diluted to half strength. Follow the instructions on the fertilizer label. I usually fertilize every two weeks.
Phase 3: Flowering and Pegging – The Peanut-Making Process
This is where things get interesting! Peanuts are unique because they flower above ground, but the peanuts themselves develop *underground*.
1. Observe Flowering: After a few weeks, you should start to see small, yellow flowers appear on the plants. These flowers are self-pollinating, so you don’t need to do anything to help them.
2. Pegging: After the flowers fade, small “pegs” will emerge from the base of the flower. These pegs are actually the developing peanut pods. They will grow downwards and bury themselves in the soil. This is why a large, deep container is so important!
3. Maintain Consistent Moisture: It’s crucial to keep the soil consistently moist during the pegging process. The pegs need moisture to develop properly.
4. Hilling (Optional): As the plants grow, you can add more potting mix to the container to “hill” around the base of the plants. This helps support the plants and provides more space for the pegs to bury themselves.
Phase 4: Harvesting – The Grand Finale!
This is the moment we’ve been waiting for! Harvesting peanuts is a bit of a guessing game, but here are some signs that they’re ready:
1. Timing: Peanuts typically take about 120-150 days to mature. Keep track of when you planted them.
2. Yellowing Leaves: The leaves of the peanut plants will start to turn yellow and brown.
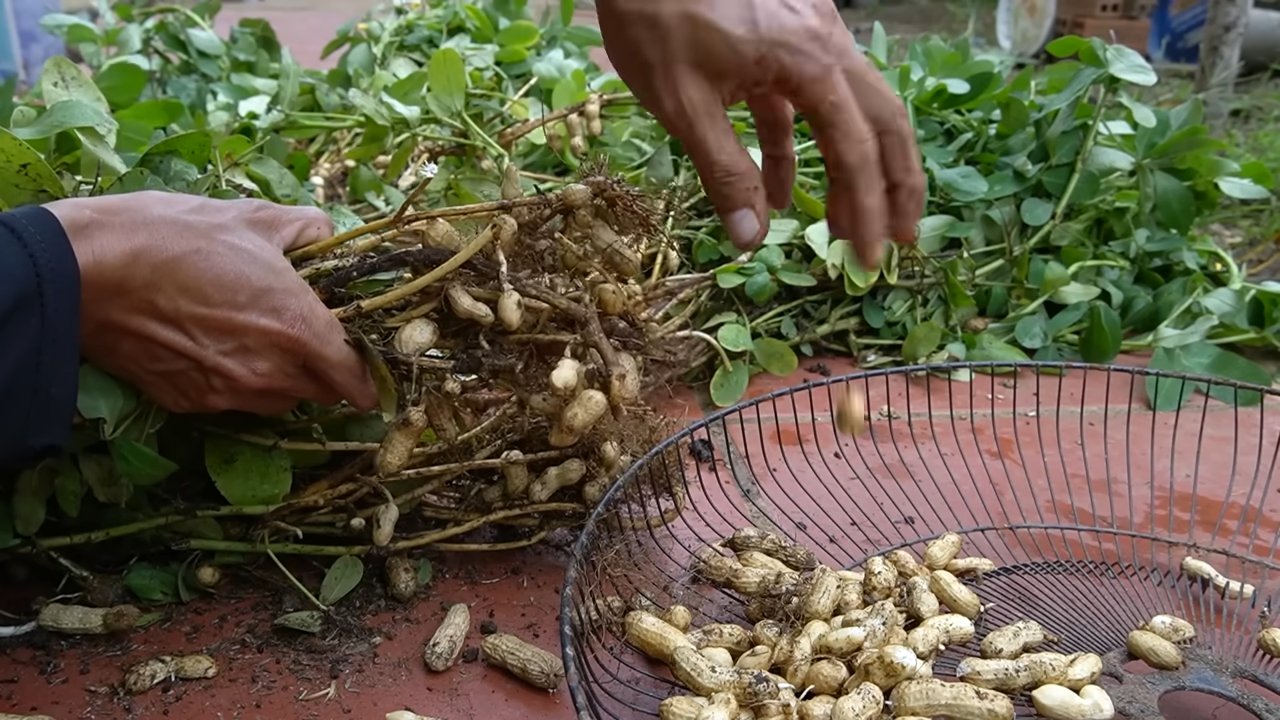
3. Test Dig: Gently dig around the base of one plant and check the peanuts. They should be plump and well-formed. The inside of the shells should be starting to show their characteristic peanut markings.
4. Harvesting: Once you’re confident that the peanuts are ready, carefully dig up the entire plant. Shake off as much soil as possible.
5. Curing: This is an important step to prevent mold and improve the flavor of the peanuts. Hang the entire plant upside down in a warm, dry, and well-ventilated place for about 2-4 weeks. You can also spread the peanuts out on a screen or tray to dry.
6. Shelling: After curing, you can shell the peanuts. They should come out of the shells easily.
7. Roasting (Optional): You can roast the peanuts in the oven at 350°F (175°C) for about 15-20 minutes, or until they are golden brown and fragrant.
Troubleshooting: Common Peanut Problems
Even with the best care, you might encounter some problems. Here are a few common issues and how to address them:
* Poor Germination: Make sure your peanuts are raw and unsalted. Also, ensure the temperature is warm enough.
* Yellowing Leaves: This could be a sign of overwatering, underwatering, or nutrient deficiency. Adjust your watering schedule and fertilize if necessary.
* Lack of Flowers: Make sure the plants are getting enough light.
* No Peanuts: This could be due to poor pollination, insufficient moisture during pegging, or not enough space for the pegs to bury themselves.
Enjoying Your Homegrown Peanuts
Congratulations! You’ve successfully grown peanuts indoors. Now it’s time to enjoy the fruits (or rather, nuts) of your labor. You can eat them raw, roasted, or use them in your favorite recipes. I love adding them to salads, stir-fries, and of course, peanut butter!
Growing peanuts indoors is a fun and rewarding experience. It’s a great way to connect with nature, even if you don’t have a garden. So, give it a try and enjoy the taste of homegrown peanuts!
Conclusion
So, you’ve reached the end of our guide on harvesting peanuts without a garden! By now, you should be armed with the knowledge and confidence to embark on this surprisingly rewarding endeavor. Let’s recap why this DIY trick is an absolute must-try for any food enthusiast, urban gardener, or curious soul.
First and foremost, growing peanuts, even without a traditional garden, offers a unique connection to your food. There’s something incredibly satisfying about nurturing a plant from seed to harvest, especially when that harvest yields a delicious and versatile ingredient like peanuts. Imagine the stories you can tell when you serve homemade peanut butter or roasted peanuts, knowing you cultivated them yourself, right on your balcony or patio!
Beyond the personal satisfaction, this method is incredibly accessible. You don’t need acres of land or specialized equipment. A container, some soil, peanut seeds (or raw, unsalted peanuts), and a sunny spot are all you need to get started. This makes it perfect for apartment dwellers, urban homesteaders, or anyone with limited space who wants to experience the joy of growing their own food.
And let’s not forget the cost savings! While the initial investment in a container and soil might be necessary, you’ll quickly recoup those costs with the abundance of peanuts you can harvest. Plus, you can save seeds from your harvest to plant again next year, creating a sustainable and self-sufficient system.
But the real magic lies in the variations and possibilities this method unlocks. Feel free to experiment with different types of peanuts. Virginia peanuts, known for their large size, might be a fun challenge. Spanish peanuts, with their smaller kernels and reddish skins, offer a different flavor profile. Or, try Valencia peanuts, which typically produce multiple peanuts per plant, maximizing your yield.
Consider adding companion plants to your container. Herbs like basil or thyme can help deter pests and enhance the flavor of your peanuts. Marigolds are another excellent choice, known for their pest-repelling properties and vibrant blooms.
Don’t be afraid to get creative with your container selection. While a standard pot works perfectly well, you could also repurpose old buckets, tubs, or even grow bags. Just make sure your container has adequate drainage to prevent waterlogging.
And finally, remember that harvesting peanuts without a garden is a learning experience. Don’t be discouraged if your first attempt isn’t perfect. Pay attention to your plants, observe their growth patterns, and adjust your methods accordingly. The more you experiment, the more successful you’ll become.
So, what are you waiting for? Grab a container, some soil, and those peanut seeds, and get ready to embark on a peanut-growing adventure! We’re confident that you’ll be amazed by the results. And once you’ve harvested your bounty, we encourage you to share your experience with us. Post photos of your peanut plants, share your favorite recipes, and let us know what you learned along the way. Together, we can create a community of urban peanut growers and inspire others to discover the joy of growing their own food, no matter where they live. This DIY peanut harvesting method is a game changer!
Frequently Asked Questions (FAQ)
1. What kind of peanuts should I use to start? Can I just use roasted peanuts from the store?
No, you cannot use roasted peanuts from the store. Roasting destroys the viability of the seed. You need to use raw, unsalted peanuts. Look for peanuts specifically labeled as “seed peanuts” at your local garden center or online. Alternatively, you can use raw, unsalted peanuts from the grocery store, but make sure they are truly raw and haven’t been treated with any chemicals or preservatives. Virginia peanuts are a popular choice due to their large size, but Spanish or Valencia peanuts will also work well. Experiment to see which variety thrives best in your specific environment.
2. What size container do I need for growing peanuts?
A container that is at least 18 inches in diameter and 12 inches deep is recommended. Peanuts need room for their roots to spread and for the pegs (the stems that produce the peanuts) to penetrate the soil. The larger the container, the more peanuts you’ll likely harvest. Make sure the container has drainage holes to prevent waterlogging, which can lead to root rot.
3. What type of soil is best for growing peanuts in containers?
Peanuts prefer well-draining, sandy loam soil. You can purchase a potting mix specifically designed for containers, or you can create your own mix by combining equal parts of potting soil, compost, and sand. The compost will provide essential nutrients, while the sand will improve drainage. Avoid using heavy clay soil, as it can become compacted and hinder the growth of the peanuts.
4. How much sunlight do peanuts need?
Peanuts need at least 6-8 hours of direct sunlight per day to thrive. Choose a sunny location for your container, such as a balcony, patio, or windowsill. If you don’t have enough natural sunlight, you can supplement with grow lights.
5. How often should I water my peanut plants?
Water your peanut plants regularly, especially during hot, dry weather. The soil should be consistently moist but not waterlogged. Check the soil moisture by sticking your finger about an inch into the soil. If it feels dry, it’s time to water. Avoid overwatering, as this can lead to root rot.
6. How long does it take to harvest peanuts?
Peanuts typically take 120-150 days to mature from planting to harvest. The exact time will depend on the variety of peanut, the climate, and the growing conditions. You’ll know it’s time to harvest when the leaves start to turn yellow and the plant begins to wilt.
7. How do I harvest peanuts from a container?
Gently loosen the soil around the base of the plant. Carefully pull the entire plant out of the container, being careful not to break off any of the peanuts. Shake off any excess soil and then gently remove the peanuts from the roots.
8. How do I cure peanuts after harvesting?
Curing is essential for developing the flavor and extending the shelf life of your peanuts. After harvesting, wash the peanuts thoroughly to remove any remaining soil. Spread the peanuts out in a single layer on a screen or tray in a well-ventilated area. Allow them to dry for 1-2 weeks, or until the shells are completely dry and brittle.
9. Can I roast my homegrown peanuts?
Yes, you can roast your homegrown peanuts! Preheat your oven to 350°F (175°C). Spread the dried peanuts in a single layer on a baking sheet. Roast for 20-25 minutes, or until the peanuts are golden brown and fragrant. Let them cool completely before storing them in an airtight container.
10. What are some common problems I might encounter when growing peanuts in containers?
Some common problems include pests, diseases, and nutrient deficiencies. Aphids, spider mites, and whiteflies can attack peanut plants. Treat infestations with insecticidal soap or neem oil. Root rot can occur if the soil is waterlogged. Prevent this by ensuring good drainage and avoiding overwatering. Yellowing leaves can indicate a nutrient deficiency. Fertilize your plants with a balanced fertilizer according to the package directions.
11. Can I grow peanuts indoors?
While it’s possible to grow peanuts indoors, it can be challenging. Peanuts require a lot of sunlight, so you’ll need to supplement with grow lights. You’ll also need to ensure good air circulation and maintain consistent soil moisture. Growing peanuts outdoors in containers is generally easier and more successful.
12. Can I save seeds from my harvested peanuts to plant next year?
Yes, you can save seeds from your harvested peanuts. Choose the largest and healthiest peanuts from your harvest. Allow them to dry completely and then store them in an airtight container in a cool, dark place. Plant these seeds the following spring. This is a great way to create a sustainable and self-sufficient peanut-growing system.
Leave a Comment