
Grow radishes and add a peppery punch to your family meals! Have you ever dreamt of harvesting your own vibrant, crunchy radishes right from your backyard? Imagine the satisfaction of serving a fresh salad bursting with homegrown flavor, knowing you cultivated it yourself. This isn’t just a dream; it’s an achievable reality with a few simple tricks and DIY hacks!
Radishes, with their cheerful colors and zesty bite, have been cultivated for centuries. Originating in Asia, these humble root vegetables were enjoyed by the ancient Egyptians and Romans, who valued them for their nutritional benefits and ease of cultivation. Today, radishes remain a popular choice for gardeners of all levels, and for good reason. They are incredibly fast-growing, making them perfect for impatient gardeners (like me!) and a great way to introduce kids to the joys of gardening.
But let’s be honest, sometimes growing radishes can be a bit tricky. You might end up with tiny, bitter roots or leafy greens with no radish to show for it. That’s where these DIY tricks come in! I’m going to share my favorite tips and hacks to help you grow radishes successfully, ensuring a bountiful harvest of crisp, flavorful radishes for your family’s meals. From soil preparation to watering techniques, I’ll guide you through every step of the process, so you can enjoy the delicious rewards of your own homegrown radishes. Let’s get started!
Growing Radishes: From Seed to Salad in Weeks!
Hey there, fellow garden enthusiasts! I’m so excited to share my guide to growing radishes. These little root veggies are incredibly fast-growing, making them perfect for impatient gardeners like myself! Plus, they add a delightful peppery crunch to salads and other dishes. Let’s get started!
Choosing Your Radish Variety
Before we dive into the planting process, let’s talk about radish varieties. There are tons to choose from, each with its own unique flavor, size, and color. Here are a few of my favorites:
* Cherry Belle: This is a classic, round, bright red radish. It’s known for its mild flavor and quick maturity.
* French Breakfast: These are elongated radishes with a red top and a white bottom. They have a slightly milder flavor than Cherry Belle and are delicious with butter and salt.
* Easter Egg: This variety is a mix of radishes in different colors – red, pink, purple, and white. It’s a fun and colorful addition to any garden.
* Black Spanish: If you’re looking for something with a bit more kick, try Black Spanish radishes. They have a black skin and a pungent, spicy flavor.
* Watermelon Radish: Don’t let the name fool you, it doesn’t taste like watermelon! This radish has a pale green exterior and a vibrant pink interior, making it a beautiful addition to salads. It has a mild, slightly sweet flavor.
Preparing Your Radish Bed
Radishes are pretty low-maintenance, but they do need a few things to thrive. Here’s how to prepare your garden bed:
* Sunlight: Radishes need at least 6 hours of sunlight per day. Choose a spot in your garden that gets plenty of sun.
* Soil: Radishes prefer loose, well-drained soil. If your soil is heavy clay, amend it with compost or other organic matter to improve drainage.
* pH: The ideal soil pH for radishes is between 6.0 and 7.0. You can test your soil pH with a soil testing kit.
* Fertilizer: Radishes don’t need a lot of fertilizer. In fact, too much nitrogen can cause them to grow leafy tops at the expense of the roots. Before planting, you can amend the soil with a small amount of compost or a balanced fertilizer.
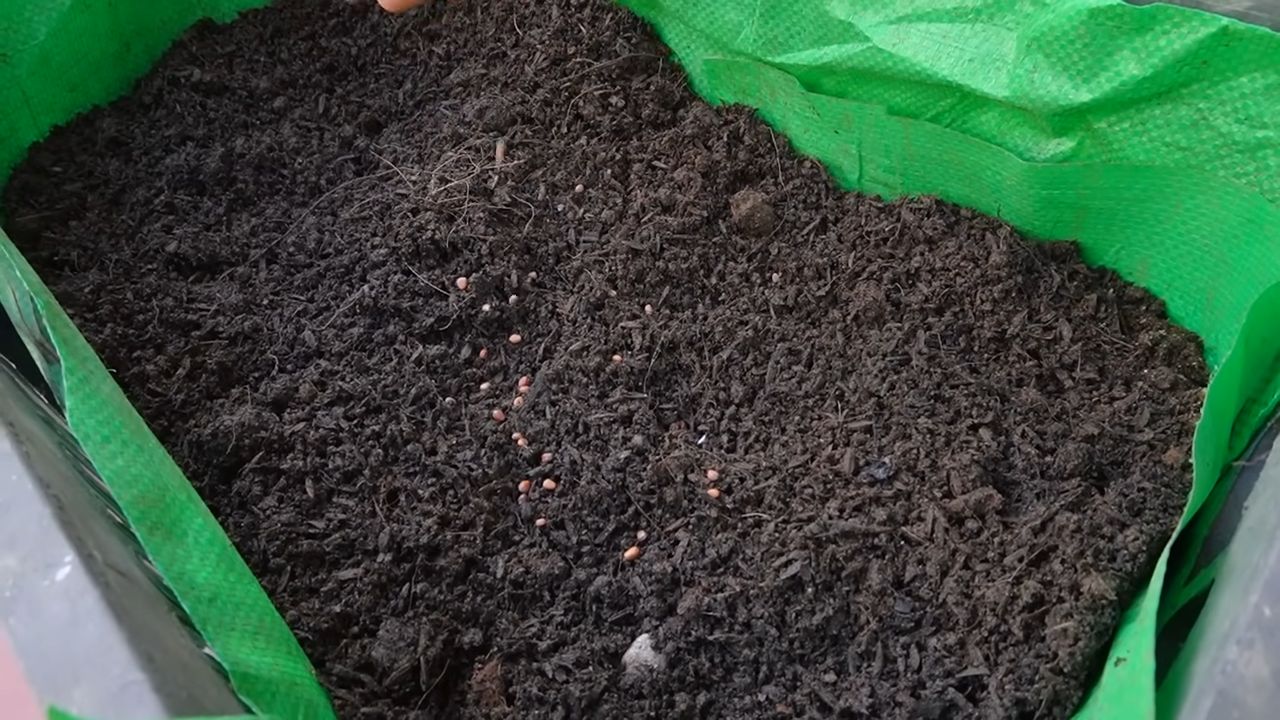
Planting Radish Seeds
Now for the fun part – planting! Here’s how to sow your radish seeds:
1. Timing is Key: Radishes are a cool-season crop, so they’re best planted in early spring or late summer/early fall. In the spring, plant them as soon as the soil can be worked. In the fall, plant them about 4-6 weeks before the first expected frost. I usually start planting in early April and then again in late August for a fall harvest.
2. Prepare the Soil: Rake the soil smooth and remove any rocks or debris. This will help the radish roots grow straight and true.
3. Make Rows: Create shallow rows about 1/2 inch deep and 1 inch apart. You can use a garden trowel or your finger to make the rows.
4. Sow the Seeds: Sprinkle the radish seeds evenly in the rows, about 1/2 inch apart. Don’t overcrowd them, or they’ll compete for resources.
5. Cover the Seeds: Gently cover the seeds with soil and pat it down lightly.
6. Water Well: Water the soil thoroughly after planting. Keep the soil moist until the seeds germinate, which usually takes about 3-7 days.
Caring for Your Radishes
Radishes are relatively easy to care for, but here are a few tips to keep them happy and healthy:
* Watering: Radishes need consistent moisture to grow quickly and develop good flavor. Water them regularly, especially during dry spells. Aim for about 1 inch of water per week.
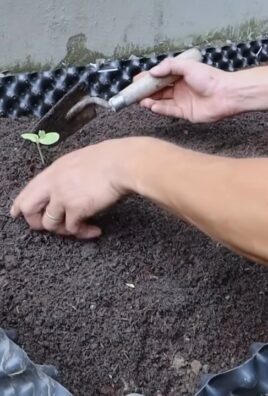
* Thinning: Once the seedlings emerge, thin them to about 1-2 inches apart. This will give the radishes enough room to grow. You can eat the thinnings as microgreens!
* Weeding: Keep the radish bed free of weeds. Weeds can compete with the radishes for nutrients and water.
* Pest Control: Radishes are generally pest-resistant, but they can sometimes be bothered by flea beetles or root maggots. If you notice any pests, you can try using insecticidal soap or neem oil. I personally haven’t had too many pest problems with my radishes.
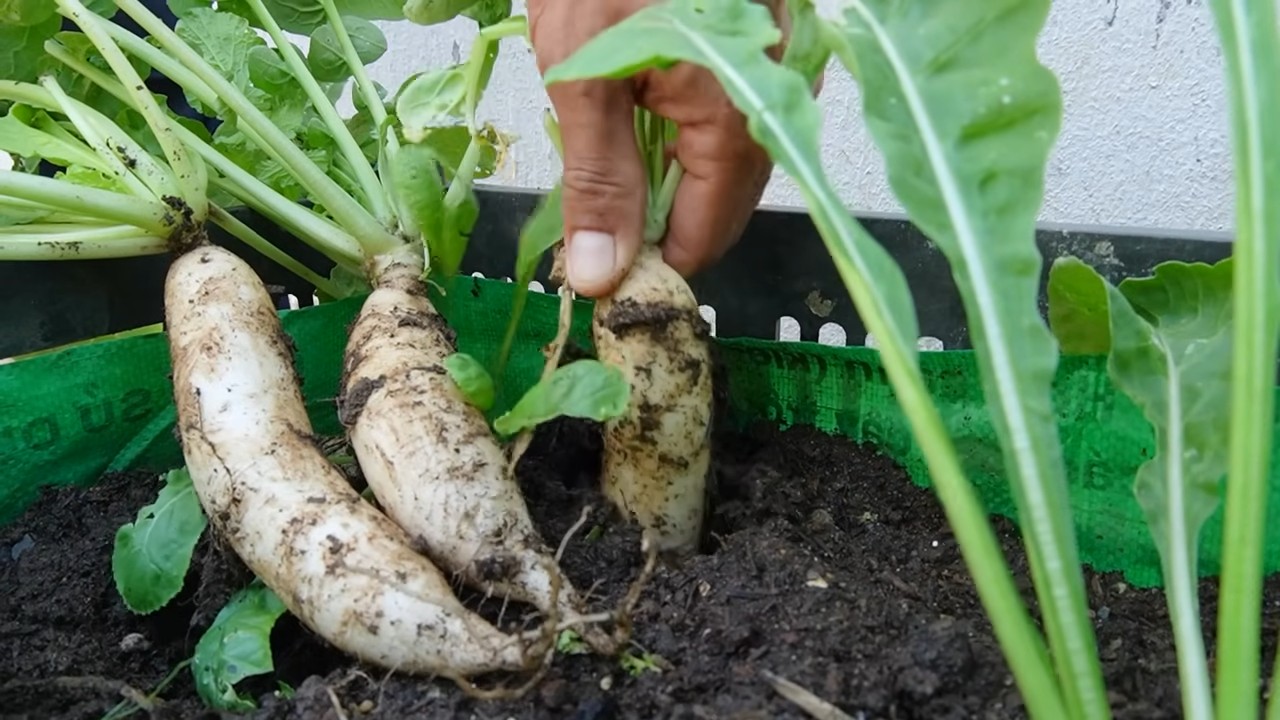
Harvesting Your Radishes
This is the best part! Radishes are ready to harvest in as little as 3-4 weeks after planting.
1. Check for Size: The size of the radish will depend on the variety, but generally, they’re ready to harvest when they’re about 1 inch in diameter.
2. Pull Them Up: Gently pull the radishes out of the ground. If the soil is dry, you may need to loosen it with a garden fork first.
3. Wash and Enjoy: Wash the radishes thoroughly and trim off the tops and roots. You can eat the radish greens too! They have a peppery flavor and can be added to salads or stir-fries.
Troubleshooting Common Radish Problems
Even with the best care, you might encounter a few problems when growing radishes. Here are some common issues and how to fix them:
* Radishes are too small: This could be due to overcrowding, lack of water, or poor soil. Thin the seedlings, water regularly, and amend the soil with compost.
* Radishes are cracked: This is usually caused by inconsistent watering. Water regularly and deeply, especially during dry spells.
* Radishes are too spicy: This can be caused by hot weather or letting the radishes grow too large. Harvest them when they’re still relatively small.
* Radishes are all tops and no roots: This is often caused by too much nitrogen in the soil. Avoid using high-nitrogen fertilizers.
Creative Ways to Use Your Radish Harvest
Now that you’ve harvested your radishes, it’s time to enjoy them! Here are a few of my favorite ways to use them:
* Salads: Radishes add a peppery crunch to salads. Slice them thinly or quarter them and toss them with your favorite greens, vegetables, and dressing.
* Radish and Butter Sandwiches: This is a classic French snack. Spread butter on a slice of baguette, top with thinly sliced radishes, and sprinkle with sea salt.
* Roasted Radishes: Roasting radishes mellows out their flavor and makes them slightly sweet. Toss them with olive oil, salt, and pepper and roast them in the oven until they’re tender.
* Radish Greens Pesto: Don’t throw away the radish greens! They can be used to make a delicious pesto. Simply blend them with garlic, Parmesan cheese, pine nuts, and olive oil.
* Pickled Radishes: Pickled radishes are a great way to preserve your harvest and add a tangy flavor to your meals.
Extending Your Radish Harvest
Want to enjoy radishes all season long? Here are a few tips for extending your harvest:
* Succession Planting: Plant a new batch of radish seeds every 2-3 weeks. This will ensure a continuous supply of radishes throughout the growing season.
* Choose Different Varieties: Some radish varieties mature faster than others. Plant a mix of varieties to extend your harvest.
* Use Row Covers: Row covers can protect your radishes from frost and pests, allowing you to plant them earlier in the spring and later in the fall.
* Store Radishes Properly: To store radishes, remove the greens and store them in a plastic bag in the refrigerator. They should last for about a week.
Radish Recipes for Family Meals
Radishes aren’t just for salads! Here are a couple of family-friendly recipes that incorporate these peppery gems:
Radish and Cucumber Salad with Yogurt Dressing
This refreshing salad is perfect for a light lunch or side dish.
Ingredients:
* 1 bunch radishes, thinly sliced
* 1 cucumber, thinly sliced
* 1/2 cup plain yogurt
* 1 tablespoon lemon juice
* 1 tablespoon chopped fresh dill
* Salt and pepper to taste
Instructions:
1. Combine the radishes and cucumber in a bowl.
2. In a separate bowl, whisk together the yogurt, lemon juice, dill, salt, and pepper.
3. Pour the dressing over the radishes and cucumber and toss to combine.
4. Serve immediately or chill for later.
Sautéed Radishes with Garlic and Lemon
This simple side dish is a great way to introduce radishes to picky eaters. The cooking process mellows out
Conclusion
So there you have it! Growing radishes for family meals doesn’t have to be a daunting task relegated to experienced gardeners. This simple, effective DIY trick unlocks the potential for a continuous supply of fresh, crisp radishes right from your own backyard (or even balcony!). We’ve shown you how to bypass common pitfalls and maximize your yield, ensuring that you have plenty of these peppery delights to incorporate into your family’s favorite dishes.
Why is this a must-try? Because it’s accessible, affordable, and incredibly rewarding. Imagine the satisfaction of serving a salad bursting with radishes you nurtured from seed to table. Think of the vibrant color and zesty flavor they’ll add to your tacos, sandwiches, or even a simple crudité platter. This isn’t just about growing vegetables; it’s about connecting with nature, teaching your children about the food cycle, and enjoying the unparalleled taste of homegrown produce.
But the beauty of this DIY radish-growing trick lies in its adaptability. Feel free to experiment with different radish varieties. Try French Breakfast radishes for their mild flavor and elongated shape, or opt for Watermelon radishes for a stunning visual appeal and slightly sweeter taste. You can also adjust the planting schedule to suit your local climate and desired harvest time. Consider companion planting with carrots or lettuce to maximize space and deter pests.
Don’t be afraid to get your hands dirty and embrace the learning process. Gardening is all about trial and error, and even if you encounter a few bumps along the way, the ultimate reward of fresh, homegrown radishes is well worth the effort.
We wholeheartedly encourage you to try this DIY trick for growing radishes. It’s a game-changer for family meals, offering a healthy, delicious, and sustainable addition to your table. And most importantly, we want to hear about your experience! Share your successes, your challenges, and any variations you’ve discovered in the comments below. Let’s build a community of radish enthusiasts and learn from each other. Your insights could inspire others to embark on their own radish-growing journey. So, grab your seeds, prepare your soil, and get ready to enjoy the bounty of your own radish patch! Happy gardening!
Frequently Asked Questions (FAQ)
What kind of soil is best for growing radishes?
Radishes thrive in loose, well-drained soil that is rich in organic matter. Amend heavy clay soil with compost or well-rotted manure to improve drainage and aeration. A slightly acidic to neutral pH (around 6.0 to 7.0) is ideal. Avoid soils that are compacted or rocky, as these can hinder root development and result in misshapen radishes. Before planting, work the soil to a depth of at least 6 inches to ensure the radishes have room to grow. Adding some bone meal to the soil can also help with root development.
How often should I water my radishes?
Consistent moisture is crucial for growing radishes. Water deeply and regularly, especially during dry periods. Aim to keep the soil consistently moist but not waterlogged. Overwatering can lead to root rot, while underwatering can cause the radishes to become tough and bitter. A good rule of thumb is to water when the top inch of soil feels dry to the touch. Mulching around the plants can help retain moisture and suppress weeds. Consider using a soaker hose or drip irrigation to deliver water directly to the roots.
How much sunlight do radishes need?
Radishes prefer full sun, which means at least 6 hours of direct sunlight per day. However, they can also tolerate partial shade, especially in hotter climates. If you’re growing radishes in a location with intense afternoon sun, providing some shade during the hottest part of the day can prevent them from bolting (going to seed prematurely). Insufficient sunlight can result in leggy plants with small, underdeveloped roots.
How long does it take for radishes to mature?
One of the great things about radishes is their quick maturity. Most varieties are ready to harvest in just 3 to 4 weeks after planting. Check the seed packet for the specific maturity time of the variety you’re growing. To ensure a continuous harvest, sow seeds every 1 to 2 weeks. Overcrowding can delay maturity, so be sure to thin the seedlings to the recommended spacing.
What are some common pests and diseases that affect radishes?
Radishes are generally relatively pest-resistant, but they can be susceptible to certain issues. Common pests include flea beetles, root maggots, and aphids. Flea beetles can create small holes in the leaves, while root maggots can damage the roots. Aphids can suck the sap from the plants, weakening them. To control these pests, consider using row covers, insecticidal soap, or diatomaceous earth. Diseases that can affect radishes include damping-off and white rust. Damping-off is a fungal disease that can kill seedlings, while white rust causes white pustules on the leaves. To prevent these diseases, ensure good air circulation, avoid overwatering, and use disease-resistant varieties.
Can I grow radishes in containers?
Yes, radishes are well-suited for container gardening. Choose a container that is at least 6 inches deep and has drainage holes. Use a good-quality potting mix and follow the same planting and care instructions as you would for growing radishes in the ground. Container-grown radishes may require more frequent watering, as the soil in containers tends to dry out faster. Place the container in a location that receives full sun or partial shade.
How do I know when radishes are ready to harvest?
The best way to determine if radishes are ready to harvest is to check their size. Most varieties are ready to harvest when the roots are about 1 inch in diameter. Gently pull one or two radishes to check their size and maturity. If they are the desired size and have a crisp, firm texture, you can harvest the rest. Don’t leave radishes in the ground for too long, as they can become overgrown, tough, and bitter.
Can I eat the radish greens?
Yes, radish greens are edible and nutritious. They have a peppery flavor similar to the roots. You can use radish greens in salads, soups, stir-fries, or as a garnish. Choose young, tender greens for the best flavor and texture. Wash the greens thoroughly before using them.
What are some creative ways to use radishes in family meals?
Beyond salads, radishes are incredibly versatile. Slice them thinly and add them to tacos or sandwiches for a crunchy, peppery kick. Roast them with other root vegetables for a sweet and savory side dish. Pickle them for a tangy condiment. Add them to soups or stews for a subtle spice. You can even grill them for a smoky flavor. Get creative and experiment with different ways to incorporate radishes into your family’s favorite meals.
What if my radishes are all leaves and no root?
This is a common problem, and it’s usually caused by one of a few factors: overcrowding, insufficient sunlight, or soil that is too rich in nitrogen. Thin your seedlings to the recommended spacing to give them enough room to develop. Ensure they are getting at least 6 hours of direct sunlight per day. Avoid over-fertilizing with nitrogen-rich fertilizers, as this can promote leafy growth at the expense of root development.

Leave a Comment