
Growing square watermelons might sound like something out of a science fiction movie, but trust me, it’s a surprisingly achievable and fun project for any home gardener! Have you ever dreamt of wowing your friends and family with perfectly cubed watermelons? Imagine the looks on their faces when you present them with this unique and conversation-starting fruit. This isn’t just about novelty; it’s about pushing the boundaries of what’s possible in your own backyard and adding a touch of artistic flair to your harvest.
While the exact origins are debated, the practice of shaping fruits, including growing square watermelons, has roots in Japanese agriculture. Farmers sought to create watermelons that were easier to stack, store, and transport, addressing practical concerns with an innovative solution. This ingenuity has since captured the imagination of gardeners worldwide, transforming a logistical problem into a fascinating horticultural art form.
Why should you try this DIY trick? Well, beyond the sheer coolness factor, it’s a fantastic way to learn about plant development and manipulation. Plus, square watermelons take up less space in your fridge! I know I’m always struggling to fit those round behemoths in. This guide will walk you through the entire process, from selecting the right watermelon variety to crafting the perfect mold. Get ready to impress everyone with your gardening prowess and enjoy the sweet taste of success – literally!
Growing Square Watermelons: A Fun and Quirky DIY Project
Hey there, fellow gardening enthusiasts! Ever wanted to impress your friends and neighbors with something truly unique? How about growing square watermelons? It’s not as complicated as it sounds, and with a little patience and the right tools, you can have your own geometrically perfect melons. Let’s dive into this fun DIY project!
What You’ll Need
Before we get started, let’s gather all the necessary supplies. This will make the process smoother and more enjoyable.
* Watermelon Seeds: Choose a variety known for its smaller size and relatively thin rind. Sugar Baby or Golden Midget are good options.
* Seed Starting Supplies: Seed starting trays or small pots, seed starting mix, and a spray bottle.
* A Square Mold: This is the key to the whole operation! You can buy these online, or even build your own. I’ll explain how to build one later.
* Well-Draining Soil: Watermelons need soil that drains well to prevent root rot.
* Fertilizer: A balanced fertilizer formulated for fruits and vegetables.
* Water: Consistent watering is crucial for healthy watermelon growth.
* Pruning Shears: For trimming vines and removing excess fruit.
* Soft Cloth or Padding: To protect the watermelon from bruising inside the mold.
* Patience: This project requires a bit of patience and observation.
Building Your Own Square Mold (Optional)
If you’re feeling extra crafty, you can build your own square mold. This allows you to customize the size and material to your liking.
* Materials:
* Plywood or sturdy plastic sheets (approximately 1/4 inch thick)
* Screws or bolts
* Measuring tape
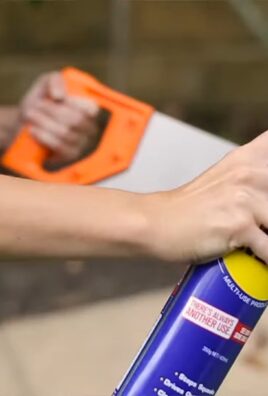
* Saw
* Drill
* Sandpaper (optional, for smoothing edges)
* Instructions:
1. Measure and Cut: Decide on the desired size of your square watermelon. A good starting point is around 8 inches per side. Cut six pieces of plywood or plastic to this size. You’ll need four pieces for the sides, one for the top, and one for the bottom.
2. Assemble the Sides: Use screws or bolts to assemble the four side pieces into a square frame. Make sure the corners are square and the frame is sturdy.
3. Attach the Bottom: Attach the bottom piece to the frame, creating a closed box.
4. Create a Hinged Top (Optional): For easier access, you can create a hinged top. Attach the top piece to one side of the frame with hinges. This will allow you to open and close the mold without completely removing the watermelon.
5. Add Drainage Holes: Drill a few small drainage holes in the bottom of the mold to prevent water from accumulating.
6. Smooth the Edges: Use sandpaper to smooth any rough edges or corners. This will prevent the watermelon from getting scratched or damaged.
7. Consider Ventilation: Drill small holes on the sides of the mold to allow for air circulation. This helps prevent mold and mildew growth.
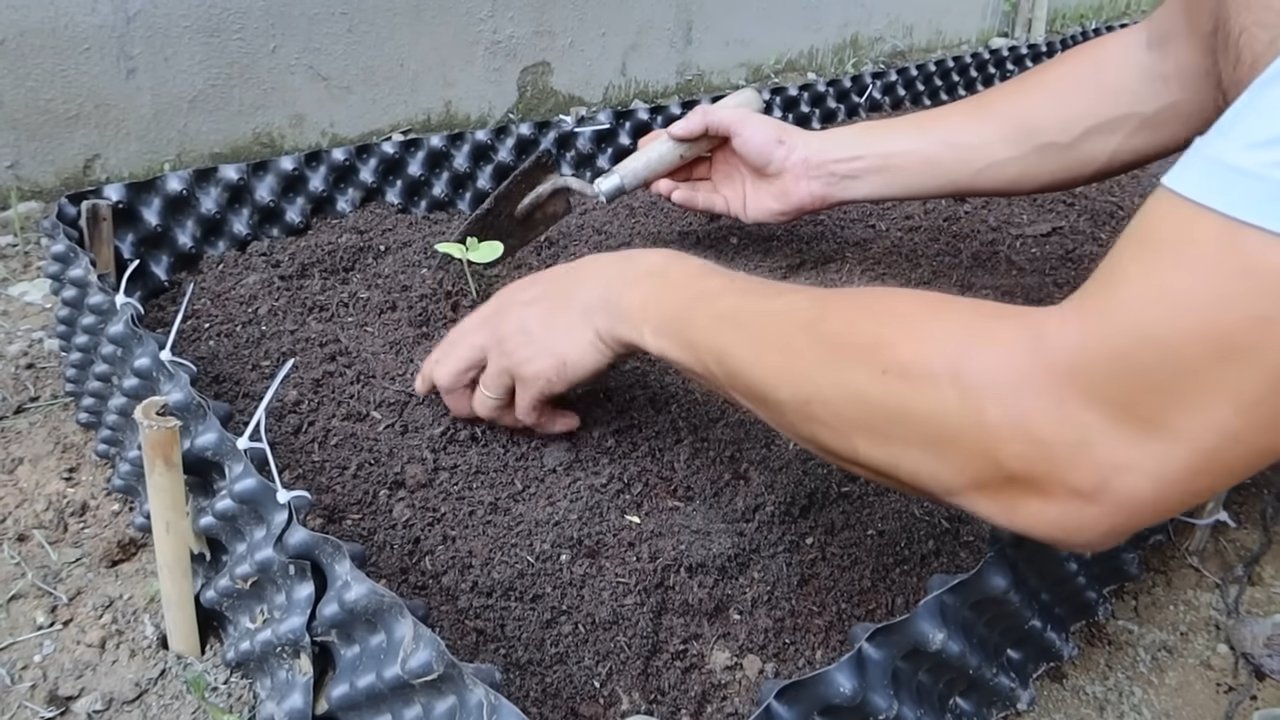
Starting Your Watermelon Seeds
I always prefer to start my watermelon seeds indoors to give them a head start.
1. Sow the Seeds: Fill your seed starting trays or small pots with seed starting mix. Plant the watermelon seeds about 1 inch deep.
2. Water Gently: Water the soil gently with a spray bottle until it’s moist but not soggy.
3. Provide Warmth: Watermelon seeds need warmth to germinate. Place the trays or pots in a warm location, such as on top of a refrigerator or on a heat mat. The ideal temperature is around 80-85°F (27-29°C).
4. Keep Moist: Keep the soil consistently moist, but not waterlogged. Check the soil daily and water as needed.
5. Germination: Watermelon seeds typically germinate within 7-10 days.
6. Provide Light: Once the seedlings emerge, provide them with plenty of light. Place them under grow lights or in a sunny window.
7. Harden Off: Before transplanting the seedlings outdoors, you’ll need to harden them off. This means gradually exposing them to outdoor conditions over a period of 7-10 days. Start by placing them outside for a few hours each day, gradually increasing the amount of time they spend outdoors.
Transplanting Your Watermelon Seedlings
Once the seedlings have been hardened off and the weather is warm enough (soil temperature above 60°F or 15°C), it’s time to transplant them into your garden.
1. Choose a Sunny Location: Watermelons need at least 6-8 hours of sunlight per day. Choose a location in your garden that receives plenty of sun.
2. Prepare the Soil: Watermelons need well-draining soil that is rich in organic matter. Amend the soil with compost or well-rotted manure.
3. Dig Holes: Dig holes that are slightly larger than the root balls of the seedlings. Space the holes about 2-3 feet apart.
4. Transplant Carefully: Gently remove the seedlings from their trays or pots and place them in the holes. Be careful not to damage the roots.
5. Backfill with Soil: Backfill the holes with soil and gently firm the soil around the seedlings.
6. Water Thoroughly: Water the seedlings thoroughly after transplanting.
7. Mulch: Apply a layer of mulch around the seedlings to help retain moisture and suppress weeds.
Training the Vines and Selecting Fruit
Watermelon vines can spread quite a bit, so it’s important to train them to grow in the desired direction.
1. Train the Vines: As the vines grow, gently guide them in the direction you want them to go. You can use stakes or trellises to support the vines.
2. Prune Excess Vines: Prune any excess vines that are growing in unwanted directions. This will help to concentrate the plant’s energy on producing fruit.
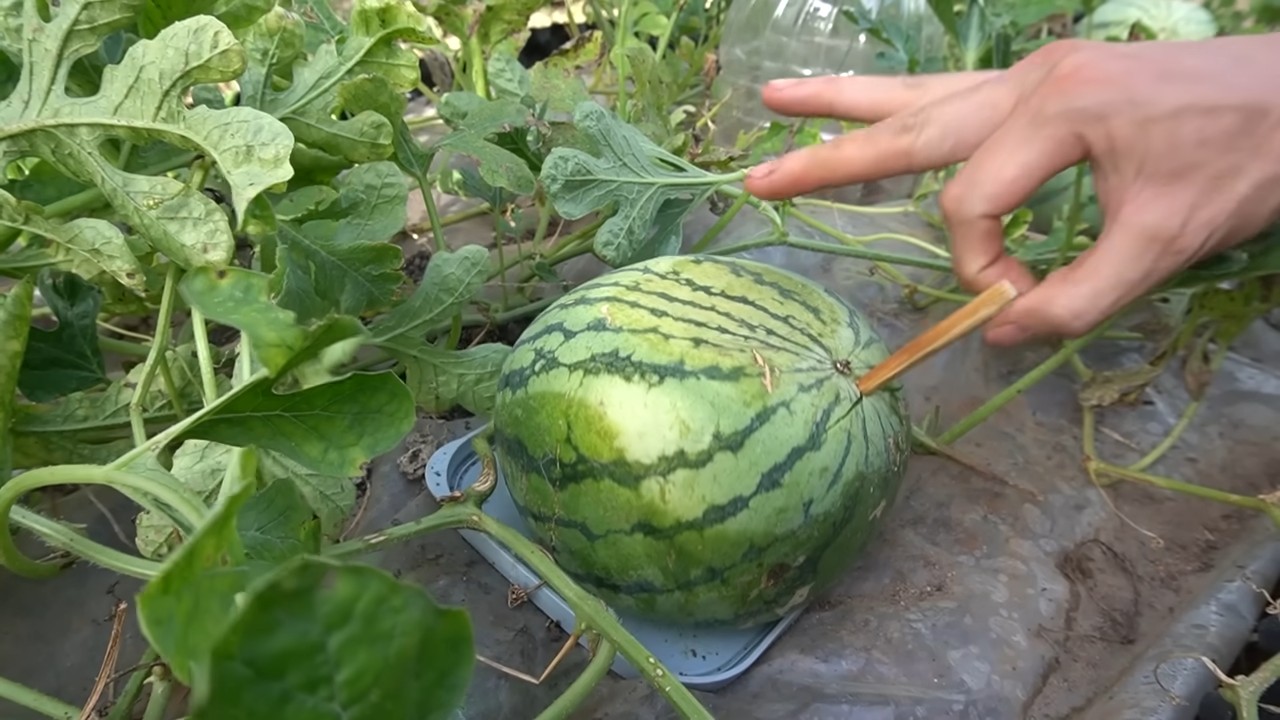
3. Select a Fruit: Once the watermelons start to develop, select one fruit per vine to grow into a square shape. Choose a fruit that is about the size of a softball.
4. Remove Other Fruit: Remove any other fruit that is growing on the vine. This will ensure that the selected fruit receives all of the plant’s energy.
Placing the Watermelon in the Mold
This is the most crucial step! Timing is everything.
1. Prepare the Mold: Clean the square mold thoroughly and line the inside with a soft cloth or padding. This will protect the watermelon from bruising.
2. Position the Mold: Carefully position the mold around the selected watermelon. Make sure the watermelon is centered in the mold.
3. Secure the Mold: Secure the mold tightly around the watermelon. If you’re using a homemade mold, use screws or bolts to hold the sides together.
4. Monitor Growth: Monitor the watermelon’s growth closely. As the watermelon grows, it will fill the mold and take on the square shape.
5. Adjust as Needed: You may need to adjust the mold as the watermelon grows. If the watermelon is growing too quickly, you may need to loosen the mold slightly. If the watermelon is growing too slowly, you may need to tighten the mold.
Caring for Your Square Watermelon
Consistent care is key to a successful square watermelon harvest.
1. Water Regularly: Watermelons need consistent watering, especially during hot weather. Water deeply and regularly, making sure the soil stays moist but not waterlogged.
2. Fertilize: Fertilize the watermelon plants every 2-3 weeks with a balanced fertilizer formulated for fruits and vegetables.
3. Control Pests and Diseases: Monitor the watermelon plants for pests and diseases. Take action to control any problems as soon as they arise.
4. Provide Support: As the watermelon grows larger, it may need additional support. You can use slings or netting to support the fruit and prevent it from breaking off the vine.
Harvesting Your Square Watermelon
Knowing when to harvest is important for optimal flavor.
1. Check for Ripeness: Watermelons are typically ready to harvest about 80-90 days after planting. Look for these signs of ripeness:
* The tendril closest to the watermelon has turned brown and dry.
* The bottom of the watermelon (the part that rests on the ground) has turned from white to yellow.
* The watermelon sounds hollow when you thump it.
2. Remove from Mold: Carefully remove the watermelon from the mold.
3. Harvest Carefully: Use a sharp knife to cut the watermelon from the vine, leaving a few
Conclusion
So, there you have it! Growing square watermelons isn’t just a quirky gardening experiment; it’s a rewarding endeavor that combines creativity, patience, and a touch of agricultural ingenuity. This DIY project offers a unique way to impress your friends and family, add a conversation starter to your garden, and even optimize space if you’re working with limited areas. The novelty of a perfectly cubed watermelon is undeniable, making it a fantastic gift or a standout addition to any summer gathering.
But beyond the aesthetic appeal, growing square watermelons encourages a deeper connection with the natural world. It allows you to witness the fascinating process of fruit development firsthand and appreciate the delicate balance required for successful cultivation. It’s a hands-on learning experience that can be enjoyed by gardeners of all skill levels, from seasoned veterans to curious beginners.
Don’t be afraid to experiment with different varieties of watermelons. While the smaller, personal-sized varieties are generally easier to manage within the confines of a mold, you can certainly try your hand at larger types. Just be sure to select a mold that’s appropriately sized and sturdy enough to support the growing fruit. Consider using transparent molds to monitor the watermelon’s progress without disturbing it. You can also explore different mold materials, such as acrylic or even repurposed containers, as long as they are food-safe and allow for adequate ventilation.
Another variation to consider is the timing of mold placement. Some gardeners prefer to place the mold when the watermelon is very small, while others wait until it’s slightly larger. Experiment to see what works best for your specific growing conditions and watermelon variety. Remember to regularly inspect the watermelon for any signs of stress or disease and adjust your care accordingly.
We strongly encourage you to embark on this exciting gardening adventure and try growing your own square watermelons. It’s a fun, educational, and ultimately delicious experience that you won’t soon forget. And most importantly, don’t forget to document your progress and share your results with the gardening community! Post pictures of your square watermelons on social media, share your tips and tricks in online forums, and inspire others to give it a try. Let’s spread the joy of square watermelons far and wide!
This method of growing square watermelons is a must-try because it offers a unique blend of practicality and novelty. It’s a conversation starter, a space saver, and a testament to your gardening skills. So, grab your seeds, build your molds, and get ready to harvest some perfectly cubed delights! We are confident that you will be amazed by the results.
Frequently Asked Questions (FAQ)
What type of watermelon is best for growing in a square mold?
Smaller, personal-sized watermelon varieties like ‘Sugar Baby’ or ‘Golden Midget’ are generally recommended for growing in square molds. These varieties tend to be more manageable within the confines of the mold and reach maturity faster. However, you can experiment with larger varieties, but be sure to choose a mold that is appropriately sized and strong enough to support the weight of the growing fruit. Consider the growth habit of the watermelon variety as well; bush types may be easier to manage than sprawling vine types.
When is the best time to place the mold around the watermelon?
The ideal time to place the mold around the watermelon is when the fruit is approximately 4-6 inches in diameter. At this stage, the watermelon is still actively growing but not so large that it will be overly stressed by the confinement of the mold. Avoid placing the mold too early, as this can restrict the watermelon’s initial growth and development. Similarly, waiting too long can make it difficult to fit the watermelon into the mold without causing damage. Monitor your watermelons closely and choose a time when they are actively growing but still relatively small.
What type of mold should I use?
The mold should be made of a sturdy, food-safe material that can withstand the weight of the growing watermelon. Clear acrylic or polycarbonate molds are popular choices because they allow you to monitor the watermelon’s progress without disturbing it. You can also use repurposed containers, such as plastic storage bins, as long as they are clean, food-safe, and have adequate ventilation holes. Ensure the mold is smooth and free of sharp edges that could damage the watermelon’s skin. The size of the mold should be appropriate for the watermelon variety you are growing.
How do I prevent the watermelon from rotting inside the mold?
Proper ventilation is crucial to prevent the watermelon from rotting inside the mold. Drill several small holes in the mold to allow for air circulation and prevent moisture buildup. Avoid overwatering the watermelon, as this can create a humid environment inside the mold that promotes fungal growth. Regularly inspect the watermelon for any signs of rot or disease, such as soft spots or discoloration. If you notice any problems, remove the mold immediately and treat the watermelon with an appropriate fungicide.
How long does it take for a watermelon to grow into a square shape?
The time it takes for a watermelon to grow into a square shape depends on several factors, including the watermelon variety, growing conditions, and the size of the mold. Generally, it takes about 2-3 weeks for the watermelon to fill out the mold and take on its square shape. Monitor the watermelon’s progress closely and adjust your care accordingly. Once the watermelon has reached the desired size and shape, remove the mold carefully.
Can I reuse the mold for multiple watermelons?
Yes, you can reuse the mold for multiple watermelons, but be sure to clean and sanitize it thoroughly between uses to prevent the spread of disease. Wash the mold with soap and water, then disinfect it with a solution of bleach and water. Rinse the mold thoroughly and allow it to dry completely before using it again.
Will the square shape affect the taste of the watermelon?
The square shape should not significantly affect the taste of the watermelon. The flavor of the watermelon is primarily determined by the variety, growing conditions, and ripeness. However, some gardeners believe that the confinement of the mold can slightly alter the texture of the watermelon, making it denser or more crisp. Ultimately, the taste of your square watermelon will depend on the quality of your gardening practices.
What if the watermelon gets stuck in the mold?
If the watermelon gets stuck in the mold, do not force it out. Gently try to loosen the watermelon by wiggling the mold or applying a small amount of lubricant, such as vegetable oil, to the inside of the mold. If the watermelon is still stuck, you may need to carefully cut the mold open to remove it. Be extremely careful not to damage the watermelon in the process.
Is growing square watermelons worth the effort?
Absolutely! While growing square watermelons requires some extra effort and attention, the novelty and satisfaction of harvesting a perfectly cubed fruit make it a worthwhile endeavor. It’s a fun and educational project that can be enjoyed by gardeners of all ages and skill levels. Plus, square watermelons make unique gifts and conversation starters. So, if you’re looking for a fun and rewarding gardening challenge, give it a try!

Leave a Comment