
Effortless self-growing cowpeas – imagine a garden bursting with these delicious, protein-packed legumes, practically growing themselves! Forget back-breaking labor and complicated gardening techniques. This isn’t just a dream; it’s an achievable reality with a few clever DIY tricks. For generations, cowpeas have been a staple crop in many cultures, particularly in Africa and Asia, prized for their resilience and nutritional value. They’re more than just food; they’re a symbol of self-sufficiency and resourcefulness.
But let’s be honest, not everyone has the time or expertise for traditional gardening. That’s where these DIY hacks come in. We’re going to unlock the secrets to cultivating effortless self-growing cowpeas, even if you have a tiny balcony or a less-than-green thumb. Think of it as a shortcut to fresh, healthy food and a beautiful, thriving garden, all without the usual hassle. I’m excited to share these simple, effective methods that will transform your gardening experience and bring the joy of homegrown cowpeas right to your table. Get ready to ditch the gardening gloves (well, maybe not entirely!) and embrace a simpler, more rewarding way to grow your own food.
Müheloses Anbauen von Augenbohnen: Dein DIY-Leitfaden für eine reiche Ernte
Hey Gärtnerfreunde! Habt ihr Lust auf eine Pflanze, die nicht nur superlecker ist, sondern auch noch unglaublich pflegeleicht? Dann sind Augenbohnen (Cowpeas) genau das Richtige für euch! Ich zeige euch, wie ihr diese Hülsenfrüchte ganz einfach selbst anbauen könnt – egal ob im Garten, auf dem Balkon oder sogar in Töpfen. Los geht’s!
Was sind Augenbohnen und warum solltest du sie anbauen?
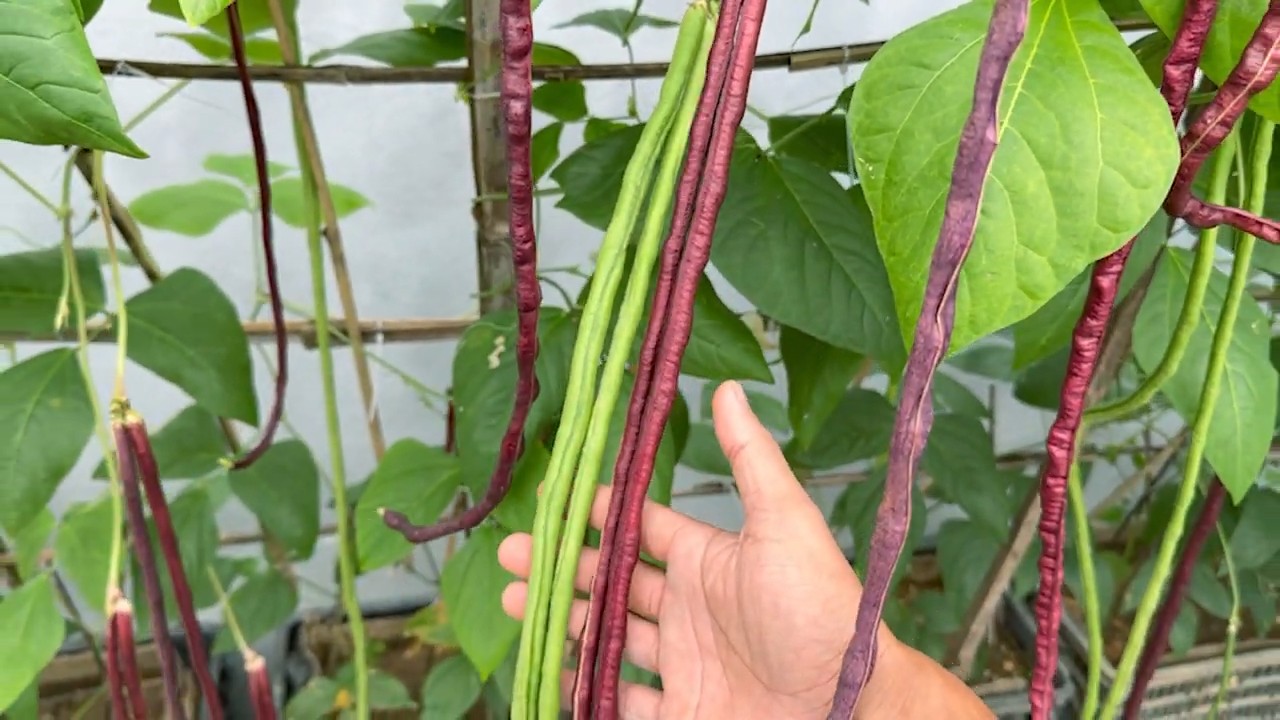
Augenbohnen, auch Kuhbohnen oder Black-Eyed Peas genannt, sind nicht nur schmackhaft, sondern auch unglaublich nützlich für deinen Garten. Sie sind Leguminosen, was bedeutet, dass sie Stickstoff aus der Luft im Boden fixieren können. Das ist wie ein natürlicher Dünger für deine anderen Pflanzen! Außerdem sind sie sehr robust und kommen gut mit Trockenheit und Hitze zurecht. Perfekt also, wenn du nicht jeden Tag gießen möchtest.
Vorteile des Anbaus von Augenbohnen:
* Verbessern die Bodenqualität: Fixieren Stickstoff und machen den Boden fruchtbarer.
* Trockenheitstolerant: Benötigen wenig Wasser.
* Hitzeresistent: Wachsen auch bei hohen Temperaturen gut.
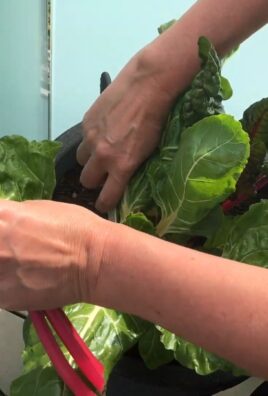
* Vielseitig verwendbar: Die jungen Schoten, die Blätter und die reifen Bohnen sind essbar.
* Schädlingsresistent: Weniger anfällig für Schädlinge als andere Gemüsesorten.
* Schnellwachsend: Du kannst schon nach kurzer Zeit ernten.
Die Vorbereitung: Was du brauchst
Bevor wir loslegen, brauchen wir natürlich ein paar Dinge. Keine Sorge, die meisten davon hast du wahrscheinlich schon zu Hause!
Materialien:
* Augenbohnensamen (am besten Bio-Saatgut)
* Gartenerde oder Anzuchterde
* Kompost (optional, aber empfehlenswert)
* Pflanzgefäße (wenn du im Topf anbauen möchtest)
* Gartengeräte: Spaten, Harke, Gießkanne
* Rankhilfe (optional, aber hilfreich für rankende Sorten)
Standort:
Augenbohnen lieben die Sonne! Wähle einen Standort, der mindestens 6 Stunden Sonne pro Tag bekommt. Der Boden sollte gut durchlässig sein. Wenn du schweren Lehmboden hast, kannst du ihn mit Kompost oder Sand verbessern.
Aussaat: So bringst du die Samen in die Erde
Jetzt kommt der spannende Teil: die Aussaat! Du kannst die Samen entweder direkt ins Freiland säen oder sie vorziehen. Ich bevorzuge die Direktsaat, weil es einfacher ist und die Pflanzen robuster werden.
Direktsaat im Freiland:
1. Boden vorbereiten: Lockere den Boden mit einem Spaten auf und entferne Unkraut. Harke den Boden glatt.
2. Aussaatzeitpunkt: Warte, bis keine Frostgefahr mehr besteht und der Boden sich erwärmt hat (mindestens 15°C). Das ist meistens ab Mitte Mai der Fall.
3. Aussaat: Säe die Samen in Reihen oder Horsten aus. Die Reihen sollten etwa 60-70 cm auseinanderliegen, die Samen in der Reihe etwa 10-15 cm. Lege die Samen etwa 2-3 cm tief in die Erde.
4. Gießen: Gieße die Erde nach der Aussaat vorsichtig an.
5. Markieren: Beschrifte die Reihen, damit du weißt, wo du gesät hast.
Vorziehen im Haus:
1. Anzuchtgefäße vorbereiten: Fülle kleine Töpfe oder Anzuchtschalen mit Anzuchterde.
2. Aussaat: Lege 1-2 Samen pro Topf etwa 2 cm tief in die Erde.
3. Gießen: Gieße die Erde vorsichtig an.
4. Standort: Stelle die Töpfe an einen hellen, warmen Ort (z.B. auf eine Fensterbank).
5. Pflege: Halte die Erde feucht, aber nicht nass.
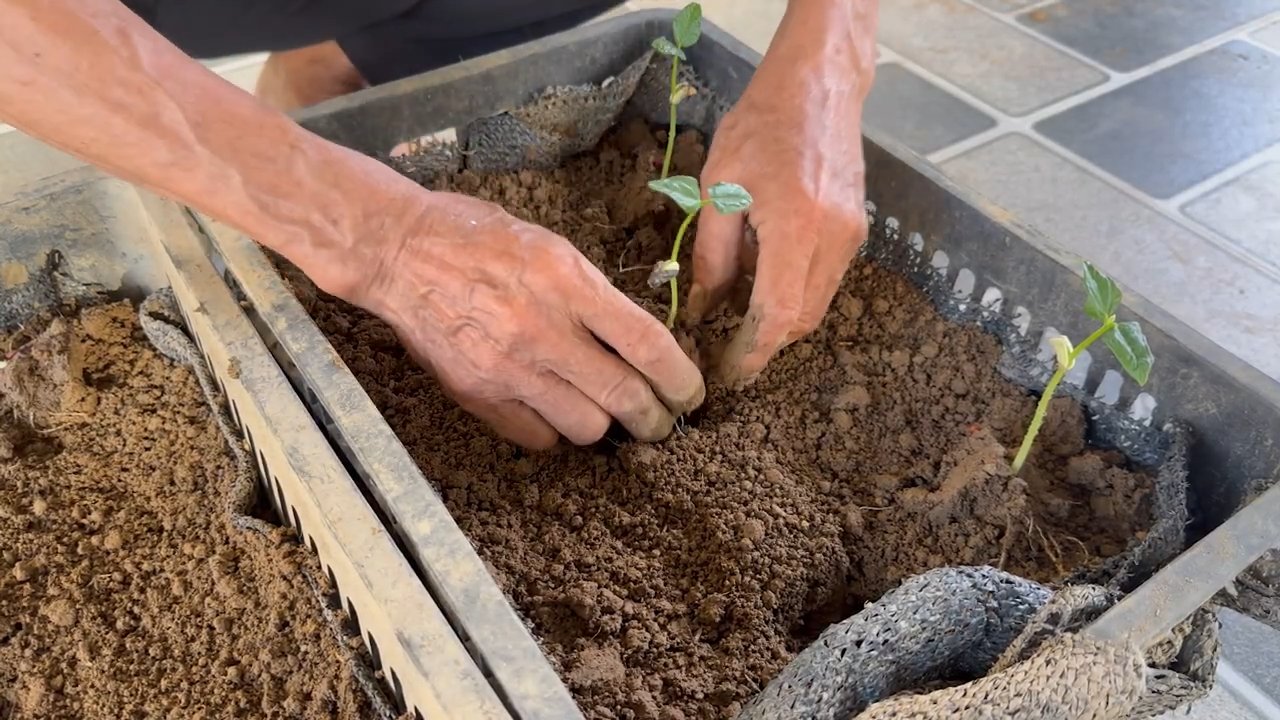
6. Auspflanzen: Sobald die Pflanzen groß genug sind (etwa 10-15 cm hoch) und keine Frostgefahr mehr besteht, kannst du sie ins Freiland auspflanzen. Achte darauf, die Pflanzen vorsichtig aus den Töpfen zu nehmen und die Wurzeln nicht zu beschädigen.
Pflege: So bleiben deine Augenbohnen gesund und glücklich
Augenbohnen sind wirklich pflegeleicht, aber ein bisschen Aufmerksamkeit brauchen sie trotzdem.
Gießen:
Gieße die Pflanzen regelmäßig, besonders während der Blütezeit und wenn sich die Schoten bilden. Achte darauf, dass der Boden nicht austrocknet, aber vermeide Staunässe.
Düngen:
Augenbohnen brauchen in der Regel keine zusätzliche Düngung, da sie selbst Stickstoff im Boden fixieren. Wenn du aber sehr nährstoffarmen Boden hast, kannst du etwas Kompost oder organischen Dünger geben.
Unkraut entfernen:
Halte den Bereich um die Pflanzen herum unkrautfrei. Unkraut konkurriert mit den Augenbohnen um Wasser und Nährstoffe.
Rankhilfe:
Einige Augenbohnensorten sind rankend und brauchen eine Rankhilfe. Du kannst dafür einen Zaun, ein Spalier oder einfach ein paar Stöcke verwenden.
Schädlinge und Krankheiten:
Augenbohnen sind relativ resistent gegen Schädlinge und Krankheiten. Gelegentlich können Blattläuse auftreten. Diese kannst du einfach mit einem Wasserstrahl abspritzen oder mit einem biologischen Insektizid bekämpfen.
Ernte: Der Lohn deiner Mühe
Nach etwa 60-90 Tagen kannst du die ersten Augenbohnen ernten!
Erntezeitpunkt:
* Junge Schoten: Ernte die jungen Schoten, wenn sie noch zart und grün sind. Du kannst sie wie grüne Bohnen zubereiten.
* Reife Bohnen: Lasse die Schoten an der Pflanze trocknen, bis sie braun und trocken sind. Dann kannst du die reifen Bohnen ernten.
Erntemethode:
* Junge Schoten: Schneide die Schoten mit einer Schere oder einem Messer ab.
* Reife Bohnen: Ziehe die Schoten von der Pflanze ab und öffne sie, um die Bohnen herauszunehmen.
Lagerung:
* Junge Schoten: Lagere die jungen Schoten im Kühlschrank. Sie halten sich dort einige Tage.
* Reife Bohnen: Trockne die reifen Bohnen vollständig und lagere sie in einem luftdichten Behälter an einem kühlen, trockenen Ort. Sie halten sich so mehrere Monate.
Augenbohnen in Töpfen anbauen: So geht’s auf dem Balkon
Kein Garten? Kein Problem! Augenbohnen lassen sich auch wunderbar in Töpfen auf dem Balkon oder der Terrasse anbauen.
Topfgröße:
Wähle Töpfe mit einem Durchmesser von mindestens 30 cm.
Erde:
Verwende hochwertige Blumenerde oder eine Mischung aus Gartenerde und Kompost.
Aussaat:
Säe 3-4 Samen pro Topf etwa 2 cm tief in die Erde.
Pflege:
Gieße die Pflanzen regelmäßig und dünge sie bei Bedarf mit einem organischen Dünger.
Rankhilfe:
Auch im Topf brauchen rankende Sorten eine Rankhilfe.
Rezepte: Was du mit deinen Augenbohnen alles zaubern kannst
Augenbohnen sind unglaublich vielseitig in der Küche. Du kannst sie kochen, braten, grillen oder zu Suppen und Eintöpfen verarbeiten. Hier sind ein paar Ideen:
* Klassisch: Augenbohnen mit Speck und Zwiebeln
* Vegetarisch: Augenbohnen-Salat mit Tomaten, Gurken und Feta
* Vegan: Augenbohnen-Curry mit Kokosmilch und Gemüse
* Snack: Geröstete Augenbohnen mit Gewürzen
Ich hoffe, dieser Leitfaden hat dir geholfen, deine eigenen Augenbohnen anzubauen. Viel Spaß beim Gärtnern und guten Appetit!
Conclusion
So, there you have it! Growing your own cowpeas doesn’t have to be a daunting task. This simple, DIY approach to effortless self growing cowpeas unlocks a world of fresh, flavorful possibilities right in your own backyard, balcony, or even a sunny windowsill. Forget complicated gardening techniques and expensive equipment. This method is all about simplicity, sustainability, and enjoying the fruits (or rather, the legumes!) of your labor with minimal effort.
Why is this a must-try? Because it empowers you to take control of your food source, ensuring you have access to fresh, healthy cowpeas whenever you desire. Imagine the satisfaction of harvesting your own crop, knowing exactly where it came from and how it was grown. Plus, it’s a fantastic way to connect with nature, learn about the growing process, and even get the kids involved in a fun and educational activity.
But the beauty of this DIY trick lies not only in its simplicity but also in its adaptability. Feel free to experiment with different varieties of cowpeas to find your favorite flavor profile. Try using different types of containers, from repurposed buckets to hanging baskets, to suit your space and aesthetic preferences. You can even incorporate companion planting techniques, such as planting basil or marigolds alongside your cowpeas, to deter pests and attract beneficial insects.
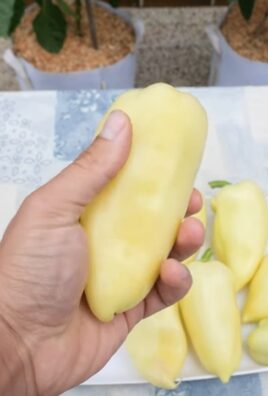
Consider adding a trellis or support structure as your cowpeas grow taller, encouraging them to climb and maximize your yield. For a spicier kick, try adding a few chili peppers to your container garden – they’ll thrive in similar conditions and add a delightful contrast to your cowpea dishes. And don’t be afraid to get creative with your soil mix! Adding compost or other organic matter will provide your cowpeas with the nutrients they need to flourish.
We truly believe that this method of effortless self growing cowpeas is a game-changer for anyone who wants to enjoy fresh, homegrown produce without the hassle. It’s a sustainable, cost-effective, and incredibly rewarding way to add a touch of green to your life and a burst of flavor to your meals.
So, what are you waiting for? Gather your supplies, follow the simple steps outlined, and get ready to embark on your own cowpea-growing adventure. We’re confident that you’ll be amazed by the results.
And most importantly, we want to hear about your experience! Share your photos, tips, and stories with us in the comments below. Let us know what varieties you’re growing, what challenges you’ve faced, and what delicious dishes you’ve created with your homegrown cowpeas. Together, we can build a community of passionate gardeners and inspire others to discover the joy of effortless self growing cowpeas. Happy gardening!
Frequently Asked Questions (FAQ)
What exactly are cowpeas, and why should I grow them?
Cowpeas, also known as black-eyed peas, are a type of legume that’s packed with nutrients and flavor. They’re a great source of protein, fiber, iron, and folate, making them a healthy and delicious addition to any diet. Growing your own cowpeas ensures you have access to fresh, organic produce, free from harmful pesticides and chemicals. Plus, they’re relatively easy to grow, even for beginner gardeners, and this effortless self growing method makes it even simpler.
What kind of soil is best for growing cowpeas?
Cowpeas thrive in well-draining soil that’s rich in organic matter. A mixture of potting soil, compost, and perlite is ideal. Avoid heavy clay soils, as they can retain too much moisture and lead to root rot. Before planting, consider amending your soil with compost or aged manure to improve its fertility and drainage. A slightly acidic to neutral pH (around 6.0 to 7.0) is optimal for cowpea growth.
How much sunlight do cowpeas need?
Cowpeas need at least 6-8 hours of direct sunlight per day to thrive. Choose a location that receives plenty of sunlight throughout the day. If you’re growing them indoors, place them near a sunny window or use grow lights to supplement natural light. Insufficient sunlight can lead to stunted growth and reduced yields.
How often should I water my cowpeas?
Water your cowpeas regularly, especially during hot and dry weather. Keep the soil consistently moist, but avoid overwatering, which can lead to root rot. Water deeply whenever the top inch of soil feels dry to the touch. During cooler periods, you may need to water less frequently. Mulching around the plants can help retain moisture and reduce the need for frequent watering.
How long does it take for cowpeas to mature?
Cowpeas typically take 60-90 days to mature, depending on the variety and growing conditions. You can start harvesting the pods when they are plump and filled with beans. The pods will turn from green to yellow or brown as they mature. For dried cowpeas, allow the pods to dry completely on the plant before harvesting.
What are some common pests and diseases that affect cowpeas?
Common pests that can affect cowpeas include aphids, bean beetles, and spider mites. Diseases include fungal infections like powdery mildew and root rot. To prevent pests and diseases, practice good sanitation, such as removing weeds and debris from around the plants. You can also use organic pest control methods, such as insecticidal soap or neem oil, to control pests. Ensure proper drainage to prevent root rot.
Can I grow cowpeas in containers?
Yes, cowpeas can be successfully grown in containers, making this effortless self growing method even more accessible. Choose a container that is at least 12 inches deep and wide to accommodate the root system. Make sure the container has drainage holes to prevent waterlogging. Use a well-draining potting mix and provide adequate sunlight and water.
What are some different varieties of cowpeas I can grow?
There are many different varieties of cowpeas to choose from, each with its own unique flavor and characteristics. Some popular varieties include Black-Eyed Peas, Cream Peas, Crowder Peas, and Pink-Eyed Purple Hull Peas. Experiment with different varieties to find your favorites. Consider factors such as maturity time, pod size, and disease resistance when selecting a variety.
How do I harvest cowpeas?
Harvest cowpeas when the pods are plump and filled with beans. For fresh cowpeas, harvest the pods when they are still green and tender. For dried cowpeas, allow the pods to dry completely on the plant before harvesting. To harvest, simply snap the pods off the plant.
How do I store cowpeas?
Fresh cowpeas can be stored in the refrigerator for up to a week. Dried cowpeas can be stored in an airtight container in a cool, dry place for up to a year. You can also freeze fresh cowpeas for longer storage. Blanch them in boiling water for a few minutes, then cool them in ice water before freezing.
Can I save seeds from my cowpeas to plant next year?
Yes, you can save seeds from your cowpeas to plant next year. Allow the pods to dry completely on the plant before harvesting. Remove the seeds from the pods and store them in an airtight container in a cool, dry place. Be sure to label the seeds with the variety and date.
What are some ways to use cowpeas in cooking?
Cowpeas are a versatile ingredient that can be used in a variety of dishes. They can be boiled, steamed, or fried. They can be added to soups, stews, salads, and side dishes. They are also a popular ingredient in Southern cuisine. Some popular cowpea dishes include Hoppin’ John, black-eyed pea salad, and cowpea fritters.
Is there anything else I should know about growing cowpeas?
Cowpeas are relatively easy to grow, but they do require some basic care. Be sure to provide them with plenty of sunlight, water, and nutrients. Protect them from pests and diseases. And most importantly, be patient and enjoy the process of growing your own food. With a little effort, you can enjoy a bountiful harvest of fresh, delicious cowpeas. Remember, this effortless self growing method is designed to simplify the process and make it accessible to everyone.
Leave a Comment