
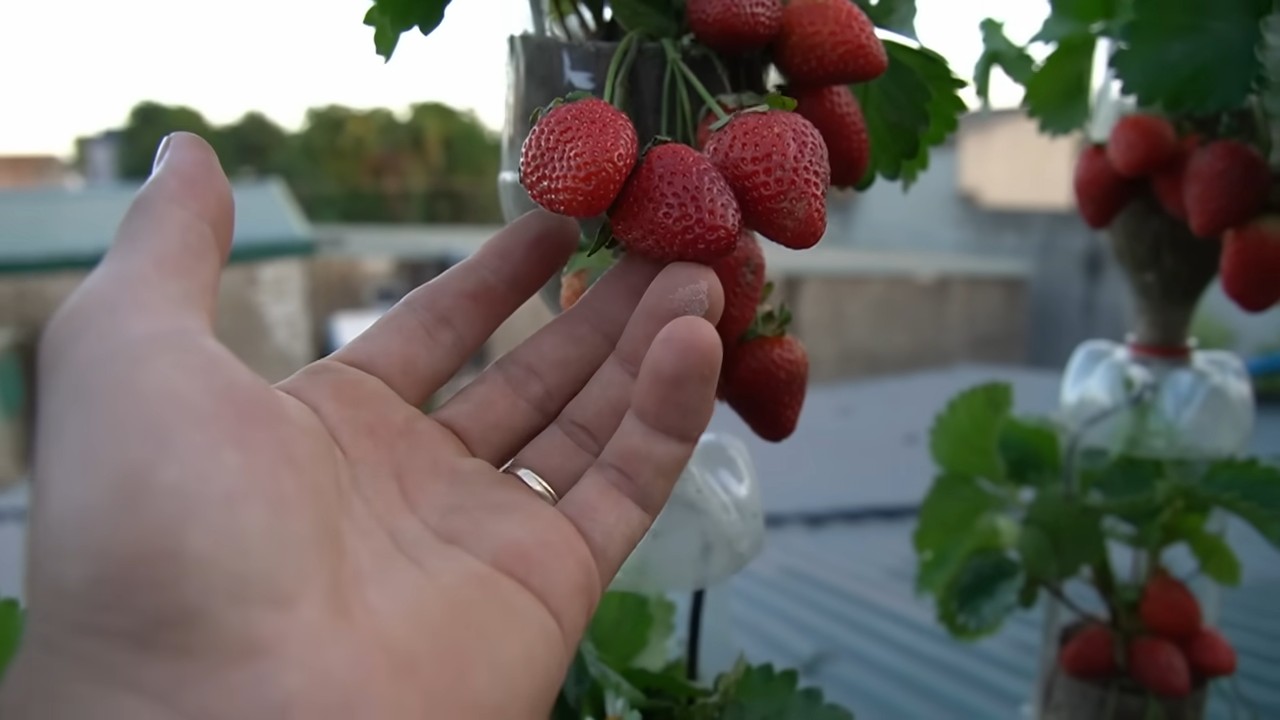
Strawberry bottle garden: Ever dreamed of plucking juicy, sun-ripened strawberries right from your balcony or kitchen windowsill? I know I have! Forget sprawling garden beds and back-breaking weeding – I’m about to share a super fun and incredibly easy DIY project that will bring the taste of summer right to your doorstep.
Vertical gardening, the concept behind our strawberry bottle garden, has roots stretching back centuries. Think of the Hanging Gardens of Babylon, one of the Seven Wonders of the Ancient World! While we might not be building anything quite so grand, we’re tapping into that same ingenious spirit of maximizing space and bringing nature into our lives.
Why do you need this DIY trick? Well, for starters, it’s perfect for anyone with limited space – apartments, small patios, or even just a sunny corner indoors. Plus, it’s a fantastic way to recycle plastic bottles, turning waste into something beautiful and productive. But the best part? Fresh, delicious strawberries are just a snip away! Imagine adding them to your morning yogurt, topping a summer salad, or simply enjoying them straight from the “vine.” This strawberry bottle garden is not only a fun project, but a sustainable way to enjoy fresh produce, even if you don’t have a traditional garden.
Erdbeerflaschengarten selber machen: Eine detaillierte Anleitung
Hallo liebe Gartenfreunde! Habt ihr Lust auf frische Erdbeeren, aber wenig Platz? Dann ist ein Erdbeerflaschengarten genau das Richtige für euch! Ich zeige euch, wie ihr mit einfachen Mitteln und ein bisschen Geduld euren eigenen kleinen Erdbeerhimmel erschaffen könnt. Es ist ein tolles Projekt für Balkon, Terrasse oder sogar die Fensterbank. Los geht’s!
Was ihr für euren Erdbeerflaschengarten braucht:
* Eine große Plastikflasche: Am besten eine 5-Liter-Flasche oder größer. Je größer die Flasche, desto mehr Erdbeerpflanzen passen hinein. Achtet darauf, dass die Flasche sauber und transparent ist.
* Erdbeerpflanzen: Junge Erdbeerpflanzen sind ideal. Achtet beim Kauf auf gesunde Blätter und kräftige Wurzeln. Hängeerdbeeren eignen sich besonders gut, da sie schön über den Rand der Flasche hängen.
* Blumenerde: Eine gute Blumenerde ist wichtig für das Wachstum der Erdbeeren. Ihr könnt auch spezielle Erdbeermerde verwenden.
* Kies oder Blähton: Für eine gute Drainage am Boden der Flasche.
* Ein scharfes Messer oder eine Schere: Zum Schneiden der Löcher in die Flasche.
* Ein Pflanzspaten oder Löffel: Zum Einpflanzen der Erdbeeren.
* Gießkanne oder Sprühflasche: Zum Bewässern der Pflanzen.
* Handschuhe: Um eure Hände sauber zu halten.
* Optional: Dekorative Steine oder Mulch, um die Erde abzudecken.
Schritt-für-Schritt-Anleitung:
1. Die Flasche vorbereiten: Zuerst müsst ihr die Plastikflasche gründlich reinigen. Entfernt alle Etiketten und spült sie mit Wasser und Spülmittel aus. Lasst sie anschließend gut trocknen.
2. Löcher schneiden: Jetzt kommt der spannende Teil! Mit dem scharfen Messer oder der Schere schneidet ihr Löcher in die Flasche. Diese Löcher dienen als Pflanzöffnungen für die Erdbeeren.
* Die Anzahl der Löcher: Die Anzahl der Löcher hängt von der Größe der Flasche und der Anzahl der Erdbeerpflanzen ab, die ihr einsetzen möchtet. Ich empfehle, mit 4-6 Löchern zu beginnen und bei Bedarf weitere hinzuzufügen.
* Die Größe der Löcher: Die Löcher sollten groß genug sein, damit die Erdbeerpflanzen hineinpassen, aber nicht zu groß, damit die Erde nicht herausfällt. Ein Durchmesser von etwa 5-7 cm ist ideal.
* Die Anordnung der Löcher: Verteilt die Löcher gleichmäßig um die Flasche herum. Achtet darauf, dass zwischen den Löchern genügend Platz ist, damit die Erdbeerpflanzen ausreichend Platz zum Wachsen haben. Ihr könnt die Löcher versetzt anordnen, um mehr Pflanzen unterzubringen.
* Sicherheitshinweis: Seid beim Schneiden der Löcher vorsichtig, um euch nicht zu verletzen. Tragt am besten Handschuhe und arbeitet auf einer stabilen Unterlage.
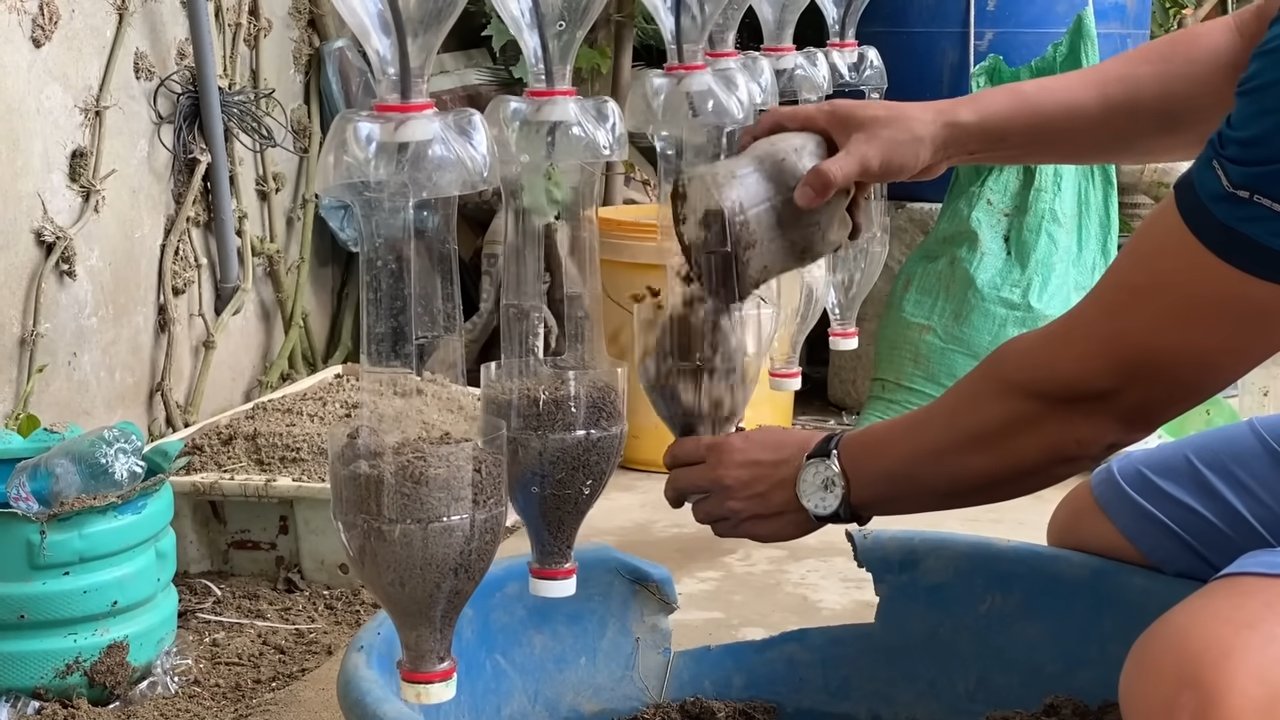
3. Drainage anlegen: Am Boden der Flasche solltet ihr eine Drainageschicht anlegen, um Staunässe zu vermeiden. Füllt dazu eine Schicht Kies oder Blähton (ca. 5-10 cm hoch) in die Flasche.
4. Erde einfüllen: Füllt nun die Blumenerde in die Flasche. Lasst dabei oben einen Rand von etwa 5 cm frei. Die Erde sollte locker und luftig sein.
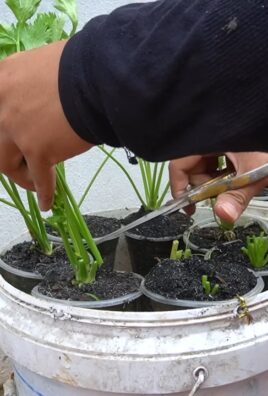
5. Erdbeeren einpflanzen: Jetzt kommen die Erdbeerpflanzen zum Einsatz! Nehmt die Pflanzen vorsichtig aus ihren Töpfen und lockert die Wurzeln etwas auf. Führt die Wurzeln durch die Löcher in der Flasche und platziert die Pflanzen so, dass die Blätter nach außen zeigen. Füllt die Löcher mit Erde auf und drückt sie leicht an.
6. Obere Bepflanzung: Auf der Oberseite der Flasche könnt ihr ebenfalls Erdbeeren einpflanzen. Macht dazu ein Loch in die Mitte der Erde und setzt die Pflanze hinein. Füllt das Loch mit Erde auf und drückt sie leicht an.
7. Gießen: Gießt die Erdbeerpflanzen vorsichtig an. Achtet darauf, dass die Erde gleichmäßig feucht ist, aber nicht zu nass. Vermeidet Staunässe.
8. Standort wählen: Stellt euren Erdbeerflaschengarten an einen sonnigen und warmen Standort. Erdbeeren brauchen viel Sonne, um gut zu wachsen und Früchte zu tragen. Ein Südbalkon oder eine sonnige Terrasse sind ideal.
9. Pflege:
* Gießen: Gießt die Erdbeeren regelmäßig, besonders an heißen Tagen. Die Erde sollte immer leicht feucht sein.
* Düngen: Düngt die Erdbeeren alle 2-3 Wochen mit einem speziellen Erdbeerdünger.
* Ausgeizen: Entfernt regelmäßig alte und vertrocknete Blätter.
* Schutz vor Schädlingen: Kontrolliert die Erdbeeren regelmäßig auf Schädlinge wie Blattläuse oder Schnecken. Bei Bedarf könnt ihr biologische Schädlingsbekämpfungsmittel einsetzen.
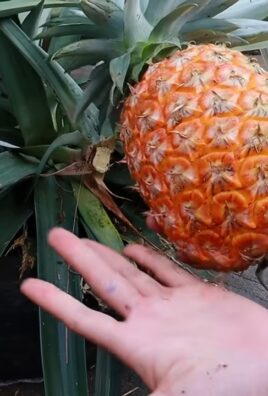
* Ernte: Wenn die Erdbeeren rot und reif sind, könnt ihr sie ernten. Pflückt die Früchte vorsichtig ab, damit ihr die Pflanzen nicht beschädigt.
Zusätzliche Tipps und Tricks:
* Sortenwahl: Wählt Erdbeersorten, die für den Anbau im Topf geeignet sind. Hängeerdbeeren sind besonders empfehlenswert.
* Erde: Verwendet eine hochwertige Blumenerde oder spezielle Erdbeermerde.
* Drainage: Eine gute Drainage ist wichtig, um Staunässe zu vermeiden.
* Sonnenschein: Erdbeeren brauchen viel Sonne, um gut zu wachsen und Früchte zu tragen.
* Regelmäßiges Gießen: Gießt die Erdbeeren regelmäßig, besonders an heißen Tagen.
* Düngen: Düngt die Erdbeeren alle 2-3 Wochen mit einem speziellen Erdbeerdünger.
* Schutz vor Vögeln: Wenn Vögel eure Erdbeeren anknabbern, könnt ihr ein Netz über den Flaschengarten spannen.
* Überwinterung: Erdbeeren sind mehrjährig und können überwintert werden. Stellt den Flaschengarten im Winter an einen kühlen und hellen Ort. Gießt die Pflanzen nur wenig.
Häufige Probleme und Lösungen:
* Gelbe Blätter: Gelbe Blätter können ein Zeichen für Nährstoffmangel sein. Düngt die Erdbeeren mit einem speziellen Erdbeerdünger.
* Braune Blätter: Braune Blätter können ein Zeichen für Staunässe sein. Achtet darauf, dass die Erde gut drainiert ist und gießt die Pflanzen nicht zu viel.
* Keine Früchte: Wenn die Erdbeeren keine Früchte tragen, kann das an zu wenig Sonne liegen. Stellt den Flaschengarten an einen sonnigeren Standort.
* Schädlinge: Kontrolliert die Erdbeeren regelmäßig auf Schädlinge und bekämpft sie bei Bedarf mit biologischen Mitteln.
Variationen des Erdbeerflaschengartens:
* Vertikaler Garten: Ihr könnt mehrere Flaschen übereinander anordnen, um einen vertikalen Garten zu schaffen.
* Hängender Garten: Befestigt die Flasche mit Seilen oder Ketten und hängt sie auf.
* Kombination mit anderen Pflanzen: Ihr könnt den Erdbeerflaschengarten mit anderen Kräutern oder Blumen kombinieren.
Ich hoffe, diese Anleitung hilft euch dabei, euren eigenen Erdbeerflaschengarten zu gestalten. Viel Spaß beim Gärtnern und guten Appetit! Lasst es euch schmecken!
Conclusion
So, there you have it! Creating your own strawberry bottle garden isn’t just a fun project; it’s a sustainable, space-saving, and incredibly rewarding way to enjoy fresh, delicious strawberries right at your fingertips. We’ve walked you through the process, highlighting the simplicity and adaptability of this DIY trick. Forget those expensive, bulky planters that take up precious patio space. With a few recycled bottles, some soil, and a little bit of love, you can transform your balcony, windowsill, or even a sunny corner of your kitchen into a thriving strawberry patch.
But why is this a must-try? Beyond the obvious benefit of homegrown strawberries, this project offers a unique connection to nature. You’ll witness the entire life cycle of your plants, from tiny seedlings to plump, juicy berries. It’s a fantastic educational opportunity for kids, teaching them about gardening, recycling, and the importance of sustainable living. Plus, let’s be honest, there’s nothing quite like the taste of a strawberry you’ve grown yourself – the flavor is simply unmatched!
Don’t be afraid to experiment with variations! Try using different types of bottles – larger bottles can accommodate more plants, while smaller bottles are perfect for creating a vertical garden wall. You can also explore different soil mixes to find what works best for your local climate and strawberry variety. Consider adding companion plants like basil or marigolds to deter pests and attract pollinators. And for a truly unique touch, paint or decorate your bottles to match your personal style.
This project is more than just a gardening hack; it’s a statement. It’s a statement about reducing waste, embracing sustainability, and connecting with the natural world. It’s a statement about taking control of your food source and enjoying the simple pleasures of life. It’s a statement about the power of DIY and the satisfaction of creating something beautiful and useful with your own two hands.
We wholeheartedly encourage you to give this strawberry bottle garden a try. It’s a simple, affordable, and incredibly rewarding project that will bring joy and deliciousness to your life. And once you’ve experienced the magic of homegrown strawberries, we’re confident you’ll be hooked!
Don’t keep your success (or your challenges!) to yourself. We want to hear all about your experience creating your own strawberry bottle garden. Share your photos, tips, and questions in the comments below. Let’s build a community of bottle garden enthusiasts and inspire others to embrace this sustainable and delicious DIY project. We can’t wait to see what you create!
Frequently Asked Questions (FAQ)
What type of bottles are best for a strawberry bottle garden?
The best bottles for a strawberry bottle garden are typically plastic soda or water bottles. They are readily available, lightweight, and easy to cut. However, you can also use glass bottles, but exercise caution when cutting them, as they can be more prone to shattering. Ensure the bottles are clean and free of any residue before using them. The size of the bottle will determine how many strawberry plants you can grow in each container. Larger bottles, such as 2-liter soda bottles, are ideal for accommodating multiple plants.
What kind of soil should I use for my strawberry bottle garden?
Strawberries thrive in well-draining, slightly acidic soil. A good potting mix specifically formulated for fruits and vegetables is an excellent choice. You can also create your own mix by combining equal parts of potting soil, compost, and perlite or vermiculite. The compost provides essential nutrients, while the perlite or vermiculite improves drainage and aeration. Avoid using garden soil, as it can be too heavy and may contain pests or diseases.
How often should I water my strawberry bottle garden?
The watering frequency will depend on the climate, the type of soil, and the size of the bottles. Generally, you should water your strawberry plants when the top inch of soil feels dry to the touch. Avoid overwatering, as this can lead to root rot. Ensure the bottles have adequate drainage holes to prevent water from accumulating at the bottom. During hot, dry weather, you may need to water your plants more frequently.
How much sunlight do strawberry plants need?
Strawberry plants need at least 6-8 hours of direct sunlight per day to produce abundant fruit. Choose a sunny location for your bottle garden, such as a south-facing balcony or windowsill. If you don’t have access to enough natural sunlight, you can supplement with grow lights.
What type of strawberries are best for a bottle garden?
Day-neutral strawberry varieties are generally the best choice for bottle gardens, as they produce fruit throughout the growing season, regardless of day length. Everbearing varieties are also a good option, as they produce two main crops of fruit per year. Some popular day-neutral and everbearing strawberry varieties include Albion, Seascape, and Ozark Beauty.
How do I fertilize my strawberry bottle garden?
Strawberries are heavy feeders and benefit from regular fertilization. Use a balanced fertilizer specifically formulated for fruits and vegetables. Follow the instructions on the fertilizer package for application rates and frequency. You can also use organic fertilizers, such as compost tea or fish emulsion. Fertilize your plants every 2-4 weeks during the growing season.
How do I protect my strawberry plants from pests and diseases?
Regularly inspect your plants for signs of pests or diseases. Common strawberry pests include aphids, spider mites, and slugs. You can control these pests with insecticidal soap, neem oil, or by handpicking them off the plants. Common strawberry diseases include powdery mildew and gray mold. Prevent these diseases by providing good air circulation, avoiding overwatering, and removing any infected leaves.
Can I grow strawberries indoors in a bottle garden?
Yes, you can grow strawberries indoors in a bottle garden, but you’ll need to provide them with adequate light and ventilation. Place your bottle garden near a sunny window or use grow lights to supplement natural light. Ensure the plants have good air circulation to prevent fungal diseases.
How long does it take for strawberries to grow in a bottle garden?
The time it takes for strawberries to grow in a bottle garden will depend on the variety, the growing conditions, and the size of the plants. Generally, you can expect to harvest your first strawberries within 2-3 months of planting.
What do I do with my strawberry plants after the growing season?
Strawberry plants are perennials, meaning they can live for several years. After the growing season, you can overwinter your plants by moving them to a sheltered location or covering them with mulch. In the spring, remove the mulch and fertilize the plants to encourage new growth. You can also propagate new strawberry plants from runners, which are stems that grow horizontally from the parent plant.

Leave a Comment