
Water spinach no watering routine – sounds too good to be true, right? I thought so too, until I discovered this game-changing DIY trick that lets you enjoy fresh, vibrant water spinach without the daily watering grind! For centuries, water spinach, also known as Ong Choy or Kang Kong, has been a staple in Asian cuisine, prized for its delicious flavor and nutritional benefits. But let’s be honest, keeping it consistently watered can be a real chore, especially during those scorching summer months.
That’s where this simple yet effective DIY hack comes in. Imagine harvesting crisp, healthy water spinach from your own backyard, knowing you haven’t spent hours lugging watering cans or worrying about your plants drying out. This method is perfect for busy individuals, forgetful gardeners (like me sometimes!), or anyone looking to conserve water. We’ll dive into a step-by-step guide to creating a self-watering system that will keep your water spinach thriving. Get ready to unlock the secret to effortless gardening and enjoy a bountiful harvest with this water spinach no watering routine!
DIY-Trick: Wasserspinat auch ohne tägliches Gießen zum Sprießen bringen!
Ich liebe Wasserspinat (auch bekannt als Morning Glory oder Ong Choy)! Er ist so lecker, wächst schnell und ist super einfach anzubauen. Aber, wie viele von uns, habe ich manchmal Schwierigkeiten, mich an das tägliche Gießen zu erinnern, besonders im Sommer. Deshalb habe ich diesen DIY-Trick entwickelt, um meinen Wasserspinat auch ohne tägliche Bewässerung glücklich und gesund zu halten. Es ist eine Kombination aus verschiedenen Techniken, die ich über die Jahre gelernt und angepasst habe.
Was du brauchst:
* Wasserspinatsamen oder Stecklinge: Am besten kaufst du qualitativ hochwertige Samen oder nimmst Stecklinge von einer gesunden Pflanze.
* Einen großen Behälter: Ein großer Eimer, eine Wanne oder sogar ein alter Mörtelkübel funktionieren prima. Je größer, desto besser, da er mehr Wasser speichern kann.
* Erde: Eine Mischung aus Gartenerde und Kompost ist ideal. Der Kompost hilft, Feuchtigkeit zu speichern.
* Mulch: Stroh, Holzhackschnitzel oder Kokosfasern eignen sich hervorragend als Mulchmaterial.
* Eine Plastikfolie oder Teichfolie (optional): Wenn dein Behälter nicht wasserdicht ist, brauchst du eine Folie, um ihn auszukleiden.
* Kieselsteine oder Blähton: Für eine gute Drainage am Boden des Behälters.
* Ein paar leere Plastikflaschen: Diese werden zu Bewässerungshelfern umfunktioniert.
* Ein Bohrer oder eine dicke Nadel: Zum Löcher machen in die Plastikflaschen.
* Eine Schere oder ein Messer: Zum Zuschneiden der Folie (falls benötigt).
Die Vorbereitung: Der Schlüssel zum Erfolg
Bevor wir mit dem Pflanzen beginnen, müssen wir den Behälter vorbereiten und unsere Bewässerungshilfen basteln. Das ist ein wichtiger Schritt, um sicherzustellen, dass der Wasserspinat genügend Feuchtigkeit bekommt, auch wenn ich mal einen Tag vergesse zu gießen.
1. Den Behälter vorbereiten:
1. Reinige den Behälter gründlich: Entferne alle Rückstände und Verunreinigungen.
2. Auskleiden (optional): Wenn dein Behälter nicht wasserdicht ist, schneide die Plastikfolie oder Teichfolie so zu, dass sie den gesamten Innenraum auskleidet. Lass an den Rändern etwas Überstand, den du später abschneiden kannst.
3. Drainage schaffen: Verteile eine Schicht Kieselsteine oder Blähton am Boden des Behälters. Das verhindert Staunässe und sorgt für eine gute Drainage.
2. Bewässerungshilfen basteln:
1. Löcher bohren: Nimm die leeren Plastikflaschen und bohre oder stich mit der Nadel viele kleine Löcher in den Deckel und den unteren Teil der Flasche. Je mehr Löcher, desto besser wird das Wasser verteilt.
2. Anzahl der Flaschen: Je nach Größe deines Behälters benötigst du 2-4 Flaschen.
Pflanzen und Mulchen: Der grüne Daumen ist gefragt
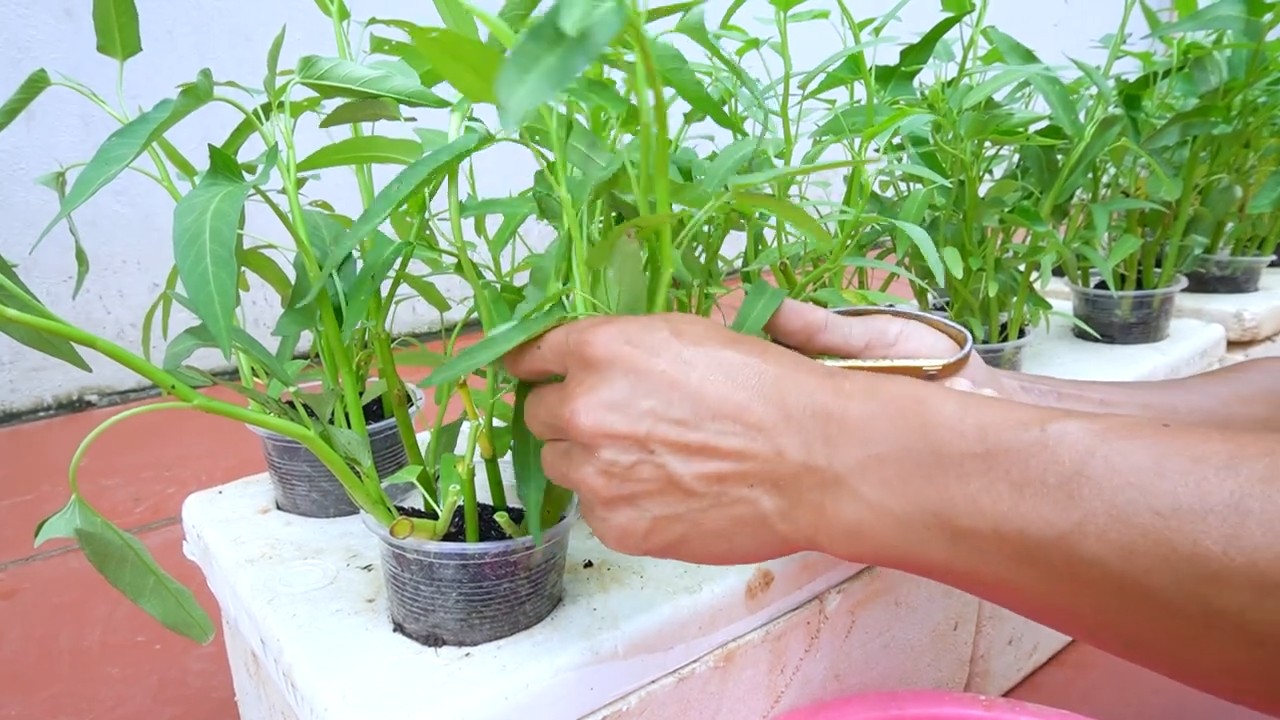
Jetzt kommt der spaßige Teil: das Pflanzen des Wasserspinats! Ich liebe es, zu sehen, wie die kleinen Samen oder Stecklinge zu kräftigen Pflanzen heranwachsen.
3. Erde einfüllen:
1. Mischung vorbereiten: Mische Gartenerde und Kompost im Verhältnis 2:1.
2. Einfüllen: Fülle den Behälter mit der Erdmischung, aber lass oben noch etwas Platz für den Mulch.
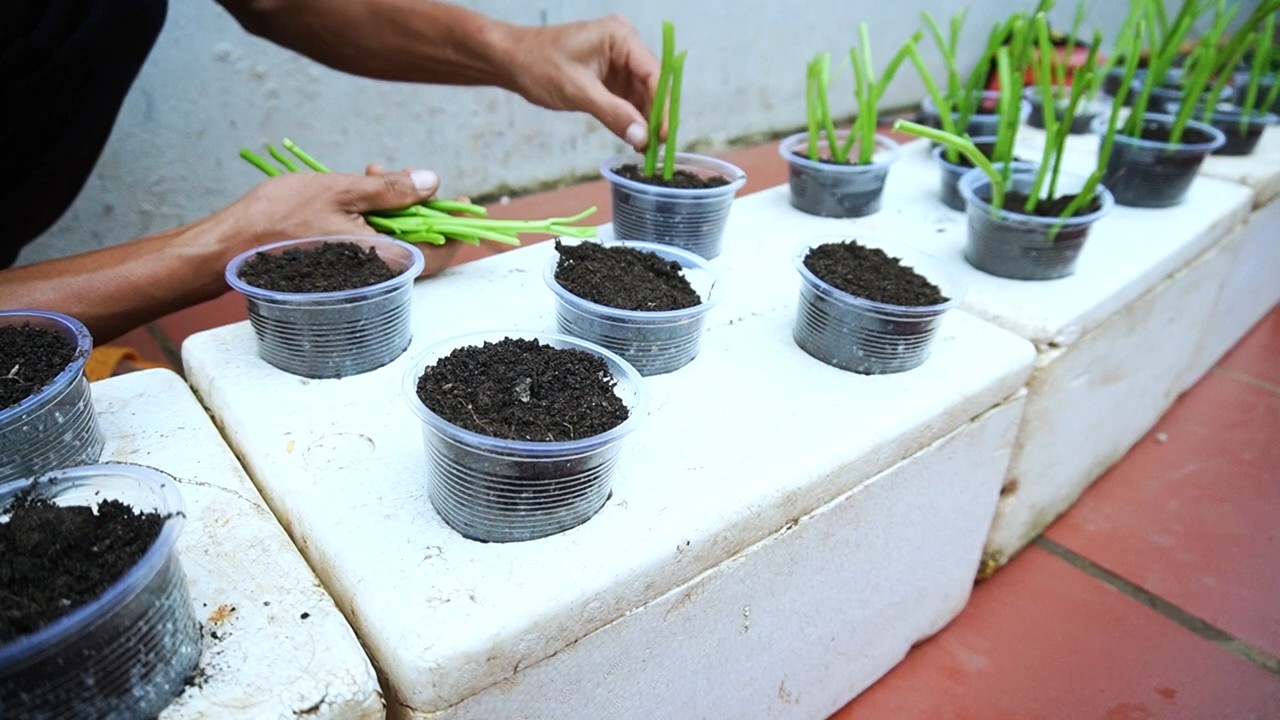
4. Pflanzen:
1. Samen säen: Wenn du Samen verwendest, säe sie gemäß den Anweisungen auf der Packung. Drücke sie leicht in die Erde und bedecke sie mit einer dünnen Schicht Erde.
2. Stecklinge pflanzen: Wenn du Stecklinge verwendest, stecke sie etwa 5-7 cm tief in die Erde. Achte darauf, dass die Blätter nicht im Boden sind.
3. Abstand halten: Achte darauf, dass die Pflanzen genügend Platz haben, um zu wachsen. Ein Abstand von 15-20 cm zwischen den Pflanzen ist ideal.
5. Bewässerungshilfen platzieren:
1. Eingraben: Grabe die Plastikflaschen mit den Löchern bis zum Hals in die Erde ein. Verteile sie gleichmäßig im Behälter.
2. Befüllen: Fülle die Flaschen mit Wasser. Das Wasser sickert langsam durch die Löcher in die Erde und versorgt die Pflanzen mit Feuchtigkeit.
6. Mulchen:
1. Verteilen: Verteile eine dicke Schicht Mulch (Stroh, Holzhackschnitzel oder Kokosfasern) um die Pflanzen herum.
2. Zweck: Der Mulch hilft, die Feuchtigkeit im Boden zu halten, Unkraut zu unterdrücken und die Bodentemperatur zu regulieren.
Pflege und Ernte: Geduld wird belohnt
Nach dem Pflanzen ist es wichtig, den Wasserspinat gut zu pflegen, damit er prächtig gedeiht. Das bedeutet, ihn regelmäßig zu kontrollieren, bei Bedarf zu gießen und ihn vor Schädlingen zu schützen.
7. Gießen:
1. Kontrolle: Überprüfe regelmäßig die Feuchtigkeit der Erde. Stecke deinen Finger etwa 2-3 cm tief in die Erde. Wenn sie sich trocken anfühlt, ist es Zeit zu gießen.
2. Gießen: Gieße den Wasserspinat gründlich, aber vermeide Staunässe. Fülle auch die Plastikflaschen regelmäßig auf.
3. Weniger gießen: Dank der Bewässerungshilfen und des Mulchs musst du nicht jeden Tag gießen.
8. Standort:
1. Sonne: Wasserspinat liebt die Sonne! Stelle den Behälter an einen sonnigen Standort, an dem er mindestens 6 Stunden Sonnenlicht pro Tag bekommt.
2. Windschutz: Schütze den Wasserspinat vor starkem Wind, da dieser die Blätter beschädigen kann.
9. Düngen (optional):
1. Komposttee: Wenn du möchtest, kannst du den Wasserspinat alle paar Wochen mit Komposttee düngen. Das fördert das Wachstum und die Gesundheit der Pflanzen.
2. Organischer Dünger: Alternativ kannst du auch einen organischen Flüssigdünger verwenden.
10. Schädlinge und Krankheiten:
1. Kontrolle: Überprüfe die Pflanzen regelmäßig auf Schädlinge wie Blattläuse oder Schnecken.
2. Bekämpfung: Bei einem Befall kannst du natürliche Schädlingsbekämpfungsmittel wie Neemöl oder eine Seifenlösung verwenden.
11. Ernten:
1. Zeitpunkt: Du kannst den Wasserspinat ernten, sobald die Stängel etwa 20-30 cm lang sind.
2. Methode: Schneide die Stängel mit einer Schere oder einem Messer ab. Lass etwa 5-7 cm der Stängel stehen, damit die Pflanze weiterwachsen kann.
3. Regelmäßig ernten: Je öfter du erntest, desto mehr wächst der Wasserspinat.
Zusätzliche Tipps für den Wasserspinat-Erfolg:
* Wasserspinat liebt Wasser: Obwohl dieser Trick das tägliche Gießen reduziert, solltest du sicherstellen, dass der Boden immer leicht feucht ist.
* Beobachte deine Pflanzen: Jede Umgebung ist anders. Beobachte, wie dein Wasserspinat auf die Bewässerung reagiert und passe die Wassermenge entsprechend an.
* Experimentiere: Probiere verschiedene Mulchmaterialien aus, um herauszufinden, welches für dich am besten funktioniert.
* Recycle: Verwende alte Plastikflaschen, um Ressourcen zu schonen und Abfall zu reduzieren.
Mit diesem DIY-Trick kannst du deinen Wasserspinat auch ohne tägliches Gießen zum Sprießen bringen. Es ist eine einfache und effektive Methode, um sicherzustellen, dass deine Pflanzen immer genügend Feuchtigkeit bekommen. Viel Spaß beim Gärtnern!
Conclusion
So, there you have it! Transforming your water spinach cultivation with this simple, yet incredibly effective, DIY self-watering system is a game-changer. No more daily watering routines, no more worrying about underwatering or overwatering – just thriving, vibrant water spinach ready for your next delicious meal. This method isn’t just about convenience; it’s about creating a consistently optimal environment for your plants, leading to healthier growth, bigger yields, and ultimately, more flavorful greens.
Why is this a must-try? Because it addresses the core needs of water spinach – consistent moisture – in a way that’s both sustainable and incredibly easy to implement. Forget complicated irrigation systems or expensive gadgets. This DIY approach utilizes readily available materials and a basic understanding of plant needs to deliver exceptional results. It’s a win-win for you and your water spinach!
Beyond the basic setup, there’s plenty of room for experimentation and customization. Consider adding a small amount of slow-release fertilizer to the water reservoir to provide your plants with a steady stream of nutrients. You could also experiment with different types of containers to find what works best for your space and aesthetic preferences. For example, terracotta pots, while porous, can help with aeration and temperature regulation, but might require more frequent refills. Plastic containers are more water-retentive but can heat up quickly in direct sunlight.
Another variation involves incorporating a wicking system using strips of felt or cotton fabric instead of just relying on the soil’s capillary action. This can be particularly beneficial in drier climates or for larger containers where the water needs to travel further. You can also adjust the size and number of drainage holes based on the size of your container and the specific needs of your water spinach. Observe your plants closely and make adjustments as needed. Remember, gardening is a journey of learning and adaptation!
We’re confident that this DIY self-watering trick will revolutionize your water spinach growing experience. It’s a simple, effective, and sustainable way to ensure your plants receive the consistent moisture they need to thrive. So, ditch the daily watering routine and embrace this innovative approach.
Don’t just take our word for it – try it out for yourself! We’re eager to hear about your experiences. Share your photos, tips, and variations in the comments below. Let’s build a community of water spinach enthusiasts who are passionate about growing their own delicious and nutritious greens. Let us know what kind of container you used, what kind of soil you used, and how often you had to refill the water reservoir. Your insights could help other gardeners achieve even greater success with this DIY water spinach growing method. Happy gardening!
Frequently Asked Questions (FAQ)
What type of container is best for this DIY self-watering system?
The best type of container depends on your space, aesthetic preferences, and climate. Plastic containers are generally more water-retentive and affordable, making them a good starting point. However, they can heat up quickly in direct sunlight, potentially harming the roots. Terracotta pots, on the other hand, offer better aeration and temperature regulation due to their porous nature. However, they also lose water more quickly, requiring more frequent refills. Consider the size of your water spinach plants and choose a container that provides ample space for root growth. A container that is at least 12 inches deep and wide is generally recommended. Ultimately, the best container is one that you can easily manage and that provides a stable environment for your plants.
What kind of soil should I use for water spinach in this system?
Water spinach thrives in rich, well-draining soil. A good potting mix that contains a blend of peat moss, perlite, and vermiculite is ideal. This combination provides good water retention while also ensuring adequate drainage to prevent root rot. You can also amend your potting mix with compost or other organic matter to further enrich the soil and provide essential nutrients. Avoid using heavy clay soils, as they can become waterlogged and suffocate the roots. The pH of the soil should be slightly acidic to neutral, around 6.0 to 7.0. Before planting, make sure to thoroughly moisten the soil to ensure that it is evenly hydrated.
How often will I need to refill the water reservoir?
The frequency of refills will depend on several factors, including the size of the container, the climate, the size of the water reservoir, and the growth stage of your water spinach plants. In general, you should check the water level in the reservoir every few days and refill it when it gets low. During hot, dry weather, you may need to refill it more frequently. Conversely, during cooler, wetter weather, you may need to refill it less often. Observe your plants closely for signs of dehydration, such as wilting leaves, and adjust your watering schedule accordingly. As a general rule of thumb, aim to keep the soil consistently moist but not waterlogged.
Can I use this system for other plants besides water spinach?
Yes, this DIY self-watering system can be adapted for other plants that require consistent moisture, such as herbs like basil and mint, or vegetables like tomatoes and peppers. However, you may need to adjust the size of the container, the type of soil, and the frequency of refills based on the specific needs of each plant. For example, plants that prefer drier conditions may require fewer drainage holes or a less water-retentive soil mix. Always research the specific watering requirements of each plant before implementing this system.
What if my water spinach starts to show signs of nutrient deficiency?
If your water spinach starts to show signs of nutrient deficiency, such as yellowing leaves or stunted growth, you can add a small amount of slow-release fertilizer to the water reservoir. Alternatively, you can use a liquid fertilizer diluted to half strength and apply it directly to the soil. Be careful not to over-fertilize, as this can damage the roots. Choose a fertilizer that is specifically formulated for leafy greens and that contains a balanced blend of nitrogen, phosphorus, and potassium. You can also amend the soil with compost or other organic matter to provide a slow-release source of nutrients.
How do I prevent algae growth in the water reservoir?
Algae growth in the water reservoir is a common problem, especially in sunny locations. To prevent algae growth, you can add a small amount of hydrogen peroxide to the water reservoir. Alternatively, you can use an opaque container to block sunlight from reaching the water. You can also clean the reservoir regularly with a mild bleach solution to remove any algae that has accumulated. Make sure to rinse the reservoir thoroughly after cleaning to remove any traces of bleach.
What if my water spinach gets pests or diseases?
Like any plant, water spinach can be susceptible to pests and diseases. To prevent problems, inspect your plants regularly for signs of infestation or infection. If you notice any pests, such as aphids or spider mites, you can spray your plants with insecticidal soap or neem oil. For fungal diseases, such as powdery mildew, you can use a fungicide or improve air circulation around your plants. Remove any infected leaves or stems to prevent the disease from spreading. Maintaining healthy growing conditions, such as proper watering and fertilization, can also help to prevent pests and diseases.
Can I use tap water in the self-watering system?
While tap water is generally safe to use, it may contain chlorine or other chemicals that can be harmful to plants. If your tap water is heavily chlorinated, it’s best to let it sit out for 24 hours before using it to allow the chlorine to dissipate. Alternatively, you can use rainwater or distilled water. Avoid using softened water, as it contains high levels of sodium, which can be toxic to plants.
How do I know if the soil is getting enough water?
The best way to check if the soil is getting enough water is to feel it with your finger. The soil should be consistently moist but not waterlogged. If the soil feels dry to the touch, it’s time to refill the water reservoir. You can also use a moisture meter to get a more accurate reading of the soil moisture level. Observe your plants closely for signs of dehydration, such as wilting leaves, and adjust your watering schedule accordingly.
How long does it take for water spinach to grow using this method?
Water spinach is a fast-growing plant, and you can typically harvest your first crop within 4-6 weeks of planting. The exact time will depend on the growing conditions, such as temperature, sunlight, and soil fertility. With this DIY self-watering system, you can expect to see consistent and healthy growth, leading to a bountiful harvest.


Leave a Comment