
Grow baby carrots at home? Absolutely! Imagine plucking sweet, miniature carrots straight from your backyard – a delightful treat for you and a fun project for the whole family. Forget those bland, store-bought baby carrots; we’re talking about vibrant, flavorful, homegrown goodness!
For centuries, gardening has been a source of sustenance and joy. From ancient civilizations cultivating crops to modern-day urban farmers, the connection between humans and the earth remains strong. While the exact origin of baby carrots as a commercially produced product is more recent (think the 1980s!), the desire for smaller, sweeter carrots has always been there.
But why bother with this DIY project? Well, for starters, growing your own food is incredibly rewarding. Plus, you have complete control over what goes into your garden, ensuring your baby carrots are free from harmful pesticides and chemicals. More importantly, learning how to grow baby carrots at home is a fantastic way to teach children about where their food comes from and encourage healthy eating habits. Let’s dive into some simple yet effective tricks and hacks that will have you harvesting a bounty of adorable baby carrots in no time!
Baby Karotten selber ziehen: Ein kinderleichtes DIY-Projekt für deinen Garten oder Balkon
Hallo liebe Gartenfreunde! Habt ihr Lust auf knackig-süße, selbstgezogene Baby Karotten? Ich zeige euch, wie ihr das ganz einfach zu Hause hinbekommt, egal ob im Garten oder auf dem Balkon. Es ist ein super Projekt, auch für Anfänger und Kinder!
Was du brauchst:
* Karottensamen: Wählt eine Sorte, die sich gut für Baby Karotten eignet. Es gibt spezielle Sorten, die kleiner bleiben und schneller reifen.
* Pflanzgefäß: Ein Topf, Balkonkasten oder ein Beet im Garten. Wichtig ist, dass es mindestens 20 cm tief ist, damit die Karotten genug Platz zum Wachsen haben.
* Erde: Am besten eine lockere, sandige Erde. Karotten mögen keine Staunässe. Ihr könnt spezielle Gemüseerde kaufen oder Blumenerde mit Sand mischen.
* Sand: Hilft, die Erde locker zu halten und die Drainage zu verbessern.
* Gießkanne oder Sprühflasche: Zum sanften Bewässern der zarten Keimlinge.
* Optional: Kompost oder organischer Dünger für eine Extraportion Nährstoffe.
Die Vorbereitung: Der Grundstein für eine reiche Ernte
1. Wahl des Standorts: Karotten lieben die Sonne! Sucht euch einen sonnigen Platz aus, an dem eure Karotten mindestens 6 Stunden am Tag Sonne bekommen.
2. Vorbereitung des Pflanzgefäßes: Wenn ihr einen Topf oder Balkonkasten verwendet, achtet darauf, dass er Abzugslöcher hat, damit überschüssiges Wasser ablaufen kann. Füllt den Topf mit eurer vorbereiteten Erde. Lasst etwa 2-3 cm Platz bis zum Rand.
3. Bodenvorbereitung im Garten: Lockert den Boden gründlich auf und entfernt Steine und Unkraut. Mischt etwas Sand unter, um die Drainage zu verbessern. Wenn euer Boden sehr lehmig ist, könnt ihr auch Kompost einarbeiten, um ihn aufzulockern und mit Nährstoffen anzureichern.
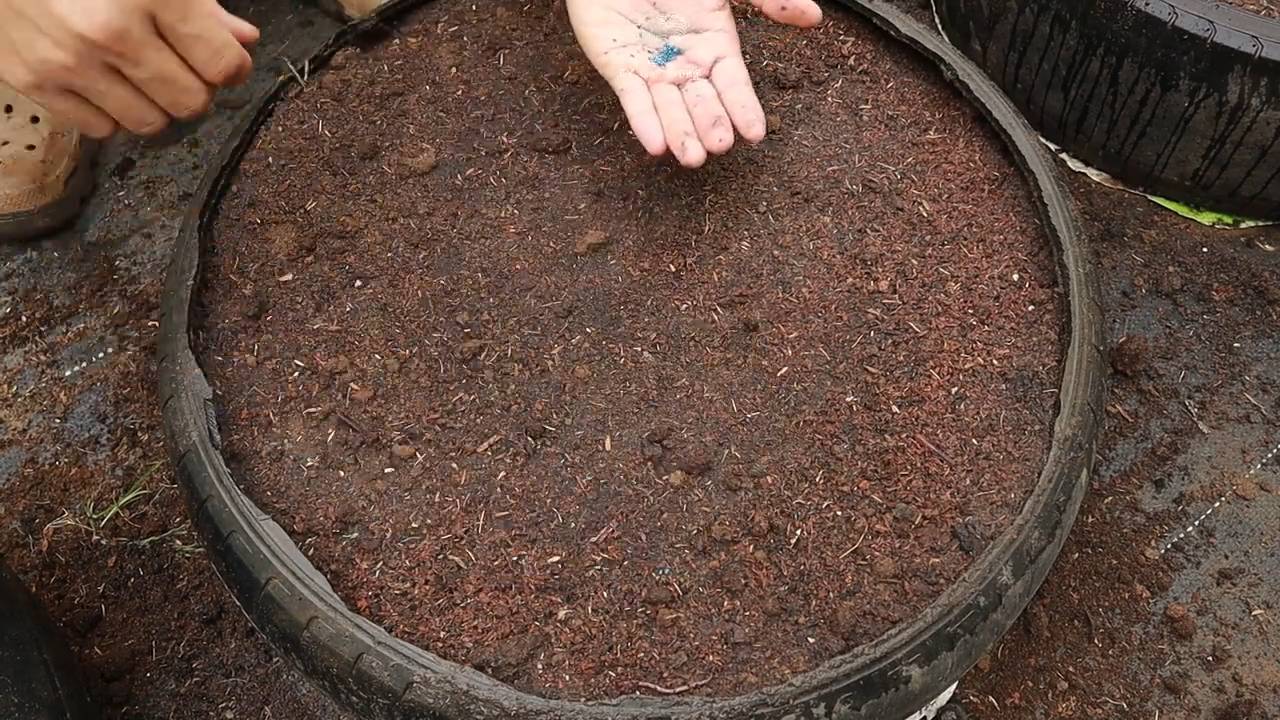
Die Aussaat: Kleine Samen, große Träume
1. Samen säen: Karottensamen sind sehr klein. Mischt sie am besten mit etwas Sand, um sie gleichmäßiger auszusäen. Zieht mit dem Finger oder einem kleinen Stock flache Rillen in die Erde (ca. 1 cm tief). Der Abstand zwischen den Rillen sollte etwa 5-7 cm betragen.
2. Samen verteilen: Streut die Samen-Sand-Mischung vorsichtig in die Rillen. Achtet darauf, dass die Samen nicht zu dicht liegen.
3. Samen bedecken: Bedeckt die Samen mit einer dünnen Schicht Erde (ca. 0,5 cm).
4. Angießen: Gießt die Erde vorsichtig mit einer Gießkanne oder Sprühflasche an. Achtet darauf, dass die Erde feucht, aber nicht nass ist.
Die Pflege: Geduld und Aufmerksamkeit zahlen sich aus
1. Feuchtigkeit halten: Die Erde sollte immer leicht feucht sein, besonders während der Keimung. Gießt regelmäßig, aber vermeidet Staunässe.
2. Unkraut jäten: Entfernt regelmäßig Unkraut, damit eure Karotten genug Platz und Nährstoffe haben. Seid dabei vorsichtig, um die zarten Karottenpflänzchen nicht zu beschädigen.
3. Vereinzeln: Wenn die Karottenpflänzchen etwa 2-3 cm groß sind, müsst ihr sie vereinzeln. Das bedeutet, dass ihr die schwächsten Pflänzchen entfernt, damit die stärkeren genug Platz zum Wachsen haben. Der Abstand zwischen den einzelnen Karotten sollte etwa 2-3 cm betragen.
4. Düngen (optional): Wenn ihr möchtet, könnt ihr eure Karotten während des Wachstums einmal oder zweimal mit einem organischen Dünger düngen. Achtet darauf, die Dosierungsanleitung auf der Verpackung zu beachten.
5. Schutz vor Schädlingen: Karotten können von verschiedenen Schädlingen befallen werden, wie z.B. der Möhrenfliege. Um eure Karotten zu schützen, könnt ihr ein Insektenschutznetz über das Beet oder den Topf spannen.
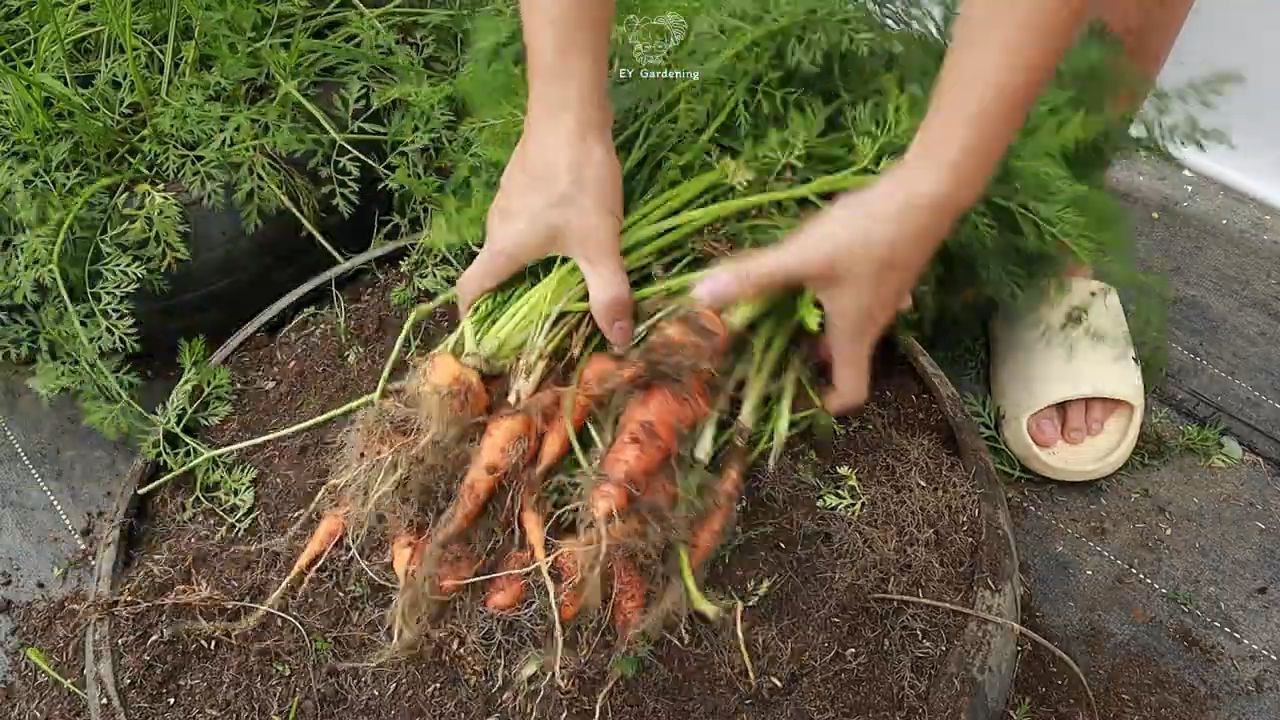
Die Ernte: Der Lohn der Mühe
1. Erntezeitpunkt: Baby Karotten sind in der Regel nach etwa 60-70 Tagen erntereif. Ihr könnt sie ernten, sobald sie die gewünschte Größe erreicht haben.
2. Ernten: Zieht die Karotten vorsichtig aus der Erde. Wenn der Boden sehr fest ist, könnt ihr ihn vorher etwas auflockern.
3. Genießen: Wascht die Karotten gründlich und genießt sie frisch aus dem Garten! Sie schmecken pur, im Salat oder als Snack zwischendurch.
Zusätzliche Tipps für eine erfolgreiche Ernte:
* Fruchtfolge beachten: Baut Karotten nicht jedes Jahr am selben Standort an. Wechselt die Anbaufläche, um Krankheiten und Schädlingen vorzubeugen.
* Mischkultur: Karotten profitieren von einer Mischkultur mit Zwiebeln oder Knoblauch. Diese Pflanzen halten Schädlinge fern.
* Mulchen: Eine Mulchschicht aus Stroh oder Rasenschnitt hilft, die Feuchtigkeit im Boden zu halten und Unkraut zu unterdrücken.
* Regelmäßig gießen: Besonders in trockenen Perioden ist es wichtig, die Karotten regelmäßig zu gießen.
* Nicht zu dicht säen: Eine zu dichte Aussaat führt zu kleinen und dünnen Karotten.
* Auf die richtige Sorte achten: Wählt eine Sorte, die sich gut für Baby Karotten eignet.
Häufige Probleme und Lösungen:
* Karotten werden nicht dick: Das kann verschiedene Ursachen haben. Möglicherweise ist der Boden zu fest, die Aussaat zu dicht oder die Nährstoffversorgung nicht ausreichend. Achtet auf eine lockere Erde, vereinzelte Pflänzchen und eine regelmäßige Düngung.
* Karotten sind von der Möhrenfliege befallen: Die Larven der Möhrenfliege fressen an den Wurzeln der Karotten. Ein Insektenschutznetz kann helfen, den Befall zu verhindern.
* Karotten sind bitter: Das kann an Wassermangel oder zu viel Sonne liegen. Achtet auf eine regelmäßige Bewässerung und schützt die Karotten vor zu starker Sonneneinstrahlung.
* Schlechte Keimung: Karottensamen keimen manchmal schlecht. Achtet darauf, frisches Saatgut zu verwenden und die Erde während der Keimung feucht zu halten.
Noch ein paar Worte zum Schluss:
Ich hoffe, diese Anleitung hilft euch dabei, eure eigenen Baby Karotten zu ziehen. Es ist ein wirklich lohnendes Projekt, das viel Freude bereitet. Und das Beste: Ihr wisst genau, was in euren Karotten steckt! Also, ran an die Schaufel und viel Spaß beim Gärtnern! Lasst mich wissen, wie es bei euch läuft! Ich freue mich über eure Erfahrungen und Fragen.
Conclusion
So, there you have it! Growing baby carrots at home is not only achievable, but it’s also a rewarding and surprisingly simple process. Forget those pre-packaged, often bland baby carrots from the grocery store. With a little patience and these easy-to-follow steps, you can cultivate your own batch of sweet, tender, and perfectly sized baby carrots, bursting with fresh-from-the-garden flavor.
Why is this DIY trick a must-try? Because it puts you in control. You control the soil, the watering, and the harvesting, ensuring that you get the highest quality, most delicious baby carrots possible. Plus, it’s a fantastic way to reduce your reliance on store-bought produce and connect with the natural world. Imagine the satisfaction of serving a salad featuring baby carrots you nurtured from seed to table!
But the benefits don’t stop there. Growing your own baby carrots is also a budget-friendly option. A single packet of carrot seeds can yield a substantial harvest, far exceeding the cost of buying pre-packaged baby carrots repeatedly. And let’s not forget the environmental advantages. By growing your own, you’re reducing your carbon footprint associated with transportation and packaging.
Looking for variations? Absolutely! Experiment with different carrot varieties known for their sweetness and smaller size, such as ‘Parisian’ or ‘Thumbelina.’ You can also try interplanting your baby carrots with companion plants like radishes or onions, which can help deter pests and improve soil health. Consider succession planting, sowing seeds every few weeks, to ensure a continuous supply of baby carrots throughout the growing season. For those with limited space, container gardening is an excellent option. Choose a wide, shallow container and follow the same planting and care instructions.
Growing baby carrots at home is more than just a gardening project; it’s an investment in your health, your wallet, and the environment. It’s a chance to experience the joy of nurturing life from seed to harvest and to savor the unparalleled flavor of homegrown produce.
Don’t be intimidated by the prospect of gardening. This DIY trick is designed to be accessible to everyone, regardless of their experience level. With a little effort and attention, you’ll be amazed at what you can achieve.
So, what are you waiting for? Grab a packet of carrot seeds, prepare your soil, and get ready to embark on a rewarding gardening adventure. We encourage you to try this DIY trick and share your experience with us! Post photos of your baby carrot harvest on social media using #HomegrownBabyCarrots and let us know what you think. We can’t wait to see your success! Happy gardening!
Frequently Asked Questions (FAQ)
What is the best time of year to plant baby carrots?
The best time to plant baby carrots depends on your climate. In general, baby carrots prefer cool weather, so the ideal planting times are early spring or late summer/early fall. For spring planting, sow seeds as soon as the soil can be worked. For fall planting, aim to sow seeds about 2-3 months before the first expected frost. Check your local climate data for specific frost dates to determine the optimal planting window. In warmer climates, you may be able to grow baby carrots throughout the winter.
What kind of soil is best for growing baby carrots?
Baby carrots thrive in loose, well-drained soil that is rich in organic matter. Avoid heavy clay soils, as they can restrict root growth and result in misshapen carrots. Amend your soil with compost or well-rotted manure to improve drainage and fertility. A slightly acidic to neutral soil pH (around 6.0 to 7.0) is ideal. Before planting, remove any rocks or debris from the soil, as these can also hinder root development.
How often should I water my baby carrots?
Consistent moisture is crucial for growing healthy baby carrots. Water regularly, especially during dry periods, to keep the soil consistently moist but not waterlogged. Aim for about 1 inch of water per week. Use a gentle watering method, such as a soaker hose or watering can with a rose attachment, to avoid disturbing the delicate seedlings. Mulching around the plants can help retain moisture and suppress weeds.
How long does it take for baby carrots to grow?
Baby carrots typically take 50-70 days to mature, depending on the variety and growing conditions. You can start harvesting them when they reach the desired size, usually around 3-4 inches long. To check for ripeness, gently loosen the soil around a few carrots and pull them up. If they are the right size and color, you can harvest the rest.
Do baby carrots need fertilizer?
While baby carrots don’t require heavy fertilization, a light feeding can help promote healthy growth. Apply a balanced fertilizer, such as 10-10-10, at planting time and again about halfway through the growing season. Follow the instructions on the fertilizer package carefully to avoid over-fertilizing, which can lead to excessive foliage growth at the expense of root development. Alternatively, you can use a liquid seaweed or fish emulsion fertilizer for a more gentle and organic approach.
How do I prevent pests and diseases from affecting my baby carrots?
Several pests and diseases can affect baby carrots, including carrot rust flies, aphids, and leaf blight. To prevent these problems, practice good garden hygiene, such as removing weeds and debris that can harbor pests and diseases. Companion planting with onions or garlic can help deter carrot rust flies. Use row covers to protect seedlings from pests. If you notice signs of disease, such as yellowing or browning leaves, remove the affected plants immediately. Consider using organic pest control methods, such as insecticidal soap or neem oil, if necessary.
Can I grow baby carrots in containers?
Yes, you can successfully grow baby carrots in containers, making it a great option for those with limited space. Choose a wide, shallow container that is at least 6-8 inches deep. Fill the container with a well-draining potting mix. Sow the seeds according to the instructions above and water regularly. Place the container in a sunny location that receives at least 6 hours of sunlight per day.
Why are my baby carrots small and stunted?
Several factors can contribute to small and stunted baby carrots, including poor soil, insufficient watering, overcrowding, and pests or diseases. Ensure that your soil is loose, well-drained, and rich in organic matter. Water regularly to keep the soil consistently moist. Thin the seedlings to provide adequate spacing for root development. Check for signs of pests or diseases and take appropriate action.
Can I eat the carrot greens?
Yes, carrot greens are edible and nutritious! They have a slightly bitter taste, similar to parsley. You can use them in salads, soups, stews, or pesto. Be sure to wash them thoroughly before eating. Some people may be sensitive to carrot greens, so start with a small amount to see how you react.
How do I store my harvested baby carrots?
To store your harvested baby carrots, remove the greens and wash the carrots thoroughly. Pat them dry and store them in a plastic bag or container in the refrigerator. They should last for several weeks. You can also freeze baby carrots for longer storage. Blanch them in boiling water for a few minutes, then transfer them to an ice bath to stop the cooking process. Drain them well and store them in freezer bags.


Leave a Comment