
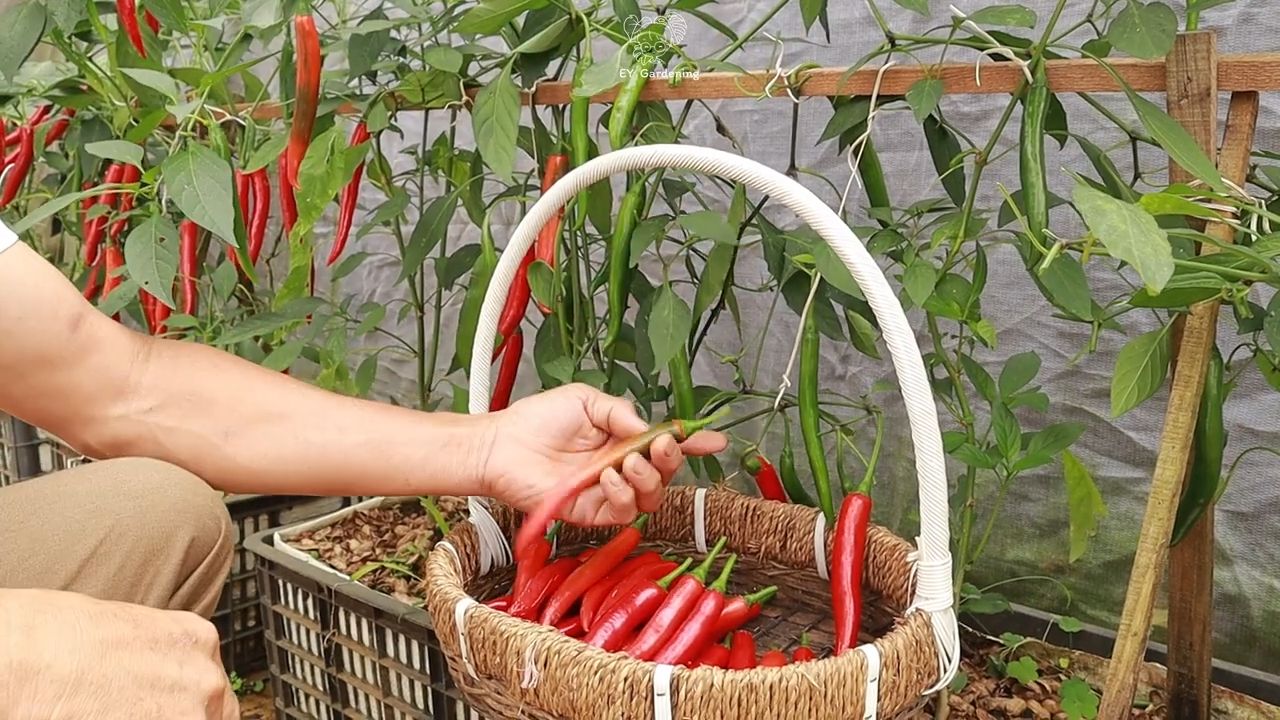
Grow Flavorful Chili at Home – imagine plucking vibrant, fiery chilies straight from your own garden, ready to spice up your next culinary masterpiece! Forget bland, store-bought peppers; this year, we’re taking control of our chili destiny with some simple, yet effective, DIY tricks. For centuries, chilies have been more than just a spice; they’ve been integral to cultures worldwide, from the ancient Aztecs using them in rituals to the vibrant street food of Southeast Asia.
But why should you bother with the effort of growing your own? Well, for starters, the flavor is unparalleled. Freshly picked chilies burst with a vibrancy you simply can’t find in dried or processed versions. Plus, you get to choose the exact varieties you want, tailoring the heat and flavor profile to your personal preferences. I know, I know, the idea of gardening can seem daunting, but trust me, these DIY hacks are designed to make the process easy and enjoyable, even if you don’t have a green thumb.
In this article, I’m going to share my favorite tips and tricks for successfully growing flavorful chili at home, regardless of your space or experience level. From seed starting secrets to pest control solutions, we’ll cover everything you need to know to harvest a bumper crop of delicious chilies. So, grab your gardening gloves, and let’s get started on this exciting journey to grow flavorful chili at home!
Chili selber ziehen: So klappt’s mit dem feurigen Geschmackserlebnis!
Ich liebe es, frische Chilis in meinen Gerichten zu verwenden. Der Geschmack ist einfach unvergleichlich, und es macht riesigen Spaß, sie selbst anzubauen. Keine Sorge, du brauchst keinen grünen Daumen, um erfolgreich Chilis zu ziehen. Mit dieser Anleitung zeige ich dir, wie du ganz einfach deine eigenen, superleckeren Chilis zu Hause anbauen kannst.
Was du brauchst: Die richtige Ausrüstung für den Chili-Anbau
Bevor wir loslegen, lass uns sicherstellen, dass du alles hast, was du brauchst. Hier ist eine Liste der wichtigsten Dinge:
* Chilisamen: Wähle deine Lieblingssorten! Es gibt unzählige Chili-Sorten, von mild bis extrem scharf. Informiere dich vorher, welche Sorte am besten zu deinen Vorlieben passt. Du kannst Samen online, im Gartencenter oder sogar aus getrockneten Chilis gewinnen.
* Anzuchterde: Normale Blumenerde ist oft zu nährstoffreich für die empfindlichen Keimlinge. Anzuchterde ist speziell auf die Bedürfnisse junger Pflanzen abgestimmt.
* Anzuchtgefäße: Kleine Töpfe, Anzuchtschalen oder Torfquelltöpfe sind ideal für die Voranzucht.
* Mini-Gewächshaus (optional): Ein Mini-Gewächshaus sorgt für ein feuchtwarmes Klima, das die Keimung beschleunigt. Du kannst aber auch einfach Frischhaltefolie über die Anzuchtgefäße spannen.
* Pikierstab oder Löffel: Zum vorsichtigen Vereinzeln der Keimlinge.
* Töpfe für die späteren Pflanzen: Wähle Töpfe mit ausreichend Volumen (mindestens 10 Liter) für die ausgewachsenen Pflanzen.
* Blumenerde: Gute Blumenerde ist wichtig für das Wachstum der Pflanzen.
* Dünger: Spezieller Chili-Dünger oder Tomatendünger versorgt die Pflanzen mit den nötigen Nährstoffen.
* Gießkanne oder Sprühflasche: Zum Bewässern der Pflanzen.
* Sonniger Standort: Chilis lieben die Sonne!
Phase 1: Die Voranzucht – So bringst du die Samen zum Keimen
Die Voranzucht ist ein wichtiger Schritt, um deinen Chilis einen guten Start zu ermöglichen. Ich beginne meistens im Februar oder März mit der Voranzucht, damit die Pflanzen im Mai, nach den Eisheiligen, ins Freie können.
1. Samen vorbereiten (optional): Um die Keimung zu beschleunigen, kannst du die Samen vor dem Aussäen für 12-24 Stunden in lauwarmem Wasser quellen lassen. Das macht die Samenschale weicher und erleichtert das Keimen.
2. Anzuchtgefäße vorbereiten: Fülle die Anzuchtgefäße mit Anzuchterde. Drücke die Erde leicht an und befeuchte sie mit einer Sprühflasche. Die Erde sollte feucht, aber nicht nass sein.
3. Samen aussäen: Lege pro Anzuchtgefäß 1-2 Samen auf die Erde. Bedecke die Samen mit einer dünnen Schicht Anzuchterde (ca. 0,5 cm).
4. Befeuchten und abdecken: Befeuchte die Erde erneut mit einer Sprühflasche. Decke die Anzuchtgefäße mit einem Mini-Gewächshaus oder Frischhaltefolie ab, um die Luftfeuchtigkeit zu erhöhen.
5. Warm und hell stellen: Stelle die Anzuchtgefäße an einen warmen und hellen Ort. Die ideale Keimtemperatur liegt zwischen 22 und 28 Grad Celsius. Ein Platz auf der Fensterbank über der Heizung ist oft ideal.
6. Regelmäßig lüften und befeuchten: Lüfte die Anzuchtgefäße täglich, um Schimmelbildung zu vermeiden. Befeuchte die Erde regelmäßig mit einer Sprühflasche, damit sie nicht austrocknet.
7. Geduld haben: Die Keimung kann je nach Chili-Sorte und Temperatur 1-3 Wochen dauern. Sobald die ersten Keimlinge erscheinen, kannst du die Abdeckung entfernen.
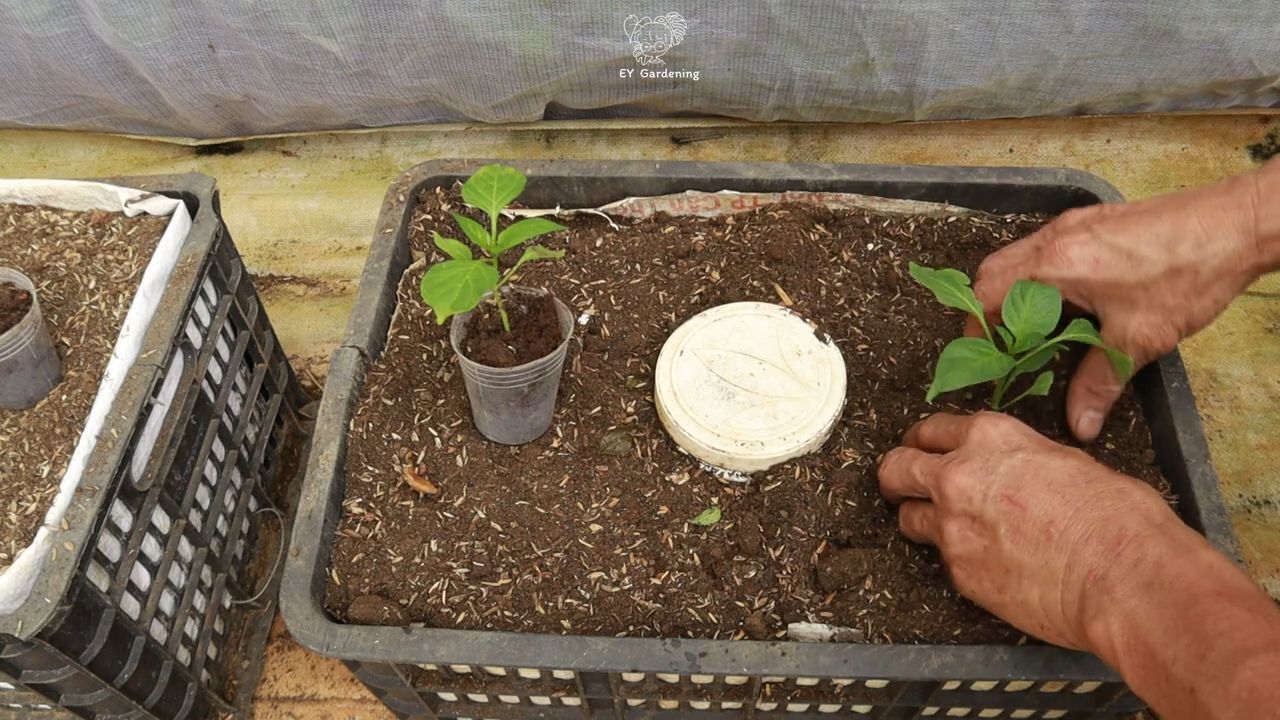
Phase 2: Pikieren – Den Keimlingen mehr Platz geben
Sobald die Keimlinge ihre ersten richtigen Blätter (nach den Keimblättern) entwickelt haben, ist es Zeit, sie zu pikieren. Das bedeutet, dass du sie in größere Töpfe umpflanzt, damit sie mehr Platz zum Wachsen haben.
1. Vorbereitung: Fülle kleine Töpfe (ca. 8-10 cm Durchmesser) mit Blumenerde. Befeuchte die Erde leicht.
2. Keimlinge vorsichtig ausheben: Löse die Keimlinge vorsichtig mit einem Pikierstab oder Löffel aus der Anzuchterde. Achte darauf, die Wurzeln nicht zu beschädigen.
3. Einpflanzen: Setze jeden Keimling in einen eigenen Topf. Die Keimlinge können etwas tiefer eingepflanzt werden, als sie vorher in der Anzuchtschale standen.
4. Andrücken und gießen: Drücke die Erde um die Keimlinge leicht an und gieße sie vorsichtig.
5. Heller Standort: Stelle die pikierten Keimlinge an einen hellen, aber nicht zu sonnigen Ort.
Phase 3: Die Chili-Pflanzen pflegen – So werden sie stark und gesund
Nach dem Pikieren brauchen die Chili-Pflanzen regelmäßige Pflege, um gut zu wachsen und viele Früchte zu tragen.
1. Gießen: Gieße die Chili-Pflanzen regelmäßig, aber vermeide Staunässe. Die Erde sollte immer leicht feucht sein.
2. Düngen: Dünge die Chili-Pflanzen regelmäßig mit speziellem Chili-Dünger oder Tomatendünger. Beginne mit dem Düngen etwa 2-3 Wochen nach dem Pikieren.
3. Sonnenlicht: Chilis lieben die Sonne! Stelle die Pflanzen an einen möglichst sonnigen Standort.
4. Regelmäßig drehen: Drehe die Pflanzen regelmäßig, damit sie von allen Seiten gleichmäßig mit Licht versorgt werden.
5. Ausgeizen (optional): Einige Chili-Sorten bilden Geiztriebe (Seitentriebe in den Blattachseln). Diese können ausgegeizt werden, um die Bildung von Früchten zu fördern. Informiere dich vorher, ob deine Chili-Sorte ausgegeizt werden muss.
6. Unterstützung (optional): Einige Chili-Sorten werden sehr hoch und brauchen eine Stütze, um nicht umzuknicken. Du kannst ihnen einen Stab oder ein Rankgitter geben.
Phase 4: Auspflanzen – Ab ins Freie oder in den großen Topf
Nach den Eisheiligen (Mitte Mai) können die Chili-Pflanzen ins Freie gepflanzt werden. Du kannst sie entweder in den Garten pflanzen oder in große Töpfe (mindestens 10 Liter) umtopfen.
1. Abhärten: Bevor du die Chili-Pflanzen ins Freie pflanzt, solltest du sie langsam an die Sonne und die Außentemperaturen gewöhnen. Stelle sie dazu tagsüber für einige Stunden ins Freie und hole sie abends wieder rein.
2. Standort vorbereiten: Wähle einen sonnigen und windgeschützten Standort für die Chili-Pflanzen. Lockere die Erde auf und mische etwas Kompost oder Hornspäne unter.
3. Pflanzen: Pflanze die Chili-Pflanzen mit ausreichend Abstand zueinander (ca. 40-50 cm).
4. Angießen: Gieße die Pflanzen nach dem Einpflanzen gründlich an.
Phase 5: Erntezeit – Die Früchte deiner Arbeit genießen
Je nach Chili-Sorte und Witterung kannst du ab Juli oder August die ersten Chilis ernten.
1. Reife erkennen: Die Farbe der Chilis verändert sich, wenn sie reif sind. Je nach Sorte werden sie rot, gelb, orange oder braun.
2. Ernten: Schneide die Chilis mit einer Schere oder einem Messer ab.
3. Verarbeiten: Du kannst die Chilis frisch verwenden, trocknen, einlegen oder zu Soßen und Pasten verarbeiten.
Zusätzliche Tipps für den Chili-Anbau:
* Schädlinge: Achte auf Schädlinge wie Blattläuse oder Spinn
Conclusion
So, there you have it! Growing flavorful chili at home isn’t just a gardening project; it’s an investment in delicious meals, a connection to nature, and a way to personalize your culinary experiences. We’ve walked you through the essential steps, from selecting the right chili varieties to nurturing your plants and harvesting your fiery bounty.
Why is this DIY trick a must-try? Because store-bought chilies, while convenient, often lack the vibrant flavor and satisfying heat that homegrown chilies possess. You control the entire process, ensuring your chilies are grown organically, picked at peak ripeness, and bursting with the unique characteristics of your chosen varieties. Imagine the satisfaction of adding a pinch of your own homegrown chili powder to your favorite dish, knowing exactly where it came from and the care that went into its creation.
Beyond the superior flavor, growing your own chilies offers a fantastic opportunity to experiment. Consider these variations to elevate your chili-growing game:
* Hydroponic Chili Growing: For those with limited space or a desire for a more controlled environment, hydroponics can be a fantastic option. You’ll need a hydroponic system, nutrient solution, and grow lights, but the results can be impressive, with faster growth and higher yields.
* Container Gardening with Companion Plants: Enhance your chili plants’ growth and deter pests by planting companion plants like basil, marigolds, or onions in the same container. These plants offer natural protection and can even improve the flavor of your chilies.
* Fermented Chili Paste: Once you’ve harvested your chilies, consider fermenting them to create a complex and flavorful chili paste. Fermentation not only preserves your chilies but also adds a unique depth of flavor that you won’t find in store-bought products.
* Smoked Chili Peppers: Smoking your chili peppers before drying them adds a rich, smoky flavor that is perfect for chili powders, rubs, and sauces. Experiment with different types of wood chips to create unique flavor profiles.
Growing flavorful chili at home is more than just a trend; it’s a sustainable and rewarding way to enhance your culinary life. It allows you to connect with the food you eat, experiment with different flavors, and enjoy the satisfaction of creating something truly special.
We wholeheartedly encourage you to give this DIY trick a try. Start small, choose a few chili varieties that appeal to you, and follow the steps outlined in this guide. Don’t be afraid to experiment and adapt the techniques to suit your specific environment and preferences.
Most importantly, we want to hear about your experiences! Share your chili-growing journey with us in the comments below. Tell us about the varieties you’re growing, the challenges you’ve faced, and the delicious dishes you’ve created with your homegrown chilies. Your insights and experiences will inspire others to embark on their own chili-growing adventures. Let’s build a community of chili enthusiasts and share the joy of growing flavorful chili at home!
FAQ
What are the best chili varieties to grow for beginners?
For beginners, milder varieties like Anaheim, Poblano, or Jalapeño are excellent choices. They are relatively easy to grow and offer a good balance of flavor and heat. As you gain experience, you can explore hotter varieties like Serrano, Cayenne, or even Habanero. Remember to check the Scoville Heat Units (SHU) rating of each variety to understand its heat level before planting.
How much sunlight do chili plants need?
Chili plants thrive in full sunlight, requiring at least 6-8 hours of direct sunlight per day. If you’re growing them indoors, supplement with grow lights to ensure they receive adequate light. Insufficient sunlight can lead to leggy growth, reduced flowering, and smaller chili production.
What kind of soil is best for growing chili peppers?
Chili plants prefer well-draining soil that is rich in organic matter. A mix of potting soil, compost, and perlite or vermiculite is ideal. Avoid heavy clay soils, as they can retain too much moisture and lead to root rot. Ensure the soil pH is slightly acidic to neutral, around 6.0 to 7.0.
How often should I water my chili plants?
Water your chili plants regularly, especially during hot and dry weather. The soil should be kept consistently moist but not waterlogged. Check the soil moisture level by sticking your finger about an inch deep into the soil. If it feels dry, it’s time to water. Avoid overhead watering, as it can promote fungal diseases.
What are some common pests and diseases that affect chili plants?
Common pests that affect chili plants include aphids, spider mites, whiteflies, and chili pepper weevils. Diseases include fungal infections like powdery mildew, blossom-end rot, and damping-off. Regularly inspect your plants for signs of pests or diseases and take appropriate action, such as using insecticidal soap, neem oil, or copper fungicide. Good air circulation and proper watering practices can also help prevent diseases.
How do I fertilize my chili plants?
Fertilize your chili plants regularly with a balanced fertilizer, such as a 10-10-10 or 5-10-5 formula. Start fertilizing when the plants are about 6 inches tall and continue throughout the growing season. Follow the instructions on the fertiliz
So, there you have it! Growing flavorful chili at home isn’t just a gardening project; it’s an investment in delicious meals, a connection to nature, and a way to personalize your culinary experiences. We’ve walked you through the essential steps, from selecting the right chili varieties to nurturing your plants and harvesting your fiery bounty.
Why is this DIY trick a must-try? Because store-bought chilies, while convenient, often lack the vibrant flavor and satisfying heat that homegrown chilies possess. You control the entire process, ensuring your chilies are grown organically, picked at peak ripeness, and bursting with the unique characteristics of your chosen varieties. Imagine the satisfaction of adding a pinch of your own homegrown chili powder to your favorite dish, knowing exactly where it came from and the care that went into its creation.
Beyond the superior flavor, growing your own chilies offers a fantastic opportunity to experiment. Consider these variations to elevate your chili-growing game:
* Hydroponic Chili Growing: For those with limited space or a desire for a more controlled environment, hydroponics can be a fantastic option. You’ll need a hydroponic system, nutrient solution, and grow lights, but the results can be impressive, with faster growth and higher yields.
* Container Gardening with Companion Plants: Enhance your chili plants’ growth and deter pests by planting companion plants like basil, marigolds, or onions in the same container. These plants offer natural protection and can even improve the flavor of your chilies.
* Fermented Chili Paste: Once you’ve harvested your chilies, consider fermenting them to create a complex and flavorful chili paste. Fermentation not only preserves your chilies but also adds a unique depth of flavor that you won’t find in store-bought products.
* Smoked Chili Peppers: Smoking your chili peppers before drying them adds a rich, smoky flavor that is perfect for chili powders, rubs, and sauces. Experiment with different types of wood chips to create unique flavor profiles.
Growing flavorful chili at home is more than just a trend; it’s a sustainable and rewarding way to enhance your culinary life. It allows you to connect with the food you eat, experiment with different flavors, and enjoy the satisfaction of creating something truly special.
We wholeheartedly encourage you to give this DIY trick a try. Start small, choose a few chili varieties that appeal to you, and follow the steps outlined in this guide. Don’t be afraid to experiment and adapt the techniques to suit your specific environment and preferences.
Most importantly, we want to hear about your experiences! Share your chili-growing journey with us in the comments below. Tell us about the varieties you’re growing, the challenges you’ve faced, and the delicious dishes you’ve created with your homegrown chilies. Your insights and experiences will inspire others to embark on their own chili-growing adventures. Let’s build a community of chili enthusiasts and share the joy of growing flavorful chili at home!
FAQ
What are the best chili varieties to grow for beginners?
For beginners, milder varieties like Anaheim, Poblano, or Jalapeño are excellent choices. They are relatively easy to grow and offer a good balance of flavor and heat. As you gain experience, you can explore hotter varieties like Serrano, Cayenne, or even Habanero. Remember to check the Scoville Heat Units (SHU) rating of each variety to understand its heat level before planting.
How much sunlight do chili plants need?
Chili plants thrive in full sunlight, requiring at least 6-8 hours of direct sunlight per day. If you’re growing them indoors, supplement with grow lights to ensure they receive adequate light. Insufficient sunlight can lead to leggy growth, reduced flowering, and smaller chili production.
What kind of soil is best for growing chili peppers?
Chili plants prefer well-draining soil that is rich in organic matter. A mix of potting soil, compost, and perlite or vermiculite is ideal. Avoid heavy clay soils, as they can retain too much moisture and lead to root rot. Ensure the soil pH is slightly acidic to neutral, around 6.0 to 7.0.
How often should I water my chili plants?
Water your chili plants regularly, especially during hot and dry weather. The soil should be kept consistently moist but not waterlogged. Check the soil moisture level by sticking your finger about an inch deep into the soil. If it feels dry, it’s time to water. Avoid overhead watering, as it can promote fungal diseases.
What are some common pests and diseases that affect chili plants?
Common pests that affect chili plants include aphids, spider mites, whiteflies, and chili pepper weevils. Diseases include fungal infections like powdery mildew, blossom-end rot, and damping-off. Regularly inspect your plants for signs of pests or diseases and take appropriate action, such as using insecticidal soap, neem oil, or copper fungicide. Good air circulation and proper watering practices can also help prevent diseases.
How do I fertilize my chili plants?
Fertilize your chili plants regularly with a balanced fertilizer, such as a 10-10-10 or 5-10-5 formula. Start fertilizing when the plants are about 6 inches tall and continue throughout the growing season. Follow the instructions on the fertilizer package for application rates. You can also use organic fertilizers like compost tea or fish emulsion.
When should I harvest my chili peppers?
Harvest your chili peppers when they have reached their mature color and size. The color will vary depending on the variety, but generally, they will turn from green to red, yellow, or orange. Gently twist or cut the peppers from the plant, leaving a small stem attached. You can harvest chilies at any stage of ripeness, but the flavor and heat will intensify as they mature.
How do I dry chili peppers?
There are several ways to dry chili peppers. You can air-dry them by stringing them together and hanging them in a well-ventilated area. You can also use a dehydrator or oven to dry them. To dry in the oven, spread the peppers on a baking sheet and bake at a low temperature (around 150-170°F) for several hours, until they are completely dry and brittle.
Can I grow chili peppers indoors?
Yes, you can grow chili peppers indoors, but you’ll need to provide them with adequate light and warmth. Use grow lights to supplement natural sunlight and maintain a consistent temperature of around 70-80°F. Choose smaller chili varieties that are well-suited for container gardening.
How do I save seeds from my chili peppers?
To save seeds from your chili peppers, allow the peppers to fully ripen on the plant. Once they are ripe, carefully cut them open and remove the seeds. Spread the seeds on a paper towel and let them dry completely for several days. Store the dried seeds in an airtight container in a cool, dark place.

Leave a Comment