
Guava tree terrace gardening – ever dreamt of stepping onto your balcony and plucking a juicy, sun-ripened guava straight from your own tree? I know I have! It sounds like a tropical fantasy, right? But trust me, it’s totally achievable, even if you’re working with limited space. This isn’t just about growing a plant; it’s about bringing a slice of the tropics to your doorstep.
Guavas have a rich history, deeply rooted in tropical and subtropical cultures worldwide. For centuries, they’ve been cherished not only for their delicious fruit but also for their medicinal properties. Imagine carrying on that tradition, nurturing your own guava tree and sharing its bounty with friends and family.
But why terrace gardening with guavas? Well, let’s face it, not everyone has a sprawling backyard. Many of us are city dwellers, making the most of balconies, patios, and rooftops. That’s where the magic of guava tree terrace gardening comes in! This DIY guide will equip you with the knowledge and simple tricks to successfully grow a thriving guava tree in a container, regardless of your gardening experience. We’ll cover everything from choosing the right variety and pot size to providing the perfect soil and care. Get ready to transform your terrace into a mini-orchard and enjoy the sweet taste of homegrown guavas!
Guavenbaum-Terrassengarten: Dein DIY-Leitfaden für üppige Ernten auf kleinem Raum
Hallo Gartenfreunde! Träumst du von saftigen, aromatischen Guaven, aber hast keinen riesigen Garten? Keine Sorge! Ich zeige dir, wie du deinen eigenen Guavenbaum-Terrassengarten anlegen kannst. Es ist einfacher als du denkst und bringt dir frische, selbst angebaute Früchte direkt vor die Haustür. Lass uns loslegen!
Was du brauchst: Die Materialliste
Bevor wir anfangen, stelle sicher, dass du alles griffbereit hast. Hier ist eine Liste der Dinge, die du benötigst:
* **Guavenbaum-Setzling:** Wähle eine Sorte, die für den Anbau in Töpfen geeignet ist. Zwergsorten sind ideal.
* **Große Töpfe oder Container:** Mindestens 50 cm Durchmesser und Tiefe. Achte auf gute Drainage!
* **Hochwertige Blumenerde:** Eine Mischung aus Gartenerde, Kompost und Perlit ist perfekt.
* **Drainagematerial:** Kies, Blähton oder Tonscherben für den Topfboden.
* **Organischer Dünger:** Guavenbäume sind hungrig!
* **Gartenschere:** Zum Beschneiden.
* **Gießkanne oder Schlauch:** Für die Bewässerung.
* **Mulch:** Stroh, Holzhackschnitzel oder Kokosfasern.
* **Pflanzschilder:** Damit du den Überblick behältst.
* **Optional: Rankhilfe:** Wenn du eine kletternde Guavensorte hast.
* **Optional: pH-Meter:** Um den Säuregehalt des Bodens zu überprüfen.
* **Optional: Gartenvlies:** Zum Schutz vor Frost.
Die Vorbereitung: Der Schlüssel zum Erfolg
Bevor wir den Guavenbaum einpflanzen, müssen wir die Töpfe vorbereiten und die Erde mischen.
1. **Töpfe vorbereiten:** Reinige die Töpfe gründlich. Lege eine Schicht Drainagematerial (Kies, Blähton oder Tonscherben) auf den Boden des Topfes. Das verhindert Staunässe, die Guavenbäume gar nicht mögen.
2. **Erde mischen:** Mische die Gartenerde, den Kompost und das Perlit in einem Verhältnis von etwa 2:1:1. Der Kompost liefert Nährstoffe, das Perlit sorgt für eine gute Belüftung des Bodens. Wenn du ein pH-Meter hast, überprüfe den Säuregehalt der Erde. Guavenbäume bevorzugen einen leicht sauren Boden (pH-Wert zwischen 5,5 und 6,5).
3. **Standort wählen:** Guavenbäume lieben die Sonne! Wähle einen Standort, der mindestens 6 Stunden direkte Sonneneinstrahlung pro Tag erhält. Achte auch darauf, dass der Standort windgeschützt ist.
Der Hauptakt: Den Guavenbaum einpflanzen
Jetzt kommt der spannende Teil: Das Einpflanzen des Guavenbaums!
1. **Setzling vorbereiten:** Nimm den Guavenbaum-Setzling vorsichtig aus dem Anzuchttopf. Lockere die Wurzeln etwas auf, damit sie sich besser im neuen Topf ausbreiten können.
2. **Pflanzloch graben:** Grabe ein Loch in die vorbereitete Erde, das etwas größer ist als der Wurzelballen des Setzlings.
3. **Guavenbaum einsetzen:** Setze den Setzling vorsichtig in das Pflanzloch. Achte darauf, dass der obere Rand des Wurzelballens mit der Erdoberfläche abschließt.
4. **Mit Erde auffüllen:** Fülle das Pflanzloch mit der vorbereiteten Erde auf und drücke sie leicht an.
5. **Angießen:** Gieße den Guavenbaum gründlich an. Das hilft, die Erde zu setzen und die Wurzeln zu befeuchten.
6. **Mulchen:** Verteile eine Schicht Mulch (Stroh, Holzhackschnitzel oder Kokosfasern) um den Stamm des Guavenbaums. Das hält die Feuchtigkeit im Boden, unterdrückt Unkraut und schützt die Wurzeln vor extremen Temperaturen.
Die Pflege: Damit dein Guavenbaum prächtig gedeiht
Ein Guavenbaum braucht regelmäßige Pflege, um gesund zu bleiben und viele Früchte zu tragen.
1. **Bewässerung:** Gieße den Guavenbaum regelmäßig, besonders während der Wachstumsperiode und bei heißem Wetter. Die Erde sollte immer leicht feucht sein, aber nicht nass. Vermeide Staunässe!
2. **Düngung:** Dünge den Guavenbaum regelmäßig mit einem organischen Dünger. Beginne im Frühjahr und dünge alle 4-6 Wochen bis zum Herbst. Befolge die Anweisungen auf der Düngemittelpackung.
3. **Beschneidung:** Beschneide den Guavenbaum regelmäßig, um seine Form zu erhalten und die Fruchtbildung zu fördern. Entferne abgestorbene, kranke oder beschädigte Äste. Beschneide auch Äste, die sich kreuzen oder in das Innere des Baumes wachsen. Der beste Zeitpunkt für den Rückschnitt ist nach der Ernte.
4. **Schutz vor Schädlingen und Krankheiten:** Kontrolliere den Guavenbaum regelmäßig auf Schädlinge und Krankheiten. Blattläuse, Spinnmilben und Fruchtfliegen können Probleme verursachen. Bei Bedarf kannst du biologische Schädlingsbekämpfungsmittel einsetzen.
5. **Überwinterung:** Guavenbäume sind nicht winterhart. Wenn du in einer Region mit kalten Wintern lebst, musst du den Guavenbaum ins Haus holen oder ihn mit Gartenvlies schützen. Stelle den Guavenbaum an einen hellen, kühlen Ort und gieße ihn sparsam.
Spezielle Tipps für den Terrassengarten
Hier sind noch ein paar zusätzliche Tipps, die dir helfen, deinen Guavenbaum-Terrassengarten optimal zu gestalten:
* **Wähle die richtige Sorte:** Zwergsorten wie ‘Ruby Supreme’ oder ‘Thai White’ sind ideal für den Anbau in Töpfen. Sie bleiben kleiner und tragen trotzdem viele Früchte.
* **Achte auf die Drainage:** Staunässe ist der Feind des Guavenbaums. Stelle sicher, dass die Töpfe eine gute Drainage haben und dass die Erde gut durchlässig ist.
* **Drehe die Töpfe regelmäßig:** Drehe die Töpfe regelmäßig, damit der Guavenbaum von allen Seiten gleichmäßig Sonnenlicht erhält.
* **Verwende eine Rankhilfe:** Wenn du eine kletternde Guavensorte hast, verwende eine Rankhilfe, um die Äste zu stützen.
* **Ernte die Früchte rechtzeitig:** Guaven sind reif, wenn sie leicht weich sind und einen angenehmen Duft verströmen. Ernte die Früchte rechtzeitig, damit der Baum nicht überlastet wird.
* **Beobachte deinen Baum:** Achte auf Veränderungen im Aussehen des Baumes. Gelbe Blätter, braune Flecken oder ein langsames Wachstum können Anzeichen für Probleme sein.
Häufige Probleme und Lösungen
Auch beim Anbau von Guavenbäumen können Probleme auftreten. Hier sind einige häufige Probleme und wie du sie lösen kannst:
* **Gelbe Blätter:** Gelbe Blätter können ein Zeichen für Nährstoffmangel, Überwässerung oder Staunässe sein. Überprüfe die Bewässerung und dünge den Baum bei Bedarf.
* **Braune Flecken auf den Blättern:** Braune Flecken können durch Pilzkrankheiten verursacht werden. Entferne die befallenen Blätter und behandle den Baum mit einem Fungizid.
* **Keine Früchte:** Wenn dein Guavenbaum nicht fruchtet, kann das an mangelnder Sonneneinstrahlung, falscher Düngung oder fehlender Bestäubung liegen. Stelle sicher, dass der Baum genügend Sonne bekommt, dünge ihn regelmäßig und bestäube die Blüten von Hand, wenn nötig.
* **Schädlinge:** Blattläuse, Spinnmilben und Fruchtfliegen können Probleme verursachen. Bekämpfe die Schädlinge mit biologischen Schädlingsbekämpfungsmitteln.
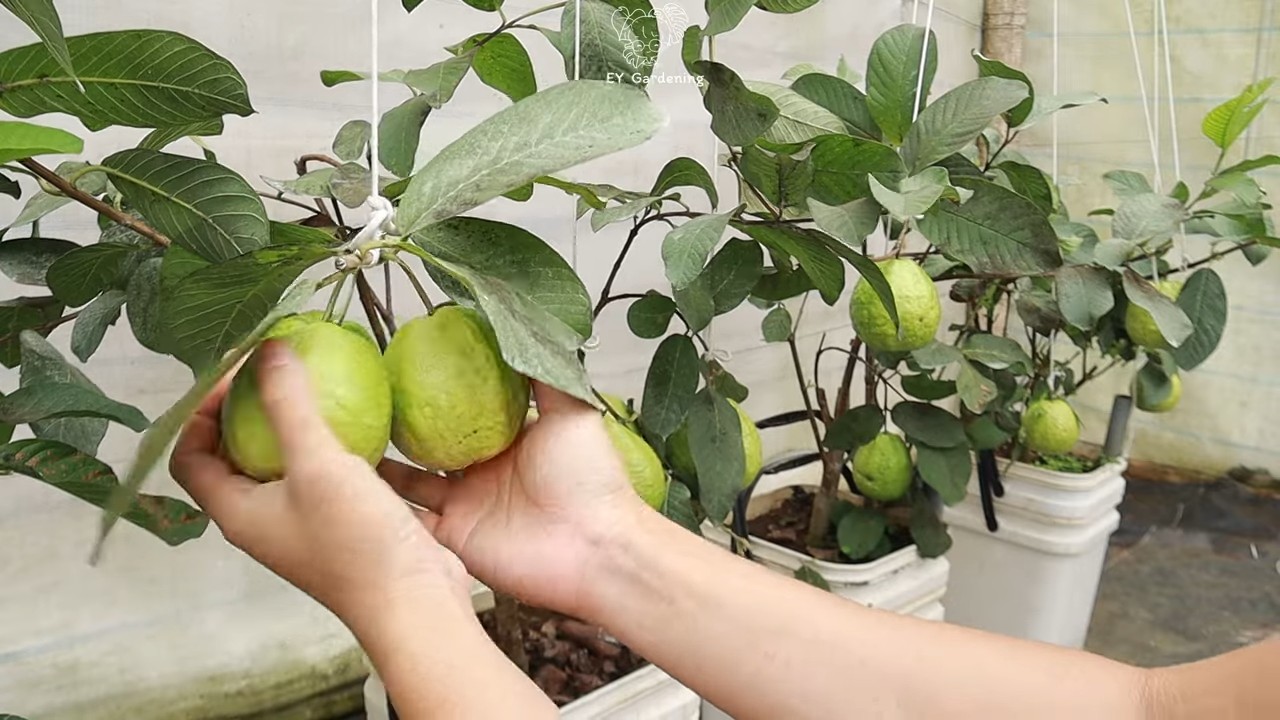
Die Ernte: Der Lohn deiner Mühe
Nach all der Arbeit und Pflege kommt endlich der Moment, auf den du gewartet hast: Die Ernte! Guaven sind reif, wenn sie leicht weich sind und einen angenehmen Duft verströmen. Pflücke die Früchte vorsichtig vom Baum. Du kannst sie direkt essen, zu Marmelade verarbeiten oder in Smoothies verwenden.
Ich hoffe, dieser Leitfaden hat dir geholfen, deinen eigenen Guavenbaum-Terrassengarten anzulegen. Mit etwas Geduld und Sorgfalt wirst du bald deine

Conclusion
So, there you have it! Transforming your outdoor space with a thriving guava tree terrace garden is not only achievable but also incredibly rewarding. We’ve explored the key steps, from selecting the right guava variety and preparing the terrace to planting, nurturing, and harvesting your own delicious fruit. But why is this DIY trick a must-try?
Firstly, a guava tree terrace garden allows you to enjoy fresh, homegrown guavas even if you lack a traditional garden. Imagine stepping outside your door and picking ripe, juicy guavas whenever you please. The taste of homegrown fruit is simply unmatched, and knowing you cultivated it yourself adds an extra layer of satisfaction.
Secondly, it’s an excellent way to maximize space. Terraces, often underutilized, become vibrant, productive areas. This is particularly beneficial for urban dwellers or those with limited gardening space. You’re essentially creating a mini-orchard in a compact footprint.
Thirdly, a guava tree terrace garden is aesthetically pleasing. The lush greenery and the promise of delicious fruit add beauty and charm to your outdoor space. It becomes a focal point, a conversation starter, and a source of pride.
But the benefits extend beyond the tangible. Gardening is therapeutic. It’s a chance to connect with nature, relieve stress, and engage in a mindful activity. Nurturing your guava tree, watching it grow, and eventually harvesting its fruit is an incredibly fulfilling experience.
Now, let’s talk about variations. While we’ve focused on a general approach, feel free to adapt the techniques to suit your specific needs and preferences.
* Consider companion planting: Incorporate herbs, flowers, or vegetables that complement guava trees. Marigolds, for example, can deter pests, while basil can enhance the flavor of the fruit.
* Experiment with different guava varieties: Explore the diverse range of guava cultivars available, each with its unique flavor profile and characteristics. Pink guavas, white guavas, and even seedless varieties offer exciting options.
* Get creative with your terrace design: Use different container sizes, arrange them in visually appealing patterns, and incorporate decorative elements to create a truly personalized space.
* Explore vertical gardening techniques: If space is extremely limited, consider training your guava tree to grow against a wall or trellis. This maximizes vertical space and adds a unique architectural element to your terrace.
Ultimately, the success of your guava tree terrace garden depends on your dedication and willingness to experiment. Don’t be afraid to try new things, learn from your mistakes, and adapt your approach as needed.
We strongly encourage you to embark on this exciting DIY project. The rewards are well worth the effort. Imagine the satisfaction of sharing your homegrown guavas with friends and family, knowing you created something truly special.
And most importantly, we want to hear about your experiences! Share your photos, tips, and challenges in the comments section below. Let’s create a community of guava tree terrace gardeners, sharing our knowledge and inspiring each other to grow the best guavas possible. Your insights could be invaluable to others who are just starting out. So, grab your gardening gloves, get your hands dirty, and start creating your own guava tree terrace garden today! Remember, the key to success is patience, persistence, and a love for all things green. Let’s cultivate a greener, healthier, and more delicious world, one guava tree at a time. This **guava tree terrace gardening** project is a journey, not just a destination.
Frequently Asked Questions (FAQ)
1. What is the best guava variety to grow in a terrace garden?
The best guava variety for a terrace garden depends on your climate, space constraints, and personal preferences. Dwarf varieties like ‘Ruby Supreme’ or ‘Thai Guava’ are excellent choices for containers as they don’t grow too large. ‘Mexican Cream’ is another popular option known for its sweet, creamy fruit. Consider your local climate and choose a variety that is well-suited to your region’s growing conditions. Research the specific needs of each variety before making your final decision. Also, consider disease resistance when making your selection.
2. How often should I water my guava tree in a container?
Watering frequency depends on several factors, including the size of the container, the climate, and the stage of growth. Generally, water deeply when the top inch of soil feels dry to the touch. During hot, dry periods, you may need to water daily. Avoid overwatering, as this can lead to root rot. Ensure the container has adequate drainage to prevent waterlogging. A good rule of thumb is to check the soil moisture regularly and adjust your watering schedule accordingly. During the dormant season, reduce watering frequency.
3. What type of soil is best for guava trees in containers?
Guava trees thrive in well-draining soil that is rich in organic matter. A good potting mix for guava trees should consist of a blend of garden soil, compost, and perlite or vermiculite. This combination provides good drainage, aeration, and nutrient retention. Avoid using heavy clay soils, as they can become waterlogged and suffocate the roots. You can also add a slow-release fertilizer to the potting mix to provide a steady supply of nutrients.
4. How often should I fertilize my guava tree?
Guava trees are heavy feeders and benefit from regular fertilization. Fertilize your guava tree every 2-3 months during the growing season (spring and summer) with a balanced fertilizer. Look for a fertilizer with an NPK ratio of 10-10-10 or similar. Follow the instructions on the fertilizer packaging carefully. Avoid over-fertilizing, as this can burn the roots. You can also supplement with organic fertilizers like compost tea or fish emulsion. Reduce or stop fertilizing during the dormant season (fall and winter).
5. How do I protect my guava tree from pests and diseases?
Regularly inspect your guava tree for signs of pests and diseases. Common pests include aphids, scale, and fruit flies. Diseases can include anthracnose and root rot. Treat infestations promptly with appropriate insecticides or fungicides. Encourage beneficial insects like ladybugs and lacewings to help control pests naturally. Ensure good air circulation around the tree to prevent fungal diseases. Prune away any dead or diseased branches. Consider using organic pest control methods whenever possible.
6. How do I prune my guava tree in a container?
Pruning is essential for maintaining the shape and size of your guava tree, as well as promoting fruit production. Prune your guava tree in late winter or early spring, before new growth begins. Remove any dead, diseased, or crossing branches. Thin out the canopy to improve air circulation and sunlight penetration. Prune back branches that are growing too long or are becoming crowded. You can also prune to shape the tree and encourage branching. Avoid removing more than one-third of the tree’s foliage at any one time.
7. How long does it take for a guava tree to bear fruit?
The time it takes for a guava tree to bear fruit depends on the variety, the age of the tree, and the growing conditions. Grafted guava trees typically begin to bear fruit within 1-2 years of planting. Seed-grown trees may take 3-5 years to produce fruit. Ensure your guava tree receives adequate sunlight, water, and nutrients to promote fruit production. Regular pruning can also help to encourage fruiting.
8. Can I grow a guava tree indoors?
While it’s possible to grow a guava tree indoors, it can be challenging. Guava trees need at least 6-8 hours of direct sunlight per day to thrive. If you don’t have a sunny window, you may need to supplement with artificial lighting. Ensure the container is large enough to accommodate the tree’s root system. Water regularly and fertilize as needed. Be aware that indoor guava trees may not produce as much fruit as those grown outdoors.
9. What do I do if my guava tree is not producing fruit?
There are several reasons why your guava tree may not be producing fruit. It could be due to a lack of sunlight, inadequate watering, insufficient fertilization, or improper pruning. Ensure your tree is receiving at least 6-8 hours of direct sunlight per day. Water deeply when the top inch of soil feels dry to the touch. Fertilize regularly with a balanced fertilizer. Prune your tree in late winter or early spring to remove any dead or diseased branches and to encourage branching. If your tree is still not producing fruit, it may be due to a lack of pollination. You can hand-pollinate the flowers by using a small brush to transfer pollen from one flower to another.
10. How do I know when my guavas are ripe?
Guavas are typically ripe when they change color from green to yellow or pink, depending on the variety. The fruit should also feel slightly soft to the touch. Ripe guavas have a sweet, fragrant aroma. You can also gently twist the fruit; if it comes off easily, it’s ripe. Taste a small piece of the fruit to confirm its ripeness.
Leave a Comment