
Grow Cauliflower and Broccoli Home – sounds intimidating, right? But trust me, it’s more rewarding than you can imagine! Forget those pricey, sometimes lackluster, veggies from the grocery store. Imagine stepping into your backyard and harvesting your own crisp, flavorful cauliflower and broccoli, bursting with freshness. This isn’t just about saving money; it’s about connecting with nature and knowing exactly where your food comes from.
For centuries, cultivating brassicas like cauliflower and broccoli has been a cornerstone of gardens worldwide. From the ancient Romans, who prized broccoli for its nutritional value, to the elaborate kitchen gardens of Renaissance Europe, these vegetables have nourished and delighted generations. Today, the desire to grow our own food is experiencing a powerful resurgence, driven by a longing for healthier lifestyles and a deeper understanding of sustainable practices.
But let’s be honest, getting started can feel overwhelming. That’s where these DIY tricks and hacks come in! Many people struggle with common issues like pest control, soil preparation, and knowing when to harvest. I’m here to demystify the process and provide you with simple, effective solutions that will help you grow cauliflower and broccoli home like a pro, even if you’re a complete beginner. Get ready to roll up your sleeves and transform your garden into a thriving, delicious oasis!
Kopfkohl und Brokkoli selbst anbauen: Dein umfassender DIY-Leitfaden
Hallo Gartenfreunde! Ich freue mich riesig, euch heute in die Welt des Kopfkohls und Brokkolis einzuführen. Diese beiden Gemüsesorten selbst anzubauen, ist nicht nur unglaublich lohnend, sondern auch einfacher, als ihr vielleicht denkt. Mit ein wenig Planung und Geduld könnt ihr bald frischen, knackigen Brokkoli und leckeren Kopfkohl direkt aus eurem eigenen Garten ernten. Lasst uns loslegen!
Was du für den Anbau von Kopfkohl und Brokkoli brauchst
Bevor wir mit dem Pflanzen beginnen, hier eine Liste der Dinge, die du benötigst:
* Saatgut oder Jungpflanzen: Du kannst entweder mit Samen beginnen oder Jungpflanzen kaufen, um den Prozess zu beschleunigen.
* Anzuchterde: Für die Anzucht von Samen ist spezielle Anzuchterde ideal.
* Gartenerde: Gut durchlässige, nährstoffreiche Gartenerde ist entscheidend.
* Kompost oder organischer Dünger: Um den Boden anzureichern und die Pflanzen zu ernähren.
* Pflanzgefäße oder ein Gartenbeet: Je nachdem, ob du in Töpfen oder im Garten anbauen möchtest.
* Gießkanne oder Gartenschlauch: Für die Bewässerung.
* Gartenwerkzeug: Spaten, Schaufel, Harke.
* Pflanzstäbe oder Rankgitter (optional): Für zusätzlichen Halt, besonders bei Kopfkohl.
* Schutznetz (optional): Zum Schutz vor Schädlingen wie Kohlweißlingen.
Die richtige Vorbereitung ist alles
Bevor wir uns den einzelnen Schritten widmen, ist es wichtig, die Grundlagen zu verstehen. Kopfkohl und Brokkoli sind sogenannte Starkzehrer, das bedeutet, sie benötigen viele Nährstoffe, um optimal zu wachsen. Daher ist eine gute Bodenvorbereitung das A und O.
* Der richtige Standort: Wähle einen sonnigen Standort für deine Pflanzen. Mindestens sechs Stunden Sonne pro Tag sind ideal.
* Der richtige Boden: Der Boden sollte gut durchlässig und reich an organischen Stoffen sein. Schwere Böden können mit Kompost oder Sand verbessert werden.
* Der richtige Zeitpunkt: Die beste Zeit für die Aussaat oder das Pflanzen hängt von deinem Klima ab. In kälteren Regionen solltest du mit der Anzucht im Haus beginnen.
Schritt-für-Schritt-Anleitung: Kopfkohl und Brokkoli anbauen
Hier ist eine detaillierte Anleitung, die dich durch den gesamten Prozess führt:
1. Samen aussäen oder Jungpflanzen kaufen
* Aussaat: Wenn du mit Samen beginnst, fülle kleine Anzuchttöpfe mit Anzuchterde. Säe die Samen etwa 1 cm tief ein und halte die Erde feucht. Stelle die Töpfe an einen warmen, hellen Ort. Nach etwa 2-3 Wochen sollten die Sämlinge aufgehen.
* Jungpflanzen: Wenn du Jungpflanzen kaufst, achte darauf, dass sie gesund und kräftig aussehen. Vermeide Pflanzen mit gelben oder braunen Blättern.
2. Den Boden vorbereiten
* Boden lockern: Lockere den Boden im Gartenbeet oder in den Pflanzgefäßen gründlich auf. Entferne Steine und Unkraut.
* Kompost einarbeiten: Arbeite reichlich Kompost oder organischen Dünger in den Boden ein. Dies versorgt die Pflanzen mit wichtigen Nährstoffen.
* Boden glätten: Glätte die Oberfläche des Bodens mit einer Harke.
3. Pflanzen
* Abstand beachten: Pflanze die Sämlinge oder Jungpflanzen mit ausreichend Abstand zueinander. Für Kopfkohl sind etwa 40-50 cm Abstand ideal, für Brokkoli etwa 30-40 cm.
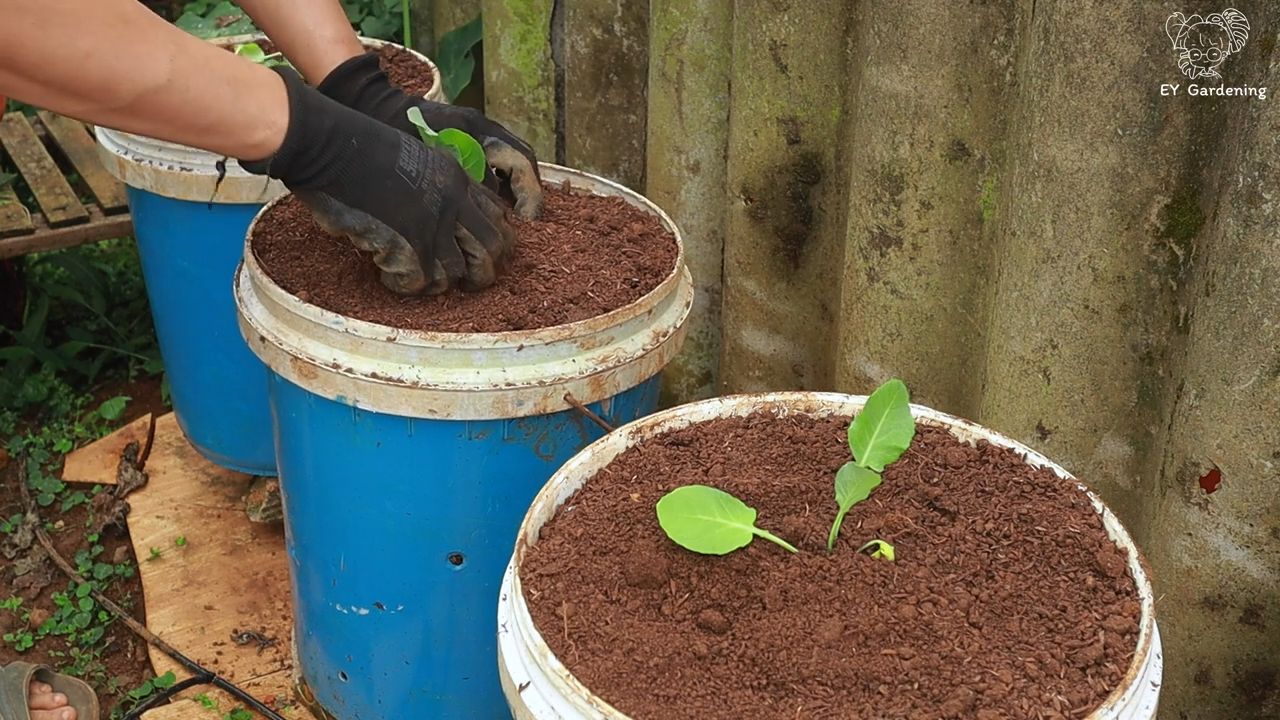
* Pflanzloch ausheben: Hebe ein Pflanzloch aus, das etwas größer ist als der Wurzelballen der Pflanze.
* Pflanze einsetzen: Setze die Pflanze vorsichtig in das Pflanzloch ein und fülle es mit Erde auf. Drücke die Erde leicht an.
* Angießen: Gieße die Pflanzen gründlich an.
4. Bewässerung
* Regelmäßig gießen: Kopfkohl und Brokkoli benötigen regelmäßig Wasser, besonders während trockener Perioden. Achte darauf, dass der Boden immer leicht feucht ist, aber nicht durchnässt.
* Morgens gießen: Gieße am besten morgens, damit die Blätter tagsüber abtrocknen können. Dies hilft, Pilzkrankheiten vorzubeugen.
5. Düngung
* Nachdüngen: Nach etwa 4-6 Wochen solltest du die Pflanzen nachdüngen. Verwende einen organischen Dünger oder Komposttee.
* Regelmäßig düngen: Wiederhole die Düngung alle 2-3 Wochen, um sicherzustellen, dass die Pflanzen ausreichend Nährstoffe erhalten.
6. Schädlingsbekämpfung
* Kohlweißlinge: Kohlweißlinge sind häufige Schädlinge, die die Blätter von Kopfkohl und Brokkoli fressen. Du kannst sie mit einem Schutznetz fernhalten oder die Raupen absammeln.
* Erdflöhe: Erdflöhe können kleine Löcher in die Blätter fressen. Eine Mulchschicht kann helfen, sie fernzuhalten.
* Blattläuse: Blattläuse können mit einem Wasserstrahl abgespült oder mit einem biologischen Insektizid bekämpft werden.
7. Ernte
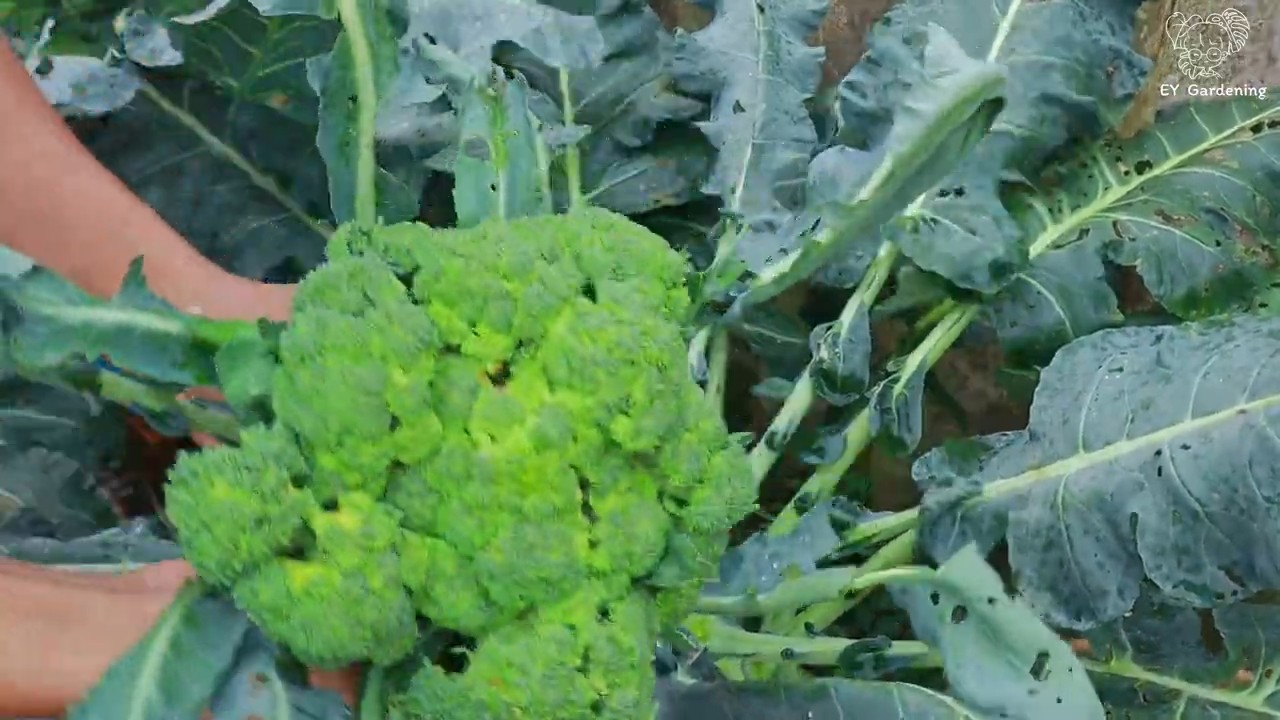
* Kopfkohl: Kopfkohl ist erntereif, wenn der Kopf fest und geschlossen ist. Schneide den Kopf mit einem scharfen Messer ab.
* Brokkoli: Brokkoli ist erntereif, wenn die Röschen fest und geschlossen sind. Schneide den Haupttrieb ab. Die Seitentriebe können später geerntet werden.
Detaillierte Tipps und Tricks für den erfolgreichen Anbau
Hier sind einige zusätzliche Tipps, die dir helfen werden, das Beste aus deinem Anbau herauszuholen:
* Fruchtfolge beachten: Pflanze Kopfkohl und Brokkoli nicht jedes Jahr am selben Standort. Wechsle die Anbaufläche, um Krankheiten und Schädlinge zu vermeiden.
* Mulchen: Eine Mulchschicht aus Stroh oder Rasenschnitt hilft, den Boden feucht zu halten, Unkraut zu unterdrücken und den Boden zu düngen.
* Pflanzpartner: Pflanze Kopfkohl und Brokkoli zusammen mit anderen Pflanzen, die sie unterstützen. Gute Pflanzpartner sind beispielsweise Ringelblumen, Kamille und Dill.
* Regelmäßige Kontrolle: Kontrolliere deine Pflanzen regelmäßig auf Schädlinge und Krankheiten. Je früher du Probleme erkennst, desto einfacher ist es, sie zu beheben.
* Sortenwahl: Wähle Sorten, die für dein Klima geeignet sind. Es gibt frühe, mittlere und späte Sorten.
Häufige Probleme und Lösungen
Auch beim Anbau von Kopfkohl und Brokkoli können Probleme auftreten. Hier sind einige häufige Probleme und wie du sie lösen kannst:
* Kopfkohl platzt: Dies kann passieren, wenn der Kopf zu schnell wächst. Reduziere die Bewässerung und ernte den Kopf so schnell wie möglich.
* Brokkoli bildet keine Röschen: Dies kann an Nährstoffmangel oder zu wenig Sonne liegen. Dünge die Pflanzen und stelle sicher, dass sie ausreichend Sonne bekommen.
* Schädlinge: Bekämpfe Schädlinge frühzeitig, um größere Schäden zu vermeiden. Verwende biologische Insektizide oder sammle die Schädlinge ab.
* Krankheiten: Achte auf Anzeichen von Krankheiten wie Mehltau oder Kohlhernie. Entferne befallene Blätter oder Pflanzen und sorge für eine gute Belüftung.
Zusätzliche Informationen und Ressourcen
* Bücher: Es gibt viele gute Bücher über den Anbau von Gemüse im eigenen Garten.
* Online-Foren: In Online-Foren kannst du dich mit anderen Gärtnern austauschen und Fragen stellen.
* Gartenvereine: Gartenvereine bieten oft Kurse und Workshops zum Thema Gemüseanbau an.
Fazit
Ich hoffe, dieser Leitfaden hat dir geholfen, den Anbau von Kopfk
Conclusion
So, there you have it! Growing your own cauliflower and broccoli at home isn’t just a gardening project; it’s an investment in fresh, flavorful, and healthy eating. We’ve walked through the essential steps, from selecting the right varieties to warding off common pests, and hopefully, you’re feeling empowered to give it a try.
Why is this DIY trick a must-try? Because store-bought cauliflower and broccoli, while convenient, often lack the vibrant taste and nutritional punch of homegrown produce. Think about it: you’re controlling every aspect of their growth, from the soil they’re nurtured in to the sunlight they soak up. This translates to denser, more flavorful heads of cauliflower and broccoli bursting with vitamins and minerals. Plus, there’s an undeniable satisfaction in harvesting something you’ve nurtured from seed to table.
But the benefits extend beyond just taste and nutrition. Growing your own vegetables is a fantastic way to connect with nature, reduce your carbon footprint (less transportation!), and even save money in the long run. It’s a rewarding hobby that can bring joy and a sense of accomplishment to your life.
Don’t be afraid to experiment! Consider these variations to personalize your growing experience:
* Succession Planting: Plant new seeds every few weeks to ensure a continuous harvest throughout the growing season. This is especially helpful for broccoli, which tends to produce one main head.
* Companion Planting: Plant herbs like rosemary and thyme near your cauliflower and broccoli to deter pests naturally. Marigolds are also excellent companion plants.
* Colored Cauliflower: Branch out from the traditional white cauliflower and try growing purple, orange, or green varieties. They add a beautiful splash of color to your garden and your plate!
* Container Gardening: If you’re short on space, you can successfully grow cauliflower and broccoli in large containers. Just make sure they have adequate drainage and are placed in a sunny location.
Ultimately, the best way to learn is by doing. Don’t be discouraged if you encounter challenges along the way. Gardening is a learning process, and every mistake is an opportunity to improve. Embrace the journey, enjoy the process, and savor the delicious rewards of your labor.
We wholeheartedly encourage you to try growing your own cauliflower and broccoli at home. It’s a rewarding experience that will transform the way you think about food. And most importantly, we want to hear about your experiences! Share your tips, tricks, and triumphs in the comments below. Let’s build a community of home gardeners who are passionate about growing their own fresh, healthy produce. What are you waiting for? Grab some seeds, get your hands dirty, and start growing your own delicious cauliflower and broccoli today! Remember, the freshest, most flavorful vegetables are the ones you grow yourself.
Frequently Asked Questions (FAQ)
Q: What are the best varieties of cauliflower and broccoli to grow at home?
A: The best varieties depend on your climate and growing season. For cauliflower, popular choices include ‘Snowball Y Improved’ (a reliable white variety), ‘Graffiti’ (a vibrant purple variety), and ‘Cheddar’ (an orange variety). For broccoli, consider ‘Waltham 29’ (a classic green variety), ‘DiCicco’ (a fast-maturing variety), and ‘Romanesco’ (a unique, fractal-shaped variety). Research varieties that are well-suited to your local climate and growing conditions for the best results. Consider disease resistance as well.
Q: How much sunlight do cauliflower and broccoli need?
A: Cauliflower and broccoli require at least 6 hours of direct sunlight per day to thrive. Choose a planting location that receives ample sunlight throughout the day. If you’re growing them in containers, make sure to place them in a sunny spot. Insufficient sunlight can lead to leggy plants and smaller heads.
Q: What kind of soil is best for growing cauliflower and broccoli?
A: Cauliflower and broccoli prefer well-drained, fertile soil that is rich in organic matter. Amend your soil with compost or well-rotted manure before planting to improve its fertility and drainage. The ideal soil pH is between 6.0 and 7.0. You can test your soil pH with a home testing kit or by sending a sample to your local agricultural extension office.
Q: How often should I water my cauliflower and broccoli plants?
A: Water your cauliflower and broccoli plants regularly, especially during dry periods. Aim to keep the soil consistently moist but not waterlogged. Water deeply at the base of the plants, avoiding wetting the foliage, which can increase the risk of fungal diseases. Mulching around the plants can help retain moisture in the soil.
Q: What are some common pests and diseases that affect cauliflower and broccoli, and how can I control them?
A: Common pests include cabbage worms, aphids, and flea beetles. Cabbage worms can be controlled by handpicking them off the plants or by using Bacillus thuringiensis (Bt), a natural insecticide. Aphids can be washed off with a strong stream of water or controlled with insecticidal soap. Flea beetles can be deterred by using row covers or by applying diatomaceous earth around the plants. Common diseases include clubroot and black rot. Clubroot can be prevented by maintaining a soil pH above 7.0 and by practicing crop rotation. Black rot can be prevented by using disease-free seeds and by avoiding overhead watering.
Q: When is the best time to harvest cauliflower and broccoli?
A: Harvest cauliflower when the head is firm, compact, and white (or the appropriate color for the variety). The head should be about 6-8 inches in diameter. Harvest broccoli when the flower buds are tight and green. If the buds start to open and turn yellow, it’s time to harvest. Cut the main head with a sharp knife, leaving a few inches of stem. Side shoots may develop after the main head is harvested, providing additional harvests.
Q: Can I grow cauliflower and broccoli in containers?
A: Yes, you can successfully grow cauliflower and broccoli in containers, provided they are large enough. Choose containers that are at least 12 inches in diameter and depth. Use a well-draining potting mix and make sure the containers have drainage holes. Water regularly and fertilize as needed. Place the containers in a sunny location that receives at least 6 hours of direct sunlight per day.
Q: How can I prevent my cauliflower head from turning yellow?
A: To prevent the cauliflower head from turning yellow, you can blanch it by tying the outer leaves together over the head when it reaches about 3 inches in diameter. This will protect the head from sunlight and keep it white. Check the head regularly and harvest it when it’s ready.
Q: Can I freeze cauliflower and broccoli?
A: Yes, you can freeze cauliflower and broccoli for later use. To freeze them, blanch them in boiling water for 3-5 minutes, then plunge them into ice water to stop the cooking process. Drain them well and spread them out on a baking sheet to freeze individually. Once they’re frozen, transfer them to freezer bags or containers. They can be stored in the freezer for up to 12 months.
Q: What are some creative ways to use homegrown cauliflower and broccoli?
A: The possibilities are endless! You can roast them with olive oil and herbs, steam them and serve them with cheese sauce, add them to stir-fries, use them in soups and stews, or even make cauliflower rice or broccoli slaw. Get creative and experiment with different recipes to find your favorites. Freshly harvested cauliflower and broccoli have a superior flavor, making any dish even more delicious.


Leave a Comment