
High yield cucumber mistakes are more common than you might think, even among seasoned gardeners! Have you ever dreamt of a summer overflowing with crisp, juicy cucumbers, only to be met with a disappointing harvest of stunted, bitter fruits? I know I have! It’s frustrating, isn’t it? But don’t worry, you’re not alone, and more importantly, you can fix it!
Cucumbers have a rich history, dating back thousands of years to their origins in India. They’ve been cultivated and enjoyed across cultures, from ancient Rome to modern-day picnics. But even with centuries of experience, achieving a truly bountiful cucumber crop can be tricky. That’s why I’ve put together this guide to help you avoid the most common pitfalls and unlock the secrets to a truly impressive cucumber harvest.
Let’s face it, store-bought cucumbers just don’t compare to the flavor and satisfaction of growing your own. Plus, knowing exactly where your food comes from is incredibly empowering. This DIY guide will walk you through the common high yield cucumber mistakes that could be sabotaging your efforts. We’ll cover everything from soil preparation and watering techniques to pollination problems and pest control. By understanding and addressing these issues, you’ll be well on your way to enjoying a summer filled with delicious, homegrown cucumbers!
Gurken-Ernte-Booster: Vermeide diese Anfängerfehler für eine Rekordernte!
Hey Leute, ich bin’s wieder! Heute tauchen wir tief in die Welt des Gurkenanbaus ein. Ich liebe es, meine eigenen Gurken anzubauen – der Geschmack von frisch geernteten Gurken aus dem eigenen Garten ist einfach unschlagbar! Aber ich muss zugeben, am Anfang habe ich so einige Fehler gemacht, die meine Ernte ganz schön geschmälert haben. Damit euch das nicht passiert, teile ich heute meine Erfahrungen und zeige euch, wie ihr die häufigsten Fehler vermeidet und eine riesige Gurkenernte einfahrt!
Die größten Fehler beim Gurkenanbau und wie du sie vermeidest
Bevor wir uns die einzelnen Schritte ansehen, hier eine kurze Übersicht über die häufigsten Fehler, die ich (und viele andere Gärtner) gemacht haben:
* Falsche Sortenwahl: Nicht jede Gurkensorte ist für jeden Standort geeignet.
* Schlechte Bodenvorbereitung: Gurken sind Starkzehrer und brauchen einen nährstoffreichen Boden.
* Falsche Bewässerung: Zu viel oder zu wenig Wasser kann die Gurkenpflanzen stressen.
* Mangelnde Unterstützung: Gurkenpflanzen brauchen eine Rankhilfe, um optimal zu wachsen.
* Falsche Düngung: Eine Über- oder Unterdüngung kann das Wachstum beeinträchtigen.
* Vernachlässigung der Schädlingsbekämpfung: Gurkenpflanzen sind anfällig für Schädlinge und Krankheiten.
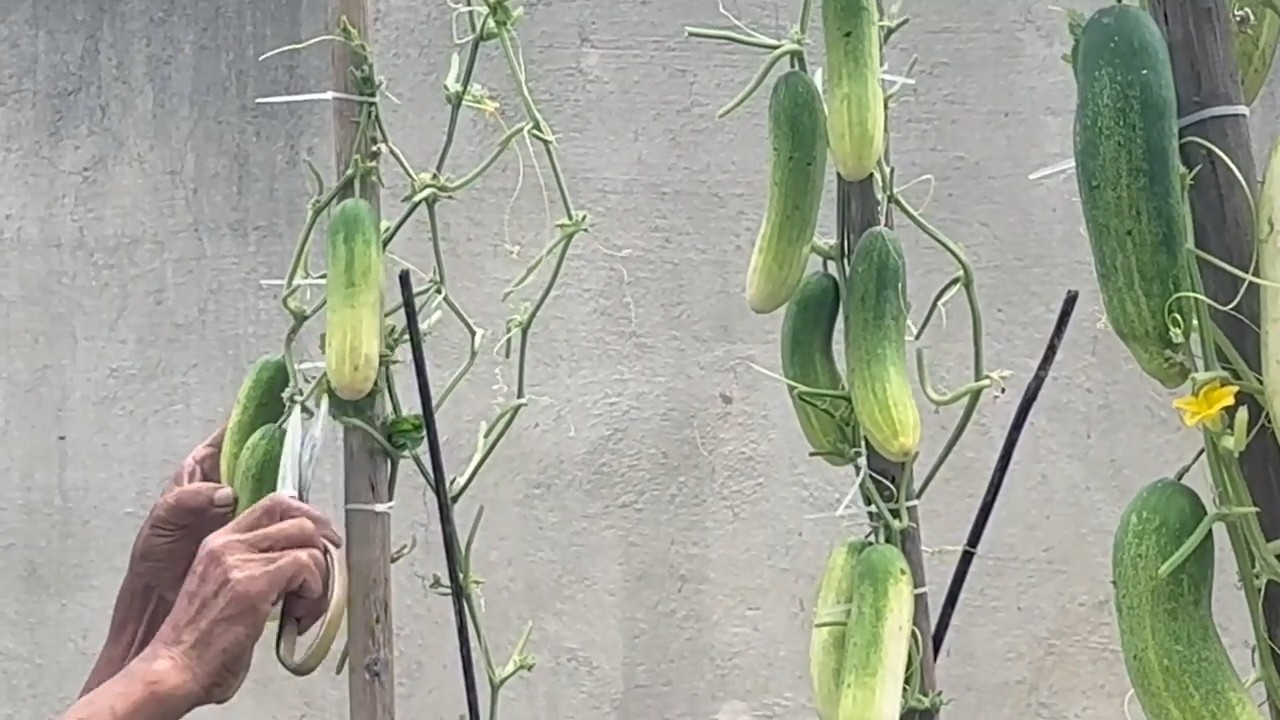
* Zu späte Ernte: Zu große Gurken können bitter werden und die Pflanze schwächen.
* Falscher Standort: Gurken brauchen viel Sonne und Schutz vor Wind.
* Keine Fruchtfolge: Immer wieder Gurken am selben Standort anzubauen, kann zu Problemen führen.
* Zu dichtes Pflanzen: Gurken brauchen genügend Platz, um sich auszubreiten.
Gurken richtig anbauen: Schritt-für-Schritt-Anleitung
Jetzt zeige ich euch, wie ihr es richtig macht! Wir gehen alle wichtigen Schritte durch, von der Vorbereitung bis zur Ernte.
1. Die richtige Sorte wählen
* Freilandgurken vs. Gewächshausgurken: Überlegt euch, wo ihr eure Gurken anbauen wollt. Freilandgurken sind robuster und widerstandsfähiger gegen Krankheiten, während Gewächshausgurken oft ertragreicher sind und früher geerntet werden können.
* Einlegegurken vs. Salatgurken: Einlegegurken sind kleiner und fester, ideal zum Einlegen. Salatgurken sind größer und haben eine dünnere Schale, perfekt für Salate.
* Parthenokarpe Sorten: Diese Sorten bilden Früchte ohne Bestäubung, was besonders im Gewächshaus von Vorteil ist. Achtet auf die Beschreibung “parthenocarp” oder “jungfernfrüchtig”.
* Resistente Sorten: Achtet auf Sorten, die gegen häufige Gurkenkrankheiten wie Mehltau resistent sind.
Ich persönlich mag die Sorte “Marketmore 76” für den Freilandanbau und “Delikatess” für das Gewächshaus.
2. Den Boden vorbereiten
* Der richtige Standort: Gurken lieben die Sonne! Wählt einen sonnigen Standort mit mindestens 6 Stunden direkter Sonneneinstrahlung pro Tag. Der Boden sollte gut durchlässig und locker sein.
* Bodenverbesserung: Gurken sind Starkzehrer, das heißt, sie brauchen viele Nährstoffe. Verbessert den Boden mit Kompost, gut verrottetem Mist oder Hornspänen. Ich mische immer eine ordentliche Portion Kompost unter die Erde, bevor ich pflanze.
* pH-Wert: Der ideale pH-Wert für Gurken liegt zwischen 6,0 und 7,0. Ihr könnt den pH-Wert mit einem Bodentest überprüfen und gegebenenfalls mit Kalk oder Schwefel anpassen.
* Beet vorbereiten: Lockert den Boden gründlich auf und entfernt Unkraut. Formt ein leicht erhöhtes Beet, um die Drainage zu verbessern.
3. Gurken vorziehen oder direkt säen?
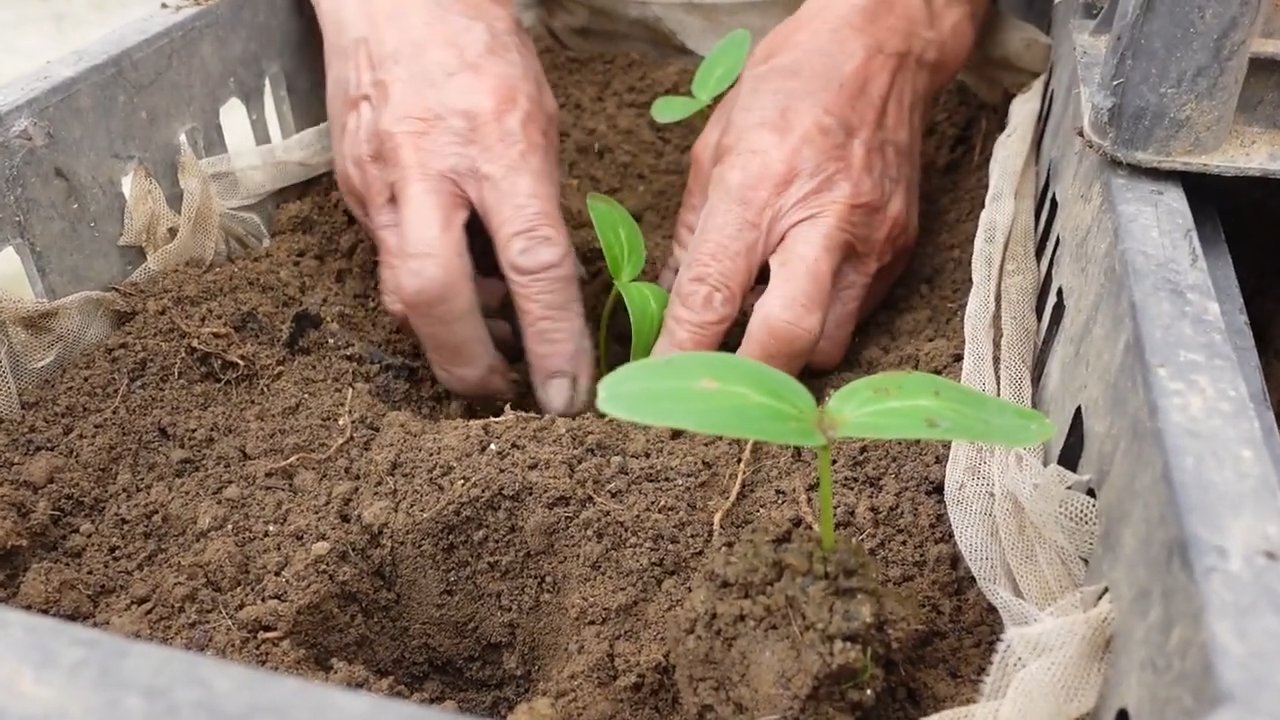
* Vorziehen: Ich ziehe meine Gurken meistens vor, weil ich so einen Vorsprung habe und früher ernten kann. Beginnt etwa 3-4 Wochen vor dem letzten erwarteten Frost mit der Aussaat in kleinen Töpfen. Verwendet Anzuchterde und haltet die Erde feucht.
* Direktsaat: Wenn ihr direkt ins Beet säen wollt, wartet, bis der Boden sich ausreichend erwärmt hat (mindestens 15°C). Säet die Samen etwa 2-3 cm tief und haltet die Erde feucht.
* Pflanzabstand: Achtet auf den richtigen Pflanzabstand! Freilandgurken brauchen etwa 60-80 cm Platz zwischen den Pflanzen, Gewächshausgurken etwas weniger (40-60 cm).
4. Gurken pflanzen
* Aushärten: Bevor ihr die vorgezogenen Gurkenpflanzen ins Beet pflanzt, müsst ihr sie abhärten. Stellt sie dazu tagsüber für einige Stunden ins Freie und holt sie abends wieder rein. So gewöhnen sie sich langsam an die Bedingungen im Freien.
* Pflanzen: Grabt ein Loch, das etwas größer ist als der Wurzelballen. Setzt die Gurkenpflanze vorsichtig hinein und füllt das Loch mit Erde auf. Drückt die Erde leicht an und gießt die Pflanze gründlich.
* Mulchen: Mulcht den Boden um die Gurkenpflanzen mit Stroh oder Rasenschnitt. Das hält die Feuchtigkeit im Boden, unterdrückt Unkraut und schützt die Früchte vor direktem Bodenkontakt.
5. Bewässerung
* Regelmäßig gießen: Gurken brauchen viel Wasser, besonders während der Fruchtbildung. Gießt regelmäßig und gründlich, am besten morgens oder abends. Vermeidet es, die Blätter zu benetzen, um Pilzkrankheiten vorzubeugen.
* Bodenfeuchtigkeit: Überprüft regelmäßig die Bodenfeuchtigkeit. Der Boden sollte sich feucht anfühlen, aber nicht nass sein.
* Tropfbewässerung: Eine Tropfbewässerung ist ideal für Gurken, da sie das Wasser direkt an die Wurzeln bringt und die Blätter trocken hält.
6. Rankhilfe anbringen
* Warum eine Rankhilfe? Gurken sind Kletterpflanzen und brauchen eine Rankhilfe, um optimal zu wachsen. Eine Rankhilfe sorgt für eine gute Belüftung der Pflanzen, verhindert, dass die Früchte auf dem Boden liegen und erleichtert die Ernte.
* Verschiedene Rankhilfen: Es gibt verschiedene Möglichkeiten, Gurken zu unterstützen. Ihr könnt ein Rankgitter, einen Zaun, ein Spalier oder einfach nur Stäbe verwenden. Ich persönlich bevorzuge ein Rankgitter aus Holz oder Metall.
* Anbringen: Bringt die Rankhilfe direkt nach dem Pflanzen an. Leitet die Gurkenpflanzen vorsichtig an der Rankhilfe entlang.
7. Düngen
* Regelmäßig düngen: Gurken sind Starkzehrer und brauchen regelmäßige Düngergaben. Düngt alle 2-3 Wochen mit einem organischen Dünger oder einem speziellen Gurkendünger.
* Stickstoff, Phosphor und Kalium: Achtet auf ein ausgewogenes Verhältnis von Stickstoff (N), Phosphor (P) und Kalium (K). Stickstoff fördert das Wachstum der Blätter, Phosphor die Wurzelbildung und Kalium die Fruchtbildung.
* Brennnesseljauche: Brennnesseljauche ist ein hervorragender organischer Dünger für Gurken. Sie ist reich an Nährstoffen und stärkt die Pflanzen.
8. Schädlinge und Krankheiten bekämpfen
* Vorbeugung: Vorbeugung ist besser als Heilung! Sorgt für eine gute Belüftung der Pflanzen, vermeidet Staunässe und entfernt regelmäßig Unkraut.
* Häufige Schädlinge: Gurken sind anfällig für Blattläuse, Spinnmilben und Schnecken. Kontrolliert die Pflanzen regelmäßig und bekämpft Schädlinge frühzeitig.
* Häufige Krankheiten: Gurken können von Mehltau, Gurkenmosaikvirus und Fusariumwelke befallen werden. Achtet auf die Symptome und handelt schnell.
* Biologische Schädlingsbekämpfung: Verwendet biologische Schädlingsbekämpfungsmittel wie Nützlinge oder Neemöl. Vermeidet chemische Pestizide, um die Umwelt
Conclusion
So, there you have it! Avoiding these common pitfalls is the key to unlocking a truly bountiful cucumber harvest. We’ve explored the crucial aspects of sunlight, soil preparation, watering techniques, pollination, and pest control – all essential for maximizing your cucumber yield. Remember, growing cucumbers isn’t just about planting seeds; it’s about understanding their needs and providing the optimal environment for them to thrive.
This isn’t just about having more cucumbers; it’s about enjoying the satisfaction of nurturing your plants and reaping the rewards of your hard work. Imagine crisp, refreshing cucumbers straight from your garden, perfect for salads, pickles, or simply enjoying as a healthy snack. The taste of homegrown produce is unparalleled, and knowing you cultivated it yourself makes it even more special.
Don’t be discouraged if you’ve made some of these mistakes in the past. Gardening is a learning process, and every season brings new opportunities to improve. Take what you’ve learned here and apply it to your next cucumber crop. You’ll be amazed at the difference it makes.
Consider experimenting with different cucumber varieties to find the ones that thrive best in your specific climate and soil conditions. Some varieties are more resistant to pests and diseases, while others are known for their exceptional flavor or high yield. You could also try companion planting, pairing your cucumbers with beneficial plants like marigolds or basil to deter pests and attract pollinators. Another variation is to try different trellising methods. Vertical growing not only saves space but also improves air circulation, reducing the risk of fungal diseases.
We strongly encourage you to put these tips into practice and see the difference for yourself. The journey to a high yield cucumber harvest is a rewarding one, filled with learning and delicious rewards. And most importantly, don’t forget to share your experiences with us! We’d love to hear about your successes, challenges, and any unique tips you’ve discovered along the way. Share your photos and stories in the comments below – let’s build a community of thriving cucumber growers! Let us know what worked for you and what didn’t. Your insights could help other gardeners avoid common mistakes and achieve their own bumper crop. Happy gardening!
Frequently Asked Questions (FAQs)
Why is sunlight so crucial for cucumber growth?
Cucumbers are sun-loving plants, requiring at least 6-8 hours of direct sunlight per day to thrive. Sunlight provides the energy they need for photosynthesis, the process by which they convert light energy into chemical energy in the form of sugars. These sugars fuel their growth, flowering, and fruit production. Insufficient sunlight leads to stunted growth, fewer flowers, and ultimately, a lower yield of cucumbers. If you’re growing cucumbers in a partially shaded area, consider using grow lights to supplement their sunlight exposure.
What’s the best way to prepare the soil for cucumbers?
Cucumbers prefer well-drained, fertile soil that is rich in organic matter. Before planting, amend your soil with compost, aged manure, or other organic materials to improve its structure, drainage, and nutrient content. Aim for a soil pH between 6.0 and 7.0. You can test your soil pH using a soil testing kit available at most garden centers. If your soil is heavy clay, consider adding sand or perlite to improve drainage. Raised beds are also an excellent option for growing cucumbers, as they provide excellent drainage and allow you to control the soil composition.
How often should I water my cucumber plants?
Cucumbers need consistent moisture, especially during hot weather and fruit development. Water deeply and regularly, aiming to keep the soil consistently moist but not waterlogged. A good rule of thumb is to water when the top inch of soil feels dry to the touch. Avoid overhead watering, as this can lead to fungal diseases. Instead, use a soaker hose or drip irrigation system to deliver water directly to the roots. Mulching around your cucumber plants can also help retain moisture and suppress weeds.
My cucumber plants are flowering, but I’m not getting any cucumbers. What could be the problem?
This is often a sign of poor pollination. Cucumbers are monoecious, meaning they have separate male and female flowers on the same plant. The female flowers need to be pollinated by bees or other insects in order to produce fruit. If you’re not seeing many bees in your garden, you may need to hand-pollinate your cucumber flowers. To do this, use a small paintbrush to transfer pollen from the male flowers to the female flowers. The female flowers have a small cucumber-like structure at the base, while the male flowers do not. You can also attract more pollinators to your garden by planting flowers that attract bees and other beneficial insects.
How can I protect my cucumber plants from pests and diseases?
Regularly inspect your cucumber plants for signs of pests and diseases. Common cucumber pests include aphids, cucumber beetles, and squash bugs. You can control these pests with insecticidal soap, neem oil, or by hand-picking them off the plants. Common cucumber diseases include powdery mildew, downy mildew, and bacterial wilt. To prevent these diseases, ensure good air circulation around your plants, avoid overhead watering, and use disease-resistant cucumber varieties. If you notice signs of disease, remove the affected leaves or plants immediately to prevent the spread of the disease. Crop rotation can also help prevent soilborne diseases from affecting your cucumber plants.
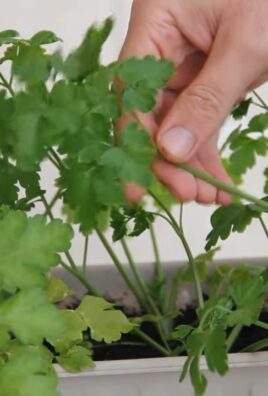
What are some good companion plants for cucumbers?
Companion planting can be a great way to improve the health and yield of your cucumber plants. Some good companion plants for cucumbers include marigolds, basil, dill, and nasturtiums. Marigolds deter nematodes and other soil pests, while basil repels aphids and whiteflies. Dill attracts beneficial insects like ladybugs and lacewings, which prey on cucumber pests. Nasturtiums attract aphids away from your cucumber plants, acting as a trap crop. Avoid planting cucumbers near aromatic herbs like sage or mint, as these can inhibit their growth.
How do I know when my cucumbers are ready to harvest?
Cucumbers are typically ready to harvest when they are firm, green, and of the desired size for their variety. Check the seed packet or plant tag for the expected size and shape of your cucumbers. Overripe cucumbers will turn yellow or orange and become seedy and bitter. Harvest your cucumbers regularly to encourage continued production. Use a sharp knife or pruning shears to cut the cucumbers from the vine, leaving a small stem attached.
Can I grow cucumbers in containers?
Yes, cucumbers can be successfully grown in containers, but you’ll need to choose a large container (at least 5 gallons) and provide adequate support for the vines. Use a well-draining potting mix and water regularly. Container-grown cucumbers may need more frequent fertilization than those grown in the ground. Choose bush or compact cucumber varieties for container gardening, as they are less sprawling than vining varieties. Make sure the container receives at least 6-8 hours of direct sunlight per day.
What are some common mistakes people make when growing cucumbers?
Some common mistakes include planting too early in the season, neglecting to provide adequate support for the vines, overwatering or underwatering, failing to fertilize regularly, and not protecting the plants from pests and diseases. By avoiding these mistakes, you can significantly increase your chances of a successful cucumber harvest. Remember that achieving a high yield cucumber crop requires attention to detail and a willingness to learn from your experiences.
Leave a Comment