
Grow Bigger Bitter Melon, you say? Absolutely! I know what you’re thinking: “Bitter melon? Really?” But trust me, once you taste a homegrown, perfectly ripened bitter melon, you’ll understand the hype. And who wouldn’t want a bigger, more bountiful harvest from their garden?
Bitter melon, also known as bitter gourd or karela, has a rich history, deeply rooted in Asian and African cultures. For centuries, it’s been prized not only for its unique, slightly bitter flavor but also for its impressive medicinal properties. From traditional remedies to culinary delights, this intriguing vegetable has earned its place in gardens and kitchens worldwide. But let’s be honest, getting a good yield can sometimes be a challenge.
That’s where these DIY tricks and hacks come in! I’ve spent years experimenting in my own garden, and I’ve discovered some simple yet effective techniques to help you grow bigger bitter melon than you ever thought possible. We’ll cover everything from soil preparation and watering strategies to pollination tips and pest control methods.
Why do you need these tricks? Because store-bought bitter melon often lacks the freshness and flavor of homegrown varieties. Plus, let’s face it, gardening is incredibly rewarding! Imagine the satisfaction of harvesting your own plump, juicy bitter melons, knowing you nurtured them from seed to table. So, let’s dive in and unlock the secrets to a thriving bitter melon patch!
Bittermelon-Booster: So bringst du deine Bittergurken zum Wachsen!
Hey Leute, ich bin’s wieder, euer Garten-Guru von nebenan! Heute zeige ich euch einen Trick, mit dem eure Bittermelonen (auch Bittergurken genannt) so richtig durchstarten. Ich habe selbst damit experimentiert und war total begeistert von den Ergebnissen. Also, krempeln wir die Ärmel hoch und legen los!
Was du brauchst:
* Bittermelonen-Samen oder Jungpflanzen: Wähle eine Sorte, die in deiner Region gut gedeiht.
* Hochwertige Erde: Bittermelonen sind hungrig! Eine nährstoffreiche, gut durchlässige Erde ist das A und O.
* Kompost oder gut verrotteter Mist: Für den extra Nährstoff-Kick!
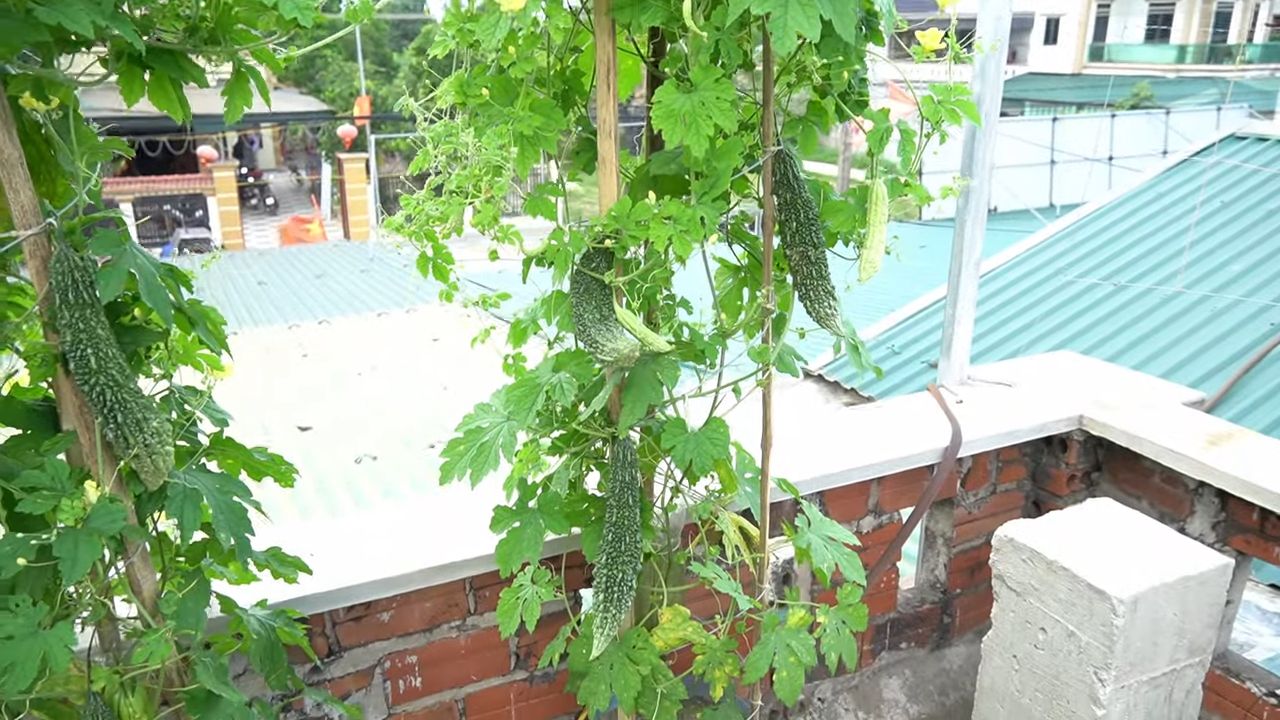
* Kletterhilfe: Bittermelonen sind Kletterpflanzen, also brauchen sie etwas zum Festhalten. Ein Rankgitter, ein Zaun oder ein selbstgebautes Gerüst sind ideal.
* Gartenschere: Zum Ausgeizen und Beschneiden.
* Organischer Dünger: Für die regelmäßige Fütterung.
* Mulchmaterial: Stroh, Holzhackschnitzel oder Rasenschnitt helfen, die Feuchtigkeit im Boden zu halten und Unkraut zu unterdrücken.
* Geduld und Liebe: Das Wichtigste überhaupt!
Die Vorbereitung: Der Grundstein für eine reiche Ernte
Bevor wir mit dem Pflanzen loslegen, müssen wir ein paar Vorbereitungen treffen. Das ist wie beim Kochen: Die richtige Vorbereitung ist die halbe Miete!
1. Samen vorziehen (optional): Wenn du früh dran bist und das Klima es zulässt, kannst du die Samen im Haus vorziehen. Das gibt den Pflanzen einen kleinen Vorsprung.
* Fülle kleine Töpfe mit Anzuchterde.
* Lege 2-3 Samen pro Topf etwa 1 cm tief in die Erde.
* Gieße die Erde vorsichtig an und stelle die Töpfe an einen warmen, hellen Ort.
* Halte die Erde feucht, aber nicht nass.
* Sobald die Keimlinge ein paar Blätter haben, kannst du die schwächsten entfernen, sodass nur noch eine Pflanze pro Topf übrig bleibt.
2. Den richtigen Standort wählen: Bittermelonen lieben die Sonne! Wähle einen sonnigen Standort mit mindestens 6-8 Stunden direkter Sonneneinstrahlung pro Tag. Der Boden sollte gut durchlässig sein und reich an organischen Stoffen.
3. Den Boden vorbereiten: Grabe den Boden an der Pflanzstelle tief um und lockere ihn auf. Mische reichlich Kompost oder gut verrotteten Mist unter, um den Boden mit Nährstoffen anzureichern. Das ist wie ein Festmahl für deine zukünftigen Bittermelonen!
4. Kletterhilfe installieren: Bevor du die Pflanzen setzt, solltest du die Kletterhilfe installieren. Das spart dir später Arbeit und verhindert, dass die Pflanzen beschädigt werden. Stelle sicher, dass die Kletterhilfe stabil ist und den wachsenden Pflanzen ausreichend Halt bietet.
Das Pflanzen: Der Startschuss für deine Bittermelonen
Jetzt kommt der spannende Teil: Das Pflanzen! Egal, ob du vorgezogene Pflanzen oder direkt gesäte Samen verwendest, hier sind die Schritte, die du beachten solltest:
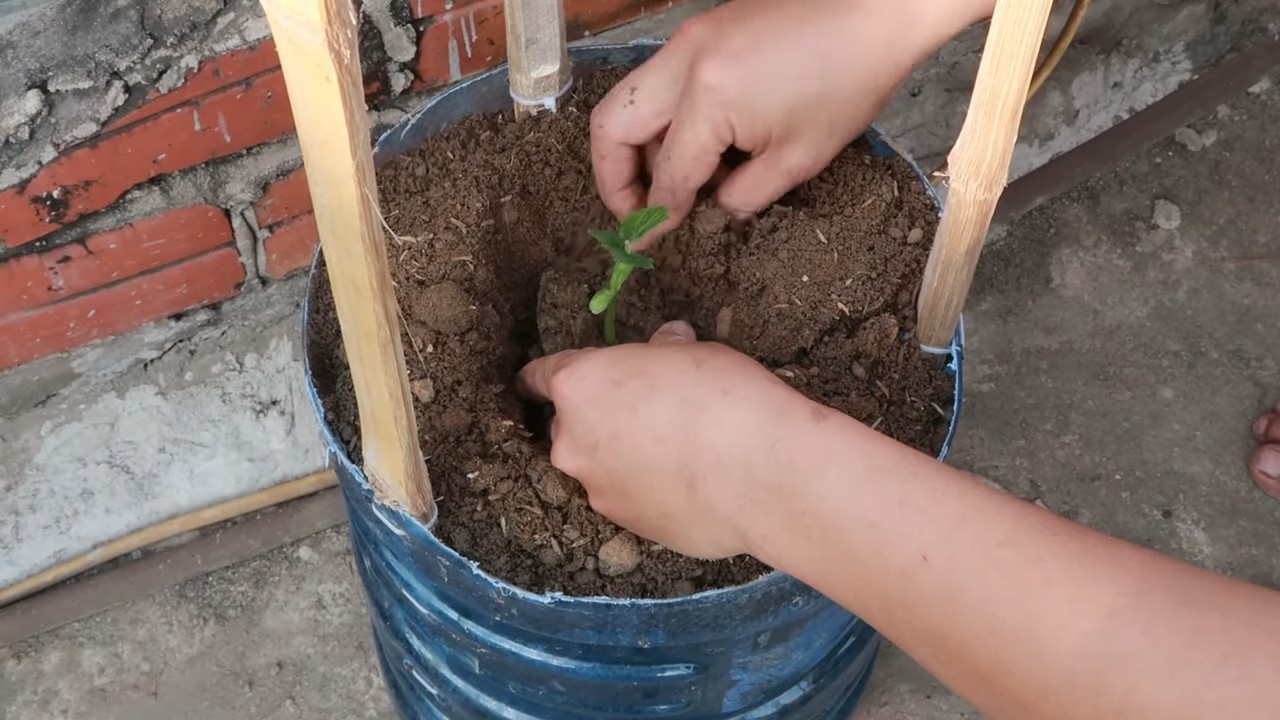
1. Pflanzen aussetzen (wenn vorgezogen):
* Grabe ein Loch, das etwas größer ist als der Wurzelballen der Pflanze.
* Nimm die Pflanze vorsichtig aus dem Topf und lockere den Wurzelballen etwas auf.
* Setze die Pflanze in das Loch und fülle es mit Erde auf.
* Drücke die Erde leicht an und gieße die Pflanze gründlich.
2. Samen direkt säen (wenn nicht vorgezogen):
* Säe die Samen etwa 2-3 cm tief in die Erde.
* Halte einen Abstand von etwa 60-90 cm zwischen den Pflanzen ein.
* Gieße die Erde vorsichtig an.
3. Mulchen: Bedecke den Boden um die Pflanzen herum mit einer Schicht Mulchmaterial. Das hilft, die Feuchtigkeit im Boden zu halten, Unkraut zu unterdrücken und den Boden vor Temperaturschwankungen zu schützen.
Die Pflege: Damit deine Bittermelonen so richtig aufblühen
Die Pflege ist das A und O für eine reiche Ernte. Bittermelonen sind zwar nicht besonders anspruchsvoll, aber ein bisschen Aufmerksamkeit brauchen sie schon.
1. Gießen: Bittermelonen brauchen regelmäßig Wasser, besonders während der heißen Sommermonate. Gieße die Pflanzen am besten früh morgens, damit die Blätter Zeit haben, abzutrocknen, bevor die Sonne aufgeht. Vermeide Staunässe, da dies zu Wurzelfäule führen kann.
2. Düngen: Bittermelonen sind hungrig! Dünge die Pflanzen alle 2-3 Wochen mit einem organischen Dünger. Ich verwende gerne Komposttee oder verdünnte Brennnesseljauche. Das ist wie ein Energy-Drink für deine Pflanzen!
3. Ausgeizen: Bittermelonen bilden viele Seitentriebe, die die Energie der Pflanze rauben können. Entferne regelmäßig die Seitentriebe, die aus den Blattachseln wachsen. Das fördert das Wachstum der Haupttriebe und die Bildung von Früchten.
4. Beschneiden: Wenn die Pflanzen zu dicht werden, kannst du sie etwas beschneiden, um die Luftzirkulation zu verbessern und Krankheiten vorzubeugen. Entferne abgestorbene oder gelbe Blätter.
5. Kletterhilfe nutzen: Hilf den Pflanzen, sich an der Kletterhilfe festzuhalten. Leite die Triebe vorsichtig an und befestige sie gegebenenfalls mit Pflanzenbindern.
6. Schädlinge und Krankheiten bekämpfen: Bittermelonen können von verschiedenen Schädlingen und Krankheiten befallen werden. Kontrolliere die Pflanzen regelmäßig auf Anzeichen von Befall und ergreife gegebenenfalls Maßnahmen. Ich verwende gerne natürliche Schädlingsbekämpfungsmittel wie Neemöl oder Schmierseifenlösung.
Der Trick für größere Bittermelonen: Die Blüten bestäuben!
Hier kommt der Clou, der den Unterschied macht! Bittermelonen haben männliche und weibliche Blüten. Die weiblichen Blüten erkennst du an dem kleinen Fruchtansatz direkt hinter der Blüte. Um sicherzustellen, dass die weiblichen Blüten bestäubt werden und sich zu großen, prallen Bittermelonen entwickeln, kannst du sie von Hand bestäuben.
1. Männliche und weibliche Blüten identifizieren: Die männlichen Blüten haben einen langen Stiel und keinen Fruchtansatz. Die weiblichen Blüten haben einen kurzen Stiel und einen kleinen Fruchtansatz direkt hinter der Blüte.
2. Bestäubung durchführen:
* Nimm einen kleinen Pinsel oder ein Wattestäbchen.
* Sammle Pollen von einer männlichen Blüte, indem du den Pinsel oder das Wattestäbchen vorsichtig in die Blüte tupfst.
* Übertrage den Pollen auf die Narbe einer weiblichen Blüte.
* Wiederhole den Vorgang für alle weiblichen Blüten.
3. Zeitpunkt der Bestäubung: Die beste Zeit für die Bestäubung ist früh morgens, wenn die Blüten geöffnet sind und der Pollen frisch ist.
Die Ernte: Der Lohn deiner Mühe
Nach all der Arbeit kommt endlich der schönste Teil: Die Ernte! Bittermelonen sind erntereif, wenn sie ihre volle Größe erreicht haben und eine leuchtend grüne Farbe haben.
1. Erntezeitpunkt: Bittermelonen sind erntereif, wenn sie ihre volle Größe erreicht haben und eine leuchtend grüne Farbe haben. Die genaue Erntezeit hängt von der Sorte ab.
2. Erntemethode: Schneide die Bittermelonen mit einer Gartenschere vom Stiel ab. Sei vorsichtig, um die Pflanze nicht zu beschädigen.
3. Lagerung: Bittermelonen sind nicht lange haltbar. Lagere sie im Kühlschrank und verbrauche sie innerhalb weniger Tage.
Zusätzliche Tipps für eine erfolgreiche Bittermelonen-Ernte:
* Wähle die richtige Sorte: Es gibt viele verschiedene Bittermelonen-Sorten. Wähle eine Sorte, die in deiner Region gut gedeiht und deinen Geschmack trifft.
* Achte auf eine gute Drainage: Bittermelonen mögen keine Staunässe. Stelle
Conclusion
So, there you have it! Mastering the art of growing bigger bitter melon isn’t about magic; it’s about understanding the plant’s needs and employing a few strategic techniques. We’ve explored everything from optimizing soil conditions and providing adequate support to hand-pollination and strategic pruning. These aren’t just theoretical concepts; they’re practical steps you can take to significantly increase the size and yield of your bitter melon harvest.
Why is this DIY approach a must-try? Because it empowers you to take control of your garden and cultivate truly impressive bitter melons. Store-bought bitter melons often lack the freshness and flavor of homegrown varieties, and by implementing these techniques, you’ll be rewarded with a bounty of vibrant, healthy fruits that are bursting with taste and nutrients. Plus, there’s an undeniable satisfaction in nurturing a plant from seed to harvest and witnessing the fruits (literally!) of your labor.
Don’t be afraid to experiment with variations to suit your specific growing conditions and preferences. For instance, if you live in a particularly hot climate, consider providing shade during the hottest part of the day to prevent sunscald. If your soil is naturally alkaline, amend it with sulfur to lower the pH. You can also explore different trellising methods to find what works best for your garden space. Some gardeners swear by vertical trellises, while others prefer horizontal structures. The key is to observe your plants closely and adapt your approach as needed.
Consider companion planting to further enhance your bitter melon’s growth. Planting basil or marigolds nearby can help deter pests, while legumes like beans or peas can fix nitrogen in the soil, providing a natural fertilizer boost.
We’ve also touched upon the importance of consistent watering and fertilization. Remember that bitter melons are heavy feeders, so regular applications of a balanced fertilizer are crucial for optimal growth. However, be careful not to over-fertilize, as this can lead to excessive foliage growth at the expense of fruit production.
Furthermore, don’t underestimate the power of observation. Regularly inspect your plants for signs of pests or diseases, and take prompt action to address any issues. Early detection and treatment can prevent minor problems from escalating into major setbacks.
Ultimately, growing bigger bitter melon is a journey of learning and discovery. There’s no one-size-fits-all solution, so be prepared to experiment and adapt your approach as needed. The rewards, however, are well worth the effort. Imagine the satisfaction of harvesting plump, juicy bitter melons from your own garden, knowing that you played an active role in their growth.
We strongly encourage you to try these DIY tricks and share your experiences with us. Post photos of your impressive bitter melon harvests on social media using #HomegrownBitterMelon or leave a comment below to let us know how these techniques worked for you. Your insights and experiences can help other gardeners achieve similar success. Let’s cultivate a community of passionate bitter melon growers!
Now, let’s dive into some frequently asked questions to address any lingering concerns you might have.
Frequently Asked Questions (FAQ)
Q: How long does it take for bitter melon to grow from seed to harvest?
A: The time from planting bitter melon seeds to harvesting mature fruits typically ranges from 60 to 90 days, depending on the variety, climate, and growing conditions. Warmer temperatures and consistent moisture will generally accelerate growth. Starting seeds indoors 4-6 weeks before the last expected frost can give you a head start.
Q: What are the best soil conditions for growing bitter melon?
A: Bitter melon thrives in well-drained, fertile soil with a slightly acidic to neutral pH (6.0 to 7.0). Amend your soil with plenty of organic matter, such as compost or well-rotted manure, to improve drainage, fertility, and water retention. A soil test can help you determine the pH and nutrient levels of your soil and guide you in making necessary amendments.
Q: How often should I water my bitter melon plants?
A: Bitter melon plants need consistent moisture, especially during hot weather and fruit development. Water deeply and regularly, aiming for about 1-2 inches of water per week. Avoid overhead watering, as this can increase the risk of fungal diseases. Drip irrigation or soaker hoses are excellent options for delivering water directly to the roots. Check the soil moisture regularly and adjust your watering schedule accordingly.
Q: What kind of fertilizer should I use for bitter melon?
A: Bitter melon is a heavy feeder and benefits from regular fertilization. Use a balanced fertilizer (e.g., 10-10-10 or 14-14-14) at planting time and then side-dress with a nitrogen-rich fertilizer every 2-3 weeks during the growing season. You can also use organic fertilizers, such as fish emulsion or compost tea. Follow the instructions on the fertilizer label carefully to avoid over-fertilizing.
Q: How do I hand-pollinate bitter melon flowers?
A: Bitter melon plants have separate male and female flowers. If you’re not seeing fruit set, hand-pollination can help. Identify the male flowers (they have a long, thin stem) and the female flowers (they have a small, immature fruit behind the flower). Use a small paintbrush or cotton swab to collect pollen from the male flower and gently transfer it to the stigma of the female flower. Do this in the morning, when the flowers are open.
Q: What are some common pests and diseases that affect bitter melon?
A: Common pests that can affect bitter melon include aphids, spider mites, and squash bugs. Diseases include powdery mildew, downy mildew, and fusarium wilt. Regularly inspect your plants for signs of pests or diseases and take prompt action to address any issues. Use organic pest control methods, such as insecticidal soap or neem oil, to control pests. Ensure good air circulation and avoid overhead watering to prevent fungal diseases.
Q: How do I know when to harvest bitter melon?
A: Bitter melon is typically harvested when the fruits are still green and firm, before they turn yellow or orange. The exact size and color will vary depending on the variety. Gently press the fruit; it should feel firm but not rock-hard. Use a sharp knife or pruning shears to cut the fruit from the vine, leaving a short stem attached.
Q: Can I grow bitter melon in containers?
A: Yes, you can grow bitter melon in containers, but you’ll need a large container (at least 15-20 gallons) to accommodate the plant’s root system. Use a well-draining potting mix and provide a trellis or other support for the vines to climb. Container-grown bitter melons may require more frequent watering and fertilization than those grown in the ground.
Q: My bitter melon fruits are small and misshapen. What could be the problem?
A: Several factors can contribute to small and misshapen bitter melon fruits, including poor pollination, nutrient deficiencies, insufficient watering, and pest or disease problems. Ensure that your plants are adequately pollinated, fertilized, and watered. Regularly inspect your plants for signs of pests or diseases and take prompt action to address any issues.
Q: Can I eat the leaves and vines of bitter melon?
A: Yes, the young leaves and tender vines of bitter melon are edible and can be used in stir-fries, soups, and other dishes. They have a slightly bitter taste, similar to the fruit. However, it’s important to note that some people may be sensitive to the bitter compounds in bitter melon, so it’s best to start with small amounts.
Q: How can I reduce the bitterness of bitter melon?
A: There are several ways to reduce the bitterness of bitter melon. Soaking the sliced fruit in salted water for 30 minutes to an hour can help draw out some of the bitter compounds. You can also blanch the fruit in boiling water for a few minutes before cooking. Another technique is to remove the white pith and seeds from the center of the fruit, as this is where most of the bitterness is concentrated.
Q: What are some creative ways to use bitter melon in cooking?
A: Bitter melon can be used in a variety of dishes, including stir-fries, soups, stews, and salads. It pairs well with savory flavors, such as garlic, ginger, soy sauce, and chili peppers. You can also stuff bitter melon with ground meat or vegetables and bake it. In some cultures, bitter melon is used to make teas and medicinal preparations. Experiment with different recipes and find what you enjoy most.
Q: Is bitter melon good for my health?
A: Bitter melon is rich in vitamins, minerals, and antioxidants, and it has been traditionally used for its medicinal properties. Some studies suggest that bitter melon may help regulate blood sugar levels, improve cholesterol levels, and boost the immune system. However, more research is needed to confirm these benefits. If you have any health concerns, consult with a healthcare professional before incorporating bitter melon into your diet.


Leave a Comment