
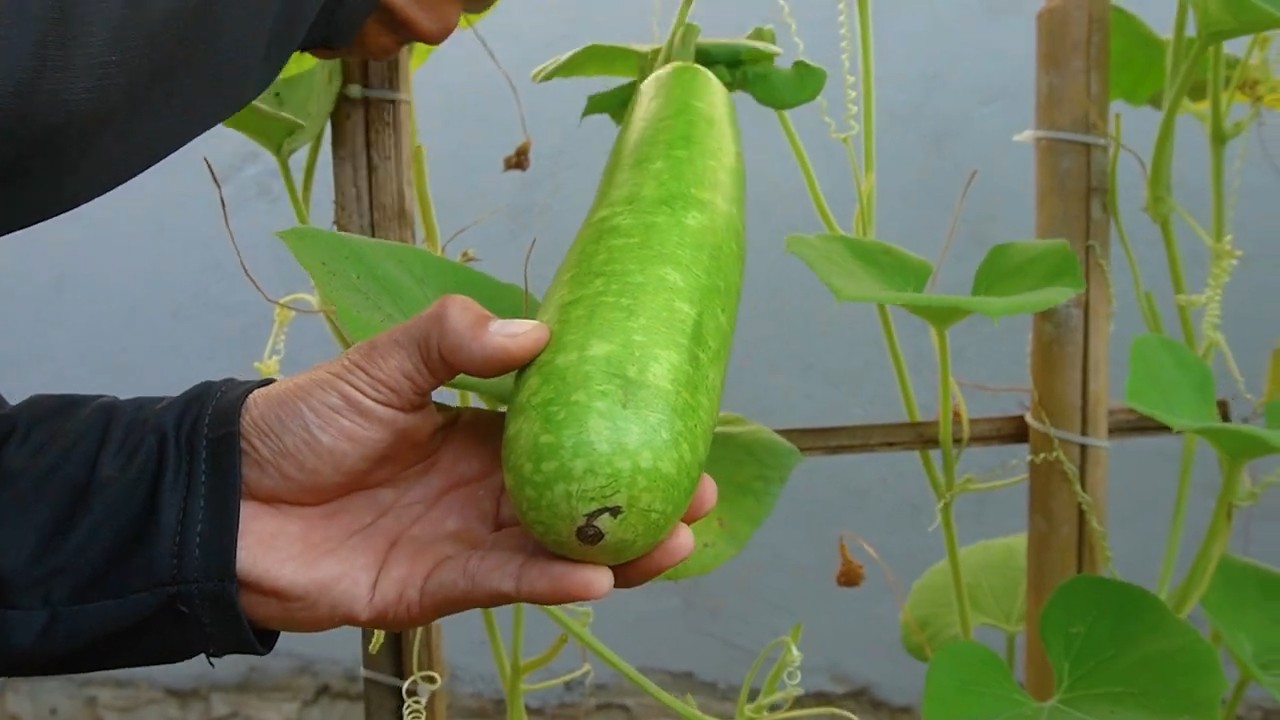
Growing gourds at home can be an incredibly rewarding experience, transforming your backyard into a vibrant, whimsical space. Have you ever dreamed of crafting your own birdhouses, unique decorations, or even musical instruments from something you’ve grown yourself? This isn’t just a pipe dream; it’s an achievable reality with a little know-how!
Gourds have a rich history, dating back thousands of years. Ancient civilizations across the globe, from Africa to Asia and the Americas, cultivated gourds for practical purposes like containers, utensils, and even ceremonial objects. Their versatility and durability made them invaluable resources. Imagine, our ancestors relied on these amazing plants for survival, and now we can harness that same potential for creative expression and sustainable living.
But why should you consider growing gourds at home? In today’s world, where mass-produced items dominate, there’s a growing desire for unique, handcrafted goods. Plus, let’s be honest, who doesn’t love a good DIY project? This article will provide you with simple, effective tricks and hacks to successfully cultivate gourds, even if you’re a complete beginner. We’ll cover everything from seed selection and soil preparation to harvesting and curing, ensuring you have all the information you need to create your own gourd-filled paradise. Get ready to unleash your inner gardener and craftsperson!
Kürbisse selbst anbauen: Dein umfassender DIY-Leitfaden
Hallo liebe Gartenfreunde! Ich freue mich riesig, euch heute in die faszinierende Welt des Kürbisanbaus mitzunehmen. Es gibt kaum etwas Befriedigenderes, als im Herbst die Früchte seiner Arbeit zu ernten – und das im wahrsten Sinne des Wortes! Egal, ob du einen riesigen Halloween-Kürbis, leckere Speisekürbisse oder dekorative Zierkürbisse anbauen möchtest, dieser Leitfaden wird dir helfen, deine Kürbis-Träume wahr werden zu lassen.
Die Grundlagen: Was du für den Kürbisanbau brauchst
Bevor wir loslegen, lass uns sicherstellen, dass du alles hast, was du brauchst. Kürbisse sind zwar relativ pflegeleicht, aber ein bisschen Vorbereitung ist der Schlüssel zum Erfolg.
* Kürbissamen: Wähle die Sorte, die du anbauen möchtest. Es gibt unzählige Optionen, von Riesenkürbissen bis hin zu kleinen, essbaren Sorten. Achte auf Qualitätssamen von einem vertrauenswürdigen Anbieter.
* Gute Erde: Kürbisse lieben nährstoffreiche, gut durchlässige Erde. Kompost, gut verrotteter Mist oder spezielle Pflanzerde für Gemüse sind ideal.
* Sonnenlicht: Kürbisse brauchen mindestens 6 Stunden Sonne pro Tag. Wähle einen sonnigen Standort in deinem Garten.
* Wasser: Regelmäßiges Gießen ist wichtig, besonders während der Fruchtbildung.
* Dünger: Ein guter Dünger hilft den Kürbissen, kräftig zu wachsen und viele Früchte zu produzieren.
* Werkzeuge: Spaten, Harke, Gießkanne oder Schlauch, eventuell eine kleine Schaufel für die Aussaat.
* Rankhilfe (optional): Für rankende Sorten kann eine Rankhilfe sinnvoll sein, um Platz zu sparen und die Früchte vor Bodenkontakt zu schützen.
Schritt-für-Schritt-Anleitung: So ziehst du deine eigenen Kürbisse
Jetzt geht’s ans Eingemachte! Hier ist eine detaillierte Anleitung, wie du deine eigenen Kürbisse anbaust:
1. Die Vorbereitung: Samen vorziehen oder direkt aussäen?
Du hast zwei Möglichkeiten: Entweder du ziehst die Samen im Haus vor oder du säst sie direkt ins Beet. Beide Methoden haben ihre Vor- und Nachteile.
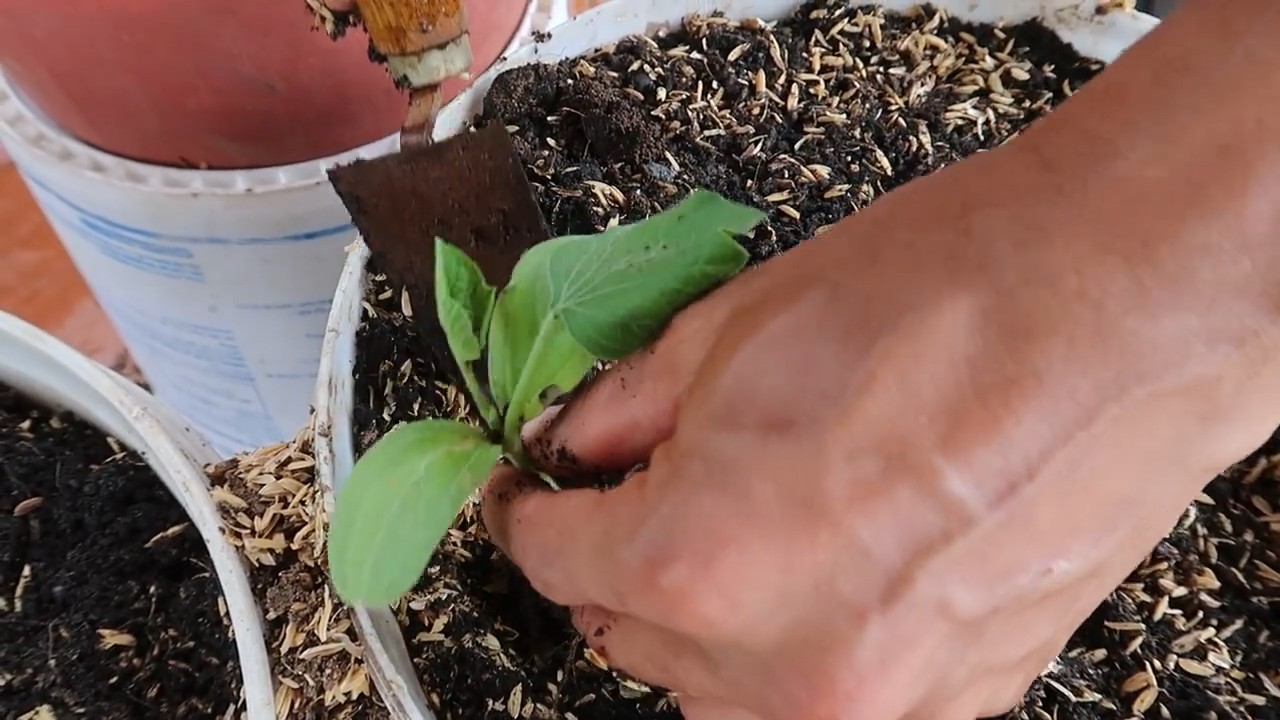
* Vorziehen im Haus: Beginne etwa 3-4 Wochen vor dem letzten erwarteten Frost. Fülle kleine Töpfe mit Anzuchterde und säe jeweils 2-3 Samen pro Topf. Halte die Erde feucht und stelle die Töpfe an einen warmen, hellen Ort. Sobald die Keimlinge ein paar Blätter haben, kannst du sie in größere Töpfe umpflanzen.
* Direktsaat ins Beet: Warte, bis der Boden sich erwärmt hat und keine Frostgefahr mehr besteht. Säe die Samen direkt ins Beet, etwa 2-3 cm tief. Lege mehrere Samen pro Pflanzstelle, um sicherzustellen, dass mindestens einer keimt.
2. Der richtige Standort: Wo fühlen sich Kürbisse wohl?
Kürbisse sind Sonnenanbeter und brauchen viel Platz. Wähle einen sonnigen Standort mit gut durchlässiger Erde.
* Boden vorbereiten: Lockere den Boden gründlich auf und arbeite Kompost oder gut verrotteten Mist ein. Das verbessert die Bodenstruktur und versorgt die Pflanzen mit Nährstoffen.
* Pflanzabstand: Achte auf ausreichend Platz zwischen den Pflanzen. Je nach Sorte kann der Pflanzabstand zwischen 1 und 2 Metern liegen. Informiere dich am besten auf der Samenpackung.
3. Das Pflanzen: Ab ins Beet!
Sobald die Frostgefahr vorüber ist und die Jungpflanzen kräftig genug sind (oder die Samen gekeimt haben), kannst du sie ins Beet pflanzen.
* Jungpflanzen auspflanzen: Grabe ein Loch, das etwas größer ist als der Wurzelballen der Jungpflanze. Setze die Pflanze vorsichtig ein und fülle das Loch mit Erde. Gieße die Pflanze gut an.
* Direktsaat vereinzeln: Wenn mehrere Samen gekeimt sind, vereinzele die Pflanzen, indem du die schwächsten entfernst. Lasse nur die kräftigste Pflanze pro Pflanzstelle stehen.
4. Die Pflege: Gießen, düngen und Unkraut jäten
Kürbisse brauchen regelmäßige Pflege, um gut zu wachsen und viele Früchte zu produzieren.
* Gießen: Gieße die Pflanzen regelmäßig, besonders während der Fruchtbildung. Vermeide es, die Blätter zu benetzen, um Pilzkrankheiten vorzubeugen. Gieße am besten morgens, damit die Blätter tagsüber abtrocknen können.
* Düngen: Dünge die Pflanzen regelmäßig mit einem organischen Dünger oder einem speziellen Kürbisdünger. Befolge die Anweisungen auf der Packung.
* Unkraut jäten: Halte das Beet unkrautfrei, damit die Kürbisse nicht um Nährstoffe konkurrieren müssen.
* Rankhilfe (optional): Wenn du eine rankende Sorte anbaust, kannst du eine Rankhilfe installieren, um Platz zu sparen und die Früchte vor Bodenkontakt zu schützen.
5. Die Bestäubung: Wie kommen die Früchte zustande?
Kürbisse sind einhäusig, das heißt, sie haben männliche und weibliche Blüten auf derselben Pflanze. Die Bestäubung erfolgt in der Regel durch Insekten, insbesondere Bienen.
* Handbestäubung (optional): Wenn du sicherstellen möchtest, dass die Bestäubung erfolgreich ist, kannst du die Blüten auch von Hand bestäuben. Trage mit einem Pinsel Pollen von einer männlichen Blüte auf die Narbe einer weiblichen Blüte. Weibliche Blüten erkennst du an dem kleinen Fruchtansatz direkt unter der Blüte.
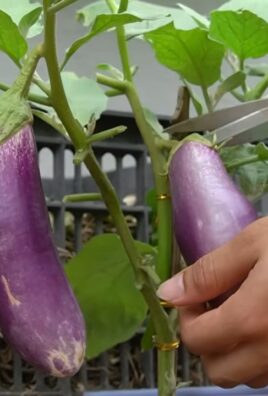
6. Die Ernte: Wann ist der Kürbis reif?
Die Erntezeit hängt von der Sorte ab. In der Regel sind Kürbisse reif, wenn die Schale hart ist und beim Klopfen hohl klingt.
* Erntezeitpunkt: Ernte die Kürbisse, bevor der erste Frost kommt. Schneide den Stiel mit einem scharfen Messer ab, lasse aber einen Stielansatz von etwa 5-10 cm stehen.
* Lagerung: Lagere die Kürbisse an einem kühlen, trockenen und gut belüfteten Ort. So halten sie sich mehrere Monate.
Herausforderungen und Lösungen: Was tun, wenn es nicht klappt?
Auch beim Kürbisanbau kann es zu Problemen kommen. Hier sind einige häufige Herausforderungen und wie du sie lösen kannst:
* Schneckenbefall: Schnecken können junge Kürbispflanzen kahlfressen. Schütze deine Pflanzen mit Schneckenkorn oder Schneckenzäunen.
* Mehltau: Mehltau ist eine Pilzkrankheit, die sich durch einen weißen Belag auf den Blättern äußert. Entferne befallene Blätter und sorge für eine gute Belüftung der Pflanzen. Du kannst auch ein Fungizid verwenden.
* Fruchtfliegen: Fruchtfliegen können reife Kürbisse befallen. Schütze deine Kürbisse mit Netzen oder ernte sie rechtzeitig.
* Keine Früchte: Wenn deine Kürbispflanzen keine Früchte tragen, kann das an mangelnder Bestäubung liegen. Versuche, die Blüten von Hand zu bestäuben.
Extra-Tipps für den erfolgreichen Kürbisanbau
Hier sind noch ein paar zusätzliche Tipps, die dir helfen werden, deine Kürbisernte zu maximieren:
* Bodenverbesserung: Arbeite vor der Pflanzung Kompost oder gut verrotteten Mist in den Boden ein. Das verbessert die Bodenstruktur und versorgt die Pflanzen mit Nährstoffen.
* Mulchen: Mulche den Boden um die Kürbispflanzen mit Stroh oder Rasenschnitt. Das hält den Boden feucht, unterdrückt Unkraut und schützt die Früchte vor Bodenkontakt.
* Kürbisse drehen: Drehe die Kürbisse regelmäßig, damit sie gleichmäßig ausreifen.
* Kürbisse vor Sonne schützen: Wenn die Sonne sehr stark ist, kannst du die Kürbisse mit einem Tuch oder einem Schirm vor Verbrennungen schützen.
Ich hoffe, dieser Leitfaden hat dir geholfen, deine Kürbis-Träume zu verwirklichen. Mit ein
Conclusion
So, there you have it! Growing gourds at home isn’t just a fun gardening project; it’s a gateway to unleashing your creativity and connecting with nature in a deeply rewarding way. From the initial thrill of planting the seeds to the satisfaction of harvesting your own unique creations, this DIY adventure offers a multitude of benefits. You’ll not only gain a deeper appreciation for the natural world but also acquire a sustainable source of materials for crafting, decorating, and even functional items.
Why is this a must-try? Because it’s more than just gardening; it’s an experience. It’s about nurturing life from a tiny seed and witnessing its transformation into something beautiful and useful. It’s about the joy of creating something with your own hands, using materials you’ve grown yourself. It’s about adding a personal touch to your home and garden with unique, handcrafted pieces that reflect your individual style. And let’s not forget the sheer satisfaction of knowing you’ve grown something from scratch!
But the fun doesn’t stop there! Feel free to experiment with different varieties of gourds to achieve a diverse range of shapes, sizes, and textures. Try painting your dried gourds with vibrant colors and intricate designs. Carve them into whimsical creatures or functional bowls. The possibilities are truly endless! Consider adding natural elements like twigs, leaves, and seeds to your gourd art for an even more organic and rustic feel. You could even try growing gourds on different types of supports to influence their shape – think trellises for long, winding gourds or sturdy frames for round, bulbous ones.
Don’t be afraid to get creative with your growing techniques, either. Experiment with different soil amendments to see how they affect the size and yield of your gourds. Try companion planting with beneficial herbs and flowers to attract pollinators and deter pests. And remember, patience is key! Growing gourds takes time and effort, but the rewards are well worth it.
We wholeheartedly encourage you to embark on this exciting journey of growing gourds at home. It’s a project that’s suitable for gardeners of all skill levels, and it’s a fantastic way to get kids involved in the wonders of nature. So, grab some seeds, prepare your garden, and get ready to experience the magic of growing your own gourds!
And most importantly, we want to hear about your experiences! Share your photos, tips, and stories with us in the comments below. Let us know what varieties you’re growing, what challenges you’ve faced, and what creative projects you’ve come up with. Together, we can create a community of gourd-growing enthusiasts and inspire others to discover the joy of this rewarding DIY activity. Happy growing!
Frequently Asked Questions (FAQ)
What are the best types of gourds to grow for crafting?
The best gourds for crafting depend on what you want to make! For birdhouses and bowls, hard-shelled gourds like the bottle gourd or dipper gourd are excellent choices. They have thick walls that provide durability and can be easily carved and hollowed out. For decorative purposes, smaller gourds like apple gourds, pear gourds, and swan gourds offer a variety of shapes and sizes that are perfect for painting, carving, and embellishing. Remember to research the specific needs of each variety to ensure successful growth.
How long does it take for gourds to mature and dry?
Gourds typically take around 100-120 days to mature after planting. However, the drying process can take much longer, often several months. The drying time depends on the size and thickness of the gourd, as well as the environmental conditions. It’s crucial to allow gourds to dry completely before using them for crafting, as this will prevent them from rotting or shrinking later on. A well-ventilated, dry space is essential for proper drying. You’ll know they’re dry when the seeds rattle inside and the outer shell is hard and lightweight.
What are some common problems when growing gourds, and how can I prevent them?
Some common problems include powdery mildew, squash bugs, and vine borers. Powdery mildew can be prevented by ensuring good air circulation around the plants and avoiding overhead watering. Squash bugs can be controlled by handpicking them off the plants or using insecticidal soap. Vine borers can be a more challenging pest, but you can protect your plants by wrapping the base of the stems with aluminum foil or netting to prevent the moths from laying their eggs. Regular inspection of your plants is key to catching problems early.
Can I eat gourds?
While some gourds are edible when young and tender, many ornamental gourds are not safe to eat. It’s essential to properly identify the type of gourd you’re growing before consuming it. Even edible gourds can become bitter and unpalatable as they mature. If you’re interested in growing edible gourds, consider varieties like zucchini, squash, or pumpkins, which are all members of the gourd family but are specifically bred for culinary use. Always err on the side of caution and avoid eating gourds unless you are absolutely certain of their edibility.
How do I clean and prepare gourds for crafting after they are dried?
Once your gourds are completely dry, you’ll need to clean them before you can start crafting. Start by washing the gourds with soapy water to remove any dirt or debris. You can use a scrub brush to help loosen stubborn grime. Next, you’ll need to remove the outer skin, which can be done by scraping it off with a knife or using a scouring pad. Be careful not to damage the underlying gourd shell. After cleaning, you can sand the gourd to create a smooth surface for painting or carving. Finally, seal the gourd with a clear coat of varnish or sealant to protect it from moisture and prevent it from cracking.
What are some creative ideas for using my homegrown gourds?
The possibilities are endless! You can create birdhouses, bowls, planters, lanterns, musical instruments, and decorative ornaments. You can paint them with vibrant colors, carve intricate designs, or embellish them with beads, shells, and other natural materials. You can also use them to create unique sculptures and art installations. Let your imagination run wild and experiment with different techniques to create one-of-a-kind pieces that reflect your personal style. Consider using stencils, wood burning tools, or even power tools to add texture and detail to your gourd creations.
How can I store my dried gourds properly to prevent them from rotting or getting infested with pests?
Proper storage is crucial for preserving your dried gourds. Store them in a cool, dry, and well-ventilated place, away from direct sunlight and moisture. Avoid storing them in airtight containers, as this can trap moisture and promote mold growth. You can also dust them with diatomaceous earth to help prevent pest infestations. Regularly inspect your stored gourds for any signs of rot or damage, and discard any that are affected. With proper care, your dried gourds can last for many years.
Is growing gourds at home a good project for kids?
Absolutely! Growing gourds is a fantastic educational and engaging project for kids. It teaches them about the life cycle of plants, the importance of nurturing and caring for living things, and the satisfaction of creating something with their own hands. Kids can help with planting the seeds, watering the plants, and harvesting the gourds. They can also participate in the cleaning, decorating, and crafting process. It’s a great way to get them outdoors, connect with nature, and develop their creativity and problem-solving skills.
Leave a Comment