
Grow Jalapenos From Seed and ignite your culinary adventures! Have you ever dreamt of adding a fiery kick to your homemade salsa or a zesty punch to your tacos, all with peppers you nurtured from tiny seeds? Well, stop dreaming and start planting! This DIY guide will unlock the secrets to successfully cultivating your own jalapeno bounty, right in your backyard or even on your sunny windowsill.
Jalapenos, originating from Mexico, have a rich history deeply intertwined with the vibrant flavors of Mexican cuisine. For centuries, they’ve been a staple ingredient, adding not just heat but also a unique depth of flavor to countless dishes. Imagine carrying on that tradition, growing your own piece of culinary history!
But why bother learning to grow jalapenos from seed yourself? Simple! Store-bought peppers can be expensive and sometimes lack the intense flavor and satisfying crunch of homegrown varieties. Plus, there’s an unparalleled joy in watching a tiny seed transform into a thriving plant, laden with spicy goodness. This DIY project is not only cost-effective but also incredibly rewarding. I’ll guide you through every step, from selecting the right seeds to harvesting your first batch of fiery jalapenos. Get ready to unleash your inner gardener and spice up your life!
Jalapenos aus Samen ziehen: Dein DIY-Guide für eine scharfe Ernte!
Hey Gartenfreunde! Ich liebe Jalapenos – in Salsa, auf Nachos, oder einfach so zum Knabbern. Und was gibt es Besseres, als sie selbst anzubauen? Es ist einfacher, als du denkst, und ich zeige dir, wie du mit Samen deine eigenen, superleckeren Jalapenos ziehen kannst. Los geht’s!
Was du brauchst: Die Vorbereitung ist alles!
Bevor wir loslegen, stell sicher, dass du alles griffbereit hast. Hier ist deine Checkliste:
* Jalapeno-Samen: Am besten von einer vertrauenswürdigen Quelle. Achte auf das Haltbarkeitsdatum!
* Anzuchterde: Normale Blumenerde ist zu nährstoffreich für junge Keimlinge. Anzuchterde ist locker und bietet die perfekte Grundlage.
* Anzuchtgefäße: Kleine Töpfe, Anzuchtschalen oder sogar Eierkartons funktionieren super. Hauptsache, sie haben Abzugslöcher.
* Mini-Gewächshaus (optional): Hilft, die Feuchtigkeit und Temperatur konstant zu halten. Ein durchsichtiger Plastikbehälter tut’s auch.
* Sprühflasche: Zum sanften Bewässern der Samen.
* Wärmematte (optional): Jalapenos lieben Wärme! Eine Wärmematte beschleunigt die Keimung.
* Pflanzetiketten: Damit du den Überblick behältst, was wo wächst.
* Bleistift oder wasserfester Stift: Zum Beschriften der Etiketten.
* Geduld: Das Wichtigste überhaupt!
Phase 1: Die Aussaat – Der Grundstein für deine Jalapenos
Jetzt wird’s ernst! Wir säen die Samen aus.
1. Gefäße vorbereiten: Fülle deine Anzuchtgefäße mit Anzuchterde. Drücke die Erde leicht an, aber nicht zu fest. Sie sollte locker und luftig bleiben.
2. Samen säen: Lege in jedes Gefäß 2-3 Samen. Sie sollten etwa 0,5-1 cm tief in der Erde liegen. Das ist wichtig, damit sie genug Licht bekommen, sobald sie keimen, aber auch genug Schutz haben.
3. Mit Erde bedecken: Bedecke die Samen vorsichtig mit einer dünnen Schicht Anzuchterde.
4. Bewässern: Befeuchte die Erde mit der Sprühflasche. Sie sollte gut durchfeuchtet sein, aber nicht triefend nass. Vermeide es, die Samen wegzuspülen.
5. Mini-Gewächshaus (optional): Stelle die Gefäße in dein Mini-Gewächshaus oder decke sie mit Frischhaltefolie ab. Das sorgt für ein feuchtwarmes Klima, das die Keimung fördert.
6. Wärme (optional): Stelle die Gefäße auf eine Wärmematte. Die ideale Keimtemperatur für Jalapenos liegt zwischen 24 und 29 Grad Celsius.
7. Beschriften: Vergiss nicht, deine Gefäße mit Pflanzetiketten zu beschriften. So weißt du später genau, was wo wächst.
Phase 2: Die Keimung – Warten und Beobachten
Jetzt heißt es warten und beobachten. Die Keimung kann je nach Temperatur und Bedingungen 1-3 Wochen dauern.
1. Feuchtigkeit kontrollieren: Achte darauf, dass die Erde immer leicht feucht bleibt. Besprühe sie bei Bedarf mit der Sprühflasche.
2. Belüften: Wenn du ein Mini-Gewächshaus verwendest, lüfte es regelmäßig, um Schimmelbildung zu vermeiden. Nimm die Abdeckung für ein paar Stunden am Tag ab.
3. Geduld haben: Die Keimung kann etwas dauern. Lass dich nicht entmutigen, wenn nicht sofort etwas passiert.
4. Erste Keimlinge: Sobald die ersten Keimlinge auftauchen, ist es Zeit, das Mini-Gewächshaus zu entfernen und die Pflanzen an einen hellen Standort zu stellen.
Phase 3: Die Aufzucht – Pflege für starke Pflanzen
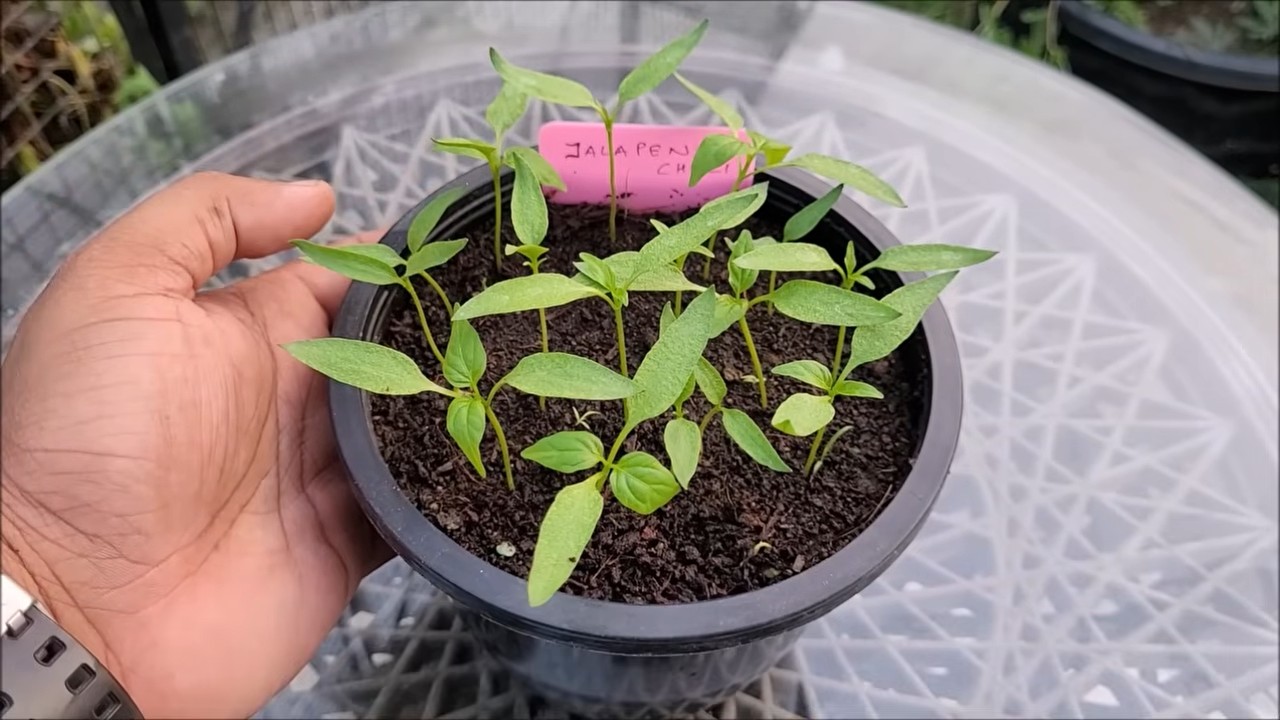
Die kleinen Pflänzchen sind da! Jetzt geht es darum, sie zu kräftigen, gesunden Jalapeno-Pflanzen heranzuziehen.
1. Heller Standort: Jalapenos brauchen viel Licht. Stelle die Pflanzen an einen hellen Standort, am besten ein Südfenster. Wenn das nicht möglich ist, kannst du auch eine Pflanzenlampe verwenden.
2. Bewässerung: Gieße die Pflanzen regelmäßig, aber vermeide Staunässe. Die Erde sollte immer leicht feucht sein.
3. Düngen: Sobald die Pflanzen ihre ersten richtigen Blätter (neben den Keimblättern) haben, kannst du mit dem Düngen beginnen. Verwende einen milden Flüssigdünger für Gemüsepflanzen. Halbiere die empfohlene Dosis, um die jungen Pflanzen nicht zu überdüngen.
4. Pikieren: Wenn die Pflanzen groß genug sind (etwa 5-7 cm hoch), ist es Zeit, sie zu pikieren. Das bedeutet, dass du sie in größere Töpfe umpflanzt, damit sie mehr Platz zum Wachsen haben.
* Vorbereitung: Fülle größere Töpfe (etwa 8-10 cm Durchmesser) mit Anzuchterde oder einer Mischung aus Anzuchterde und Blumenerde.
* Pflanzen vorsichtig ausheben: Löse die Pflanzen vorsichtig aus ihren Anzuchtgefäßen. Versuche, die Wurzeln so wenig wie möglich zu beschädigen.
* Einpflanzen: Setze jede Pflanze in einen eigenen Topf. Achte darauf, dass die Wurzeln gut mit Erde bedeckt sind.
* Bewässern: Gieße die Pflanzen nach dem Pikieren gut an.
5. Drehen: Drehe die Töpfe regelmäßig, damit die Pflanzen gleichmäßig wachsen und sich nicht zum Licht hinbiegen.
6. Abhärten: Bevor du die Pflanzen ins Freie pflanzt, musst du sie abhärten. Das bedeutet, dass du sie langsam an die Bedingungen im Freien gewöhnst. Stelle sie tagsüber für ein paar Stunden nach draußen, zuerst an einen schattigen Platz, dann an einen sonnigeren. Verlängere die Zeit im Freien jeden Tag, bis die Pflanzen den ganzen Tag draußen bleiben können.
Phase 4: Auspflanzen – Ab ins Beet oder in den Topf!
Jetzt sind deine Jalapeno-Pflanzen bereit für ihr endgültiges Zuhause!
1. Der richtige Zeitpunkt: Warte, bis keine Frostgefahr mehr besteht, bevor du die Pflanzen ins Freie pflanzt. Jalapenos sind sehr kälteempfindlich. Die Bodentemperatur sollte mindestens 15 Grad Celsius betragen.
2. Der richtige Standort: Wähle einen sonnigen Standort mit gut durchlässigem Boden. Jalapenos lieben Wärme und Sonne!
3. Boden vorbereiten: Lockere den Boden auf und reicher ihn mit Kompost oder anderem organischen Material an.
4. Pflanzen aussetzen: Grabe Löcher, die etwas größer sind als die Wurzelballen der Pflanzen. Setze die Pflanzen vorsichtig in die Löcher und fülle sie mit Erde auf. Drücke die Erde leicht an.
5. Abstand: Halte einen Abstand von etwa 45-60 cm zwischen den Pflanzen ein.
6. Bewässern: Gieße die Pflanzen nach dem Auspflanzen gut an.
7. Mulchen: Bedecke den Boden um die Pflanzen mit Mulch. Das hilft, die Feuchtigkeit im Boden zu halten und Unkraut zu unterdrücken.
Phase 5: Pflege im Freien – Für eine reiche Ernte
Deine Jalapenos sind ausgepflanzt! Jetzt geht es darum, sie gut zu pflegen, damit sie viele leckere Früchte tragen.
1. Bewässerung: Gieße die Pflanzen regelmäßig, besonders bei trockenem Wetter. Achte darauf, dass der Boden immer leicht feucht ist.
2. Düngen: Dünge die Pflanzen alle paar Wochen mit einem Gemüsedünger.
3. Stützen: Wenn die Pflanzen größer werden und viele Früchte tragen, kann es notwendig sein, sie zu stützen, damit sie nicht umknicken. Verwende dafür Stäbe oder Rankgitter.
4. Schädlinge und Krankheiten: Achte auf Schädlinge und
Conclusion
So, there you have it! Growing jalapenos from seed isn’t just a gardening project; it’s an adventure in flavor, a testament to your green thumb, and a rewarding journey from tiny speck to fiery fruit. We’ve walked you through the entire process, from selecting the perfect seeds to nurturing those delicate seedlings into robust plants ready to deliver a bountiful harvest of spicy goodness.
Why is this DIY trick a must-try? Because it puts you in complete control. You get to choose the exact variety of jalapeno you crave, ensuring you have the perfect heat level and flavor profile for your culinary creations. Forget relying on supermarket produce that may be bland or inconsistent; with homegrown jalapenos, you’re guaranteed a consistent supply of fresh, vibrant peppers bursting with flavor. Plus, there’s an undeniable satisfaction in knowing you nurtured these plants from the very beginning.
But the benefits extend beyond just flavor and control. Growing your own jalapenos is also a sustainable and cost-effective way to enjoy these versatile peppers. You’ll reduce your carbon footprint by eliminating the need for transportation and packaging, and you’ll save money in the long run by avoiding frequent trips to the grocery store. It’s a win-win for your taste buds, your wallet, and the planet.
Now, let’s talk about variations. Feel free to experiment with different growing mediums. While we recommended a seed starting mix, you can also try using coco coir or even a homemade blend of compost and perlite. Consider using different types of containers as your plants grow. From small peat pots to larger fabric pots, the options are endless. And don’t be afraid to get creative with your pest control methods. Companion planting with herbs like basil or marigolds can help deter unwanted insects naturally.
For those looking to push the boundaries, consider trying hydroponic jalapeno cultivation. This soilless method can lead to faster growth and higher yields, but it requires a bit more technical knowledge and specialized equipment. Another exciting variation is to graft your jalapeno plants onto more resilient rootstock. This can improve disease resistance and overall plant vigor, especially in challenging growing conditions.
Remember, gardening is all about experimentation and learning. Don’t be afraid to make mistakes and try new things. The most important thing is to have fun and enjoy the process.
We are confident that with a little patience and care, you’ll be harvesting your own delicious jalapenos in no time. So, grab your seeds, get your hands dirty, and embark on this exciting gardening adventure.
We wholeheartedly encourage you to try this DIY trick and experience the joy of growing your own jalapenos. And once you’ve tasted the fruits (or should we say peppers?) of your labor, we’d love to hear about your experience. Share your photos, tips, and stories with us in the comments below. Let’s create a community of jalapeno-loving gardeners and inspire others to embrace the joys of homegrown produce. Let us know what growing jalapenos from seed was like for you!
Frequently Asked Questions (FAQ)
What is the best time to start jalapeno seeds indoors?
The ideal time to start your jalapeno seeds indoors is typically 6-8 weeks before the last expected frost in your area. This allows the seedlings to develop a strong root system before being transplanted outdoors. Check your local weather forecasts and gardening resources to determine the average last frost date for your region. Starting too early can result in leggy, weak seedlings, while starting too late may delay your harvest.
How long does it take for jalapeno seeds to germinate?
Jalapeno seeds typically germinate within 7-14 days, but this can vary depending on factors such as temperature, moisture, and seed quality. Maintaining a consistent soil temperature of 75-85°F (24-29°C) is crucial for optimal germination. Using a heat mat can help regulate soil temperature, especially in cooler climates. Ensure the soil remains consistently moist but not waterlogged. Overwatering can lead to seed rot, while underwatering can prevent germination.
What type of soil is best for growing jalapenos?
Jalapenos thrive in well-draining, fertile soil with a slightly acidic to neutral pH (6.0-7.0). A good quality potting mix or seed starting mix is ideal for starting seeds indoors. When transplanting outdoors, amend your garden soil with compost or other organic matter to improve drainage and fertility. Avoid heavy clay soils, as they can retain too much moisture and lead to root rot.
How much sunlight do jalapeno plants need?
Jalapeno plants require at least 6-8 hours of direct sunlight per day to produce a bountiful harvest. Choose a sunny location in your garden where your plants will receive ample sunlight throughout the day. If you’re growing jalapenos indoors, supplement with grow lights to ensure they receive sufficient light. Insufficient sunlight can result in stunted growth, reduced flowering, and smaller peppers.
How often should I water my jalapeno plants?
Water your jalapeno plants deeply and regularly, especially during hot, dry weather. Allow the top inch of soil to dry out between waterings. Avoid overwatering, as this can lead to root rot. Mulching around your plants can help retain moisture and suppress weeds. The frequency of watering will depend on factors such as soil type, climate, and plant size. Check the soil moisture regularly and adjust your watering schedule accordingly.
When should I transplant my jalapeno seedlings outdoors?
Transplant your jalapeno seedlings outdoors after the last expected frost and when the soil has warmed up to at least 60°F (15°C). Harden off your seedlings gradually by exposing them to outdoor conditions for a few hours each day over the course of a week. This will help them acclimate to the sun, wind, and temperature changes. Choose a sunny location with well-draining soil and space your plants about 18-24 inches apart.
How do I fertilize my jalapeno plants?
Fertilize your jalapeno plants regularly throughout the growing season with a balanced fertilizer. Start with a fertilizer high in phosphorus to promote root development, and then switch to a fertilizer higher in nitrogen and potassium to encourage vegetative growth and fruit production. Follow the instructions on the fertilizer label carefully to avoid over-fertilizing. You can also supplement with organic fertilizers such as compost tea or fish emulsion.
What are some common pests and diseases that affect jalapeno plants?
Common pests that affect jalapeno plants include aphids, spider mites, whiteflies, and flea beetles. Diseases include blossom-end rot, fungal leaf spot, and verticillium wilt. Inspect your plants regularly for signs of pests or diseases and take action promptly. Use organic pest control methods such as insecticidal soap or neem oil to control pests. Ensure good air circulation and avoid overwatering to prevent fungal diseases.
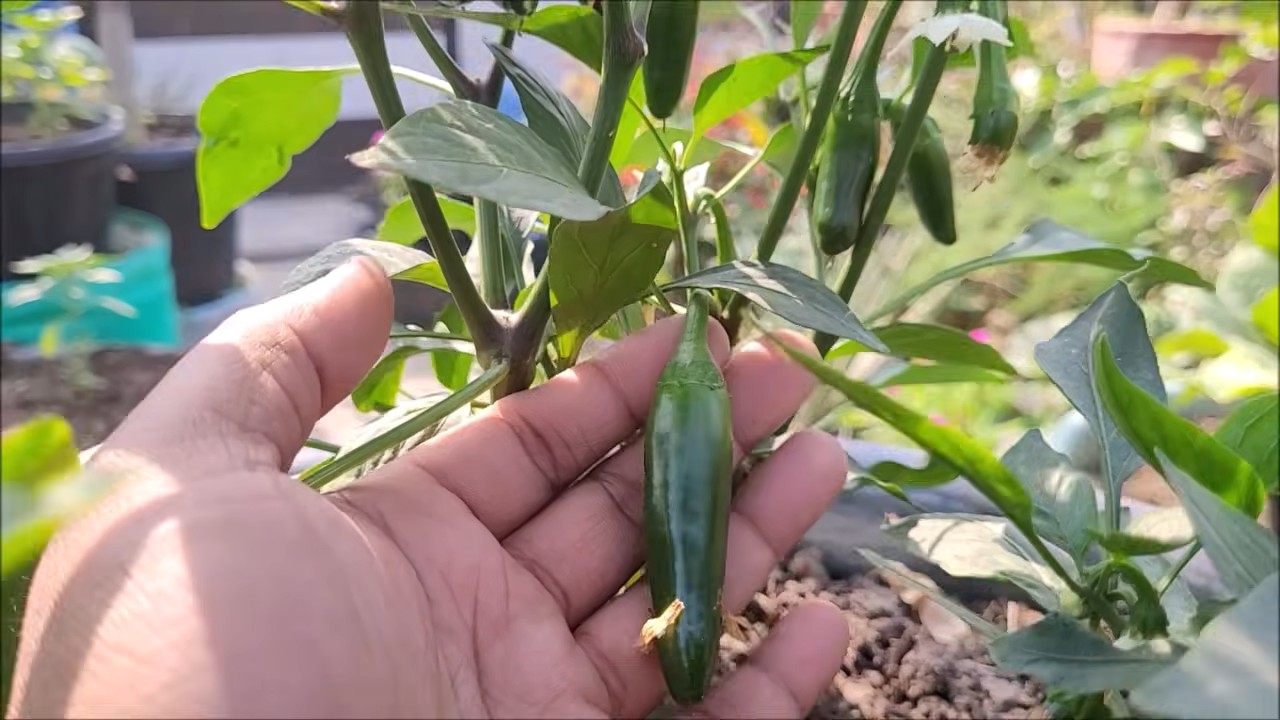
How do I harvest jalapenos?
Harvest your jalapenos when they are firm, glossy, and have reached their mature size and color. The color will vary depending on the variety, but most jalapenos turn from green to red as they ripen. Use pruning shears or a sharp knife to cut the peppers from the plant, leaving a small stem attached. Wear gloves when handling jalapenos, as the capsaicin can irritate your skin.
Can I save seeds from my jalapenos to grow next year?
Yes, you can save seeds from your jalapenos to grow next year, but keep in mind that if your plants were cross-pollinated with other pepper varieties, the seeds may not produce true-to-type plants. To save seeds, allow the peppers to fully ripen on the plant until they are red and slightly wrinkled. Remove the seeds from the peppers and spread them out on a paper towel to dry completely. Store the dried seeds in an airtight container in a cool, dark place.
Leave a Comment