
Growing Sage at Home doesn’t have to be a daunting task! Imagine stepping outside your door and snipping fresh, fragrant sage leaves to add a burst of flavor to your favorite dishes. No more trips to the grocery store for wilted herbs – just vibrant, homegrown goodness at your fingertips. For centuries, sage has been revered not only for its culinary uses but also for its medicinal properties, dating back to ancient Rome where it was considered a sacred herb.
But let’s be honest, sometimes gardening feels more like a chore than a joy, right? That’s where these simple DIY tricks and hacks come in! I’m here to share my secrets to successfully growing sage at home, even if you don’t have a green thumb. Whether you’re a seasoned gardener or a complete beginner, these tips will help you cultivate a thriving sage plant that will reward you with delicious, aromatic leaves for years to come. Plus, who doesn’t love a good DIY project that saves money and adds a touch of personal flair to their home?
This article will cover everything from choosing the right variety of sage to providing the perfect growing conditions and even propagating new plants from cuttings. So, grab your gardening gloves, and let’s get started on this exciting journey of growing your own sage!
Salbei zu Hause anbauen: Dein DIY-Leitfaden für einen grünen Daumen
Hallo liebe Gartenfreunde! Ich freue mich riesig, euch heute zu zeigen, wie ihr ganz einfach Salbei zu Hause anbauen könnt. Salbei ist nicht nur ein wunderbares Kraut zum Kochen, sondern auch eine wunderschöne Pflanze, die euren Garten oder Balkon bereichert. Und das Beste daran? Es ist wirklich kinderleicht! Also, krempeln wir die Ärmel hoch und legen los!
Was du brauchst: Die Vorbereitung
Bevor wir mit dem Pflanzen beginnen, sollten wir sicherstellen, dass wir alles Notwendige zur Hand haben. Hier ist eine Liste der Dinge, die du brauchst:
* Salbeisamen oder eine Salbeipflanze: Du kannst entweder mit Samen beginnen oder eine bereits gewachsene Pflanze kaufen. Beides funktioniert super!
* Töpfe oder Pflanzkästen: Wähle Töpfe mit guter Drainage, damit das Wasser gut ablaufen kann.
* Hochwertige Blumenerde: Salbei liebt gut durchlässige Erde.
* Gießkanne: Zum sanften Bewässern deiner Pflanzen.
* Spaten oder Schaufel: Zum Umtopfen oder Einpflanzen.
* Optional: Dünger für Kräuterpflanzen (aber Salbei ist nicht besonders anspruchsvoll).
* Optional: Eine Sprühflasche für die Blätter.
Salbei aus Samen ziehen: Schritt für Schritt
Wenn du dich für den Anbau aus Samen entschieden hast, ist hier eine detaillierte Anleitung:
1. Die Samen vorbereiten: Salbeisamen sind relativ klein. Du kannst sie entweder direkt in die Erde säen oder sie vorher in einem feuchten Tuch vorkeimen lassen. Das Vorkeimen beschleunigt den Prozess. Um die Samen vorzukeimen, lege sie zwischen zwei feuchte Papiertücher, gib sie in einen Gefrierbeutel und verschließe diesen. Stelle den Beutel an einen warmen Ort (z.B. auf die Heizung) und halte die Tücher feucht. Nach ein paar Tagen sollten die Samen keimen.
2. Aussaat in Töpfe: Fülle deine Töpfe mit Blumenerde. Drücke die Erde leicht an. Verteile die Samen gleichmäßig auf der Erde. Bedecke die Samen nur leicht mit Erde, da Salbei Licht zum Keimen benötigt.
3. Bewässerung: Befeuchte die Erde vorsichtig mit einer Sprühflasche oder einer Gießkanne mit Brauseaufsatz. Achte darauf, dass die Erde feucht, aber nicht nass ist.
4. Standort: Stelle die Töpfe an einen warmen und hellen Ort. Ein Fensterbrett mit direkter Sonneneinstrahlung ist ideal.
5. Geduld ist gefragt: Die Keimung kann einige Wochen dauern. Halte die Erde feucht und warte geduldig.
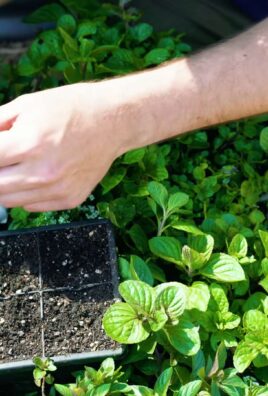
6. Pikieren: Sobald die Sämlinge groß genug sind (etwa 5-7 cm hoch), kannst du sie in größere Töpfe umpflanzen. Achte darauf, die Wurzeln nicht zu beschädigen.
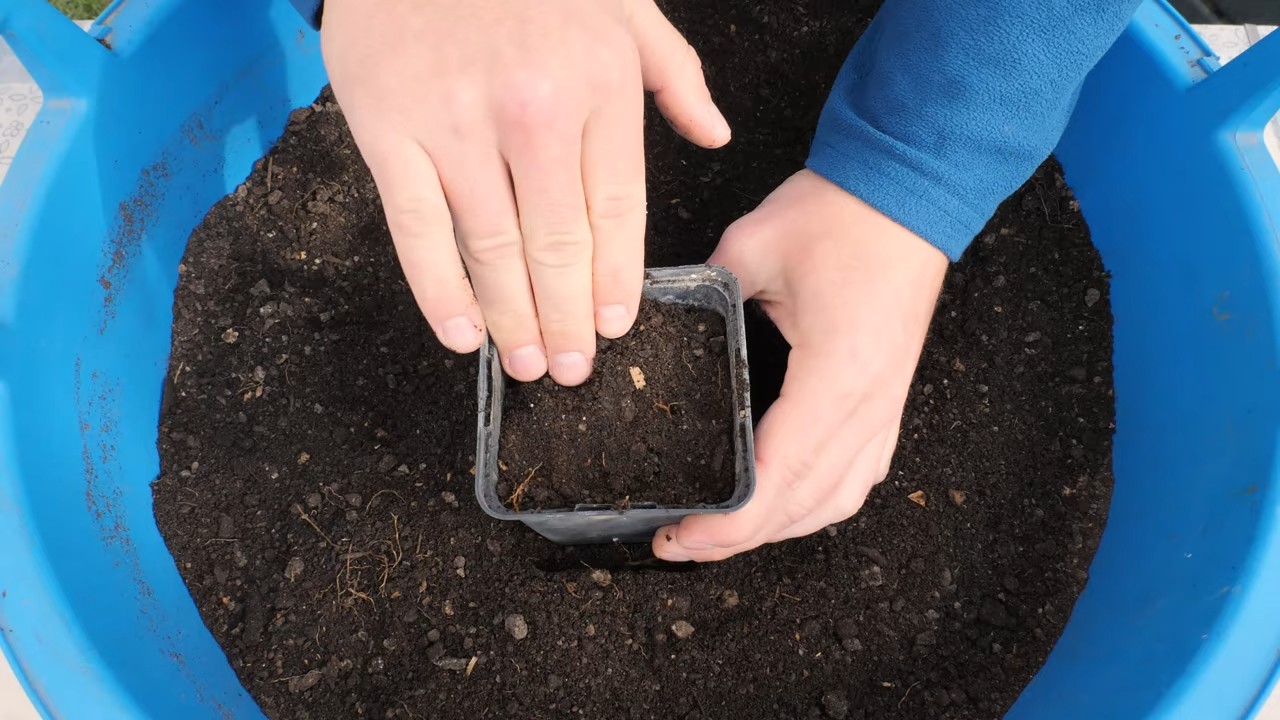
Salbeipflanzen einpflanzen: So geht’s
Wenn du eine bereits gewachsene Salbeipflanze gekauft hast, ist das Einpflanzen noch einfacher:
1. Topf vorbereiten: Wähle einen Topf, der etwas größer ist als der bisherige Topf der Pflanze. Fülle den Topf mit Blumenerde.
2. Pflanze vorsichtig herausnehmen: Nimm die Salbeipflanze vorsichtig aus ihrem alten Topf. Lockere die Wurzeln etwas auf, damit sie sich besser im neuen Topf ausbreiten können.
3. Einpflanzen: Setze die Pflanze in den neuen Topf und fülle den Topf mit Erde auf. Drücke die Erde leicht an.
4. Bewässerung: Gieße die Pflanze gründlich an.
5. Standort: Stelle den Topf an einen sonnigen Standort.
Die richtige Pflege: Damit dein Salbei prächtig gedeiht
Salbei ist relativ pflegeleicht, aber ein paar Dinge solltest du beachten, damit er sich wohlfühlt:
* Bewässerung: Gieße deinen Salbei regelmäßig, aber vermeide Staunässe. Die Erde sollte immer leicht feucht sein. Im Sommer musst du möglicherweise täglich gießen, während im Winter weniger Wasser benötigt wird. Überprüfe die Erde, bevor du gießt. Wenn sich die oberste Schicht trocken anfühlt, ist es Zeit zu gießen.
* Sonneneinstrahlung: Salbei liebt die Sonne! Stelle ihn an einen Ort, an dem er mindestens 6 Stunden Sonne pro Tag bekommt.
* Düngen: Salbei benötigt nicht viel Dünger. Wenn du möchtest, kannst du ihn im Frühjahr und Sommer einmal im Monat mit einem speziellen Kräuterdünger düngen. Aber übertreibe es nicht, denn zu viel Dünger kann den Geschmack beeinträchtigen.
* Rückschnitt: Regelmäßiges Schneiden fördert das Wachstum und verhindert, dass der Salbei verholzt. Schneide die Pflanze im Frühjahr und nach der Blütezeit zurück. Entferne dabei alte und trockene Triebe.
* Überwinterung: Salbei ist winterhart, aber in sehr kalten Regionen solltest du ihn schützen. Stelle den Topf an einen geschützten Ort oder decke die Pflanze mit Reisig ab.
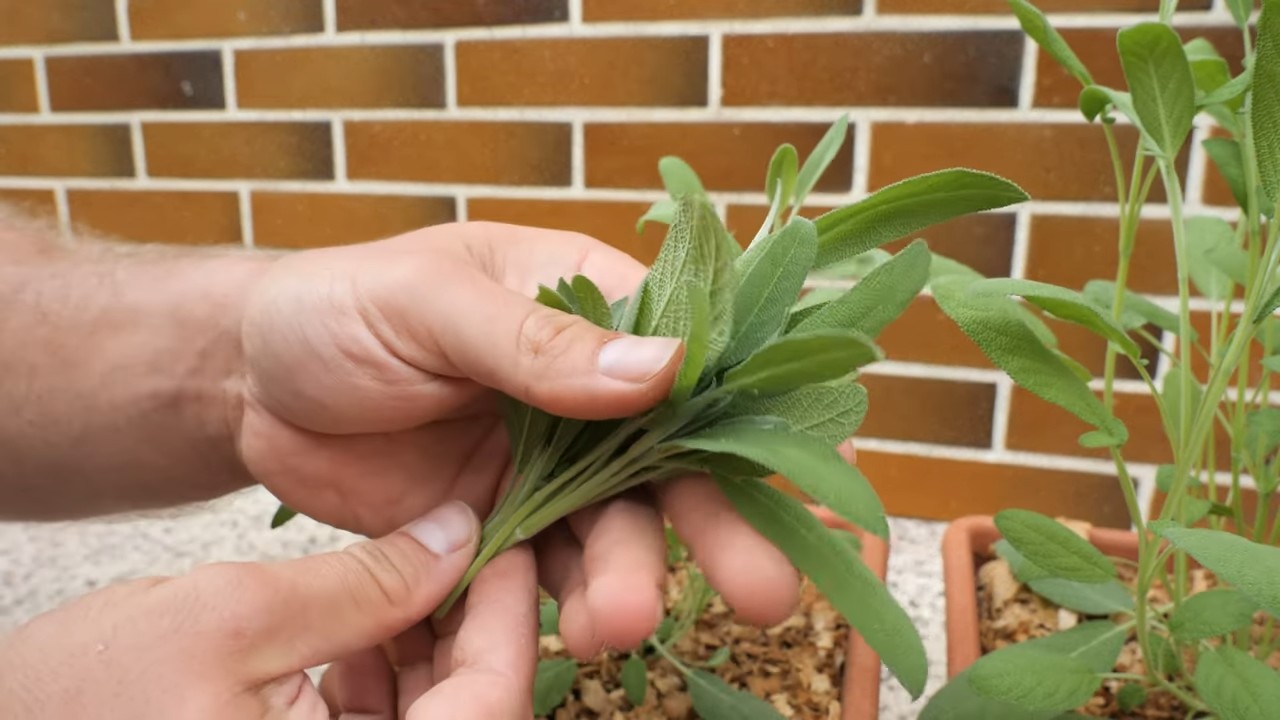
Salbei ernten: So holst du dir die frischen Blätter
Das Ernten von Salbei ist ganz einfach:
* Wann ernten: Du kannst Salbei das ganze Jahr über ernten. Am besten schmecken die Blätter jedoch vor der Blütezeit.
* Wie ernten: Schneide die Blätter mit einer Schere oder einem Messer ab. Du kannst einzelne Blätter oder ganze Triebe ernten.
* Verwendung: Frischer Salbei ist ideal zum Kochen. Du kannst ihn aber auch trocknen und für Tee oder andere Zwecke verwenden.
Salbei trocknen: Für den Vorrat
Um Salbei zu trocknen, gibt es verschiedene Methoden:
1. Lufttrocknung: Binde die Salbeitriebe zu kleinen Bündeln zusammen und hänge sie kopfüber an einem trockenen, dunklen und gut belüfteten Ort auf. Nach etwa zwei bis drei Wochen sind die Blätter trocken.
2. Trocknung im Ofen: Lege die Salbeiblätter auf ein Backblech und trockne sie bei niedriger Temperatur (ca. 50 Grad Celsius) im Ofen. Lasse die Ofentür einen Spalt offen, damit die Feuchtigkeit entweichen kann.
3. Trocknung im Dörrautomaten: Wenn du einen Dörrautomaten hast, kannst du die Salbeiblätter darin trocknen. Befolge die Anweisungen des Herstellers.
Nach dem Trocknen kannst du die Blätter in einem luftdichten Behälter aufbewahren.
Mögliche Probleme und Lösungen
Auch beim Salbeianbau können Probleme auftreten. Hier sind einige häufige Probleme und wie du sie lösen kannst:
* Blattläuse: Blattläuse können Salbei befallen. Sprühe die Pflanze mit einer Mischung aus Wasser und Spülmittel ab oder verwende ein spezielles Insektizid.
* Pilzkrankheiten: Bei zu hoher Luftfeuchtigkeit können Pilzkrankheiten auftreten. Sorge für eine gute Belüftung und vermeide Staunässe.
* Vergilbte Blätter: Vergilbte Blätter können ein Zeichen für Nährstoffmangel sein. Dünge die Pflanze mit einem Kräuterdünger.
Salbei im Garten: Eine Bereicherung für dein Beet
Salbei macht sich nicht nur gut im Topf, sondern auch im Gartenbeet. Hier sind ein paar Tipps für den Anbau im Garten:
* Standort: Wähle einen sonnigen Standort mit gut durchlässigem Boden.
* Pflanzabstand: Halte einen Pflanzabstand von etwa 30-40 cm ein.
* Bodenverbesserung: Verbessere den Boden vor dem Pflanzen mit Kompost oder anderem organischen Material.
* Pflege: Gieße den Salbei regelmäßig und schneide ihn im Frühjahr und nach der Blütezeit zurück.
Salbei vermehren: So bekommst du noch mehr Pflanzen
Es gibt verschiedene Möglichkeiten, Salbei zu vermehren:
* Stecklinge: Schneide im Frühjahr oder Sommer Stecklinge von der Pflanze ab und stecke sie in feuchte Erde. Nach einigen Wochen sollten die Stecklinge Wurzeln bilden.
Conclusion
So, there you have it! Growing sage at home isn’t just a gardening project; it’s an investment in flavor, fragrance, and well-being. From the vibrant aroma that fills your kitchen to the fresh, earthy taste that elevates your culinary creations, homegrown sage offers a sensory experience that store-bought dried herbs simply can’t match.
Why is this DIY trick a must-try? Because it empowers you to control the quality and freshness of your sage, ensuring you’re always using the best possible ingredient. Imagine the satisfaction of snipping a few sprigs of your own sage to season a hearty roast, infuse a comforting tea, or create a fragrant smudge stick. It’s a connection to nature, a step towards self-sufficiency, and a delicious way to enhance your everyday life.
But the benefits don’t stop there. Growing your own sage is also incredibly cost-effective. A single sage plant can provide you with a continuous supply of fresh herbs for years to come, saving you money on those expensive little jars from the grocery store. Plus, you’ll be reducing your environmental impact by avoiding the packaging and transportation associated with commercially grown herbs.
Feeling adventurous? Consider exploring different varieties of sage. Garden sage (Salvia officinalis) is the most common, but there are also purple sage, golden sage, and tricolor sage, each with its own unique flavor and appearance. Experiment with different growing methods, such as starting seeds indoors or propagating from cuttings. You can even try growing sage in containers on your balcony or windowsill if you don’t have a garden.
And don’t forget the many uses of sage beyond the kitchen. Sage has been used for centuries for its medicinal properties. It’s known for its anti-inflammatory, antioxidant, and antimicrobial effects. You can use it to make a soothing tea for a sore throat, a natural mouthwash for oral hygiene, or a calming aromatherapy blend.
We’ve covered the basics, from choosing the right variety to providing the ideal growing conditions. Now it’s your turn to get your hands dirty and experience the joy of growing sage at home. We are confident that you will find the process rewarding and the results delicious.
We encourage you to try this DIY trick and share your experience with us. Let us know what variety of sage you chose, what challenges you encountered, and what delicious dishes you created. Share your photos, tips, and tricks in the comments below. We can’t wait to hear your sage-growing stories!
Ready to Grow Your Own Sage?
Don’t delay! Start your sage-growing journey today and discover the many benefits of having this versatile herb at your fingertips. You’ll be amazed at how easy and rewarding it is to grow your own sage.
Frequently Asked Questions (FAQ)
What are the best conditions for growing sage?
Sage thrives in well-drained soil and full sun, requiring at least six hours of sunlight per day. The ideal soil pH is between 6.0 and 7.0. While sage is relatively drought-tolerant once established, it’s important to water regularly, especially during dry spells. Avoid overwatering, as this can lead to root rot. Good air circulation is also crucial to prevent fungal diseases. In colder climates, consider growing sage in containers that can be brought indoors during the winter months.
How often should I water my sage plant?
Water your sage plant deeply when the top inch of soil feels dry to the touch. Avoid frequent, shallow watering, as this can encourage shallow root growth and make the plant more susceptible to drought stress. During hot, dry weather, you may need to water more frequently. However, always err on the side of underwatering rather than overwatering. A good rule of thumb is to check the soil moisture every few days and water only when necessary.
When is the best time to harvest sage?
You can begin harvesting sage leaves as soon as the plant is established, usually after a few months of growth. The best time to harvest is in the morning, after the dew has dried but before the sun gets too hot. This will help to preserve the essential oils and flavor of the leaves. Simply snip off the leaves or stems as needed, using sharp scissors or pruning shears. Avoid removing more than one-third of the plant at a time, as this can stress the plant and reduce its growth.
How do I propagate sage?
Sage can be propagated from seeds, cuttings, or layering. Starting from seeds is a relatively easy method, but it can take longer to produce a mature plant. Cuttings are a faster and more reliable way to propagate sage. Simply take a 4-6 inch cutting from a healthy stem, remove the lower leaves, and place the cutting in a glass of water or directly into moist potting soil. Keep the cutting in a warm, bright location and wait for roots to develop. Layering involves bending a stem down to the ground and covering it with soil. Once roots have formed, the stem can be cut from the parent plant and transplanted.
What are some common problems with growing sage?
Some common problems with growing sage include root rot, powdery mildew, and spider mites. Root rot is caused by overwatering and poorly drained soil. To prevent root rot, ensure that your sage plant is growing in well-drained soil and avoid overwatering. Powdery mildew is a fungal disease that can cause a white, powdery coating on the leaves. To prevent powdery mildew, provide good air circulation and avoid overhead watering. Spider mites are tiny pests that can suck the sap from sage leaves, causing them to become yellow and speckled. To control spider mites, spray the plant with insecticidal soap or neem oil.
Can I grow sage indoors?
Yes, you can grow sage indoors, but it requires bright light and well-drained soil. Place your sage plant near a sunny window that receives at least six hours of sunlight per day. You may also need to supplement with artificial light, especially during the winter months. Use a well-draining potting mix and avoid overwatering. Ensure that the pot has drainage holes to prevent root rot.
How do I dry sage?
There are several ways to dry sage. One method is to tie the stems together and hang them upside down in a cool, dry, well-ventilated place. Another method is to spread the leaves on a screen or baking sheet and allow them to air dry. You can also use a dehydrator to dry sage leaves. Once the leaves are completely dry, store them in an airtight container in a cool, dark place.
What are some uses for sage?
Sage has a wide range of culinary and medicinal uses. In the kitchen, it’s often used to season meats, poultry, stuffing, and sauces. It can also be used to make sage butter, sage tea, and sage-infused oil. Medicinally, sage has been used to treat sore throats, digestive problems, and memory loss. It’s also believed to have anti-inflammatory and antioxidant properties. Sage essential oil is used in aromatherapy to promote relaxation and improve mood.
What are some companion plants for sage?
Sage is a good companion plant for rosemary, cabbage, and carrots. It can help to repel pests and improve the growth of these plants. Avoid planting sage near cucumbers, as it can inhibit their growth.
Is sage a perennial?
Yes, sage is a perennial herb, meaning that it will live for more than two years. With proper care, a sage plant can last for many years, providing you with a continuous supply of fresh herbs. In colder climates, it may be necessary to protect sage plants from frost damage by mulching around the base of the plant or bringing it indoors during the winter months.

Leave a Comment