
Grow Carrots Kitchen Gardening – sounds like a dream, right? Imagine stepping into your kitchen, not to grab ingredients from the fridge, but to harvest fresh, vibrant carrots you’ve nurtured yourself! Forget those bland, store-bought carrots; we’re talking about intensely flavorful, homegrown goodness right at your fingertips.
For centuries, kitchen gardens have been a staple in cultures worldwide. From the humble cottage gardens of England to the elaborate potagers of France, growing food close to home has always been a way to connect with nature and ensure a supply of fresh produce. It’s a tradition that’s making a huge comeback, and for good reason!
Let’s face it, life is busy. We’re all looking for ways to simplify things, eat healthier, and maybe even save a few bucks. That’s where this DIY guide comes in. I’m going to show you some super simple tricks and hacks to grow carrots kitchen gardening, even if you have limited space or zero gardening experience. We’ll cover everything from choosing the right containers and soil to preventing common pests and diseases. So, ditch the grocery store carrots and get ready to experience the joy of harvesting your own delicious, homegrown bounty!
Growing Carrots in Containers: Your DIY Guide for a Crunchy Harvest in a Small Space
Hey garden friends! Think carrots need a huge field? Think again! I’ll show you how to grow delicious carrots on your balcony, patio, or even on a windowsill. It’s easier than you think and a ton of fun! Let’s get started!
What You Need: The Ingredients for Your Carrot Success
Before we begin, here’s a list of everything you’ll need. Don’t worry, you probably have most of it at home or can get it cheap at a hardware store or garden center.
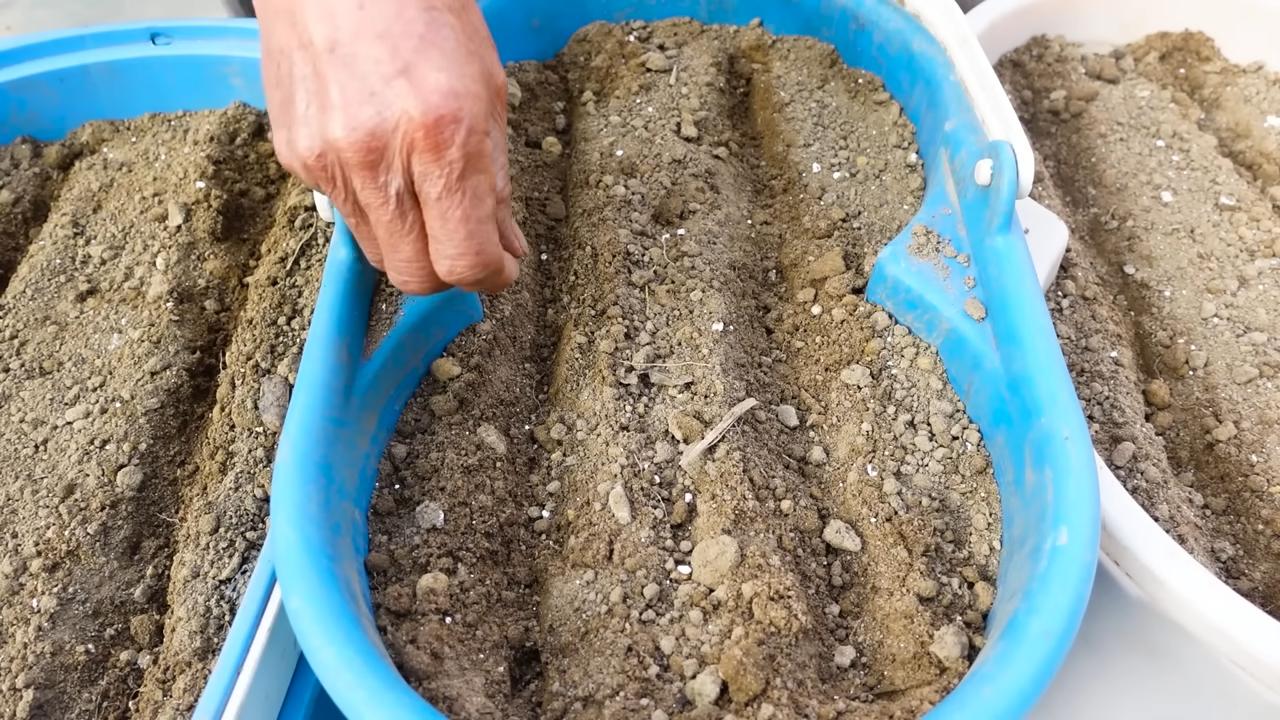
- The right container: Choose a pot that is at least 30 cm (12 inches) deep. Carrots need space to grow downwards to develop properly. The bigger the pot, the better! A diameter of 20-30 cm (8-12 inches) is ideal.
- The right soil: Regular potting soil isn’t ideal. Carrots love loose, sandy soil. You can use special vegetable soil or create your own mix of potting soil, sand, and compost. The ratio should be about 1:1:1.
- Carrot seeds: Opt for a variety that is suitable for container growing. There are special “baby” carrot varieties that don’t grow as long and are therefore perfect for pots.
- Drainage material: Expanded clay pebbles, gravel, or pottery shards at the bottom of the container ensure good drainage and prevent waterlogging.
- Watering can or hose: For regularly watering your little carrots.
- Fertilizer (optional): An organic vegetable fertilizer can support the growth of your carrots.
- A sunny spot: Carrots love the sun! Choose a location where your carrots will get at least 6 hours of sun per day.
- Patience: Carrots take time to grow. Be patient and don’t get discouraged if it doesn’t work out right away!
Step-by-Step Guide: How to Grow Your Own Carrots
Now let’s get down to it! Follow these steps, and soon you’ll be harvesting your own crunchy carrots.
1. Prepare the container:
- Place a layer of drainage material (expanded clay pebbles, gravel, or pottery shards) at the bottom of the pot. This prevents waterlogging.
- Fill the container with your prepared soil (vegetable soil or a mix of potting soil, sand, and compost). Leave about 5 cm (2 inches) of space at the top.
- Lightly moisten the soil with a watering can. It should be damp, but not wet.
2. Sow the seeds:
- Use your finger or a small stick to make shallow furrows in the soil. The furrows should be about 1 cm (0.4 inches) deep and spaced 5-7 cm (2-3 inches) apart.
- Sow the carrot seeds into the furrows. Make sure the seeds are not too close together. A distance of 1-2 cm (about half an inch) between seeds is ideal.
- Cover the seeds with a thin layer of soil (about 0.5 cm or 1/4 inch).
- Gently press the soil down and water carefully with a watering can.
3. Water and care:
- Keep the soil moist, but not wet. Water regularly, especially on hot days. Avoid waterlogging.
- Once the first seedlings appear (after about 2-3 weeks), you can thin them out. This means removing the weakest seedlings so that the remaining plants have enough space to grow. The distance between plants should be about 3-5 cm (1-2 inches).
- Fertilize your carrots regularly with an organic vegetable fertilizer. Follow the instructions on the packaging.
- Watch out for pests like carrot flies. You can protect your carrots with insect netting.
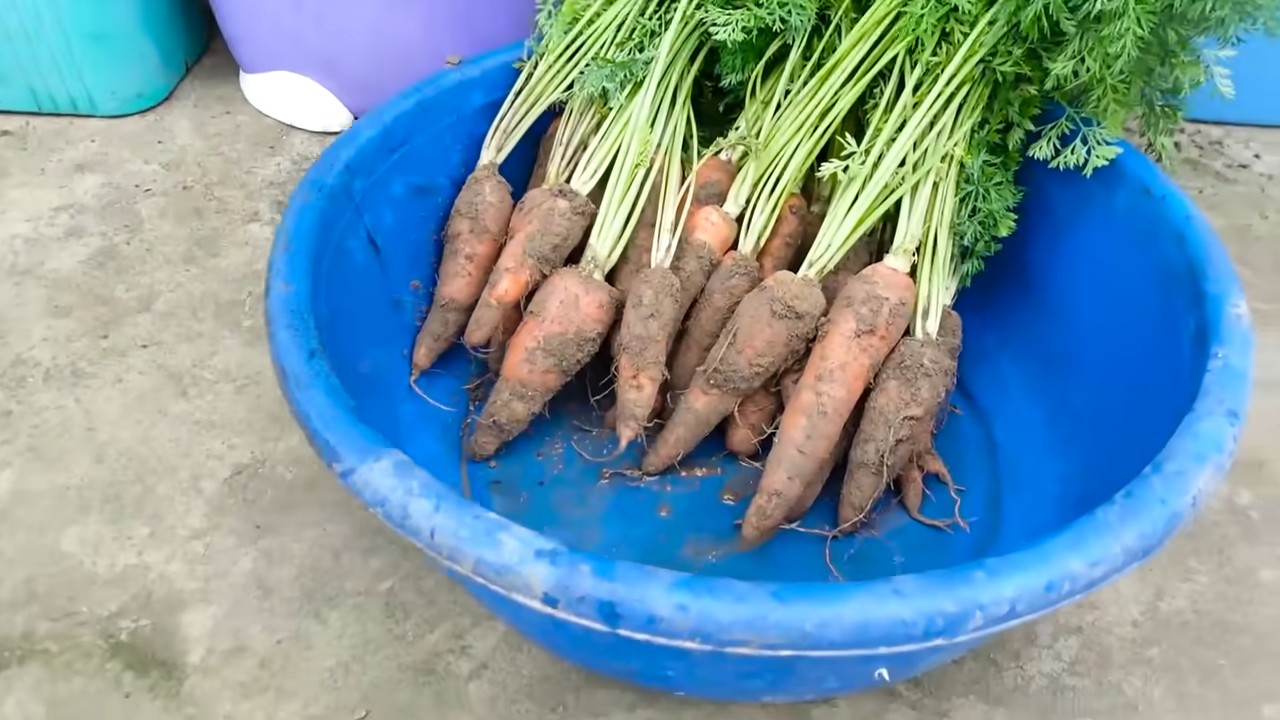
4. Harvesting:
- Depending on the variety, your carrots will be ready to harvest in about 2-3 months.
- You’ll know the carrots are ripe when the “shoulders” (the top part of the carrot that peeks out of the soil) have a strong color.
- Gently pull the carrots out of the soil. If they don’t come out easily, you can loosen the soil around the carrot a bit.
- Wash the carrots and enjoy them fresh from the garden!
Extra Tips for a Bountiful Carrot Harvest
Here are a few additional tips that will help you maximize your carrot harvest:
- Choose the right variety: As mentioned, there are special carrot varieties that are particularly well-suited for container growing. Find out about the different varieties at your garden center or online and choose the one that’s right for you. Popular container varieties include “Paris Market,” “Rodelika,” or “Amsterdam Forcing.”
- Mulching: A layer of mulch made of straw or grass clippings helps retain moisture in the soil and suppress weeds.
- Practice crop rotation: If you grow carrots in the same container every year, you can run into problems with pests and diseases. It’s best to change the location of your carrots each year or replace the soil in the container.
- Companion plants: Some plants get along particularly well with carrots and can promote their growth. These include marigolds, sage, or rosemary. Simply plant these herbs in the same container.
- Check regularly: Check your carrots regularly for pests and diseases. The sooner you spot a problem, the better you can deal with it.
Common Problems and Solutions
Problems can also arise when growing carrots in containers. Here are some of the most common problems and how you can solve them:
- Poor germination: If the seeds don’t germinate, there could be several reasons. The soil might be too dry or too wet, the seeds could be too old, or the temperature could be too low. Make sure the soil is moist, use fresh seeds, and place the container in a warm spot.
- Crooked carrots: Crooked carrots often occur when the soil is too stony or too compacted. Remove stones from the soil and loosen it regularly.
- Small carrots: Small carrots can be a sign of a nutrient deficiency. Fertilize your carrots regularly with an organic vegetable fertilizer.
- Pests: Carrot flies are a common problem when growing carrots. Protect your carrots with insect netting.
Harvesting and Enjoying Carrots: Your Reward for the Effort
After all the work, the time has finally come: you can harvest your own crunchy carrots! There’s almost nothing better than eating fresh vegetables from your own garden.
- How to best store your carrots: If you can’t eat all the carrots at once, you can store them in the refrigerator. Wrap them in a damp cloth or place them in a plastic bag. This will keep them fresh for up to a week.
- Recipe ideas: Carrots are versatile. you can snack on them raw, use them in salads, process them into soups and stews, or serve them as a side dish with meat and fish. Let your creativity run wild!
I hope this guide has helped and inspired you to grow your own carrots in a container. It’s a great feeling to watch delicious vegetables grow from tiny seeds. Happy gardening
Conclusion
So, there you have it! Mastering the art of growing carrots through kitchen gardening is not only achievable but also incredibly rewarding. We’ve explored the essential steps, from seed selection and soil preparation to watering and pest control, all within the comfortable confines of your home. This isn’t just about saving money; it’s about connecting with your food, understanding its journey from seed to table, and enjoying the unparalleled flavor of freshly harvested, homegrown carrots.
Why is this DIY trick a must-try? Because it empowers you to take control of your food source, even with limited space. Imagine the satisfaction of pulling vibrant, crisp carrots from your own container garden, knowing exactly what went into their growth. No pesticides, no hidden chemicals, just pure, natural goodness. Plus, it’s a fantastic way to introduce children to the wonders of gardening and healthy eating habits.
But the journey doesn’t end here! Feel free to experiment with different carrot varieties. Nantes carrots are known for their sweetness and cylindrical shape, perfect for slicing and snacking. Danvers carrots are classic and versatile, ideal for roasting and soups. Rainbow carrots add a splash of color to your plate and offer a slightly different flavor profile. Consider companion planting as well. Marigolds can deter nematodes, while rosemary can repel carrot flies. These simple additions can significantly enhance your carrot-growing experience.
Another variation to consider is succession planting. By sowing seeds every few weeks, you can ensure a continuous harvest throughout the growing season. This is especially beneficial if you have a small space and want to maximize your yield. You can also try growing carrots in different types of containers. While deep pots are ideal, you can also use raised beds or even repurposed containers like old buckets or tubs, as long as they provide adequate drainage.
Don’t be afraid to get your hands dirty and embrace the learning process. Gardening is a journey of discovery, and there will be successes and failures along the way. The key is to learn from your mistakes and keep experimenting. Remember to monitor your plants regularly for any signs of pests or diseases and take action promptly.
We wholeheartedly encourage you to embark on this exciting adventure of growing carrots in your kitchen garden. It’s a simple, sustainable, and incredibly satisfying way to enjoy fresh, healthy produce. Once you’ve harvested your first batch of homegrown carrots, we’d love to hear about your experience! Share your photos, tips, and challenges in the comments below. Let’s create a community of passionate kitchen gardeners and inspire others to grow their own food. Your success story could be the motivation someone else needs to start their own carrot-growing journey. So, grab your seeds, prepare your soil, and get ready to enjoy the delicious rewards of your labor. Happy gardening!
Frequently Asked Questions (FAQ)
What kind of soil is best for growing carrots in containers?
Carrots thrive in loose, well-draining soil that is rich in organic matter. Avoid heavy clay soils, as they can hinder root development and result in misshapen carrots. A good potting mix for carrots should consist of equal parts compost, peat moss (or coconut coir), and perlite or vermiculite. This combination provides the necessary nutrients, moisture retention, and drainage for healthy carrot growth. Before planting, amend the soil with a slow-release fertilizer to provide a steady supply of nutrients throughout the growing season. Ensure the pH of the soil is between 6.0 and 6.8 for optimal growth.
How often should I water my carrot plants?
Consistent watering is crucial for successful carrot cultivation. Keep the soil consistently moist, but not waterlogged. Water deeply whenever the top inch of soil feels dry to the touch. The frequency of watering will depend on factors such as the weather, the type of container you’re using, and the size of your plants. During hot, dry periods, you may need to water daily. Avoid overhead watering, as it can promote fungal diseases. Instead, water at the base of the plants to keep the foliage dry. Mulching around the plants can help retain moisture and suppress weed growth.
What are some common pests and diseases that affect carrots, and how can I prevent them?
Carrot rust flies, nematodes, and aphids are common pests that can damage carrot plants. Carrot rust flies lay their eggs near the base of the plants, and the larvae burrow into the roots, causing them to become disfigured and inedible. Nematodes are microscopic worms that feed on the roots, stunting growth and reducing yields. Aphids suck sap from the leaves, weakening the plants and spreading diseases. To prevent these pests, practice crop rotation, use row covers to protect the plants, and introduce beneficial insects such as ladybugs and lacewings. Fungal diseases such as leaf blight and powdery mildew can also affect carrots. To prevent these diseases, ensure good air circulation, avoid overhead watering, and apply a fungicide if necessary.
How long does it take for carrots to mature?
The time it takes for carrots to mature depends on the variety and growing conditions. Generally, carrots take between 60 and 80 days to reach maturity. Nantes carrots tend to mature faster than Danvers carrots. To determine if your carrots are ready to harvest, check the size and color of the roots. They should be firm and brightly colored. You can also gently pull back the soil around the base of the plants to get a better look at the roots. If the carrots are large enough, you can harvest them.
Can I grow carrots indoors year-round?
Yes, you can grow carrots indoors year-round, provided you have adequate light and temperature control. Carrots need at least 6 hours of direct sunlight per day, or 12-14 hours of artificial light. Use grow lights to supplement natural light, especially during the winter months. Maintain a temperature between 60°F and 70°F (15°C and 21°C) for optimal growth. Ensure good air circulation to prevent fungal diseases. With proper care, you can enjoy fresh, homegrown carrots throughout the year.
What are the best carrot varieties for container gardening?
Several carrot varieties are well-suited for container gardening due to their shorter root length and adaptability to confined spaces. Nantes carrots, such as ‘Nelson’ and ‘Scarlet Nantes,’ are popular choices for their sweet flavor and cylindrical shape. ‘Thumbelina’ is a round carrot variety that is perfect for small containers. ‘Parisian’ is another round carrot that is known for its early maturity. ‘Little Finger’ is a miniature carrot that is ideal for snacking. When selecting a carrot variety for container gardening, consider the size of your container and the amount of space you have available.
How do I prevent my carrots from splitting or forking?
Splitting and forking in carrots can be caused by several factors, including inconsistent watering, compacted soil, and rocky soil. To prevent these problems, ensure that you water your carrots regularly and deeply, especially during dry periods. Avoid letting the soil dry out completely, as this can cause the roots to split when they are rehydrated. Prepare the soil thoroughly before planting, removing any rocks or debris that could obstruct root growth. Amend the soil with compost to improve drainage and aeration. Avoid using fertilizers that are high in nitrogen, as this can promote excessive top growth at the expense of root development.
What is the best way to store homegrown carrots?
To store homegrown carrots, first remove the tops, leaving about an inch of stem. Gently brush off any excess soil, but do not wash the carrots. Place the carrots in a plastic bag or container lined with damp paper towels. Store them in the refrigerator crisper drawer. Carrots stored in this way can last for several weeks. You can also freeze carrots for longer storage. To freeze carrots, wash, peel, and slice them. Blanch them in boiling water for 2-3 minutes, then transfer them to an ice bath to stop the cooking process. Drain the carrots and pack them into freezer bags or containers. Frozen carrots can last for up to a year.
Leave a Comment