
Grow bell peppers indoors and banish those winter blues with a vibrant splash of summer right in your home! Imagine plucking a juicy, colorful bell pepper fresh from your indoor garden, ready to add a burst of flavor to your favorite dish. Sounds dreamy, right? Well, it’s more achievable than you might think! For centuries, humans have cultivated plants indoors, from the hanging gardens of Babylon to the Victorian-era conservatories, showcasing our innate desire to connect with nature, regardless of the season.
But let’s be honest, sometimes the thought of indoor gardening feels intimidating. We’ve all been there – staring at a sad, struggling plant, wondering what we’re doing wrong. That’s where these DIY tricks and hacks come in! I’m here to share simple, effective methods to help you successfully grow bell peppers indoors, even if you don’t have a green thumb. Forget expensive equipment and complicated techniques. We’ll focus on budget-friendly solutions and easy-to-follow steps that will have you harvesting your own delicious bell peppers in no time. So, let’s ditch the grocery store peppers and embark on this exciting indoor gardening adventure together!

Growing Peppers Indoors: Your Comprehensive DIY Guide
Hey everyone! Are you tired of expensive, tasteless peppers from the supermarket? Or do you live in an area where the growing season is just too short? Don’t worry, I’ll show you how to easily grow your own juicy peppers indoors! It’s easier than you think and incredibly satisfying when you harvest your very first pepper. Let’s get started!
What You Need: The Right Equipment
Before we begin, here’s a list of everything you’ll need for your indoor pepper project:
- Pepper seeds: Choose your favorite varieties! There are countless colors and shapes, from classic red and yellow bell peppers to sweet mini peppers. Make sure the seeds are of good quality.
- Seed starting pots or trays: Small pots or trays with individual cells are ideal for starting the seeds.
- Seed starting mix: This soil is particularly light and low in nutrients, perfect for delicate seedlings.
- Larger pots: Once the pepper plants get bigger, they’ll need more space. Pots with a diameter of at least 20 cm (8 inches) are ideal.
- Potting soil: A high-quality potting soil with good drainage is important for the growth of pepper plants.
- Grow light: Peppers need a lot of light, especially in winter. A grow light provides enough light even when the sun isn’t shining.
- Fertilizer: A special fertilizer for vegetables or tomatoes will supply the pepper plants with all the essential nutrients.
- Spray bottle: For moistening the soil and leaves.
- Watering can: For watering the plants.
- Plant stakes (optional): To support the plants as they grow taller and bear fruit.
- Thermometer: To keep an eye on the temperature. Peppers like it warm!
Phase 1: Starting the Pepper Seeds
Starting the seeds is the first and most important step. This is where we lay the foundation for healthy and strong pepper plants.
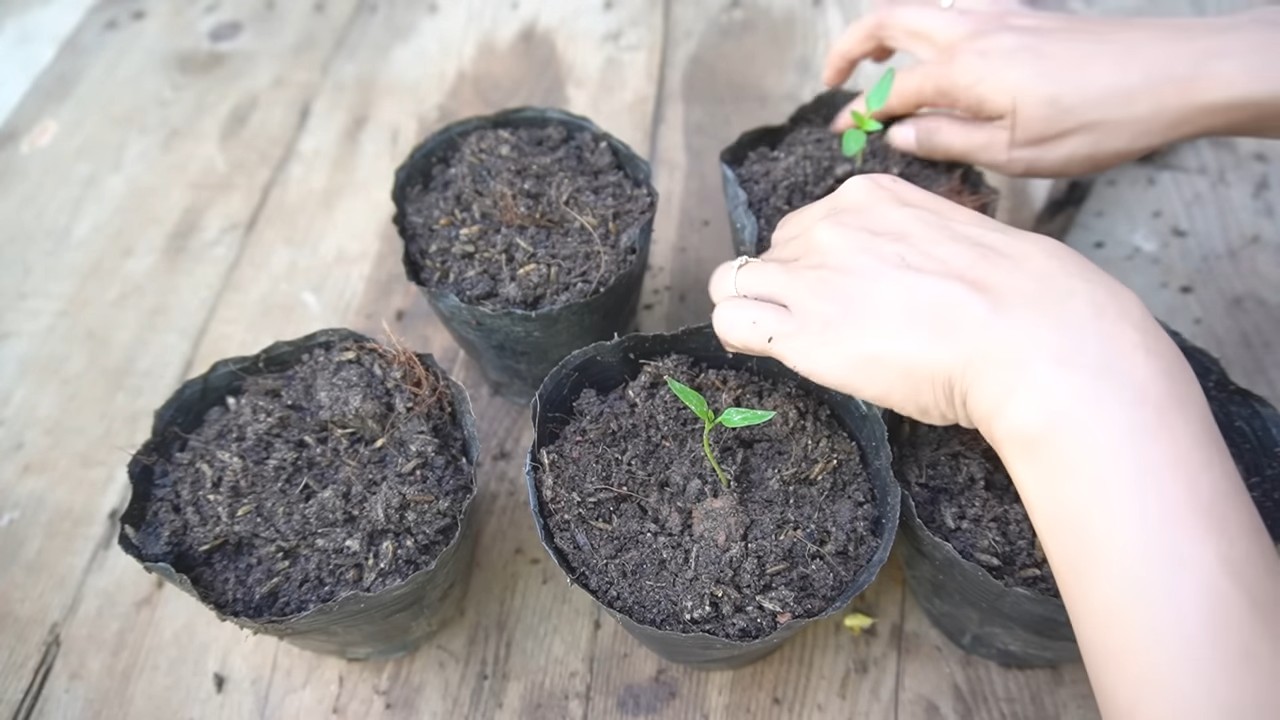
- Prepare the seed pots: Fill the seed starting pots or trays with seed starting mix. Press the soil down lightly, but not too firmly.
- Sow the seeds: Place 2-3 pepper seeds in each pot or cell. Cover the seeds with a thin layer of seed starting mix (about 0.5 cm or 1/4 inch).
- Water: Gently moisten the soil with a spray bottle. The soil should be moist, but not wet.
- Cover (optional): Cover the seed starting pots or trays with clear plastic wrap or a lid. This creates a warm, humid environment that encourages germination. Be sure to air it out regularly to prevent mold.
- Location: Place the seed pots or trays in a warm and bright place. A temperature of 22-25°C (72-77°F) is ideal for germination. A heating mat can help raise the temperature.
- Patience: Pepper seeds take some time to germinate. It usually takes 1-3 weeks for the first seedlings to appear. Keep the soil moist during this time.
Phase 2: Caring for the Seedlings
Once the first seedlings sprout from the soil, the next phase begins: caring for the small plants.
- Remove the cover: As soon as the seedlings appear, remove the plastic wrap or lid.
- Light: Place the seedlings in a very bright spot. If you don’t have a windowsill with enough sunlight, use a grow light. The seedlings should get at least 14-16 hours of light per day.
- Watering: Water the seedlings regularly, but not too much. The soil should always be slightly moist, but not wet. Avoid waterlogging, as this can lead to root rot.
- Thinning: If several seedlings have grown in one pot or cell, you should thin them. Select the strongest seedling and carefully snip the others off at the base.
- Fertilizing (optional): Once the seedlings have developed their first true leaves, you can feed them with a very diluted liquid fertilizer. Use only half the recommended dose.
Phase 3: Transplanting into Larger Pots
When the pepper plants have grown larger and their roots are filling the seed pots, it’s time to transplant them into larger pots.
- Prepare the larger pots: Fill the larger pots with potting soil. Make sure the pots have drainage holes in the bottom to allow excess water to escape.
- Transplant: Carefully remove the pepper plants from the seed pots. Try to damage the roots as little as possible.
- Planting: Place the pepper plants in the larger pots. The top of the root ball should be about 2-3 cm (1 inch) below the rim of the pot.
- Fill: Fill the pots with more potting soil and press it down lightly.
- Watering: Water the pepper plants thoroughly after transplanting.
- Location: Place the pepper plants in a warm and bright spot.
Phase 4: Caring for the Pepper Plants
Now that the pepper plants are in their larger pots, it’s important to care for them properly so they grow healthy and produce lots of fruit.
- Light: Peppers need a lot of light, at least 6-8 hours a day. If you don’t have a windowsill with enough sunlight, use a grow light.
- Watering: Water the pepper plants regularly, but not too much. The soil should always be slightly moist, but not wet. Avoid waterlogging.
- Fertilizing: Fertilize the pepper plants regularly with a special fertilizer for vegetables or tomatoes. Follow the instructions on the packaging.
- Temperature: Peppers like it warm. The ideal temperature is between 20-25°C (68-77°F). Avoid drafts and sudden temperature changes.
- Pollination: Peppers are self-pollinating, but you can assist pollination by gently shaking the plants or pollinating the flowers with a paintbrush.
- Staking: As the pepper plants grow taller and bear fruit, it may be necessary to support them with plant stakes.
- Pruning (optional): You can prune the pepper plants to encourage growth and improve fruit production. To do this, remove the suckers that grow from the leaf axils.
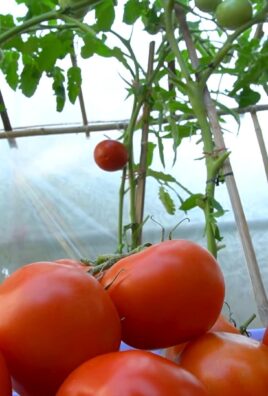
Phase 5: The Harvest
After a few weeks or months, depending on the variety, your peppers will be ripe and ready to harvest.
Enjoy: Enjoy your homegrown peppers! They taste much better than the ones from the supermarket.
Ripeness: The peppers are ripe when they have reached their final color and feel firm.
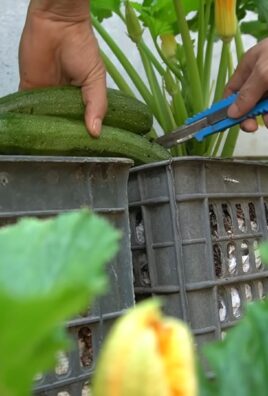
Harvesting: Cut the peppers from the stem with a sharp knife or scissors.
Conclusion
So, there you have it! Growing bell peppers indoors might seem like a challenge, but with the right approach and a little patience, you can enjoy fresh, vibrant peppers right from your own home, regardless of the season. This DIY trick isn’t just about saving money; it’s about connecting with your food, understanding the growing process, and experiencing the satisfaction of nurturing something from seed to harvest.
Why is this a must-try? Because it empowers you to control the quality and freshness of your produce. No more relying solely on grocery store offerings that may have traveled long distances and lost some of their flavor and nutritional value. Imagine the joy of adding a freshly picked, sun-ripened (or rather, grow-light-ripened!) bell pepper to your salad, stir-fry, or favorite dish. The taste difference is remarkable.
Beyond the basic method outlined, there’s plenty of room for experimentation. Try different varieties of bell peppers. Some, like the smaller ‘Mini Bell’ varieties, are particularly well-suited for indoor growing due to their compact size. You can also explore different growing mediums. While we’ve focused on soil, hydroponics is another exciting option for indoor bell pepper cultivation. This soilless method can potentially lead to faster growth and higher yields.
Consider experimenting with different lighting setups. While LED grow lights are highly recommended, you can also try supplementing with natural sunlight if you have a sunny window. Observe how your plants respond to different light intensities and durations, and adjust accordingly. Remember, every indoor environment is unique, so what works for one person may not work perfectly for another.
Don’t be afraid to get creative with your support systems. As your bell pepper plants grow, they’ll need support to prevent them from toppling over. While stakes are a common option, you can also use tomato cages or even create your own custom support structures using bamboo or other materials.
Most importantly, don’t give up if you encounter challenges along the way. Growing bell peppers indoors is a learning process, and there will inevitably be some bumps in the road. Pests, diseases, and nutrient deficiencies can all pose problems, but with careful observation and prompt action, you can overcome these obstacles and achieve a successful harvest.
We wholeheartedly encourage you to give this DIY trick a try. It’s a rewarding experience that will not only provide you with fresh, delicious bell peppers but also deepen your appreciation for the natural world. And once you’ve mastered the art of growing bell peppers indoors, we’d love to hear about your experience! Share your tips, tricks, and photos in the comments below. Let’s create a community of indoor gardeners and inspire others to embark on this exciting journey. Let us know what kind of bell pepper you grew and how you did it.
Frequently Asked Questions (FAQ)
What is the best variety of bell pepper to grow indoors?
While many bell pepper varieties can be grown indoors, some are better suited than others. Smaller varieties, such as ‘Mini Bell’ or ‘Lunchbox’ peppers, are often a good choice because they require less space and tend to produce fruit more quickly. However, you can also successfully grow larger varieties like ‘California Wonder’ or ‘Jupiter’ indoors, provided you have adequate space and lighting. Consider the size of your growing area and the amount of light available when selecting a variety. Also, research disease resistance, as indoor plants can be more susceptible to certain diseases due to limited air circulation.
How much light do bell peppers need indoors?
Bell peppers are sun-loving plants and require a significant amount of light to thrive indoors. Ideally, they need at least 8-10 hours of direct light per day. If you don’t have a sunny window that provides this much light, you’ll need to supplement with artificial grow lights. LED grow lights are a popular choice because they are energy-efficient and provide the full spectrum of light that plants need for photosynthesis. Position the grow lights close enough to the plants to provide adequate light intensity, but not so close that they burn the leaves. Adjust the height of the lights as the plants grow to maintain optimal light exposure.
What is the best soil for growing bell peppers indoors?
Bell peppers need well-draining soil that is rich in organic matter. A good potting mix for indoor bell peppers should contain a blend of peat moss, perlite, and vermiculite. You can also add compost or other organic amendments to improve the soil’s fertility and drainage. Avoid using garden soil, as it can be too heavy and may contain pests or diseases. Ensure that the pot you use has drainage holes to prevent waterlogging, which can lead to root rot.
How often should I water my indoor bell pepper plants?
Water your bell pepper plants when the top inch of soil feels dry to the touch. Avoid overwatering, as this can lead to root rot. When you water, water deeply until the water drains out of the drainage holes. Allow the soil to dry out slightly between waterings. The frequency of watering will depend on factors such as the size of the pot, the type of soil, and the temperature and humidity of your indoor environment. Check the soil moisture regularly and adjust your watering schedule accordingly.
How do I pollinate bell pepper flowers indoors?
Bell peppers are self-pollinating, but they often need a little help to pollinate effectively indoors, especially when there is no wind or insect activity. You can hand-pollinate your bell pepper flowers by gently shaking the plant or using a small paintbrush to transfer pollen from one flower to another. Do this during the warmest part of the day when the pollen is most viable. You can also use a small fan to create air circulation, which can help to distribute the pollen.
What are some common pests and diseases that affect indoor bell pepper plants?
Common pests that can affect indoor bell pepper plants include aphids, spider mites, and whiteflies. These pests can suck the sap from the leaves, causing them to yellow and wilt. You can control these pests by spraying the plants with insecticidal soap or neem oil. Diseases that can affect indoor bell pepper plants include powdery mildew, blossom end rot, and fungal infections. Powdery mildew can be treated with a fungicide. Blossom end rot is caused by a calcium deficiency and can be prevented by adding calcium to the soil. Good air circulation and proper watering can help to prevent fungal infections.
How long does it take for bell peppers to mature indoors?
The time it takes for bell peppers to mature indoors depends on the variety and growing conditions. Generally, it takes about 60-90 days from transplanting seedlings to harvesting mature peppers. However, some varieties may mature faster or slower. Provide your plants with adequate light, water, and nutrients to promote healthy growth and fruit production. Be patient and monitor your plants regularly for signs of maturity. The peppers are ready to harvest when they have reached their full size and color.
Can I grow bell peppers indoors year-round?
Yes, you can grow bell peppers indoors year-round, provided you have adequate light and temperature control. With the help of grow lights and a consistent indoor environment, you can enjoy a continuous harvest of fresh bell peppers, regardless of the season. However, keep in mind that bell pepper plants are perennials in warmer climates, but are typically grown as annuals in colder climates. If you want to keep your plants alive for multiple years, you’ll need to provide them with proper care and overwinter them indoors.
Leave a Comment