
Grow Peas Indoors? Absolutely! Imagine harvesting fresh, sweet peas right from your windowsill, even in the dead of winter. Forget those bland, store-bought peas – we’re talking about homegrown goodness bursting with flavor. For centuries, cultivating peas has been a springtime ritual, symbolizing renewal and abundance. From ancient civilizations to modern-day gardens, peas have nourished and delighted us.
But what if you don’t have a sprawling backyard or live in an apartment with limited outdoor space? That’s where this DIY guide comes in! I’m going to show you how to successfully grow peas indoors, transforming any sunny corner into a mini-vegetable garden. This isn’t just about convenience; it’s about connecting with nature, enjoying fresh produce year-round, and saving money on groceries. Plus, it’s incredibly rewarding to watch those tiny seeds sprout and flourish under your care. So, grab your gardening gloves, and let’s get started on this exciting indoor pea-growing adventure!

Growing Peas Indoors: Your DIY Guide for a Bountiful Harvest
Hey plant friends! Do you fancy some fresh, crisp peas, even when winter is raging outside? Then you’ve come to the right place! I’ll show you how to easily grow peas indoors – and with minimal effort. Let’s get started!
What You Need: Your Shopping List
Before we start, here is a list of everything you’ll need for your indoor pea adventure:
- Pea seeds: Choose varieties that are suitable for container growing. Dwarf or bush peas are ideal as they don’t grow as tall as climbing peas. I recommend varieties like ‘Little Marvel’, ‘Tom Thumb’, or ‘Sugar Ann’.
- Planters: You’ll need pots or containers with good drainage. They should be at least 15-20 cm (6-8 inches) deep to give the pea roots enough space.
- High-quality potting soil: Use a well-draining potting mix that is rich in organic matter. Avoid garden soil, as it is often too heavy and impairs drainage.
- Plant labels: So you can keep track of which variety you planted where.
- Spray bottle: To moisten the soil.
- Plant stake or trellis (optional): Although dwarf peas don’t necessarily need a trellis, it can give them extra support, especially if they grow a bit more vigorously.
- Bright light source: A sunny window or a grow lamp. Peas need a lot of light to grow well.
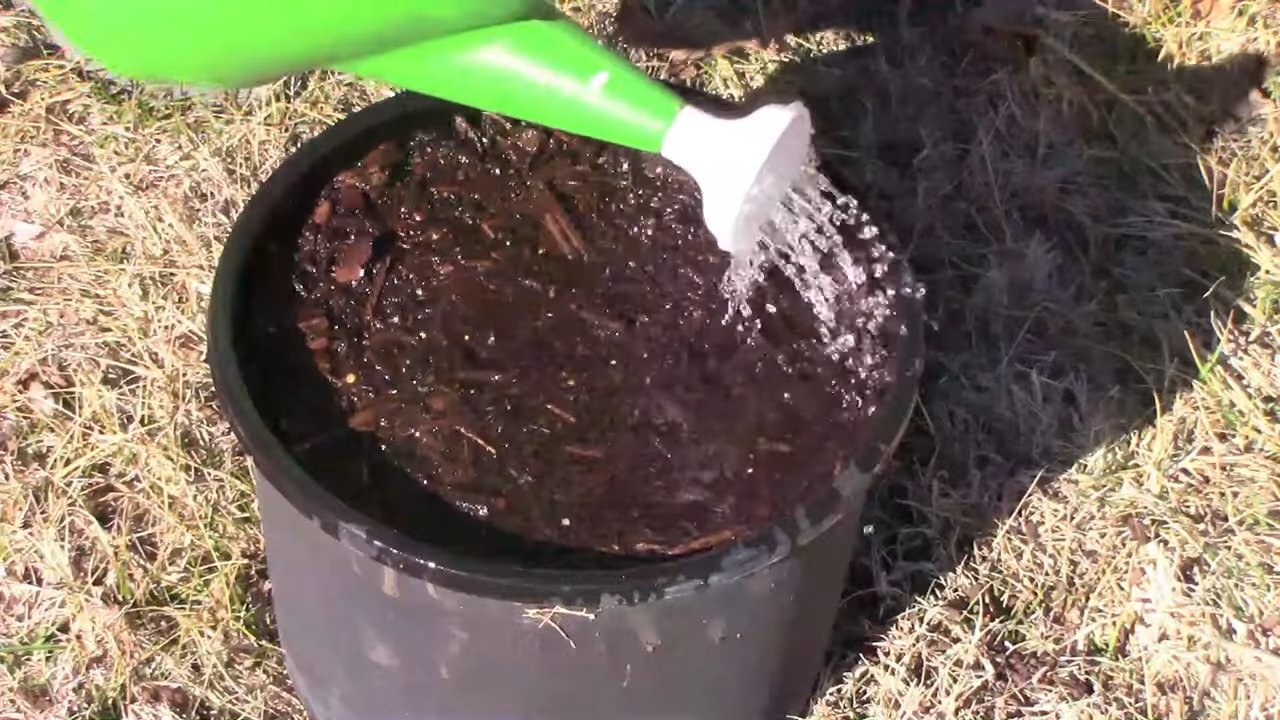
- Watering can: For watering the plants.
Step-by-Step Guide: How to Successfully Grow Peas Indoors
Now let’s get down to it! Follow these steps to grow your own indoor peas:
- Prepare the seeds: To speed up germination, you can soak the pea seeds in lukewarm water for 24 hours before planting. This softens the seed coat and makes sprouting easier.
- Prepare the planters: Fill your pots or containers with potting soil. Leave about 2-3 cm (about 1 inch) of space to the rim.
- Sow the seeds: Press the seeds about 2-3 cm (about 1 inch) deep into the soil. Make sure to leave enough space between the seeds (about 5-7 cm or 2-3 inches). This gives the plants enough room to grow.
- Water in: Gently water the soil until it is evenly moist. Avoid waterlogging, as this can lead to root rot.
- The right location: Place the pots in a bright spot, ideally a south-facing window. If you don’t have enough natural light, use a grow lamp. Peas need at least 6 hours of light per day.
- Germination: The seeds should germinate within 7-14 days. Keep the soil moist but not wet during this time.
- Care: Once the peas have germinated, it’s important to water them regularly. The soil should always be slightly moist. Fertilize the plants every two weeks with an organic liquid fertilizer.
- The trellis (optional): If your peas grow a bit taller, you can give them a trellis for support. This can be a simple plant stake or a small trellis.
- The harvest: The peas are ready to harvest when the pods are plump and firm. Pick the peas regularly to encourage the production of new pods.
Light, Heat, and Water: The Most Important Factors for Healthy Peas
To ensure your indoor peas grow optimally, it’s important to pay attention to the right conditions. Here are the most important factors:
- Light: Peas need a lot of light to grow. A sunny window is ideal, but if you don’t have enough natural light, use a grow lamp. Make sure the plants get at least 6 hours of light per day.
- Temperature: Peas prefer cool temperatures. The ideal temperature is between 13 and 18 degrees Celsius (55-65°F). Avoid placing the plants near radiators or other heat sources.
- Water: Water the peas regularly, but avoid waterlogging. The soil should always be slightly moist. Check the moisture of the soil by sticking your finger about 2-3 cm (1 inch) deep into the soil. If the soil feels dry, it’s time to water.
- Humidity: Peas like moderate humidity. If the air in your home is very dry, you can spray the plants regularly with water.
Common Problems and Solutions: How to Avoid Mistakes
Problems can also occur with indoor pea cultivation. Here are some common problems and how you can solve them:
- Yellow leaves: Yellow leaves can be a sign of overwatering or a nutrient deficiency. Check the soil moisture and fertilize the plants if necessary.
- Pests: Aphids and other pests can infest your peas. Check the plants regularly and combat pests with natural remedies like neem oil or a soap solution.
- Root rot: Root rot is caused by waterlogging. Make sure the pots have good drainage and don’t overwater the plants.
- No harvest: If your peas don’t flower or form pods, it could be due to too little light or a nutrient deficiency. Move the plants to a brighter location and fertilize them regularly.
Harvest Time: When Are the Peas Ripe?
The harvest time depends on the variety and growing conditions. As a rule, peas are ready to harvest about 60-70 days after sowing. You can recognize ripe peas by their plump and firm pods. Pick the peas regularly to encourage the production of new pods.
After the Harvest: What to Do with the Plants?
After you have harvested the peas, you can compost the plants or use them as green manure. They are rich in nitrogen and can improve the soil.
Extra Tips for a Bountiful Harvest
Here are a few additional tips to help you achieve a bountiful harvest:
- Choose the right variety: Dwarf or bush peas are ideal for container growing.
- Use high-quality potting soil: A well-draining potting mix is important for healthy plants.
- Provide enough light: Peas need a lot of light to grow.
- Water regularly, but avoid waterlogging: The soil should always be slightly moist.
- Fertilize the plants regularly: An organic liquid fertilizer provides the plants with important nutrients.
- Check the plants regularly for pests: Early detection and control of pests prevent major damage.
- Pick the peas regularly: This stimulates the production of new pods.
I hope this guide helps you grow your own indoor peas. Happy gardening and enjoy your meal
Conclusion
So, there you have it! Growing peas indoors is not just a possibility; it’s a rewarding and surprisingly simple way to bring a touch of spring into your home, regardless of the season. We’ve walked through the steps, from selecting the right pea variety to providing the optimal growing conditions. But why should you actually try this?
Firstly, the sheer joy of nurturing life from a tiny seed to a flourishing plant is incredibly fulfilling. Watching those delicate tendrils reach for support and then witnessing the emergence of plump, sweet pea pods is an experience that connects you to nature in a profound way. It’s a fantastic project for families, teaching children about the life cycle of plants and the importance of patience.
Secondly, the taste of homegrown peas is simply unparalleled. Forget the bland, often starchy peas you find in the supermarket. Freshly picked, homegrown peas burst with sweetness and a vibrant, grassy flavor that will elevate your salads, stir-fries, and even simple snacks. Imagine adding a handful of these to your next pasta dish – the difference will be remarkable.
Thirdly, growing peas indoors offers a sustainable and eco-friendly way to enjoy fresh produce. You’re reducing your reliance on commercially grown peas, which often travel long distances and contribute to carbon emissions. Plus, you have complete control over the growing process, ensuring that your peas are free from harmful pesticides and herbicides.
But the beauty of this DIY project lies in its adaptability. Feel free to experiment with different pea varieties. Try growing snow peas for their edible pods or snap peas for their crunchy texture. You can also explore different support structures, from simple bamboo stakes to elaborate trellises. Consider using a self-watering planter to simplify the watering process, especially if you’re prone to forgetting.
Don’t be afraid to get creative with your setup. A sunny windowsill is ideal, but if you lack natural light, consider investing in a grow light. This will ensure that your peas receive the necessary light for healthy growth. You can even use a vertical gardening system to maximize space and create a stunning green wall.
Ultimately, the success of your indoor pea garden depends on your willingness to experiment and learn. Pay attention to your plants, observe their growth patterns, and adjust your care accordingly. If the leaves start to yellow, it could be a sign of overwatering or nutrient deficiency. If the plants are not producing pods, they may need more light or pollination assistance.
We strongly encourage you to embark on this exciting journey of growing peas indoors. It’s a relatively low-cost, low-maintenance project that yields delicious and nutritious rewards. And most importantly, it’s a fun and engaging way to connect with nature and bring a little bit of the outdoors inside.
Once you’ve harvested your first crop of homegrown peas, we’d love to hear about your experience! Share your photos, tips, and challenges in the comments below. Let’s create a community of indoor pea growers and inspire others to try this rewarding DIY trick. Your insights could be invaluable to someone just starting out. So, grab some seeds, get your hands dirty, and prepare to enjoy the sweet taste of success!
Frequently Asked Questions (FAQs)
What are the best pea varieties to grow indoors?
While many pea varieties can be grown indoors, bush or dwarf varieties are generally the most suitable due to their compact size. These varieties don’t require as much vertical space as vining types, making them easier to manage in a limited indoor environment. Some excellent choices include ‘Little Marvel,’ ‘Tom Thumb,’ ‘Sugar Ann’ (a bush snap pea), and ‘Oregon Sugar Pod II’ (a bush snow pea). These varieties are known for their early maturity, high yields, and delicious flavor. When selecting your seeds, make sure to choose varieties that are specifically labeled as “bush” or “dwarf” to ensure they stay compact and manageable indoors.
How much sunlight do indoor peas need?
Peas require a significant amount of sunlight to thrive and produce a good harvest. Ideally, they need at least 6-8 hours of direct sunlight per day. A south-facing window is usually the best option, as it provides the most sunlight throughout the day. However, if you don’t have access to a south-facing window, an east- or west-facing window can also work, although you may need to supplement with artificial light. If your peas are not getting enough sunlight, they may become leggy (tall and spindly) and produce fewer pods. In this case, consider using a grow light to provide the necessary light intensity. A full-spectrum LED grow light is a great option, as it provides the full range of light wavelengths that plants need for photosynthesis. Position the grow light a few inches above the plants and keep it on for 12-16 hours per day.
What type of soil is best for growing peas indoors?
Peas prefer well-draining soil that is rich in organic matter. A good potting mix specifically formulated for vegetables is an excellent choice. Avoid using garden soil, as it can be too heavy and may not drain well, leading to root rot. You can also create your own potting mix by combining equal parts of peat moss (or coconut coir), perlite, and compost. This mixture provides good drainage, aeration, and nutrients for your pea plants. Before planting, amend the soil with a slow-release fertilizer to provide a steady supply of nutrients throughout the growing season.
How often should I water my indoor pea plants?
Watering frequency depends on several factors, including the size of the container, the type of soil, and the ambient temperature. In general, you should water your pea plants when the top inch of soil feels dry to the touch. Avoid overwatering, as this can lead to root rot. When watering, water deeply until the water drains out of the bottom of the container. This ensures that the roots are thoroughly moistened. During hot weather, you may need to water more frequently. Check the soil moisture regularly and adjust your watering schedule accordingly. Consider using a moisture meter to accurately gauge the moisture level in the soil.
Do indoor peas need support?
Yes, most pea varieties, especially vining types, need support to climb and grow properly. Providing support helps to keep the plants upright, improves air circulation, and makes it easier to harvest the pods. You can use a variety of support structures, such as bamboo stakes, trellises, or netting. Simply insert the support structure into the container before planting the seeds or shortly after they germinate. As the plants grow, gently guide the tendrils towards the support and encourage them to climb. For bush varieties, support may not be strictly necessary, but it can still be beneficial to prevent the plants from sprawling and becoming overcrowded.
How do I pollinate my indoor pea plants?
Peas are self-pollinating, meaning they don’t require insects or wind to transfer pollen. However, in an indoor environment, pollination may be less efficient due to the lack of natural air movement. To improve pollination, you can gently shake the plants or use a small paintbrush to transfer pollen from one flower to another. This is especially important if you notice that your plants are flowering but not producing pods. You can also use a small fan to create a gentle breeze around the plants, which can help to distribute pollen.
When can I harvest my indoor peas?
The harvest time depends on the pea variety and the growing conditions. In general, you can start harvesting peas about 60-70 days after planting. The pods should be plump and well-filled, but not overly mature. For snap peas and snow peas, harvest when the pods are still tender and the peas inside are small. For shelling peas, harvest when the pods are full and the peas are large and round. To harvest, gently snap the pods off the plant, being careful not to damage the stems. Regular harvesting encourages the plants to produce more pods.
Can I grow peas indoors year-round?
Yes, you can grow peas indoors year-round, provided you can provide the necessary growing conditions. This includes adequate light, proper watering, and suitable temperatures. However, you may need to adjust your growing practices depending on the season. During the winter months, you may need to supplement with artificial light to compensate for the shorter days. You may also need to adjust your watering schedule, as the plants may require less water during cooler temperatures. With proper care, you can enjoy a continuous harvest of fresh, homegrown peas throughout the year.
Leave a Comment