
Grow Cherry Tomatoes: Your Guide to a Bountiful Harvest
Growing cherry tomatoes is a rewarding experience, and I’m thrilled to share my favorite Grow Cherry Tomatoes tricks and DIY solutions with you! Forget expensive, underwhelming supermarket tomatoes – imagine biting into a sun-ripened, intensely flavorful cherry tomato you’ve grown yourself, bursting with juicy sweetness. That’s the magic we’re unlocking today.
For centuries, cultivating tomatoes, including the delightful cherry variety, has been a cherished tradition across cultures. From the ancient Aztec civilizations who first cultivated them to the modern-day home gardener, the simple act of nurturing a plant from seed to fruit holds a unique satisfaction. It connects us to the earth and provides a delicious reward for our efforts.
Why Grow Your Own Cherry Tomatoes?
There are so many reasons to embark on this journey of Grow Cherry Tomatoes! Beyond the incredible taste, growing your own ensures you know exactly what’s gone into your food – no pesticides, no artificial anything, just pure, natural goodness. Plus, it’s incredibly cost-effective in the long run. Once you’ve established your plants, you’ll be harvesting delicious cherry tomatoes for weeks, even months!
This article is your comprehensive guide, packed with practical tips and clever DIY solutions to help you achieve a bumper crop. We’ll cover everything from seed starting and soil preparation to pest control and harvesting techniques. Get ready to transform your garden (or even your balcony!) into a vibrant, productive cherry tomato paradise. Let’s get growing!
Growing Cherry Tomatoes: A Complete DIY Guide
I love cherry tomatoes! They’re so versatile, bursting with flavor, and perfect for snacking, salads, or adding a pop of color to any dish. Growing your own is incredibly rewarding, and it’s easier than you might think. Follow these steps, and you’ll be enjoying homegrown cherry tomatoes in no time!
Phase 1: Planning and Preparation
- Choose your variety: Research different cherry tomato varieties. Some are better suited to certain climates, while others offer unique flavors or colors. Consider factors like disease resistance and growth habit (determinate or indeterminate).
- Select your growing method: Will you be planting directly in the ground, using containers, or employing a vertical gardening system? Containers offer flexibility and are great for smaller spaces or areas with poor soil. Vertical gardening maximizes space and can be aesthetically pleasing.
- Gather your supplies: You’ll need seeds or seedlings, potting mix (if using containers), gardening gloves, a trowel or small shovel, watering can, fertilizer (optional but recommended), plant supports (stakes, cages, or trellises – especially important for indeterminate varieties), and possibly pest control measures.
- Prepare your growing area: If planting directly in the ground, amend the soil with compost or other organic matter to improve drainage and fertility. Test your soil pH; tomatoes prefer slightly acidic soil (pH 6.0-6.8). If using containers, choose pots at least 12 inches in diameter to allow for adequate root growth. Ensure good drainage by adding a layer of gravel or broken pottery shards to the bottom of the pot.
Phase 2: Starting Seeds (If Using Seeds)
- Start seeds indoors 6-8 weeks before the last expected frost: This allows the seedlings to develop strong root systems before transplanting outdoors. Use seed-starting mix, not garden soil, as it’s lighter and drains better.
- Sow seeds: Plant seeds about ¼ inch deep and 1-2 inches apart in seed trays or small pots. Gently water the soil, keeping it consistently moist but not soggy. Avoid overwatering, which can lead to damping off (a fungal disease).
- Provide warmth and light: Place the seed trays in a warm location (around 70-75°F) with plenty of sunlight or supplemental grow lights. Seedlings need at least 6-8 hours of light per day.
- Thin seedlings: Once the seedlings have developed their first true leaves (the leaves that appear after the cotyledons), thin them out, leaving the strongest seedlings. You can transplant the extras to other pots.
- Harden off seedlings: Before transplanting outdoors, gradually acclimate the seedlings to outdoor conditions over a period of 7-10 days. Start by placing them outside for a few hours each day, gradually increasing the exposure time.
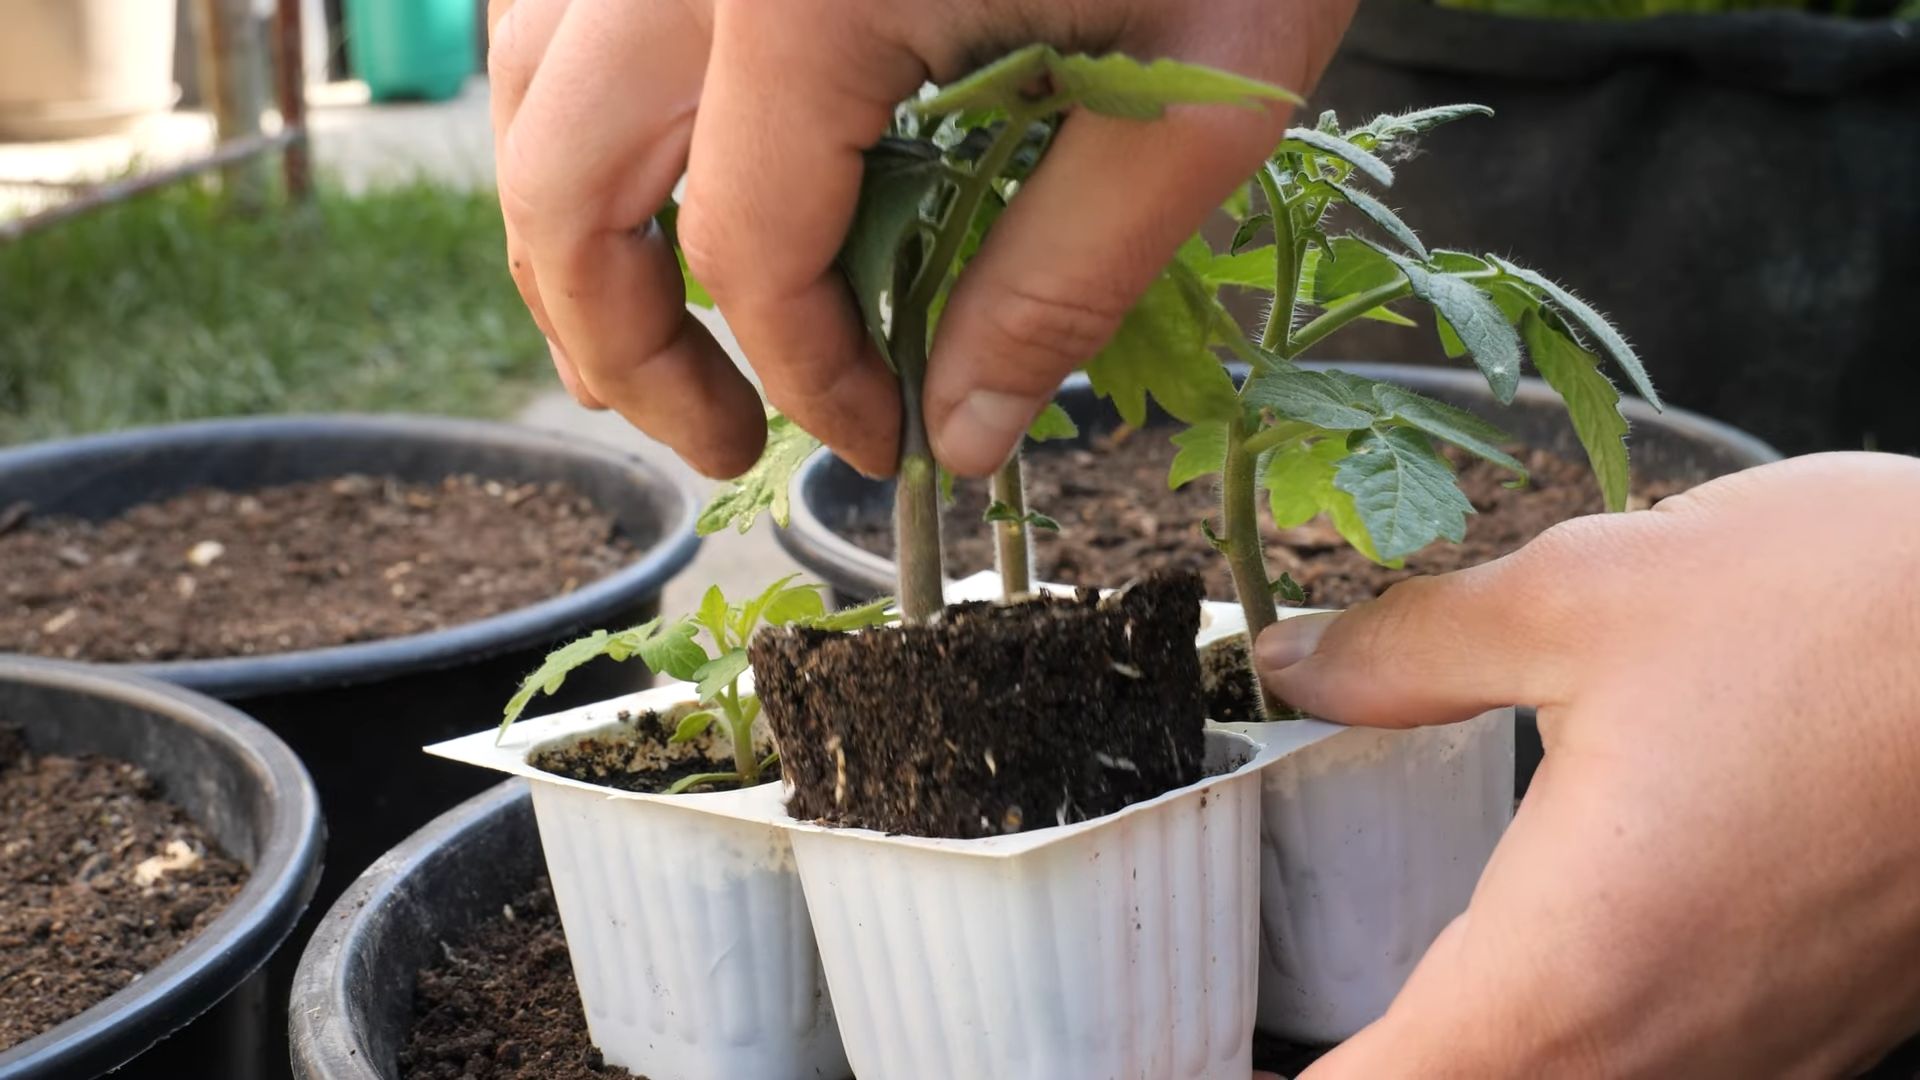
Phase 3: Transplanting and Ongoing Care
- Transplant seedlings: Once the danger of frost has passed and the soil has warmed up, transplant your seedlings outdoors. Space them appropriately according to the variety’s instructions (usually 18-24 inches apart for indeterminate varieties and 12-18 inches for determinate varieties).
- Water regularly: Water deeply and consistently, especially during dry periods. Avoid overhead watering, which can promote fungal diseases. Water at the base of the plants to keep the foliage dry.
- Mulch: Apply a layer of mulch around the plants to help retain moisture, suppress weeds, and regulate soil temperature.
- Fertilize: Feed your plants with a balanced fertilizer every 2-3 weeks, following the package instructions. Over-fertilizing can lead to excessive foliage and fewer tomatoes.
- Provide support: Indeterminate varieties need support to prevent the plants from sprawling and the fruit from touching the ground. Use stakes, cages, or trellises to keep the plants upright.
- Prune suckers: Suckers are small shoots that grow from the junction of the main stem and branches. Removing them encourages better air circulation and directs energy towards fruit production. However, some gardeners prefer not to prune, especially for smaller plants.
- Monitor for pests and diseases: Regularly inspect your plants for signs of pests (aphids, whiteflies, tomato hornworms) or diseases (blight, early/late blight). Take appropriate measures to control any problems you encounter. This might involve using insecticidal soap, neem oil, or other organic pest control methods.
Phase 4: Harvesting and Enjoying Your Tomatoes
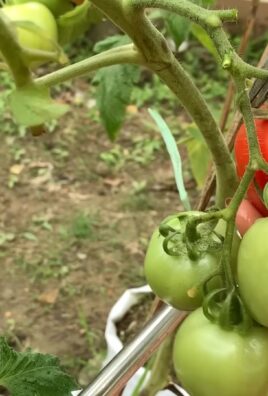
- Harvest at the right time: Cherry tomatoes are typically ready for harvest when they are fully colored and slightly soft to the touch. Don’t wait for them to become overly ripe on the vine.
- Harvest regularly: Frequent harvesting encourages the plant to produce more tomatoes. Pick tomatoes every few days to keep the plant productive.
- Store properly: Store harvested cherry tomatoes at room temperature for a few days or in the refrigerator for longer storage. Avoid washing them until you’re ready to eat them.
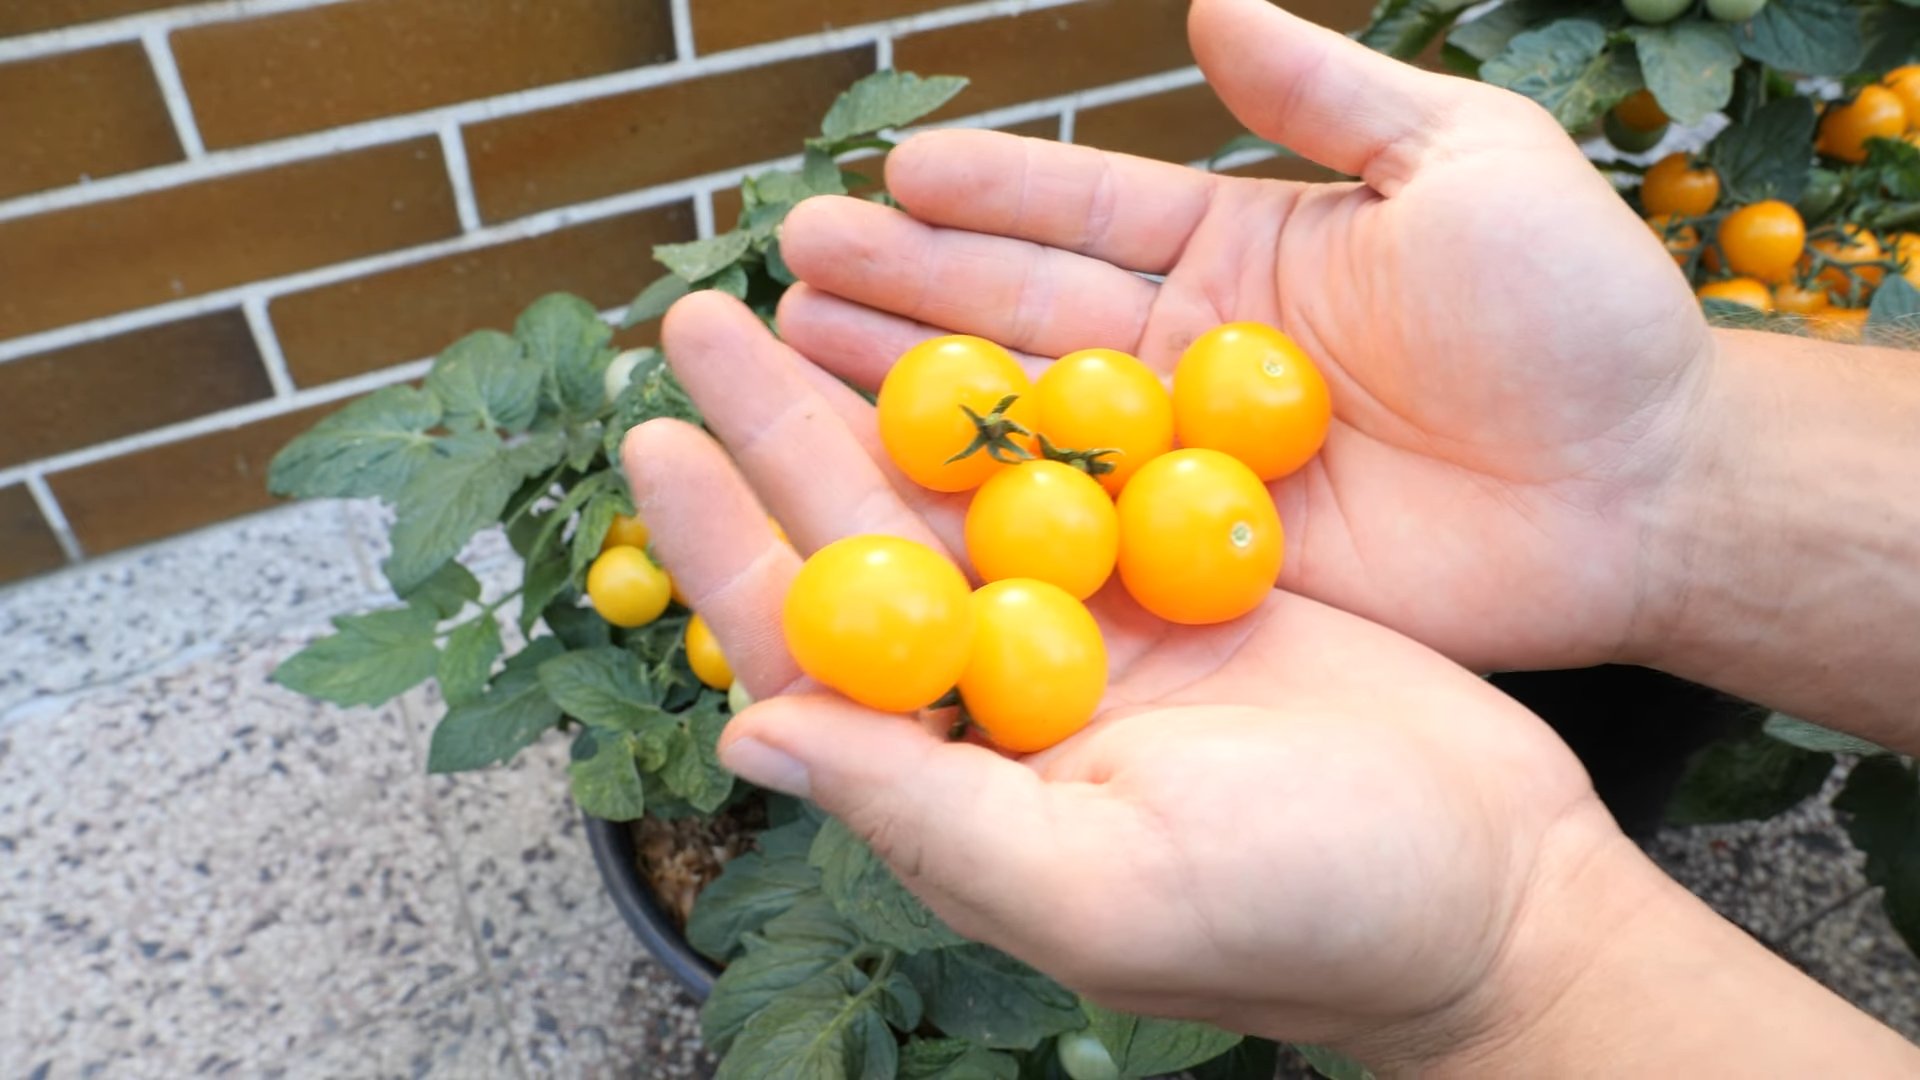
- Enjoy your homegrown bounty! Use your delicious cherry tomatoes in salads, sauces, pasta dishes, or simply enjoy them as a snack. The taste of homegrown tomatoes is truly unmatched!
Tips for Success:
- Choose a sunny location that receives at least 6-8 hours of direct sunlight per day.
- Ensure good air circulation around the plants to prevent fungal diseases.
- Regularly check the soil moisture and water as needed. Don’t let the soil dry out completely.
- Consider using a drip irrigation system for efficient watering.
- Rotate your tomato crops each year to prevent soilborne diseases.
Troubleshooting:
- Yellowing leaves: Could indicate nutrient deficiencies, overwatering, or underwatering. Adjust your watering and fertilization practices accordingly.
- Blossom end rot: Characterized by a dark, leathery spot at the bottom of the tomato. Usually caused by inconsistent watering. Ensure consistent moisture.
- Fruit cracking: Often occurs due to fluctuating moisture levels. Maintain consistent watering and avoid overwatering.
Conclusion
So there you have it – a comprehensive guide to growing your own delicious cherry tomatoes! This DIY approach isn’t just about saving money; it’s about experiencing the unparalleled satisfaction of nurturing a plant from seed to succulent, sun-ripened fruit. The taste difference between homegrown cherry tomatoes and store-bought ones is truly remarkable. You’ll savor the intense sweetness and burst of flavor that only comes from a tomato grown with love and care, under the perfect conditions you’ve created. This DIY grow cherry tomatoes method is a must-try for anyone, regardless of their gardening experience. It’s surprisingly simple, incredibly rewarding, and yields a bounty of flavorful tomatoes that will elevate your salads, sandwiches, and countless other dishes.
Beyond the basic method outlined, there are countless ways to personalize your cherry tomato growing experience. Experiment with different varieties! From the classic red to vibrant yellow, orange, and even black cherry tomatoes, the possibilities are endless. Each variety offers a unique flavor profile, adding exciting diversity to your harvest. Consider using different growing mediums, such as coco coir or a well-balanced potting mix, to see how they impact your plants’ growth and yield. You can also explore vertical gardening techniques, maximizing space and creating a visually stunning display in your garden or even on your balcony. For those with limited space, consider growing your cherry tomatoes in containers – a perfect solution for apartment dwellers or those with smaller gardens. Remember to always monitor your plants for pests and diseases, and adjust your watering and fertilizing schedules as needed. The more you learn about your plants, the better you’ll become at providing them with the optimal conditions for thriving.
Don’t be intimidated by the prospect of growing your own cherry tomatoes. This guide has equipped you with the knowledge and confidence to embark on this rewarding journey. The process is far simpler than you might imagine, and the rewards are immeasurable. The taste, the satisfaction of nurturing life, and the sheer joy of harvesting your own homegrown produce are experiences that will leave you hooked. So, gather your supplies, choose your favorite cherry tomato variety, and get started! We encourage you to share your experiences, successes, and even your challenges with us. Post pictures of your thriving plants and delicious harvests on social media using #GrowCherryTomatoesDIY – we’d love to see your progress and celebrate your achievements with you. Let’s build a community of home gardeners, sharing tips, tricks, and the joy of growing our own food.
Frequently Asked Questions
Q: How much sunlight do cherry tomato plants need?
A: Cherry tomato plants thrive in full sun, meaning at least 6-8 hours of direct sunlight per day. Less sunlight can result in fewer tomatoes and weaker plants. Choose a location in your garden or on your balcony that receives ample sunlight throughout the day.
Q: How often should I water my cherry tomato plants?
A: Watering frequency depends on several factors, including weather conditions, soil type, and pot size. Generally, aim to keep the soil consistently moist but not waterlogged. Check the soil moisture regularly by sticking your finger a couple of inches into the soil. Water deeply when the top inch or two feels dry. Avoid overhead watering, which can lead to fungal diseases. Instead, water at the base of the plant.
Q: What type of fertilizer should I use for my cherry tomato plants?
A: Cherry tomato plants benefit from regular fertilization. Use a balanced, water-soluble fertilizer specifically formulated for tomatoes. Follow the instructions on the fertilizer packaging carefully, as over-fertilizing can harm your plants. Consider using organic fertilizers for a more environmentally friendly approach.
Q: When can I expect to harvest my cherry tomatoes?
A: The time it takes for cherry tomatoes to mature depends on the variety and growing conditions. Generally, you can expect to harvest your first tomatoes 60-80 days after planting seeds. Harvest tomatoes when they are fully colored and slightly soft to the touch. Don’t wait for them to become overly ripe on the vine, as this can affect their flavor and shelf life.
Q: What are some common problems I might encounter while growing cherry tomatoes?
A: Some common problems include blossom-end rot (caused by inconsistent watering), pests like aphids or whiteflies, and fungal diseases. Regularly inspect your plants for signs of problems and take appropriate action. This might involve adjusting your watering schedule, using insecticidal soap or neem oil for pests, or improving air circulation to prevent fungal diseases. Early detection and intervention are key to preventing major issues.
Q: Can I grow cherry tomatoes indoors?
A: Yes, you can grow cherry tomatoes indoors, but you’ll need to provide them with sufficient light. A sunny south-facing window might be enough for a few plants, but for larger quantities, you’ll likely need supplemental lighting, such as grow lights, to ensure they receive the necessary amount of light for optimal growth and fruit production. Consider using compact varieties that are better suited for indoor growing.
Q: What should I do with my cherry tomato harvest?
A: Enjoy your delicious homegrown cherry tomatoes! Use them in salads, sandwiches, pasta sauces, salsas, or simply eat them straight from the vine. You can also preserve your harvest by canning, freezing, or making tomato paste or juice. The possibilities are endless!
Q: What if my cherry tomato plants aren’t producing many tomatoes?
A: Several factors can affect tomato production. Insufficient sunlight, improper watering, nutrient deficiencies, or pest infestations can all reduce yields. Review the growing conditions and address any potential issues. Ensure your plants are receiving adequate sunlight, water, and nutrients. Check for pests and diseases and take appropriate action. Sometimes, simply pruning away excess foliage can improve air circulation and encourage fruit production.
Leave a Comment