
Grow Watermelons Indoors? Absolutely! Imagine sinking your teeth into a juicy, homegrown watermelon in the dead of winter. Sounds like a dream, right? Well, it doesn’t have to be! For centuries, gardeners have been pushing the boundaries of what’s possible, experimenting with techniques to cultivate their favorite fruits and vegetables regardless of the season. While traditionally a sun-loving outdoor crop, watermelons can indeed be coaxed to thrive within the cozy confines of your home.
This DIY guide is your passport to unlocking the secrets of indoor watermelon cultivation. We’ll delve into the essential steps, from selecting the right variety and providing optimal lighting to mastering pollination and ensuring proper watering. Why should you embark on this adventure? Because fresh, flavorful produce shouldn’t be limited by geographical location or weather patterns. Plus, there’s an immense satisfaction in nurturing a plant from seed to fruit, especially when that fruit is a refreshing watermelon you’ve grown yourself!
Whether you’re a seasoned gardener looking for a new challenge or a curious beginner eager to try something different, this article will equip you with the knowledge and confidence to successfully grow watermelons indoors. Get ready to transform your living space into a miniature watermelon oasis!

Growing Watermelons Indoors: Your DIY Guide for a Sweet Harvest
Hey everyone! Are you tired of the dreary winter and longing for the sweet taste of watermelon? Then I have just the thing for you! I’ll show you how you can also grow watermelons indoors. Yes, you read that right! It’s a bit more effort than in the garden, but with the right preparation and care, you can look forward to a delicious harvest. Let’s get started!
What You Need: The Shopping List
Before we get started, we’ll naturally need the right equipment. Here is a list of everything you’ll need:
- Watermelon seeds: It’s best to choose a smaller variety that is well-suited for growing in pots. “Sugar Baby” or “Bush Sugar Baby” are good options.
- Starter pots: Small pots or seed trays for germinating the seeds.
- Seed-starting mix: Special soil for starting plants that is low in nutrients and loose.
- Large pots: Once the plants get bigger, they will need larger pots with a diameter of at least 30-40 cm (12-16 inches).
- Potting soil: A good, nutrient-rich potting soil for the larger pots.
- Support/Trellis: Watermelon plants need support to grow. A trellis or bamboo stakes are ideal.
- Grow light: A grow light is essential, especially in winter or in darker rooms.
- Spray bottle: For moistening the soil.
- Watering can: For watering the plants.
- Liquid fertilizer: Special fertilizer for fruiting vegetables.
- Paintbrush: For pollinating the flowers (more on that later).
- Thermometer: To keep an eye on the temperature.
- Moisture meter: To check the soil moisture.
Phase 1: Sowing – The Foundation for Your Watermelon
Sowing is the first and most important step. Here we lay the groundwork for a successful harvest.
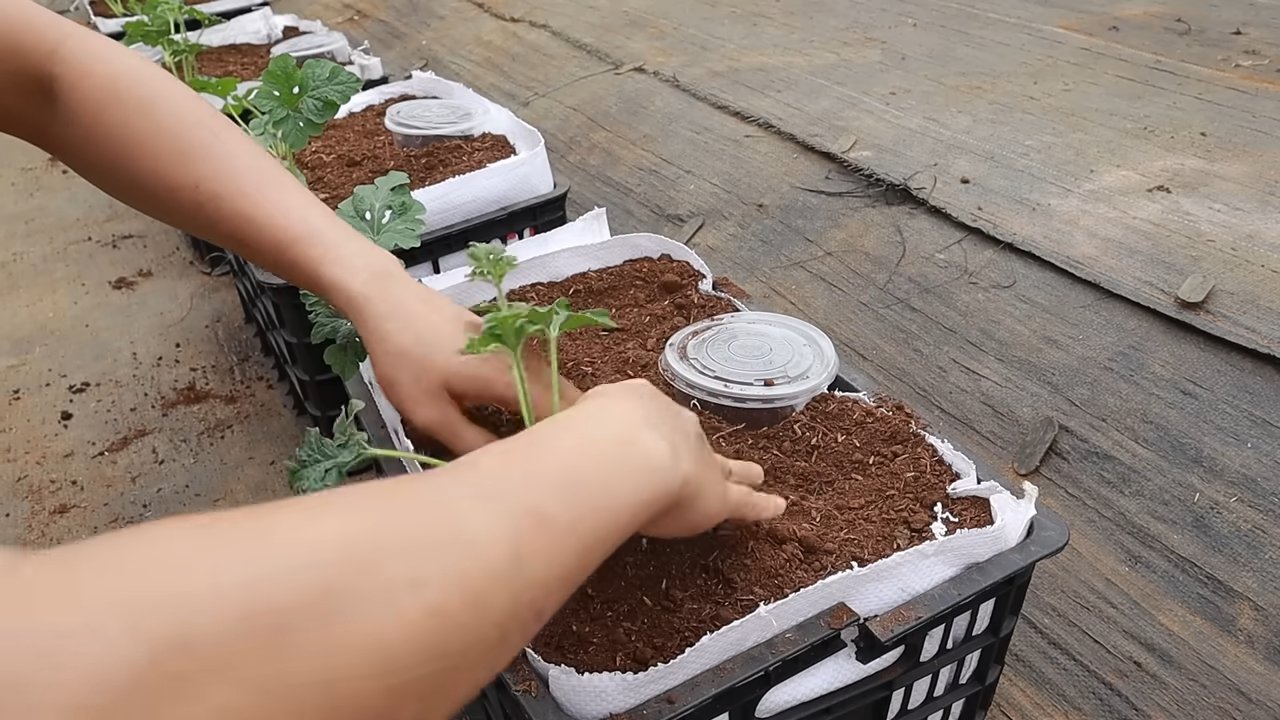
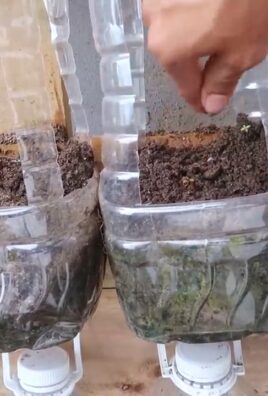
- Prepare the starter pots: Fill the starter pots with seed-starting mix. Press the soil down lightly.
- Sow the seeds: Place 2-3 seeds in each pot. Cover the seeds with a thin layer of soil (about 1 cm / 0.4 inches).
- Water: Gently moisten the soil with a spray bottle. The soil should be damp, but not wet.
- Location: Place the starter pots in a warm place (approx. 25-28°C / 77-82°F). A heat mat can be very helpful here.
- Cover: Cover the pots with plastic wrap or a mini-greenhouse to increase humidity.
- Check: Check the soil daily and moisten it if necessary.
Phase 2: Germination – When Life Awakens
After a few days (approx. 5-10 days), the first seedlings should be visible.
- Remove the cover: As soon as the seedlings appear, remove the cover.
- Light: Place the pots under a grow light. The lamp should hang about 15-20 cm (6-8 inches) above the plants.
- Thin out: If several seedlings have grown in one pot, remove the weakest one.
- Water: Continue to water the plants gently with a spray bottle.
- Temperature: Make sure the temperature does not drop below 20°C (68°F).
Phase 3: Transplanting – A New Home for Your Plant
Once the plants have developed a few leaves (about 2-3 weeks after germination), it’s time to transplant them into larger pots.
- Prepare the large pots: Fill the large pots with potting soil.
- Transplant: Carefully remove the plants from the starter pots and plant them in the large pots. Be careful not to damage the roots.
- Water: Water the plants thoroughly after transplanting.
- Location: Place the pots in a bright and warm location.
- Support: Attach a trellis so the plants can climb up it.
Phase 4: Care – So Your Watermelon Thrives
Proper care is crucial for a successful harvest.
- Watering: Water the plants regularly, but avoid waterlogging. The soil should always be slightly moist.
- Fertilizing: Fertilize the plants regularly with a liquid fertilizer for fruiting vegetables. Follow the instructions on the package.
- Light: Ensure sufficient light. The plants need at least 6-8 hours of light per day.
- Temperature: The ideal temperature is between 22-28°C (72-82°F).
- Humidity: High humidity is important for the growth of the plants. Spray the plants regularly with water.
- Pollination: Since we are growing the watermelons indoors, we have to pollinate the flowers ourselves.
- Identifying the flowers: Watermelons have male and female flowers. The female flowers can be recognized by the small, undeveloped fruit directly behind the blossom.
- Pollination process: Take a paintbrush and gently dab it inside the male flower to pick up the pollen. Then transfer the pollen to the female flower.
- Timing: It’s best to pollinate the flowers in the morning when the pollen is most active.
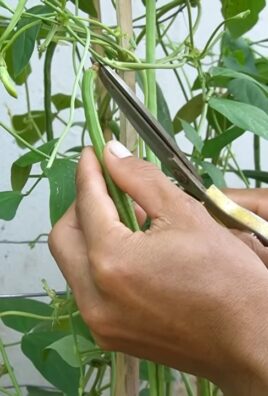
- Pruning: Regularly remove side shoots to concentrate the plant’s energy on fruit production.
- Check: Regularly check the plants for pests and diseases.
Phase 5: The Harvest – The Reward for Your Effort
After about 80-100 days (depending on the variety), the watermelons are ripe.
- Signs of ripeness: The signs of ripeness include:
- The rind of the watermelon becomes dull and loses its shine.
- The spot where the watermelon rests on the ground turns yellow.
- When you tap on the watermelon, it sounds hollow.
- Harvest: Carefully cut the watermelon from the stem.
Additional Tips and Tricks
- Variety selection: Be sure to choose a variety that is suitable for growing in pots.
- Ventilation: Ensure good ventilation to prevent mold.
- Patience: Growing watermelons indoors requires patience and perseverance. Don’t be discouraged if it doesn’t work out the first time.
- Observation: Observe your plants closely and react to changes.
I hope this guide helps you grow your own watermelons indoors. Good luck and enjoy them
Conclusion
So, there you have it! Growing watermelons indoors might seem like a daunting task, reserved for seasoned gardeners with acres of land, but with a little planning, dedication, and the right techniques, you can absolutely cultivate these juicy delights right in your own home. We’ve walked you through the essential steps, from selecting the right variety and providing optimal lighting to hand-pollinating your precious blossoms and supporting the developing fruit.
Why is this DIY trick a must-try? Because it opens up a world of possibilities! Imagine enjoying homegrown, vine-ripened watermelon in the dead of winter, a burst of summer sweetness when you need it most. Think of the satisfaction of nurturing a plant from seed to fruit, witnessing the miracle of nature unfold before your eyes. And consider the bragging rights – you’ll be the envy of all your friends and neighbors!
But beyond the novelty and the delicious reward, growing watermelons indoors offers a unique learning experience. It deepens your understanding of plant biology, hones your gardening skills, and connects you to the natural world in a profound way. It’s a project that’s both challenging and incredibly rewarding.
Variations and Suggestions
Don’t be afraid to experiment! Try different watermelon varieties to see which ones thrive best in your indoor environment. Consider using hydroponic systems for even greater control over nutrient delivery. You can also explore companion planting, adding herbs or flowers to your watermelon container to attract pollinators and deter pests.
For example, basil is known to repel aphids and whiteflies, common watermelon pests. Marigolds can also help deter nematodes in the soil. These additions not only benefit your watermelon but also add visual appeal to your indoor garden.
Another variation is to train your watermelon vines vertically using a trellis or support system. This not only saves space but also allows for better air circulation, reducing the risk of fungal diseases. Just be sure to provide adequate support for the heavy fruits as they develop.
Remember, success with indoor watermelon growing often comes down to careful observation and adaptation. Pay close attention to your plants’ needs, adjust your watering and feeding schedules as necessary, and don’t be discouraged by setbacks. Every challenge is an opportunity to learn and improve.
Share Your Experience!
We wholeheartedly encourage you to give this DIY trick a try. Embrace the challenge, enjoy the process, and savor the sweet taste of success. And most importantly, share your experience with us! We’d love to hear about your triumphs, your challenges, and any tips or tricks you discover along the way. Post photos of your indoor watermelon garden on social media using #IndoorWatermelon or leave a comment below. Let’s create a community of indoor watermelon growers and inspire others to embark on this exciting journey.
Ultimately, mastering the art of how to grow watermelons indoors is more than just a gardening project; it’s a testament to your resourcefulness, your dedication, and your love for all things green. So, grab your seeds, prepare your soil, and get ready to experience the joy of homegrown watermelon, no matter the season!
FAQ
Q: What is the best watermelon variety to grow indoors?
A: Smaller, bush-type watermelon varieties are generally the best choice for indoor growing. These varieties require less space and tend to mature more quickly. Some popular options include ‘Sugar Baby,’ ‘Bush Sugar Baby,’ ‘Golden Midget,’ and ‘Yellow Doll.’ These varieties are known for their compact size, relatively short growing season, and delicious flavor. When selecting a variety, also consider its disease resistance, as indoor environments can sometimes be prone to fungal issues. Read seed packet descriptions carefully to choose a variety that is well-suited to container gardening and indoor conditions.
Q: How much light do indoor watermelons need?
A: Watermelons are sun-loving plants and require at least 6-8 hours of direct sunlight per day to thrive. If you don’t have a south-facing window that provides sufficient sunlight, you’ll need to supplement with grow lights. Full-spectrum LED grow lights are an excellent choice, as they provide the necessary wavelengths of light for photosynthesis. Position the grow lights about 6-12 inches above the plants and adjust the height as the plants grow. You can also use a timer to ensure that the plants receive consistent light exposure each day. Insufficient light can lead to weak, leggy growth and reduced fruit production.
Q: How do I hand-pollinate my watermelon flowers?
A: Watermelons have separate male and female flowers. The female flowers have a small, immature watermelon at the base of the flower, while the male flowers do not. To hand-pollinate, use a small paintbrush or cotton swab to collect pollen from the male flower and gently transfer it to the stigma of the female flower. It’s best to do this in the morning, when the pollen is most viable. You may need to hand-pollinate several female flowers to ensure successful fruit set. You can also gently shake the male flower over the female flower to release the pollen. Repeat the hand-pollination process every day for several days to increase your chances of success.
Q: What kind of soil should I use for indoor watermelons?
A: Watermelons need well-draining soil that is rich in organic matter. A good potting mix for indoor watermelons should consist of a blend of peat moss, perlite, and vermiculite. You can also add compost or aged manure to improve the soil’s fertility and drainage. Avoid using garden soil, as it can be too heavy and may contain pests or diseases. The ideal soil pH for watermelons is between 6.0 and 6.8. Before planting, amend the soil with a slow-release fertilizer to provide essential nutrients throughout the growing season.
Q: How often should I water my indoor watermelons?
A: Watermelons need consistent moisture, especially during fruit development. Water deeply whenever the top inch of soil feels dry to the touch. Avoid overwatering, as this can lead to root rot. Ensure that your container has adequate drainage holes to prevent water from accumulating at the bottom. During hot weather, you may need to water more frequently. Mulching around the base of the plant can help retain moisture in the soil. Check the soil moisture levels regularly and adjust your watering schedule accordingly.
Q: How do I support the weight of the growing watermelons?
A: As watermelons grow, they can become quite heavy and may need support to prevent the vines from breaking. You can use slings made from pantyhose, netting, or fabric to support the developing fruits. Tie the slings to a trellis or other support structure. Alternatively, you can place the watermelons on a padded surface, such as a piece of foam or a small cushion. Regularly check the supports to ensure that they are strong enough to bear the weight of the growing fruits.
Q: What are some common pests and diseases that affect indoor watermelons?
A: Common pests that can affect indoor watermelons include aphids, spider mites, and whiteflies. These pests can be controlled with insecticidal soap or neem oil. Fungal diseases, such as powdery mildew and fusarium wilt, can also be a problem in indoor environments. To prevent fungal diseases, ensure good air circulation, avoid overwatering, and use a fungicide if necessary. Regularly inspect your plants for signs of pests or diseases and take action promptly to prevent them from spreading.
Q: How long does it take for indoor watermelons to mature?
A: The time it takes for indoor watermelons to mature depends on the variety and growing conditions. Generally, it takes about 70-90 days from planting to harvest. You’ll know that your watermelon is ripe when the tendril closest to the fruit turns brown and dry, the bottom of the watermelon turns yellow, and the watermelon sounds hollow when you thump it. You can also check the sugar content of the watermelon using a refractometer. Harvest your watermelons when they are fully ripe for the best flavor and texture.
Leave a Comment