
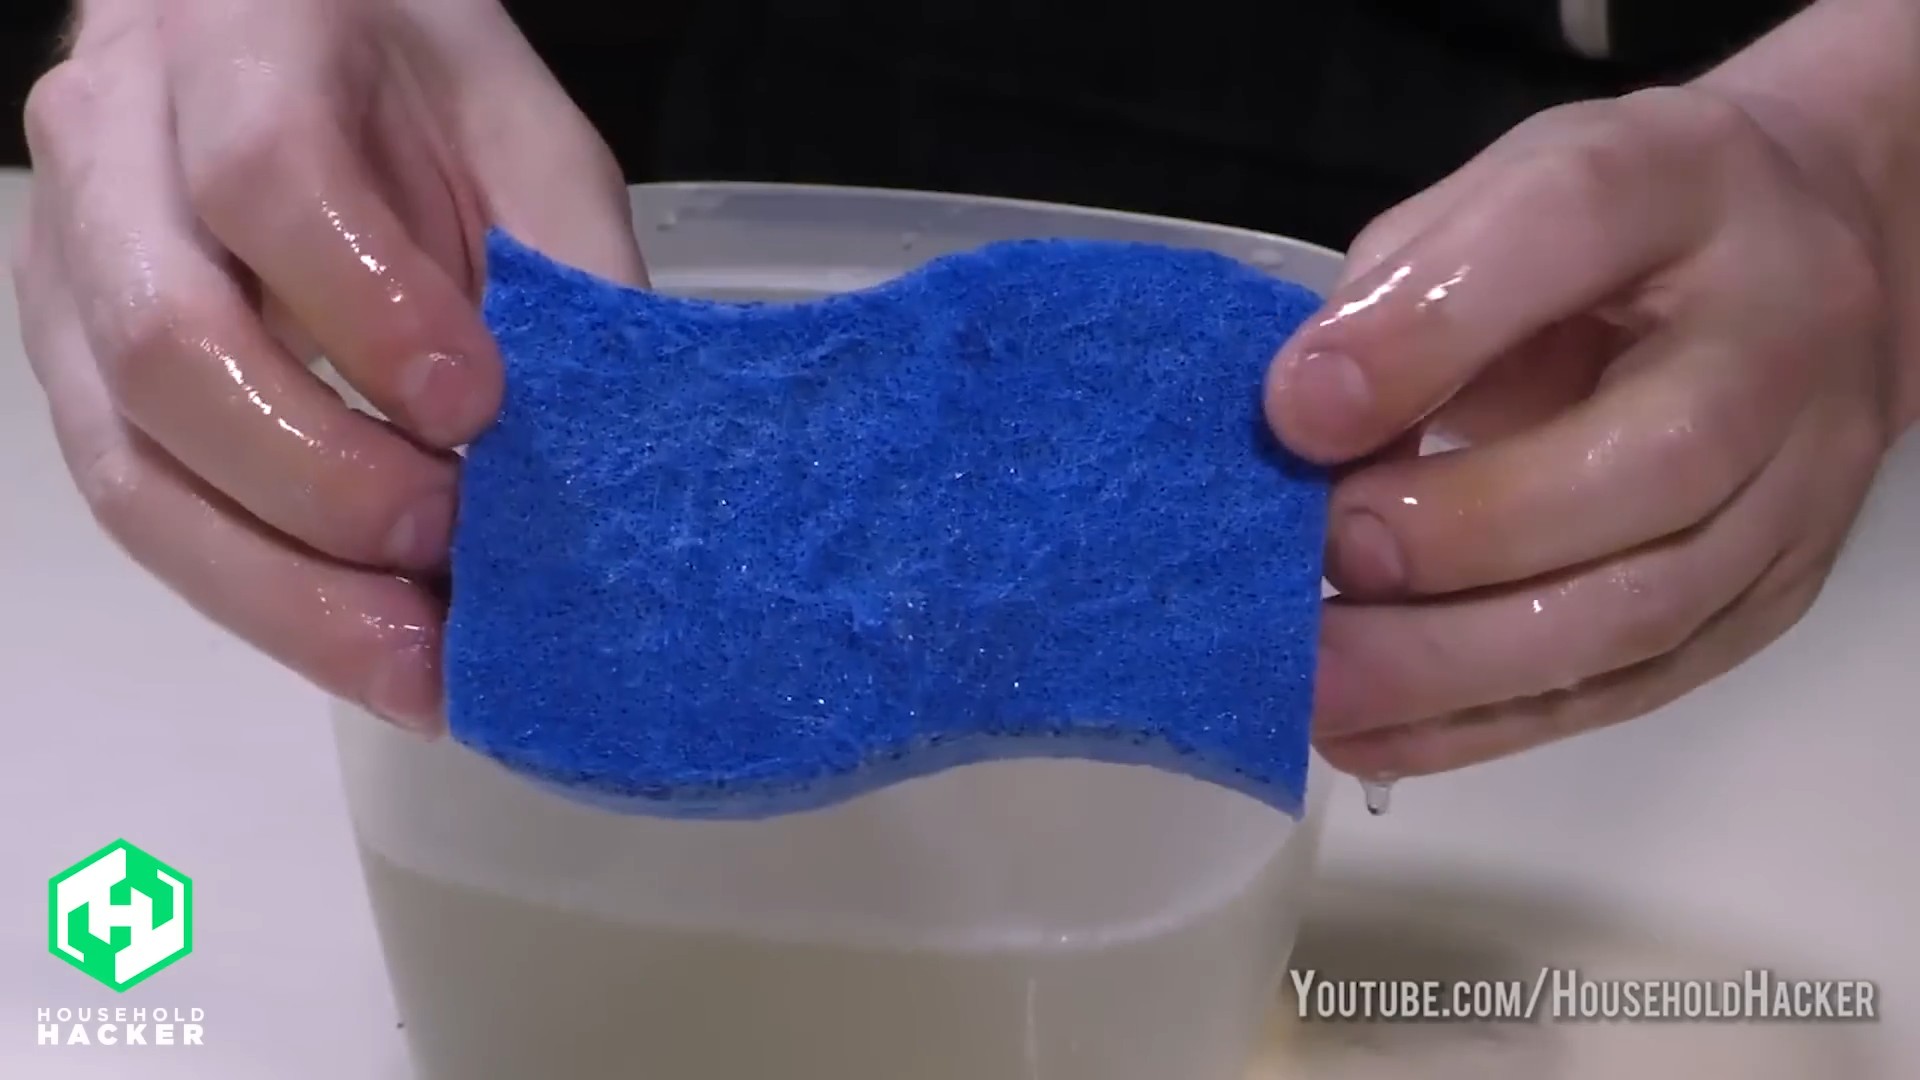
Sponge Cleaning Tips and Tricks: Are you tired of your kitchen sponge smelling funky and looking even worse? Let’s face it, that little cleaning powerhouse can quickly become a breeding ground for bacteria if not properly cared for. But don’t worry, you don’t need to constantly buy new sponges! I’m here to share some amazing DIY sponge cleaning tips and tricks that will save you money and keep your kitchen sparkling.
Sponges have been around in various forms for centuries, from natural sea sponges used by ancient Greeks and Romans for bathing to the synthetic versions we rely on today. While their purpose has remained consistent – cleaning! – our understanding of how to maintain them has evolved. In the past, people simply rinsed and reused, but now we know that a little extra effort can significantly extend the life of our sponges and prevent the spread of germs.
In today’s busy world, who has time to constantly run to the store for new sponges? These sponge cleaning tips and tricks are essential because they offer a simple, effective, and eco-friendly way to keep your sponges fresh and hygienic. Plus, by learning these easy hacks, you’ll be contributing to a cleaner, healthier home environment for you and your family. So, let’s dive in and discover how to transform your grimy sponge into a cleaning champion!
Revive Your Sponges: Cleaning Tips and Tricks for a Germ-Free Kitchen
Let’s face it, our kitchen sponges are the unsung heroes of clean-up. They tackle everything from greasy pans to sticky countertops. But all that hard work means they quickly become breeding grounds for bacteria and, well, frankly, they start to stink! Throwing them away constantly feels wasteful, and honestly, it’s not great for the environment. So, I’m here to share my tried-and-true methods for cleaning and disinfecting your sponges, extending their lifespan, and keeping your kitchen a happy, healthy place.
Why Cleaning Your Sponges Matters
Before we dive into the how-to, let’s quickly cover the why. Sponges are porous, which makes them excellent at absorbing liquids and scrubbing surfaces. However, that same porosity also makes them perfect homes for bacteria, mold, and mildew. Studies have shown that sponges can harbor a shocking number of microorganisms, some of which can be harmful. Regularly cleaning your sponges not only eliminates odors but also significantly reduces the risk of spreading germs around your kitchen.
Choosing the Right Sponge
First things first, not all sponges are created equal. I’ve found that some types hold up better to cleaning and disinfecting than others.
* Cellulose Sponges: These are your classic, plant-based sponges. They’re absorbent, affordable, and generally biodegradable. They’re also pretty good at releasing trapped particles when rinsed.
* Synthetic Sponges: These are typically made from plastic polymers. They tend to be more durable than cellulose sponges and can be more resistant to tearing. However, they’re not biodegradable.
* Scrub Sponges: These have an abrasive side attached, which is great for tackling tough messes. Just be mindful that the abrasive side can wear down more quickly with repeated cleaning.
* Silicone Sponges: These are a newer option that’s gaining popularity. They’re non-porous, which means they don’t absorb as much bacteria. They’re also heat-resistant and dishwasher-safe.
I personally prefer cellulose sponges for everyday use because they’re eco-friendly and easy to clean. But I also keep a scrub sponge on hand for those extra-stubborn messes.
Cleaning Methods: My Go-To Techniques
Okay, now for the fun part! Here are my favorite methods for cleaning and disinfecting sponges, along with step-by-step instructions:
Method 1: The Microwave Method (Quick and Easy)
This is my go-to method when I need a quick and easy clean. It’s surprisingly effective at killing bacteria.
1. Thoroughly Wet the Sponge: Make sure your sponge is completely saturated with water. This is crucial! A dry sponge in the microwave is a fire hazard.
2. Microwave for 2 Minutes: Place the wet sponge in the microwave and heat it on high for 2 minutes.
3. Let it Cool: Carefully remove the sponge from the microwave (it will be hot!) and let it cool down before handling it.
4. Rinse and Squeeze: Rinse the sponge thoroughly under running water and squeeze out any excess water.
Important Note: This method is not suitable for sponges with metal scrubbing pads, as they can spark in the microwave. Also, be sure to watch the sponge closely while it’s microwaving. If you see any smoke or hear any unusual noises, stop the microwave immediately.
Method 2: The Bleach Solution (For Heavy-Duty Disinfection)
When my sponges are particularly grimy or I’m concerned about serious contamination (like after cleaning up raw meat), I turn to bleach.
1. Prepare the Bleach Solution: In a clean container, mix 3/4 cup of bleach with 1 gallon of water. Always use cold water, as hot water can cause the bleach to release harmful fumes.
2. Soak the Sponge: Submerge the sponge in the bleach solution and let it soak for at least 5 minutes, but no more than 10 minutes.
3. Rinse Thoroughly: Remove the sponge from the bleach solution and rinse it extremely well under running water. Make sure to remove all traces of bleach.
4. Air Dry: Squeeze out any excess water and allow the sponge to air dry completely.
Safety First: Bleach is a powerful disinfectant, but it’s also a harsh chemical. Always wear gloves when handling bleach, and make sure to work in a well-ventilated area. Never mix bleach with ammonia or other cleaning products, as this can create toxic fumes.
Method 3: The Dishwasher Method (Convenient and Effective)
If you have a dishwasher, you can easily clean your sponges along with your dishes.
1. Place Sponge in Dishwasher: Place the sponge in the top rack of your dishwasher. Make sure it’s not blocking any spray arms.
2. Run a Normal Cycle: Run a normal dishwasher cycle with your regular detergent.
3. Dry Thoroughly: Once the cycle is complete, remove the sponge and allow it to air dry completely.
Tip: I like to run my sponges through the dishwasher at least once a week to keep them fresh and clean.
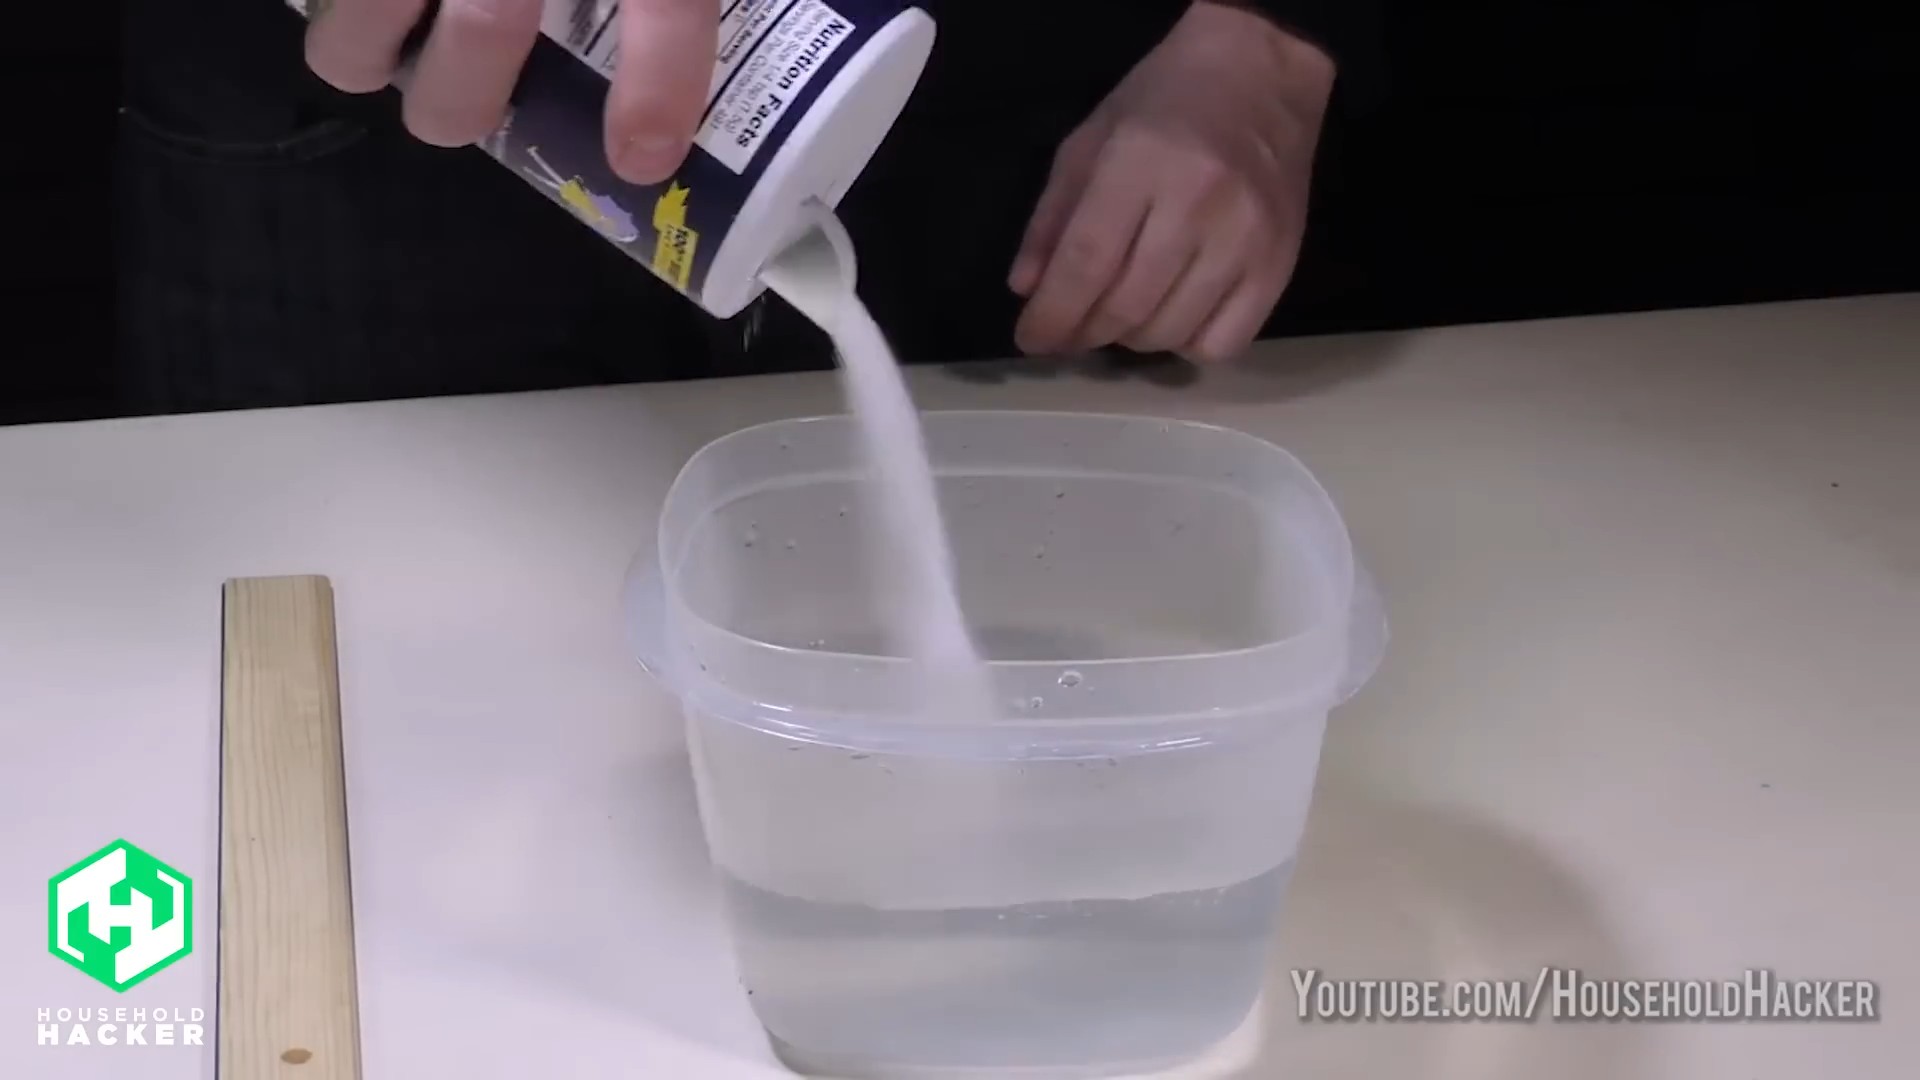
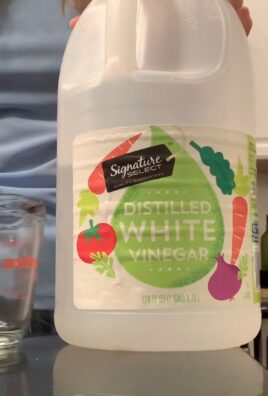
Method 4: The Vinegar Soak (A Natural Alternative)
If you prefer a more natural cleaning solution, vinegar is a great option. It’s a natural disinfectant and deodorizer.
1. Prepare the Vinegar Solution: In a clean container, mix equal parts white vinegar and water.
2. Soak the Sponge: Submerge the sponge in the vinegar solution and let it soak for at least an hour, or even overnight.
3. Rinse and Squeeze: Remove the sponge from the vinegar solution and rinse it thoroughly under running water. Squeeze out any excess water.
4. Air Dry: Allow the sponge to air dry completely.
Vinegar Power: Vinegar is a great all-purpose cleaner. It can help remove grease, grime, and odors from your sponges.
Extending the Life of Your Sponges: Pro Tips
Cleaning your sponges is essential, but there are also a few things you can do to extend their lifespan and prevent them from getting too dirty in the first place.
* Rinse After Every Use: This is the most important thing you can do! After each use, rinse your sponge thoroughly under running water to remove any food particles or debris.
* Squeeze Out Excess Water: After rinsing, squeeze out as much water as possible. A damp sponge is a breeding ground for bacteria.
* Store Properly: Store your sponge in a well-ventilated area where it can dry completely. Avoid leaving it in a sink or on a wet countertop. I use a small sponge holder with good airflow.
* Designate Sponges for Specific Tasks: Use different sponges for different tasks to prevent cross-contamination. For example, use one sponge for cleaning dishes and another for wiping countertops.
* Replace Regularly: Even with regular cleaning, sponges will eventually wear out and become less effective. I recommend replacing your sponges every 2-4 weeks, or sooner if they start to smell or look worn.
Dealing with Stubborn Odors
Sometimes, even after cleaning, your sponges might still have a lingering odor. Here are a few tips for dealing with stubborn odors:
* Baking Soda Soak: Soak the sponge in a solution of baking soda and water for a few hours. Baking soda is a natural deodorizer and can help absorb unpleasant smells.
* Lemon Juice: Rub the sponge with lemon juice and let it sit for a few minutes before rinsing. Lemon juice has antibacterial properties and can help freshen up your sponge.
* Essential Oils: Add a few drops of your favorite essential oil (like tea tree or lemon) to the cleaning solution. This will not only help eliminate odors but also leave your sponge smelling fresh and clean.
When to Say Goodbye: Recognizing the End of a Sponge’s Life
Even with the best care, sponges don’t last forever. Here are some signs that it’s time to toss your sponge and replace it with a new one:
* Persistent Odor: If your sponge still smells bad even after cleaning, it’s time to say goodbye.
* Visible Mold or Mildew: If you see any signs of mold or mildew, discard the sponge immediately.
* Excessive Wear and Tear: If the sponge is falling apart or losing its shape, it’s no longer effective.
* It’s Been Too Long: As a general rule, replace your sponges every 2-4 weeks, even if they look and smell clean.
Final Thoughts: Keeping Your Kitchen Clean and Healthy
Cleaning your sponges is a simple but important step in keeping your kitchen clean and healthy. By following these tips and tricks, you can extend the life of your sponges, reduce the risk of spreading germs, and create a more pleasant cooking environment. So, go ahead and give your sponges some love! Your kitchen (and your health) will thank you for
Conclusion
So, there you have it! Transforming your cleaning routine with these simple yet effective sponge cleaning tips and tricks is not just about saving money; it’s about creating a healthier, more hygienic home environment. We’ve explored methods that are easy to implement, using ingredients you likely already have in your pantry. From the microwave zap to the vinegar soak, each technique offers a powerful way to banish bacteria and odors, extending the life of your trusty cleaning companion.
But why is this DIY approach a must-try? Because it’s a game-changer. Think about it: sponges are breeding grounds for germs. Regularly cleaning them prevents the spread of these germs around your home, protecting you and your family from potential illnesses. Plus, constantly replacing sponges adds up, both financially and environmentally. By adopting these cleaning habits, you’re not only saving money but also reducing waste. It’s a win-win!
Beyond the Basics: Variations and Enhancements
Don’t be afraid to experiment and personalize these techniques. For instance, if you’re using the bleach solution, consider adding a few drops of your favorite essential oil, like lemon or tea tree, for an extra boost of freshness and antibacterial power. Just be sure to use essential oils safely and avoid mixing them directly with bleach.
Another variation involves using baking soda paste. After microwaving or soaking your sponge, create a paste of baking soda and water and scrub the sponge thoroughly. This will help remove stubborn stains and odors. For heavily soiled sponges, a combination of methods might be necessary. Start with a vinegar soak, followed by microwaving, and finish with a baking soda scrub.
A Call to Action: Share Your Success!
We wholeheartedly encourage you to try these sponge cleaning tips and tricks. You’ll be amazed at the difference it makes. Once you’ve given them a whirl, we’d love to hear about your experience! Share your results, variations, and any other helpful tips you’ve discovered in the comments below. Let’s create a community of clean-sponge enthusiasts! Your insights could help others discover the joy of a fresh, clean sponge and a healthier home. Remember, a clean sponge is a happy sponge, and a happy sponge contributes to a happier, healthier you! So, grab your sponge, choose your method, and get cleaning! You won’t regret it.
Frequently Asked Questions (FAQs)
Q: How often should I clean my sponges?
A: Ideally, you should clean your sponges every day or at least every other day. Sponges are constantly exposed to food particles and moisture, creating a perfect environment for bacteria to thrive. Regular cleaning will help prevent the buildup of germs and odors. If you use your sponge for particularly messy tasks, such as cleaning up raw meat juices, clean it immediately afterward.
Q: Which cleaning method is the most effective?
A: The most effective method depends on the level of soiling and your personal preference. Microwaving is a quick and easy option for daily cleaning. Soaking in vinegar or bleach solution is more effective for removing stubborn stains and odors. For heavily soiled sponges, a combination of methods, such as a vinegar soak followed by microwaving and a baking soda scrub, may be necessary. Experiment with different techniques to find what works best for you.
Q: Is it safe to microwave a sponge?
A: Yes, it is generally safe to microwave a sponge, but there are a few precautions to take. First, make sure the sponge is thoroughly wet. A dry sponge can catch fire in the microwave. Second, don’t microwave the sponge for more than two minutes. Overheating can damage the sponge and potentially release harmful chemicals. Third, let the sponge cool down before handling it, as it will be very hot. Finally, avoid microwaving sponges that contain metal or abrasive materials.
Q: Can I use dish soap to clean my sponges?
A: While dish soap can help remove food particles from your sponge, it’s not effective at killing bacteria. In fact, dish soap can actually contribute to bacterial growth by providing a food source. Therefore, it’s important to use a disinfectant, such as vinegar or bleach, in addition to dish soap when cleaning your sponges. You can wash the sponge with dish soap to remove debris and then disinfect it using one of the methods described above.
Q: How long should I soak my sponge in vinegar or bleach solution?
A: For vinegar, soak the sponge for at least five minutes, but longer soaking times (up to an hour) can be more effective for heavily soiled sponges. For bleach solution, soak the sponge for 5-10 minutes. Be sure to rinse the sponge thoroughly after soaking in either solution to remove any residue.
Q: What type of vinegar should I use to clean my sponges?
A: White distilled vinegar is the best option for cleaning sponges. It’s inexpensive, readily available, and effective at killing bacteria and removing odors. Avoid using other types of vinegar, such as apple cider vinegar or balsamic vinegar, as they may contain sugars or other ingredients that can attract bacteria.
Q: Is it better to replace my sponges regularly instead of cleaning them?
A: While regular cleaning can significantly extend the life of your sponges, it’s still important to replace them periodically. Even with diligent cleaning, sponges can eventually become worn out and harbor bacteria. A good rule of thumb is to replace your sponges every two to four weeks, or sooner if they show signs of wear and tear, such as discoloration, crumbling, or a persistent odor. Cleaning your sponges regularly in between replacements will help keep them fresher and more hygienic.
Q: Can I clean my sponges in the dishwasher?
A: Yes, you can clean your sponges in the dishwasher. Place the sponges on the top rack of the dishwasher and run a normal cycle with detergent. Be sure to use the heated drying setting to kill any remaining bacteria. While dishwashing is a convenient option, it may not be as effective as other methods, such as microwaving or soaking in vinegar or bleach solution.
Q: Are there any sponges that are more resistant to bacteria?
A: Some sponges are made with antimicrobial materials that are designed to inhibit bacterial growth. These sponges can be a good option if you’re concerned about hygiene. However, even antimicrobial sponges need to be cleaned regularly to prevent the buildup of food particles and other debris.
Q: What are the environmental implications of constantly replacing sponges?
A: Constantly replacing sponges contributes to landfill waste. Sponges are typically made from synthetic materials that are not biodegradable. By cleaning your sponges regularly and extending their lifespan, you can reduce your environmental impact. Consider switching to more sustainable alternatives, such as cellulose sponges or reusable cloths, which are biodegradable and can be composted.
Leave a Comment