
Grow Swiss Chard Kitchen gardens are becoming increasingly popular, and for good reason! Imagine stepping into your kitchen and harvesting fresh, vibrant Swiss chard, ready to add a burst of color and nutrients to your next meal. It’s not just a dream; it’s an achievable reality with a few simple tricks and DIY techniques.
For centuries, leafy greens like Swiss chard have been cultivated in home gardens, providing sustenance and a connection to the earth. From the humble kitchen gardens of medieval Europe to the modern-day urban farming movement, the desire to grow Swiss Chard Kitchen gardens has remained a constant. It’s a testament to the enduring appeal of fresh, homegrown produce.
But why should you consider growing Swiss chard in your kitchen? Well, store-bought produce can often lack the freshness and flavor of homegrown varieties. Plus, let’s be honest, who knows how long those greens have been sitting on the shelf? With a little effort, you can have a constant supply of organic, delicious Swiss chard right at your fingertips. I’m going to share some easy-to-follow DIY tricks and hacks that will help you successfully cultivate this nutritious vegetable, even if you have limited space or gardening experience. Get ready to transform your kitchen into a thriving green oasis!

Grow Your Own Swiss Chard Indoors: A Beginner’s Guide
Hey there, fellow plant enthusiasts! Ever thought about growing your own vibrant, nutritious Swiss chard right in your kitchen? It’s easier than you might think, and trust me, the satisfaction of harvesting your own leafy greens is totally worth it. I’ve been doing this for a while now, and I’m excited to share my secrets to a thriving indoor Swiss chard garden. Let’s get started!
What You’ll Need
Before we dive in, let’s gather our supplies. This is what I’ve found works best:
* Swiss Chard Seeds: Choose your favorite variety! ‘Bright Lights’ is a popular choice for its colorful stems, but ‘Lucullus’ is also a reliable and tasty option.
* Seed Starting Tray or Small Pots: These will be your nursery for the baby chard plants.
* Seed Starting Mix: This is a light, airy soil mix perfect for delicate seedlings.
* Larger Pots (at least 6 inches in diameter): These will be the permanent homes for your chard plants.
* Potting Soil: A good quality potting mix that drains well is essential.
* Grow Lights (optional but recommended): Especially if you don’t have a super sunny windowsill.
* Watering Can or Spray Bottle: For gentle watering.
* Fertilizer (optional): A balanced liquid fertilizer will give your chard a boost.
* Small Shovel or Trowel: For transplanting.
* Labels and a Marker: To keep track of your varieties (if you’re growing more than one).
Phase 1: Starting Your Seeds
This is where the magic begins! We’re going to coax those tiny seeds into becoming vibrant little seedlings.
1. Prepare Your Seed Starting Tray or Pots: Fill your seed starting tray or small pots with seed starting mix. Gently pat it down, but don’t compact it too much. You want the roots to be able to easily grow.
2. Sow the Seeds: Make small indentations (about 1/4 inch deep) in the soil. Place 2-3 seeds in each indentation. This increases your chances of at least one seed germinating.
3. Cover the Seeds: Gently cover the seeds with more seed starting mix.
4. Water Thoroughly: Use a spray bottle or watering can with a gentle nozzle to thoroughly moisten the soil. You want it to be damp, but not soggy.
5. Provide Warmth and Light: Place the tray or pots in a warm location (around 70-75°F is ideal). If you’re using grow lights, position them a few inches above the soil surface. If you’re using a windowsill, choose one that gets plenty of sunlight.
6. Keep the Soil Moist: Check the soil daily and water as needed to keep it consistently moist. Don’t let it dry out!
7. Wait for Germination: Be patient! Swiss chard seeds typically germinate in 5-10 days.
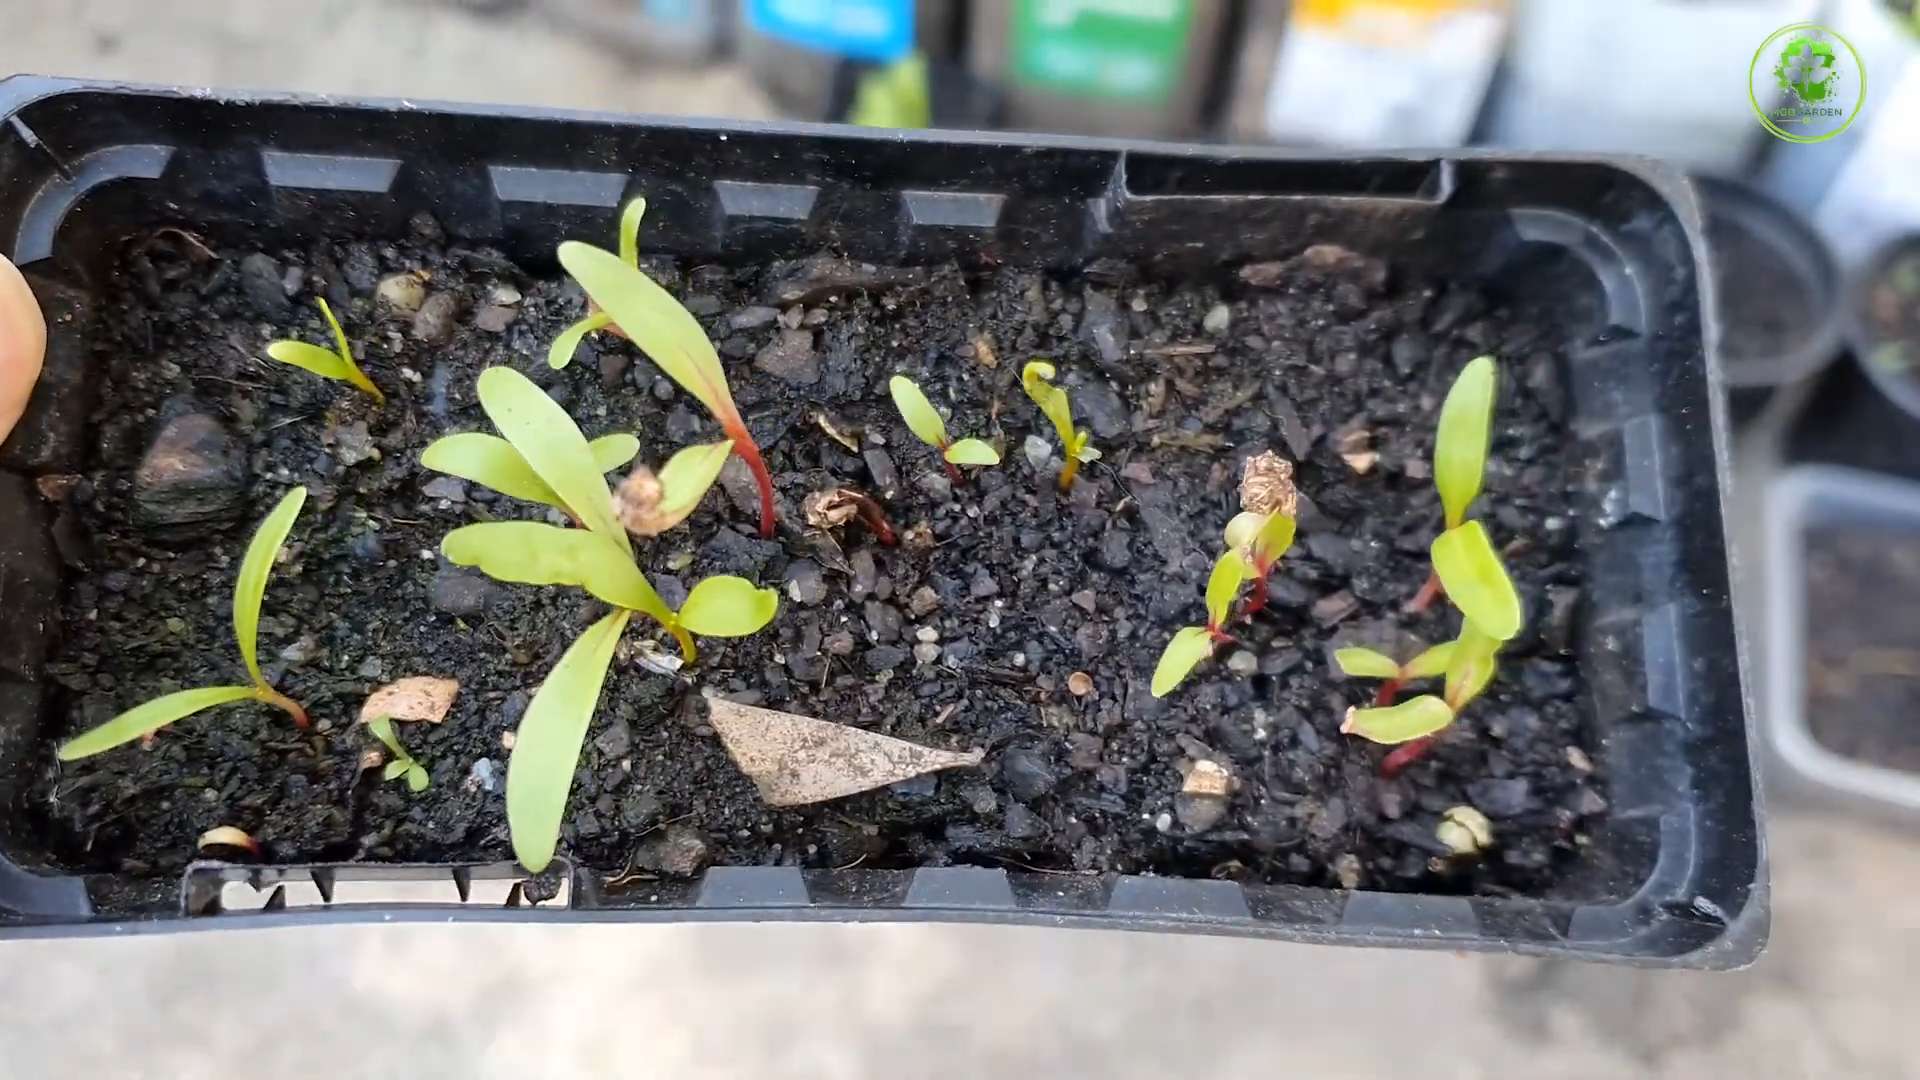
Phase 2: Transplanting Your Seedlings
Once your seedlings have developed a few sets of true leaves (the leaves that look like miniature versions of adult chard leaves), it’s time to move them to their permanent homes.
1. Prepare Your Larger Pots: Fill your larger pots with potting soil, leaving about an inch of space at the top.
2. Gently Remove Seedlings: Carefully remove the seedlings from the seed starting tray or pots. If you planted multiple seeds in one spot, choose the strongest seedling and gently snip off the others at the soil line. This prevents overcrowding.
3. Create a Hole: Make a hole in the potting soil large enough to accommodate the seedling’s root ball.
4. Transplant the Seedling: Gently place the seedling in the hole and cover the roots with potting soil. Pat the soil down gently.
5. Water Thoroughly: Water the transplanted seedlings thoroughly.
6. Provide Light and Nutrients: Place the pots in a sunny location or under grow lights. If you’re using grow lights, adjust the height as the plants grow. You can also start fertilizing your chard plants with a balanced liquid fertilizer diluted to half strength every 2-3 weeks.
Phase 3: Caring for Your Indoor Swiss Chard
Now that your chard is happily settled in its new home, it’s time to provide the ongoing care it needs to thrive.
* Watering: Water your chard plants when the top inch of soil feels dry to the touch. Avoid overwatering, as this can lead to root rot.
* Light: Swiss chard needs at least 6 hours of sunlight per day. If you’re not getting enough natural light, supplement with grow lights.
* Fertilizing: Continue fertilizing every 2-3 weeks with a balanced liquid fertilizer.
* Temperature: Swiss chard prefers temperatures between 60-75°F.
* Humidity: Swiss chard likes moderate humidity. If your home is very dry, you can increase the humidity by placing a tray of water near the plants or using a humidifier.
* Pest Control: Keep an eye out for pests like aphids or spider mites. If you spot any, you can try spraying them with insecticidal soap or neem oil.
* Pruning: Remove any yellowing or damaged leaves to encourage new growth.
Phase 4: Harvesting Your Swiss Chard
The best part! You can start harvesting your Swiss chard leaves when they are about 6 inches long.
1. Harvest Outer Leaves: Use scissors or a sharp knife to cut the outer leaves near the base of the plant.
2. Leave the Inner Leaves: Leave the inner leaves to continue growing.
3. Regular Harvesting Encourages Growth: The more you harvest, the more your chard will produce!
4. Enjoy Your Harvest: Wash your harvested chard leaves thoroughly and use them in salads, soups, stir-fries, or any other dish you like.
Troubleshooting Tips
Even with the best care, you might encounter a few challenges along the way. Here are some common problems and how to fix them:
* Yellowing Leaves: This could be a sign of overwatering, underwatering, or nutrient deficiency. Check the soil moisture and adjust your watering accordingly. If you suspect a nutrient deficiency, try fertilizing with a balanced liquid fertilizer.
* Leggy Seedlings: This means your seedlings aren’t getting enough light. Move them to a sunnier location or provide supplemental light with grow lights.
* Pests: As mentioned earlier, keep an eye out for pests and treat them promptly with insecticidal soap or neem oil.
* Slow Growth: This could be due to a variety of factors, including insufficient light, poor soil, or lack of nutrients. Make sure your chard is getting enough light, use a good quality potting mix, and fertilize regularly.
Choosing the Right Swiss Chard Variety
There are so many beautiful and delicious Swiss chard varieties to choose from! Here are a few of my favorites:
* ‘Bright Lights’: This variety is known for its colorful stems, which come in shades of red, orange, yellow, pink, and white. It’s also very productive and easy to grow.
* ‘Lucullus’: This is a classic green Swiss chard variety with a mild, slightly sweet flavor. It’s a reliable and versatile choice.
* ‘Fordhook Giant’: This variety produces large, dark green leaves with thick, white stems. It’s a good choice for cooking.
* ‘Ruby Red’: This variety has deep red stems and dark green leaves with red veins. It’s a beautiful and flavorful addition to any garden.
Extending Your Harvest
To keep your Swiss chard plants producing for as long as possible, here are a few tips:
* Succession Planting: Sow new seeds every few weeks to ensure a continuous supply of chard.
* Deadheading: Remove any flower stalks that appear, as this will encourage the plant to focus its energy on producing leaves.
* Overwintering: In mild climates, you can overwinter your Swiss chard plants by protecting them from frost. In colder climates, you can bring them indoors.
Why Grow Swiss Chard Indoors?
Growing Swiss chard indoors offers several advantages:
* Year-Round Harvest: You can enjoy fresh chard even in the winter months.
* Pest Control: Indoor plants are less susceptible to pests and diseases.
* Convenience: You can harvest fresh chard right from your kitchen.
* Aesthetics: Swiss chard is a beautiful and ornamental plant that can add a touch of greenery to your home.
* Nutritional Value:
Conclusion
So, there you have it! Growing your own Swiss chard in your kitchen is not only achievable, but it’s also incredibly rewarding. We’ve walked you through the simple steps, from selecting the right seeds to harvesting your vibrant, nutritious leaves. But why is this DIY trick a must-try?
First and foremost, freshness. Imagine snipping off exactly the amount of Swiss chard you need, moments before adding it to your salad, stir-fry, or soup. The flavor is unparalleled, and the nutritional value is at its peak. Store-bought Swiss chard, even when fresh, simply can’t compete with the vibrancy of homegrown.
Secondly, control. You have complete control over the growing environment, ensuring that your Swiss chard is free from harmful pesticides and herbicides. You know exactly what’s going into your food, providing peace of mind and a healthier option for you and your family.
Thirdly, sustainability. By growing your own Swiss chard, you’re reducing your carbon footprint. You’re eliminating the need for transportation, packaging, and refrigeration, all of which contribute to environmental pollution. It’s a small step towards a more sustainable lifestyle, but every little bit helps.
But the benefits don’t stop there. Growing Swiss chard is also a fantastic way to connect with nature, even in the heart of your kitchen. It’s a therapeutic activity that can reduce stress and improve your overall well-being. Plus, it’s a great way to get kids involved in gardening and teach them about where their food comes from.
Variations and Suggestions:
Don’t be afraid to experiment! Try different varieties of Swiss chard, such as Ruby Red, Bright Lights, or Fordhook Giant. Each variety offers a unique flavor and color, adding visual appeal to your dishes.
Consider using different containers. While we’ve focused on pots, you can also use raised beds, window boxes, or even repurposed containers like plastic tubs or buckets. Just make sure they have adequate drainage.
For an extra boost, try adding organic fertilizers or compost to your soil. This will provide your Swiss chard with the nutrients it needs to thrive. You can also use companion planting techniques, such as planting basil or marigolds alongside your Swiss chard to deter pests.
If you find that your Swiss chard is attracting pests, try using organic pest control methods, such as neem oil or insecticidal soap. You can also handpick pests off the leaves.
Finally, don’t forget to harvest your Swiss chard regularly. This will encourage new growth and prevent the leaves from becoming too tough. Simply snip off the outer leaves, leaving the inner leaves to continue growing.
We are confident that you will find that growing Swiss chard in your kitchen is a rewarding and enjoyable experience. It’s a simple, sustainable, and delicious way to add fresh, healthy greens to your diet. So, grab some seeds, find a sunny spot, and get growing!
We encourage you to try this DIY trick and share your experience with us. Let us know what varieties you’ve tried, what challenges you’ve faced, and what successes you’ve achieved. Share your photos and tips on social media using #KitchenSwissChard and let’s inspire others to grow their own food! We can’t wait to see what you create!
Frequently Asked Questions (FAQ)
1. What kind of soil is best for growing Swiss chard indoors?
The ideal soil for growing Swiss chard indoors is a well-draining potting mix that is rich in organic matter. A good quality potting mix will provide the necessary nutrients and drainage for healthy growth. You can also amend your potting mix with compost or other organic materials to improve its fertility. Avoid using garden soil, as it can be too heavy and may contain pests or diseases. A slightly acidic to neutral pH (around 6.0 to 7.0) is preferred.
2. How much sunlight does Swiss chard need when grown indoors?
Swiss chard thrives in bright, indirect sunlight. Aim for at least 6 hours of sunlight per day. If you don’t have a sunny window, you can supplement with grow lights. Place the grow lights about 6-12 inches above the plants and keep them on for 12-14 hours per day. Rotate your plants regularly to ensure even light exposure on all sides. Insufficient light can lead to leggy growth and reduced yields.
3. How often should I water my indoor Swiss chard plants?
Water your Swiss chard plants regularly, keeping the soil consistently moist but not waterlogged. Check the soil moisture by sticking your finger about an inch deep into the soil. If it feels dry, it’s time to water. Water deeply, allowing excess water to drain out of the bottom of the pot. Avoid overwatering, as this can lead to root rot. The frequency of watering will depend on factors such as the size of the pot, the temperature, and the humidity.
4. What are some common pests and diseases that affect indoor Swiss chard, and how can I prevent them?
Common pests that can affect indoor Swiss chard include aphids, spider mites, and whiteflies. To prevent these pests, inspect your plants regularly for signs of infestation. You can also use organic pest control methods, such as neem oil or insecticidal soap. Ensure good air circulation around your plants to prevent fungal diseases. Avoid overwatering, as this can create a favorable environment for fungal growth. If you notice any signs of disease, remove the affected leaves immediately.
5. How long does it take for Swiss chard to grow from seed to harvest?
Swiss chard typically takes about 50-60 days to mature from seed to harvest. However, you can start harvesting the outer leaves as soon as they are large enough to use, usually around 30-40 days after planting. Regular harvesting will encourage new growth and extend the harvest period.
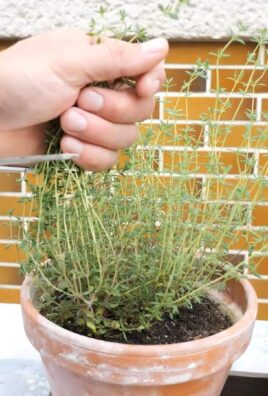
6. Can I grow Swiss chard from cuttings?
While it’s more common to grow Swiss chard from seeds, it is possible to propagate it from stem cuttings, although the success rate is lower. Take a cutting from a healthy plant, ensuring it has a few leaves. Remove the lower leaves and place the cutting in water or directly into moist potting mix. Keep the cutting in a warm, humid environment and wait for roots to develop. Once roots have formed, you can transplant the cutting into a larger pot.
7. How do I know when my Swiss chard is ready to harvest?
Swiss chard is ready to harvest when the outer leaves are about 6-8 inches long. You can harvest individual leaves as needed, or you can harvest the entire plant at once. To harvest individual leaves, simply snip them off at the base of the plant. To harvest the entire plant, cut it off at the base, leaving about 2 inches of stem. This will allow the plant to regrow and produce more leaves.
8. Can I eat the stems of Swiss chard?
Yes, the stems of Swiss chard are edible and nutritious. They have a slightly different flavor and texture than the leaves, but they can be cooked in the same way. Try chopping the stems and adding them to stir-fries, soups, or stews. You can also sauté them with garlic and olive oil for a simple and delicious side dish.
9. How do I store harvested Swiss chard?
To store harvested Swiss chard, wash the leaves thoroughly and dry them with a salad spinner or paper towels. Wrap the leaves in a damp paper towel and store them in a plastic bag in the refrigerator. Swiss chard can be stored for up to a week in this way.
10. Is growing Swiss chard in the kitchen a good way to save money?
Absolutely! Growing your own Swiss chard can save you money on groceries, especially if you regularly consume this leafy green. The cost of seeds and potting mix is relatively low, and you can harvest multiple times from a single plant. Over time, the savings can add up significantly, making it a cost-effective way to enjoy fresh, healthy produce. Plus, you’ll have the satisfaction of knowing that you grew it yourself!

Leave a Comment