
Grow Chili Peppers like a pro, even if you think you have a brown thumb! Have you ever dreamed of adding a fiery kick to your meals with homegrown chilies, bursting with flavor and heat? Imagine plucking vibrant red, yellow, or even purple peppers straight from your garden, knowing you nurtured them from tiny seedlings to spicy sensations. This isn’t just a dream; it’s an achievable reality with a few simple tricks and DIY hacks.
The history of chili peppers is as rich and vibrant as their colors. Originating in South America, they’ve been cultivated for thousands of years, adding zest to cuisines worldwide. From ancient Aztec rituals to modern-day culinary masterpieces, chili peppers have always held a special place in our hearts (and stomachs!).
But why should *you* bother learning to grow chili peppers yourself? Well, store-bought chilies often lack the intense flavor and freshness of homegrown varieties. Plus, you have complete control over the growing process, ensuring they’re free from harmful pesticides and chemicals. More importantly, growing your own food is incredibly rewarding! There’s nothing quite like the satisfaction of harvesting something you’ve nurtured from seed. I’m here to share some easy-to-follow DIY tricks that will help you cultivate a thriving chili pepper garden, no matter your experience level. Let’s get started and turn your garden into a chili paradise!
Growing Chili Peppers: From Seed to Spice Rack (A DIY Guide)
Hey there, fellow spice enthusiasts! I’m thrilled to share my tried-and-true method for growing chili peppers right at home. Forget those bland, store-bought peppers – we’re talking about vibrant, flavorful chilies that will set your taste buds on fire (in a good way!). This guide will walk you through every step, from germinating seeds to harvesting your fiery bounty. Let’s get started!
What You’ll Need
Before we dive in, let’s gather our supplies. This list might seem long, but trust me, having everything ready will make the process much smoother.
* **Chili Pepper Seeds:** Choose your favorite varieties! I recommend starting with a mix of mild and hot peppers to experiment with. Some popular choices include Jalapeño, Serrano, Habanero, and Cayenne.
* **Seed Starting Trays or Small Pots:** These will be your nurseries for the baby pepper plants.
* **Seed Starting Mix:** This is a light, sterile soil mix specifically designed for germinating seeds. Don’t use regular garden soil – it’s too heavy and can harbor diseases.
* **Spray Bottle:** For gently watering the seedlings.
* **Heat Mat (Optional but Recommended):** Chili peppers love warmth, and a heat mat will significantly improve germination rates.
* **Grow Light (Optional but Recommended):** If you’re starting seeds indoors, a grow light will provide the necessary light for healthy growth.
* **Larger Pots (for Transplanting):** Once the seedlings are big enough, they’ll need to be moved to larger pots. Choose pots that are at least 6 inches in diameter.
* **Potting Soil:** A well-draining potting mix is essential for healthy pepper plants.
* **Fertilizer:** A balanced fertilizer (e.g., 10-10-10) will provide the necessary nutrients for growth and fruiting.
* **Gardening Gloves:** To protect your hands.
* **Watering Can or Hose:** For watering the plants.
* **Stakes or Cages (Optional):** Some pepper varieties can get quite tall and may need support.
* **Pruning Shears or Scissors:** For trimming and harvesting.
Phase 1: Germinating the Seeds
This is where the magic begins! Getting your seeds to sprout is the first crucial step.
1. **Soaking the Seeds (Optional but Recommended):** To speed up germination, soak the chili pepper seeds in warm water for 12-24 hours before planting. This helps soften the seed coat and encourages sprouting. I usually put them in a small bowl with water and leave them on the counter overnight.
2. **Preparing the Seed Starting Trays:** Fill the seed starting trays or small pots with seed starting mix. Gently press the soil down to remove any air pockets.
3. **Planting the Seeds:** Make a small indentation (about ¼ inch deep) in the soil of each cell or pot. Place one or two seeds in each indentation. Cover the seeds with a thin layer of seed starting mix.
4. **Watering the Seeds:** Gently water the seeds using a spray bottle. The soil should be moist but not soggy.
5. **Providing Warmth:** Place the seed starting trays on a heat mat, if you’re using one. This will help maintain a consistent temperature of around 80-85°F (27-29°C), which is ideal for chili pepper germination.
6. **Providing Light:** If you’re starting seeds indoors, place the seed starting trays under a grow light. The light should be about 2-4 inches above the trays. If you don’t have a grow light, you can place the trays in a sunny window, but be sure to rotate them regularly to ensure even light exposure.
7. **Maintaining Moisture:** Keep the soil consistently moist by spraying it with water whenever it starts to dry out. Don’t let the soil dry out completely, but also avoid overwatering, which can lead to fungal diseases.
8. **Patience is Key:** Chili pepper seeds can take anywhere from 7 to 21 days to germinate, depending on the variety and the growing conditions. Be patient and keep an eye on the trays.
Phase 2: Nurturing the Seedlings
Once your seeds have sprouted, it’s time to nurture the seedlings and help them grow into strong, healthy plants.
1. **Providing Adequate Light:** Once the seedlings emerge, they need plenty of light to grow properly. If you’re using a grow light, keep it on for 14-16 hours per day. If you’re using natural light, make sure the seedlings are in a sunny location.
2. **Watering the Seedlings:** Water the seedlings regularly, but avoid overwatering. The soil should be moist but not soggy. I usually water them every 2-3 days, or whenever the top inch of soil feels dry.
3. **Thinning the Seedlings:** If you planted two seeds in each cell or pot, you’ll need to thin them out once they have a few sets of leaves. Choose the strongest seedling in each cell and snip off the weaker one at the base.
4. **Fertilizing the Seedlings:** Once the seedlings have a few sets of leaves, you can start fertilizing them with a diluted balanced fertilizer (e.g., 10-10-10). Follow the instructions on the fertilizer label. I usually fertilize them every 2 weeks.
5. **Hardening Off the Seedlings:** Before transplanting the seedlings outdoors, you’ll need to harden them off. This means gradually exposing them to outdoor conditions over a period of 7-10 days. Start by placing the seedlings outdoors in a sheltered location for a few hours each day, gradually increasing the amount of time they spend outdoors. This will help them adjust to the sun, wind, and temperature changes.
Phase 3: Transplanting and Growing Outdoors
Now for the exciting part – moving your pepper plants to their permanent homes!
1. **Choosing the Right Location:** Chili peppers need at least 6-8 hours of sunlight per day to thrive. Choose a location that gets plenty of sun and has well-draining soil.
2. **Preparing the Soil:** If you’re planting the peppers in the ground, amend the soil with compost or other organic matter to improve drainage and fertility. If you’re planting them in pots, use a well-draining potting mix.
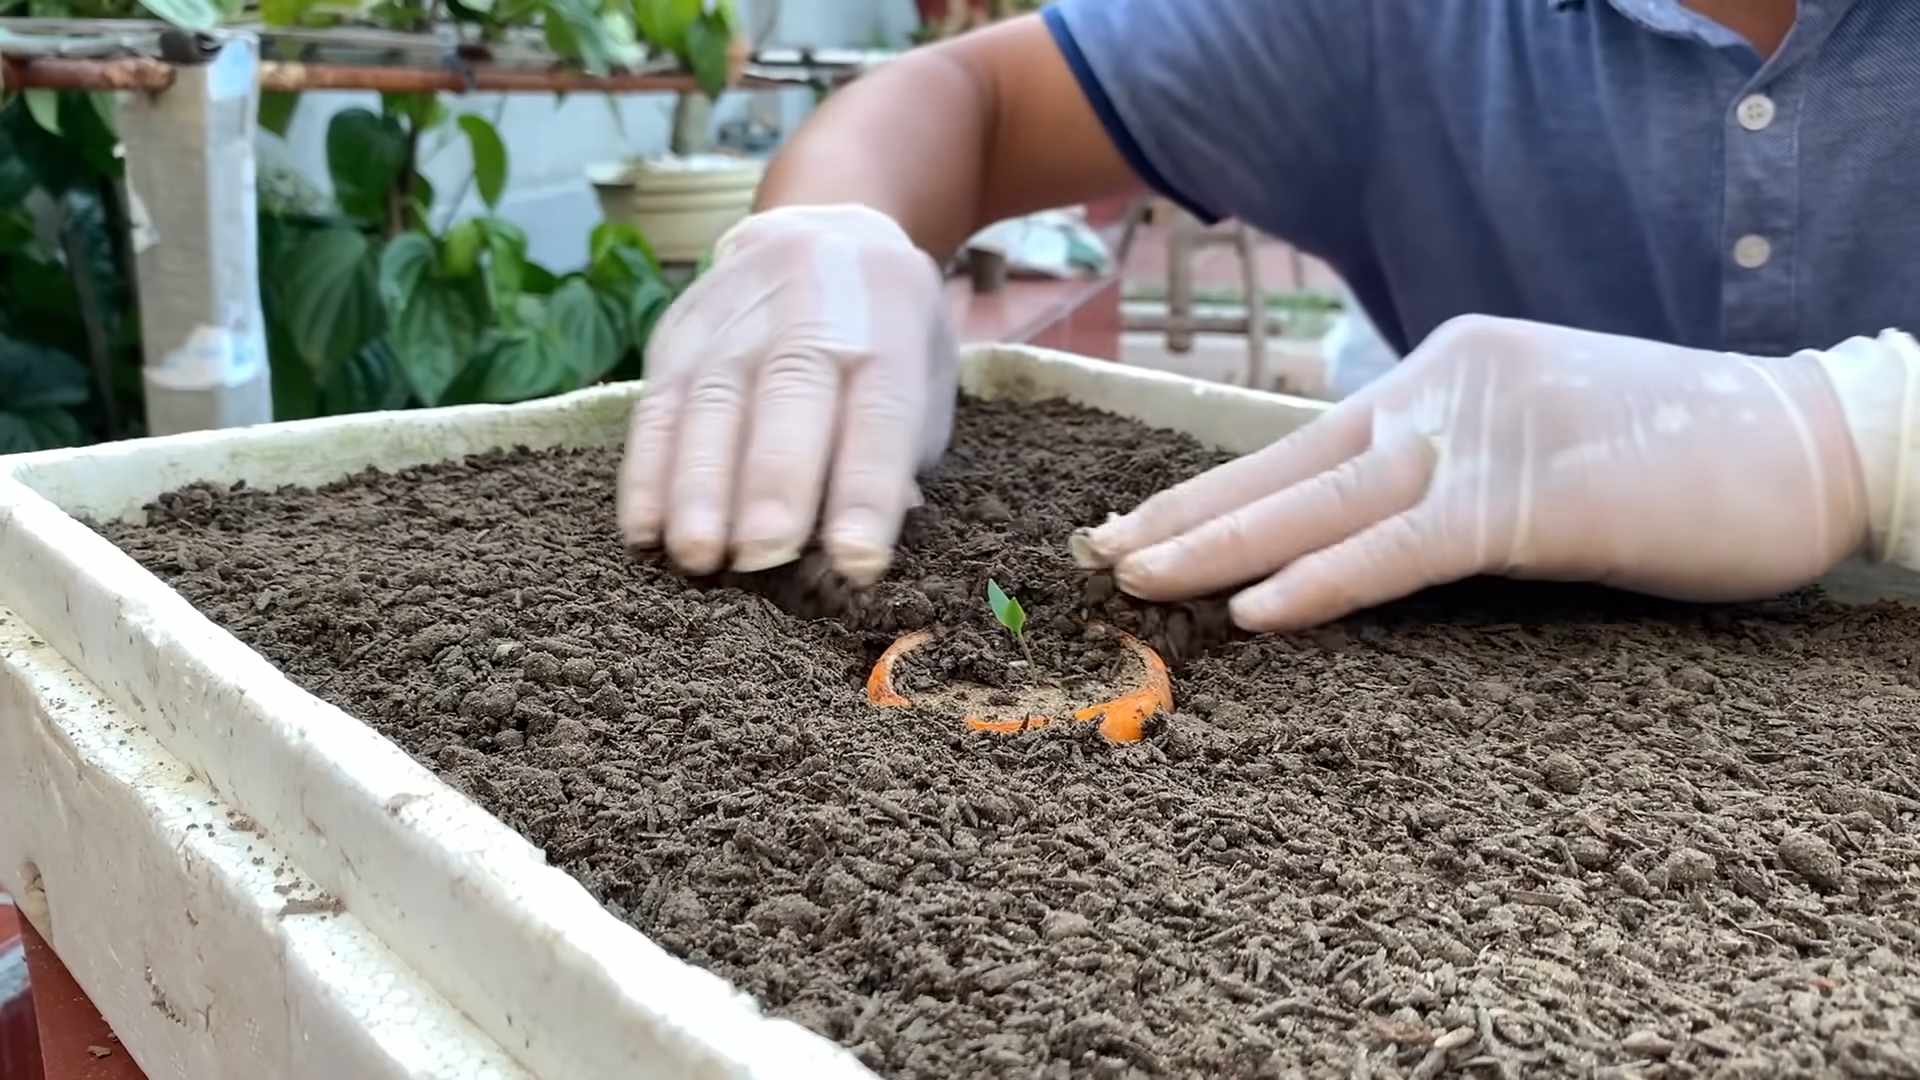
3. **Transplanting the Seedlings:** Gently remove the seedlings from their seed starting trays or pots. Be careful not to damage the roots. Dig a hole in the soil that is slightly larger than the root ball. Place the seedling in the hole and backfill with soil. Gently press the soil down around the base of the plant.
4. **Watering After Transplanting:** Water the plants thoroughly after transplanting.
5. **Spacing the Plants:** Space the plants according to the variety. Generally, smaller pepper varieties can be spaced about 12-18 inches apart, while larger varieties should be spaced about 24-36 inches apart.
6. **Providing Support (Optional):** Some pepper varieties can get quite tall and may need support. You can use stakes or cages to support the plants.
7. **Mulching:** Apply a layer of mulch around the base of the plants to help retain moisture, suppress weeds, and regulate soil temperature.
8. **Watering Regularly:** Water the plants regularly, especially during hot, dry weather. The soil should be moist but not soggy.
9. **Fertilizing Regularly:** Fertilize the plants every 2-3 weeks with a balanced fertilizer. Follow the instructions on the fertilizer label.
10. **Pest and Disease Control:** Keep an eye out for pests and diseases. Common pests of chili peppers include aphids, spider mites, and whiteflies. Common diseases include fungal diseases and blossom end rot. Treat any problems promptly. I prefer using organic pest control methods whenever possible.
11. **Pruning (Optional):** Pruning can help improve air circulation and encourage bushier growth. You can prune the plants by removing any dead or diseased leaves and stems. You can also pinch off the tips of the branches to encourage branching.
Phase 4: Harvesting and Enjoying Your Chilies
The moment you’ve been waiting for! Harvesting your homegrown chilies is incredibly rewarding.
1. **Knowing When to Harvest:** Chili peppers are typically ready to harvest when they have reached their mature color and size. The color will vary depending on the variety. For example, Jalapeños are typically harvested when they are dark green, while Habaneros are typically harvested when they are orange or red.
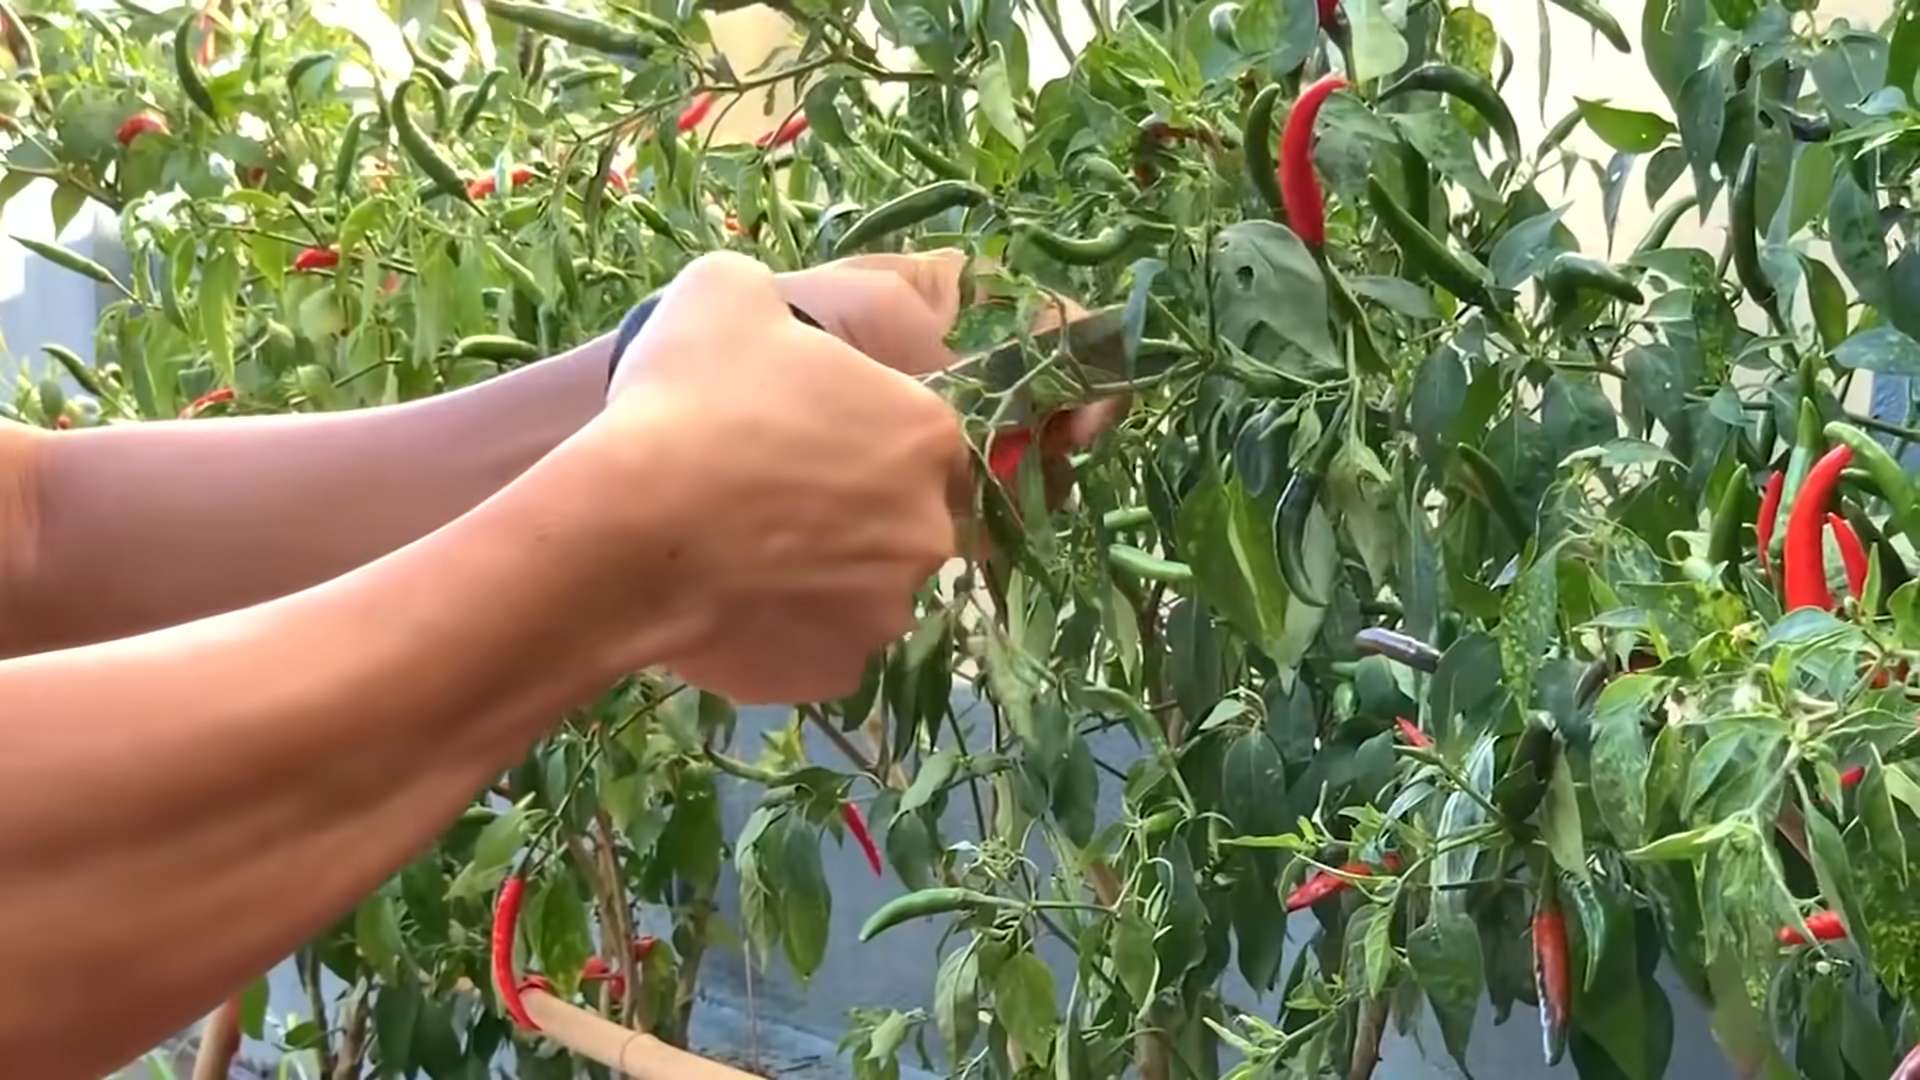
2. **Harvesting the Peppers:** Use pruning shears or scissors to cut the peppers from the plant. Be careful not to damage the plant.
3. **Handling Hot Peppers with Care:** Wear gloves when handling hot peppers, as the capsaicin (the compound that makes them hot) can irritate your skin. Avoid touching your eyes or face after handling hot peppers.
4. **Using Your Chilies:** Freshly harvested chilies can be used
Conclusion
So, there you have it! Growing chili peppers at home, while it might seem daunting at first, is incredibly rewarding and surprisingly accessible with this simple DIY trick. We’ve walked you through the process, highlighting how easy it is to nurture those tiny seeds into vibrant, fruit-bearing plants, all without breaking the bank or needing a professional green thumb.
Why is this DIY method a must-try? Because it puts you in control. You get to choose the exact variety of chili peppers you want to grow, ensuring you have a steady supply of your favorite heat levels and flavors right at your fingertips. Forget those bland, store-bought peppers that lack the fiery kick you crave. With this method, you’re guaranteed fresh, potent chilies that will elevate your culinary creations to a whole new level. Plus, there’s an undeniable satisfaction in watching something you’ve nurtured from seed flourish and produce delicious results.
But the fun doesn’t stop there! Feel free to experiment with different variations. Try using different types of containers, from repurposed plastic bottles to charming terracotta pots. Explore different soil mixes to see what works best for your specific climate and chili pepper variety. Consider adding companion plants like basil or marigolds to your chili pepper garden to deter pests and attract beneficial insects. You can even try growing your chili peppers indoors under grow lights if you live in a colder climate. The possibilities are endless!
This DIY trick for growing chili peppers is more than just a gardening project; it’s an opportunity to connect with nature, learn new skills, and enjoy the fruits (or rather, chilies!) of your labor. It’s a chance to add a personal touch to your cooking and impress your friends and family with your homegrown spicy creations.
We wholeheartedly encourage you to give this DIY trick a try. Don’t be afraid to get your hands dirty and embrace the learning process. Even if you encounter a few challenges along the way, remember that every mistake is a learning opportunity. And most importantly, have fun!
Once you’ve harvested your first batch of homegrown chili peppers, we’d love to hear about your experience. Share your photos, tips, and stories in the comments below. Let’s create a community of chili pepper enthusiasts and inspire others to embark on their own spicy gardening adventures. What are you waiting for? Get planting!
Frequently Asked Questions (FAQ)
What is the best time of year to start growing chili peppers?
The ideal time to start growing chili peppers depends on your climate. In general, chili peppers need warm temperatures to germinate and thrive. If you live in a region with a long growing season, you can start your seeds directly outdoors after the last frost. However, if you live in a colder climate, it’s best to start your seeds indoors 6-8 weeks before the last expected frost. This will give your seedlings a head start and ensure they have enough time to mature and produce fruit before the weather turns cold.
What type of soil is best for growing chili peppers?
Chili peppers prefer well-draining soil that is rich in organic matter. A good soil mix should be slightly acidic, with a pH between 6.0 and 7.0. You can improve the drainage of your soil by adding perlite or vermiculite. To increase the organic matter content, you can amend your soil with compost, aged manure, or other organic materials. Avoid using heavy clay soils, as they can retain too much moisture and lead to root rot.
How much sunlight do chili peppers need?
Chili peppers need at least 6-8 hours of direct sunlight per day to thrive. If you’re growing your chili peppers indoors, you’ll need to supplement with grow lights to provide them with adequate light. Choose a sunny location in your garden that receives plenty of sunlight throughout the day. If you live in a hot climate, you may need to provide some afternoon shade to protect your plants from scorching.
How often should I water my chili peppers?
Water your chili peppers regularly, especially during hot, dry weather. The soil should be kept consistently moist, but not waterlogged. Overwatering can lead to root rot, while underwatering can stunt growth and reduce fruit production. Check the soil moisture regularly by sticking your finger into the soil. If the top inch of soil feels dry, it’s time to water. When watering, water deeply and thoroughly, allowing the water to soak into the soil.
What are some common pests and diseases that affect chili peppers?
Chili peppers can be susceptible to a variety of pests and diseases, including aphids, spider mites, whiteflies, blossom-end rot, and fungal diseases. To prevent pest and disease problems, it’s important to choose disease-resistant varieties, provide good air circulation, and avoid overwatering. Regularly inspect your plants for signs of pests or diseases and take action promptly if you notice any problems. You can use organic pest control methods, such as insecticidal soap or neem oil, to control pests. For fungal diseases, you can use a copper-based fungicide.
How do I harvest chili peppers?
Chili peppers are typically ready to harvest when they have reached their mature color and size. The color will vary depending on the variety of chili pepper you are growing. To harvest, simply cut the pepper from the plant using a sharp knife or scissors. Be careful not to damage the plant when harvesting. You can harvest chili peppers at any stage of ripeness, but they will be hotter and more flavorful when they are fully ripe.
How do I store chili peppers?
Fresh chili peppers can be stored in the refrigerator for up to a week. To store them for longer, you can dry them, freeze them, or pickle them. To dry chili peppers, simply string them together and hang them in a cool, dry place until they are completely dry. To freeze chili peppers, wash them, dry them, and then place them in a freezer bag. To pickle chili peppers, follow a recipe for pickled peppers.
Can I grow chili peppers in containers?
Yes, chili peppers can be successfully grown in containers. Choose a container that is at least 12 inches in diameter and has drainage holes. Use a well-draining potting mix and water regularly. Container-grown chili peppers may need to be fertilized more frequently than those grown in the ground.
What are some good companion plants for chili peppers?
Some good companion plants for chili peppers include basil, marigolds, onions, garlic, and carrots. Basil helps to repel pests, while marigolds attract beneficial insects. Onions and garlic can help to deter pests and diseases. Carrots can help to improve soil drainage.
How can I make my chili peppers hotter?
Several factors can influence the heat level of chili peppers, including genetics, growing conditions, and ripeness. To increase the heat of your chili peppers, make sure they receive plenty of sunlight, water them regularly, and fertilize them with a fertilizer that is high in phosphorus. You can also stress your plants slightly by withholding water for a few days before harvesting. The longer you leave the peppers on the plant to ripen, the hotter they will become. Remember that the capsaicin, the compound that makes chili peppers hot, is concentrated in the placenta (the white membrane inside the pepper that holds the seeds).

Leave a Comment