
Grow Onions at Home – imagine stepping into your garden and plucking fresh, flavorful onions straight from the soil! No more trips to the grocery store for this kitchen staple. This isn’t just a dream; it’s an achievable reality with a few simple tricks and DIY hacks. For centuries, onions have been cultivated across the globe, from ancient Egypt where they were revered and even used as currency, to the humble gardens of today. Their versatility in cooking and purported health benefits have cemented their place in our lives.
But let’s be honest, sometimes growing your own food can feel intimidating. That’s where this guide comes in! I’m going to share some easy-to-follow DIY methods that will have you harvesting your own delicious onions in no time. Whether you’re a seasoned gardener or a complete beginner, these tips will help you grow onions at home successfully, even if you have limited space or a busy schedule. Think of the satisfaction of knowing exactly where your food comes from, the money you’ll save, and the incredible flavor of homegrown onions. Let’s get started!
Grow Your Own Onions: A Beginner’s Guide
Hey there, fellow gardening enthusiasts! Ever dreamt of snipping fresh onions straight from your backyard for your favorite recipes? Well, dream no more! Growing your own onions is surprisingly easy and incredibly rewarding. I’m going to walk you through everything you need to know, from choosing the right type of onion to harvesting your flavorful bounty. Let’s get started!
Choosing Your Onion Type
First things first, you need to decide what kind of onions you want to grow. There are three main types:
* Short-day onions: These are best suited for southern climates with mild winters and shorter days. They start forming bulbs when daylight hours are around 10-12 hours. Popular varieties include ‘Granex’, ‘White Bermuda’, and ‘Red Creole’.
* Long-day onions: These thrive in northern climates with longer summer days. They need about 14-16 hours of daylight to bulb properly. Great choices are ‘Walla Walla Sweet’, ‘Yellow Spanish’, and ‘Red Burgundy’.
* Intermediate-day onions: As the name suggests, these are more adaptable and can grow in a wider range of climates. They need around 12-14 hours of daylight. ‘Candy’ and ‘Superstar’ are good options.
How to choose? Consider your location’s climate and the length of your growing season. If you’re unsure, check with your local garden center for recommendations.
Starting from Seeds, Sets, or Transplants
You have three options for starting your onion journey: seeds, sets, or transplants. Each has its pros and cons:
* Seeds: This is the most economical option, but it requires the most time and effort. You’ll need to start your seeds indoors about 8-10 weeks before the last expected frost.
* Sets: These are small, immature onion bulbs that are easy to plant and get a head start. They’re a good option for beginners.
* Transplants: These are young onion plants that are already started for you. They’re the most expensive option, but they offer the quickest route to harvest.
My recommendation? For beginners, I usually suggest starting with sets or transplants. They’re less finicky and give you a higher chance of success.
Preparing Your Garden Bed
Onions need well-drained, fertile soil with a pH between 6.0 and 7.0. Here’s how to prepare your garden bed:
1. Choose a sunny spot: Onions need at least 6-8 hours of sunlight per day.
2. Clear the area: Remove any weeds, rocks, or debris from the planting area.
3. Amend the soil: Incorporate plenty of compost or well-rotted manure into the soil to improve drainage and fertility. I usually add a generous amount – about 2-3 inches worked into the top 6-8 inches of soil.
4. Loosen the soil: Use a garden fork or tiller to loosen the soil to a depth of at least 12 inches. This will allow the onion roots to penetrate easily.
5. Level the surface: Rake the soil smooth to create a level planting surface.
Planting Your Onions
Now comes the fun part – planting! Here’s how to plant your onions, depending on whether you’re using sets or transplants:
Planting Onion Sets
1. Dig small holes: Space the holes about 4-6 inches apart in rows that are 12-18 inches apart. The holes should be deep enough to accommodate the onion sets.
2. Place the sets in the holes: Position each set with the root end facing down.
3. Cover with soil: Gently cover the sets with soil, leaving the very tip of the bulb exposed.
4. Water thoroughly: Water the newly planted sets well to settle the soil.
Planting Onion Transplants
1. Dig holes: Dig holes that are slightly larger than the root ball of the transplants. Space the holes about 4-6 inches apart in rows that are 12-18 inches apart.
2. Remove the transplants from their containers: Gently remove the transplants from their containers, being careful not to damage the roots.
3. Loosen the roots: Gently loosen the roots of the transplants before planting.
4. Place the transplants in the holes: Position each transplant in the hole so that the top of the root ball is level with the soil surface.
5. Backfill with soil: Backfill the holes with soil, gently firming it around the roots.
6. Water thoroughly: Water the newly planted transplants well to settle the soil.
Caring for Your Onions
Onions need consistent care to thrive. Here’s what you need to do:
1. Watering: Water your onions regularly, especially during dry periods. Aim for about 1 inch of water per week. Avoid overwatering, as this can lead to rot. I usually check the soil moisture by sticking my finger about an inch deep. If it feels dry, it’s time to water.
2. Weeding: Keep the area around your onions free of weeds. Weeds compete with onions for nutrients and water. Hand-pull weeds carefully to avoid disturbing the onion roots.
3. Fertilizing: Onions are heavy feeders, so they need regular fertilization. Apply a balanced fertilizer (e.g., 10-10-10) every 2-3 weeks. Follow the instructions on the fertilizer package. I like to use a liquid fertilizer diluted in water for easy application.
4. Mulching: Apply a layer of mulch around your onions to help retain moisture, suppress weeds, and regulate soil temperature. Straw, hay, or wood chips are good options.
5. Pest and disease control: Keep an eye out for pests and diseases. Common onion pests include onion thrips and onion maggots. Diseases include onion downy mildew and onion white rot. If you spot any problems, take action immediately. Insecticidal soap or neem oil can be effective for controlling pests. Fungicides can be used to treat diseases. Always follow the instructions on the product label.
Harvesting Your Onions
The moment you’ve been waiting for! Here’s how to harvest your onions:
1. When to harvest: Onions are typically ready to harvest when the tops start to fall over and turn yellow or brown. This usually happens about 100-120 days after planting.
2. Loosen the soil: Before harvesting, loosen the soil around the onions with a garden fork.
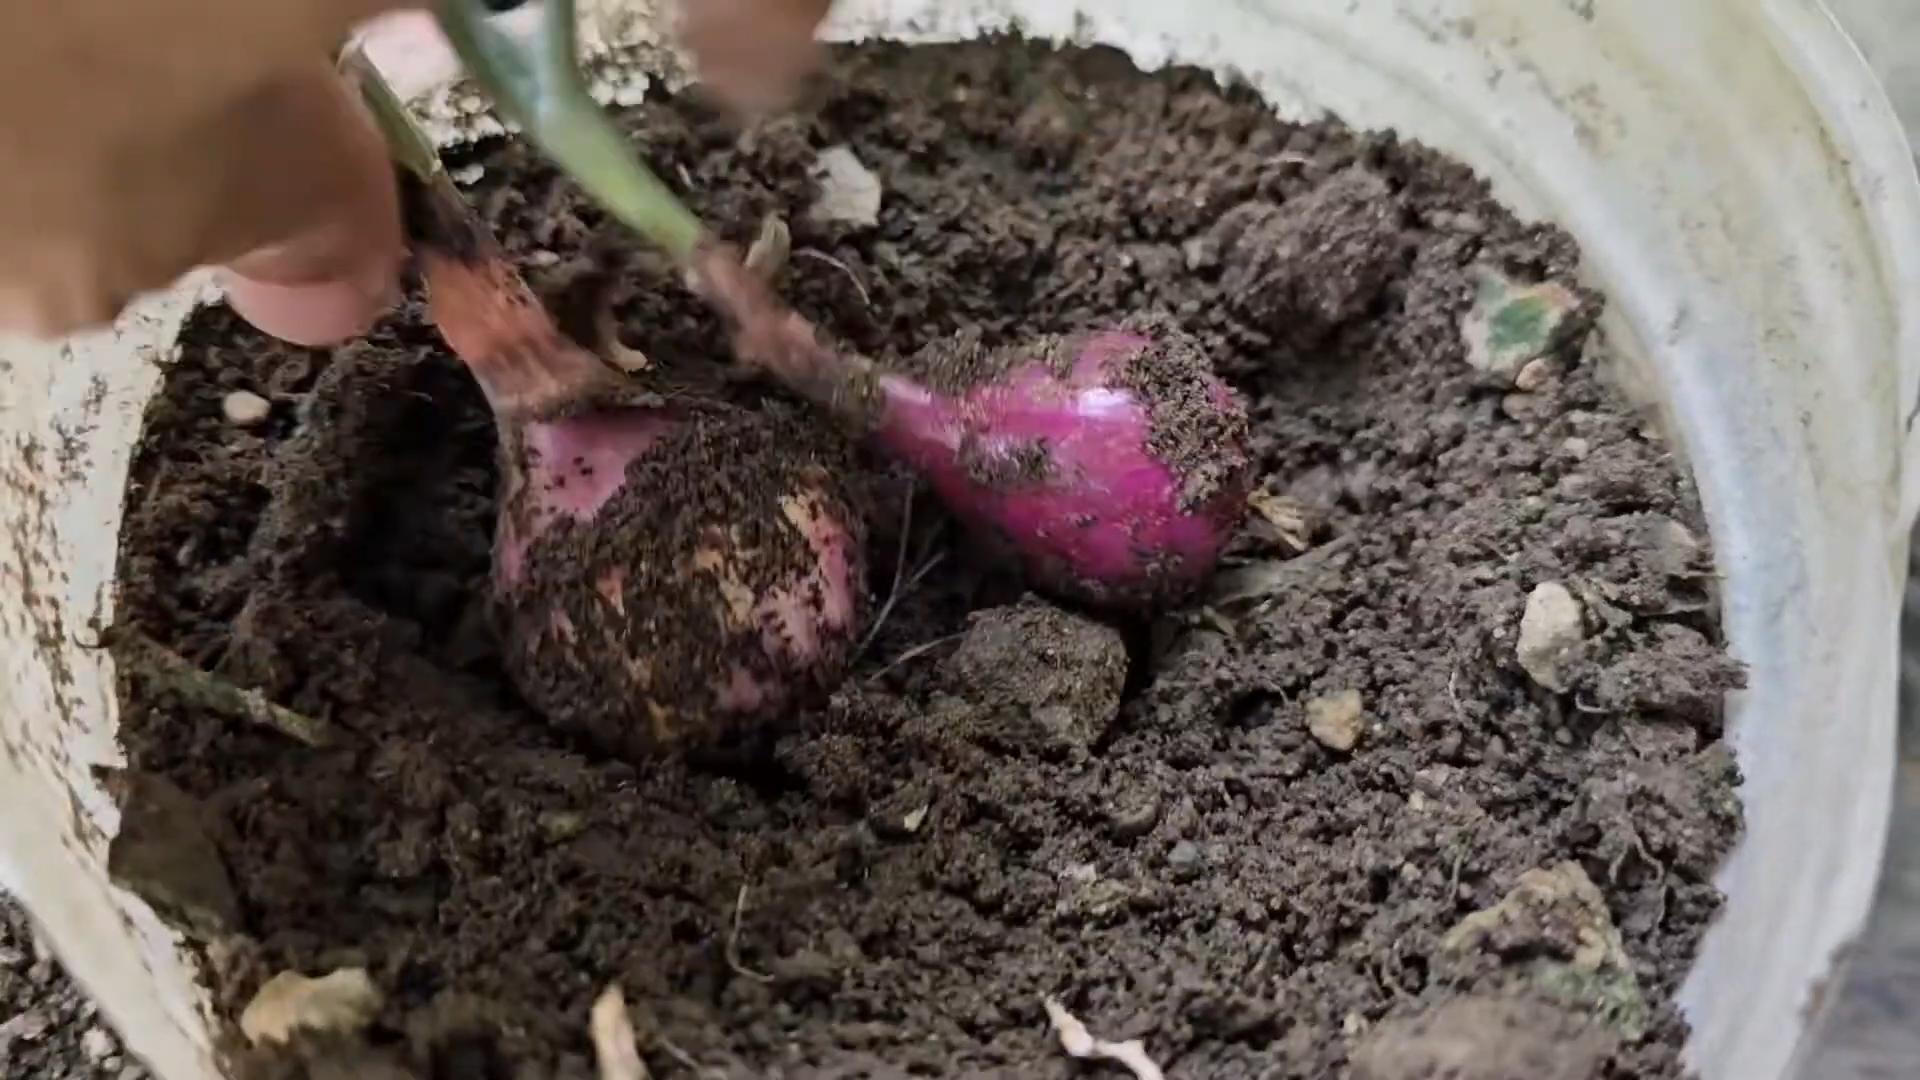
3. Pull the onions: Gently pull the onions from the soil.
4. Curing the onions: After harvesting, you need to cure the onions to help them store longer. To cure onions, spread them out in a single layer in a warm, dry, well-ventilated place for 2-3 weeks. The outer skins will dry and become papery.
5. Storing the onions: Once the onions are cured, you can store them in a cool, dry, dark place. Braiding the tops together and hanging them is a traditional method. You can also store them in mesh bags or crates. Properly cured and stored onions can last for several months.
Troubleshooting
Even with the best care, you might encounter some problems along the way. Here are a few common issues and how to address them:
* Small bulbs: This can be caused by insufficient sunlight, poor soil fertility, or overcrowding. Make sure your onions are getting enough sunlight, fertilize regularly, and thin out the plants if they’re too close together.
* Bolting (premature flowering): This can happen if onions are exposed to cold temperatures early in the season. Bolting onions will still produce bulbs, but they won’t store as well.
* Pest infestations: Regularly inspect your onions for pests and take action immediately if you spot any problems.
* Disease problems: Ensure good air circulation around your onions and avoid overwatering to prevent disease problems.
Enjoying Your Homegrown Onions
Congratulations! You’ve successfully grown your own onions. Now it’s time to enjoy the fruits (or rather, vegetables) of your labor. Use your homegrown onions in your favorite recipes, share them with friends and family, or preserve them for later use. There’s nothing quite like the taste of fresh, homegrown onions!
I hope this guide has been helpful. Happy gardening!
Conclusion
So, there you have it! Growing onions at home, especially using our simple DIY trick, is not just a gardening project; it’s an investment in flavor, freshness, and a more sustainable lifestyle. Forget those bland, store-bought onions that have traveled miles and lost their zing. Imagine the satisfaction of snipping fresh, vibrant green onion tops for your salad or pulling up a plump, juicy bulb to caramelize for your favorite dish. The difference in taste is truly remarkable.
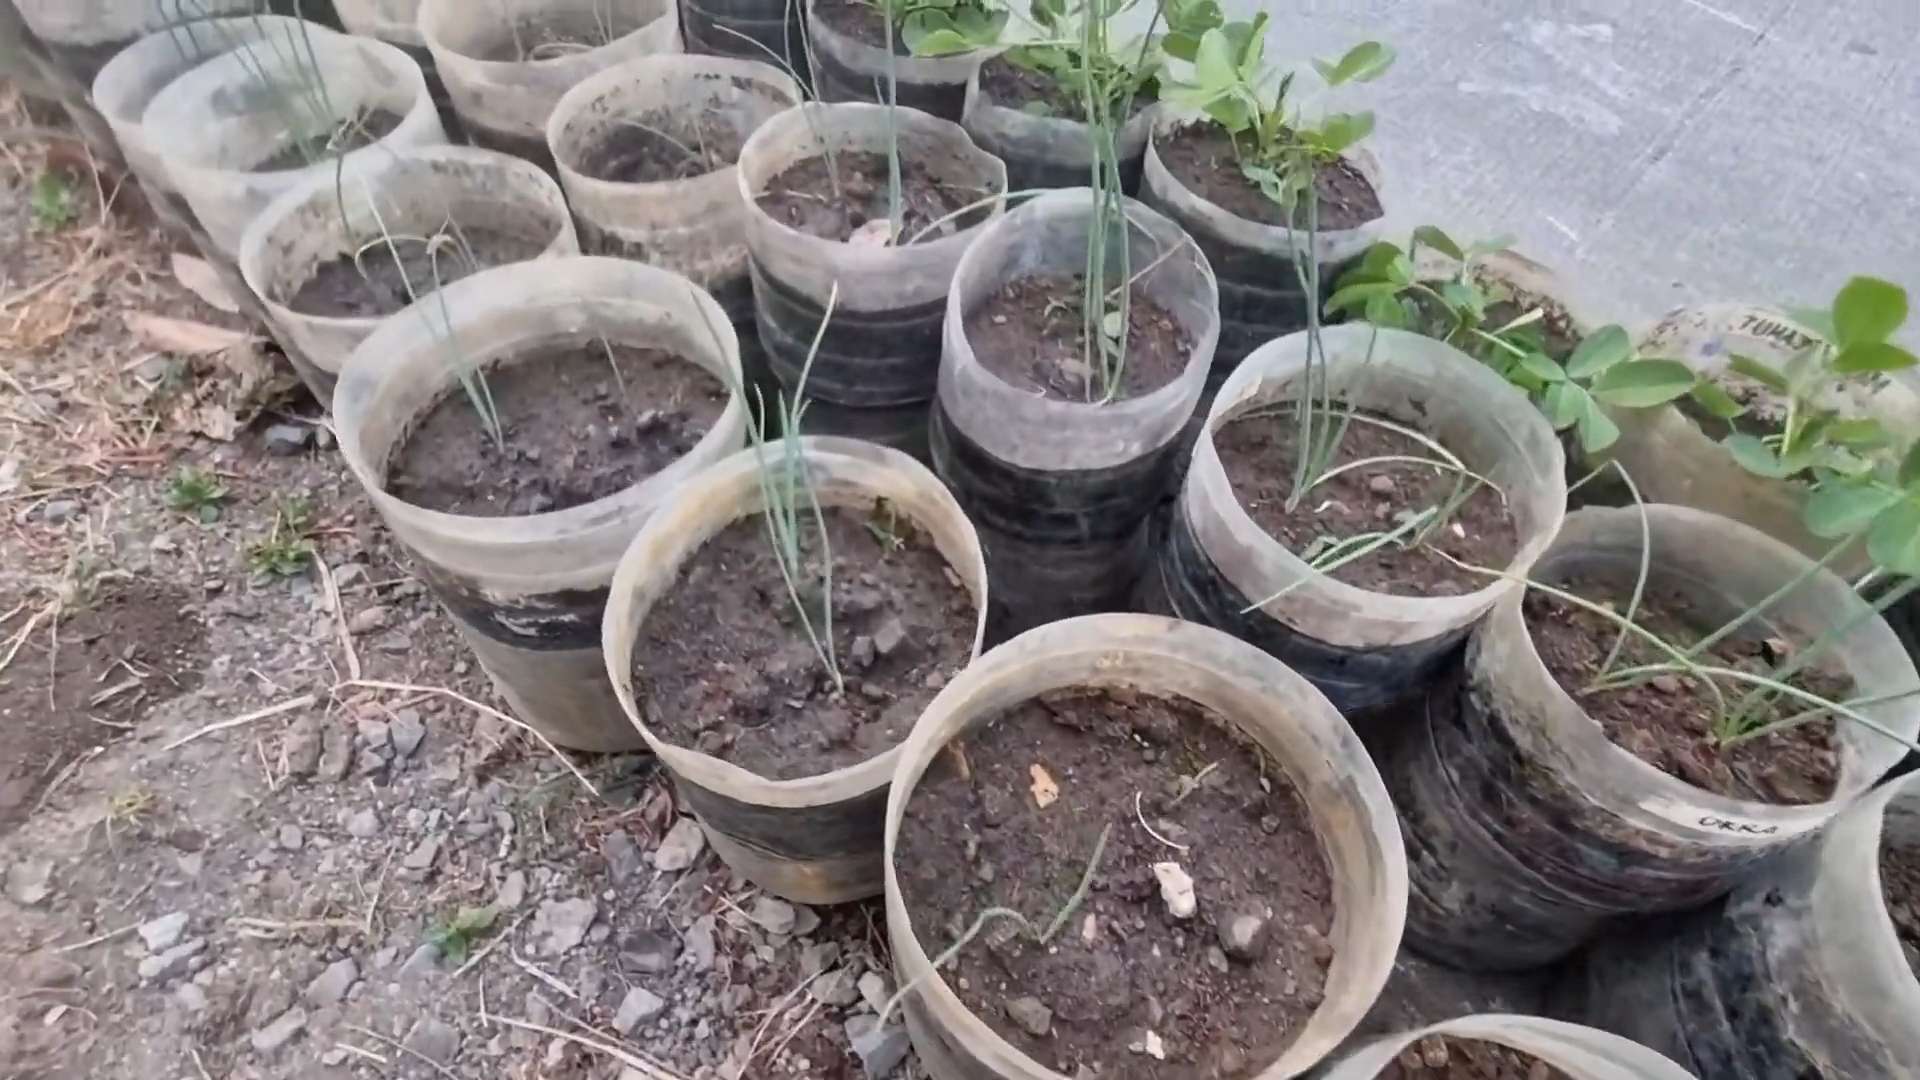
This method, focusing on ease and accessibility, makes growing onions at home a reality for even the most novice gardener. You don’t need acres of land or specialized equipment. A sunny windowsill, a balcony, or a small patch in your backyard is all you need to embark on this rewarding journey.
But the benefits extend beyond just taste. By growing your own onions, you’re reducing your carbon footprint, minimizing your reliance on commercial agriculture, and gaining a deeper connection to the food you eat. You know exactly where your onions came from, how they were grown, and what (or wasn’t) used on them. This peace of mind is priceless.
And the best part? There’s room for experimentation! Try different varieties of onions to discover your favorites. Shallots, red onions, yellow onions, white onions – the possibilities are endless. You can also experiment with different growing mediums, from traditional soil to hydroponics, to see what works best for your environment. Consider companion planting; carrots and onions are known to be excellent partners, deterring pests and promoting healthy growth.
Don’t be afraid to get creative! You can even start your onions from scraps. Save the root ends of store-bought onions and plant them in water until they sprout, then transplant them into soil. It’s a fantastic way to recycle and reduce waste.
We’ve provided a solid foundation for success, but the real magic happens when you put your own personal touch on the process. So, grab your supplies, get your hands dirty, and experience the joy of growing onions at home.
We are confident that you will find this DIY trick to be a game-changer in your gardening endeavors. It’s simple, effective, and incredibly rewarding. But don’t just take our word for it. Try it for yourself and see the difference.
We encourage you to share your experiences with us and the wider gardening community. Post pictures of your onion crops, share your tips and tricks, and let us know what worked (and what didn’t). Your feedback will help us refine this method and inspire others to embrace the joys of growing their own food. Use the hashtag #HomeGrownOnions and tag us in your posts! Let’s cultivate a community of passionate home gardeners, one onion at a time. Happy growing!
Frequently Asked Questions (FAQ)
What kind of soil is best for growing onions at home?
Onions thrive in well-drained, fertile soil that is rich in organic matter. A slightly acidic to neutral pH (around 6.0 to 7.0) is ideal. Before planting, amend your soil with compost, well-rotted manure, or other organic materials to improve drainage and nutrient content. If your soil is heavy clay, consider adding sand or perlite to improve drainage. A good quality potting mix is also suitable if you are growing onions in containers.
How much sunlight do onions need?
Onions are sun-loving plants and require at least 6-8 hours of direct sunlight per day to thrive. Choose a location in your garden or on your balcony that receives ample sunlight throughout the day. If you are growing onions indoors, place them near a sunny window or supplement with grow lights. Insufficient sunlight can result in stunted growth and smaller bulbs.
How often should I water my onions?
Water your onions regularly, especially during dry periods. The soil should be consistently moist but not waterlogged. Overwatering can lead to root rot, while underwatering can stress the plants and reduce bulb size. A good rule of thumb is to water deeply when the top inch of soil feels dry to the touch. During hot weather, you may need to water more frequently. Consider using a soaker hose or drip irrigation to deliver water directly to the roots and minimize water loss through evaporation.
When is the best time to plant onions?
The best time to plant onions depends on your climate and the type of onion you are growing. In general, onions are classified as either long-day or short-day varieties. Long-day onions require 14-16 hours of daylight to form bulbs and are best suited for northern regions. Short-day onions require 10-12 hours of daylight and are best suited for southern regions.
* **For Northern Climates:** Plant onion sets or transplants in early spring, as soon as the soil can be worked.
* **For Southern Climates:** Plant onion sets or transplants in the fall or early winter.
Check with your local garden center or agricultural extension office to determine the best onion varieties and planting times for your specific area.
What are some common pests and diseases that affect onions, and how can I prevent them?
Onions can be susceptible to several pests and diseases, including onion maggots, thrips, and fungal diseases like downy mildew and onion smut. Here are some preventative measures you can take:
* **Crop Rotation:** Avoid planting onions in the same location year after year to prevent the buildup of soilborne pests and diseases.
* **Good Sanitation:** Remove any plant debris from the garden to eliminate potential sources of infection.
* **Proper Spacing:** Ensure adequate spacing between plants to promote good air circulation and reduce humidity, which can encourage fungal diseases.
* **Insect Control:** Use insecticidal soap or neem oil to control onion maggots and thrips.
* **Disease Control:** Apply a fungicide if necessary to prevent or control fungal diseases. Choose a fungicide that is specifically labeled for use on onions.
* **Companion Planting:** Plant onions with carrots, which can help deter onion maggots.
How do I know when my onions are ready to harvest?
Onions are typically ready to harvest when the tops begin to fall over and turn yellow or brown. This usually occurs in late summer or early fall. Once the tops have fallen over, stop watering the onions and allow the bulbs to dry out in the ground for a few days. Then, carefully dig up the onions, being careful not to damage the bulbs.
How should I store my harvested onions?
After harvesting, cure the onions by allowing them to dry in a well-ventilated area for 2-3 weeks. Spread them out in a single layer on a screen or rack, and protect them from direct sunlight and rain. Once the outer skins are dry and papery, and the necks are tightly closed, you can store the onions in a cool, dry, and dark place. Braiding the onion tops together and hanging them is a traditional storage method. Properly cured and stored onions can last for several months.
Can I grow onions from seed?
Yes, you can grow onions from seed, but it requires more time and effort than growing them from sets or transplants. Start onion seeds indoors 8-10 weeks before the last expected frost. Transplant the seedlings outdoors after the danger of frost has passed. Growing onions from seed allows you to choose from a wider variety of onion types.
What are onion sets?
Onion sets are small, immature onion bulbs that are grown from seed the previous year. They are a popular choice for home gardeners because they are easy to plant and grow, and they mature more quickly than onions grown from seed.
Can I grow green onions (scallions) from the same bulbs I use for bulb onions?
While you can harvest the green tops of bulb onions for use as scallions, they won’t regrow as vigorously as dedicated scallion varieties. For a continuous supply of green onions, it’s best to grow varieties specifically bred for scallion production, or to regularly replant bulb onion tops that have been used. You can place the root end of a store-bought green onion in water, and it will often regrow, providing you with fresh greens for a short period.
Leave a Comment