
Grow artichokes at home? Absolutely! Imagine stepping into your garden and harvesting your own spiky, delicious globes of artichoke goodness. It’s not just a dream; it’s a very achievable reality with the right know-how. For centuries, artichokes have been prized for their unique flavor and nutritional benefits, gracing tables from the Mediterranean to modern kitchens worldwide. Their cultivation dates back to ancient times, with evidence suggesting their presence in Roman gardens.
But why should you bother learning to grow artichokes at home? Well, store-bought artichokes can be expensive and sometimes lack the freshness and flavor of homegrown ones. Plus, there’s an immense satisfaction in nurturing a plant from seedling to harvest, knowing you’ve created something delicious and healthy with your own two hands. This DIY guide will provide you with simple, effective tricks and hacks to successfully cultivate these fascinating plants, even if you’re a beginner gardener. We’ll cover everything from choosing the right variety to protecting your artichokes from pests, ensuring a bountiful harvest you can be proud of. So, let’s get our hands dirty and embark on this exciting gardening adventure together!
Growing Artichokes: A DIY Guide to Bountiful Blooms (and Delicious Hearts!)
Okay, artichoke lovers, listen up! I’m going to walk you through the process of growing your own artichokes at home. It might seem intimidating, but trust me, with a little patience and the right know-how, you’ll be harvesting these beauties in no time. And the taste of a homegrown artichoke? Unbeatable!
Choosing Your Artichoke Variety
First things first, let’s talk varieties. Not all artichokes are created equal, and some are better suited for certain climates. Here’s a quick rundown of some popular choices:
* Green Globe: This is the classic, most common variety. It’s reliable, produces large, round artichokes, and is relatively cold-hardy. A great choice for beginners!
* Violetta: If you’re looking for something a little different, Violetta artichokes have a beautiful purple hue. They’re also known for their tender hearts.
* Imperial Star: This variety is known for its early maturity, making it a good option for shorter growing seasons.
* Big Heart: As the name suggests, this variety produces exceptionally large artichokes with meaty hearts.
Consider your climate and growing space when making your selection. Check with your local nursery for recommendations on varieties that thrive in your area.
Getting Started: Seeds vs. Starts
You have two options for starting your artichoke journey: seeds or starts (small, established plants).
* Seeds: Starting from seed is more economical, but it requires more time and effort. You’ll need to start the seeds indoors several weeks before the last frost.
* Starts: Buying starts is the easier and faster option. You’ll get a head start on the growing season, and the plants are already established.
For this guide, I’m going to focus on starting from seeds, but the planting and care instructions are similar for both.
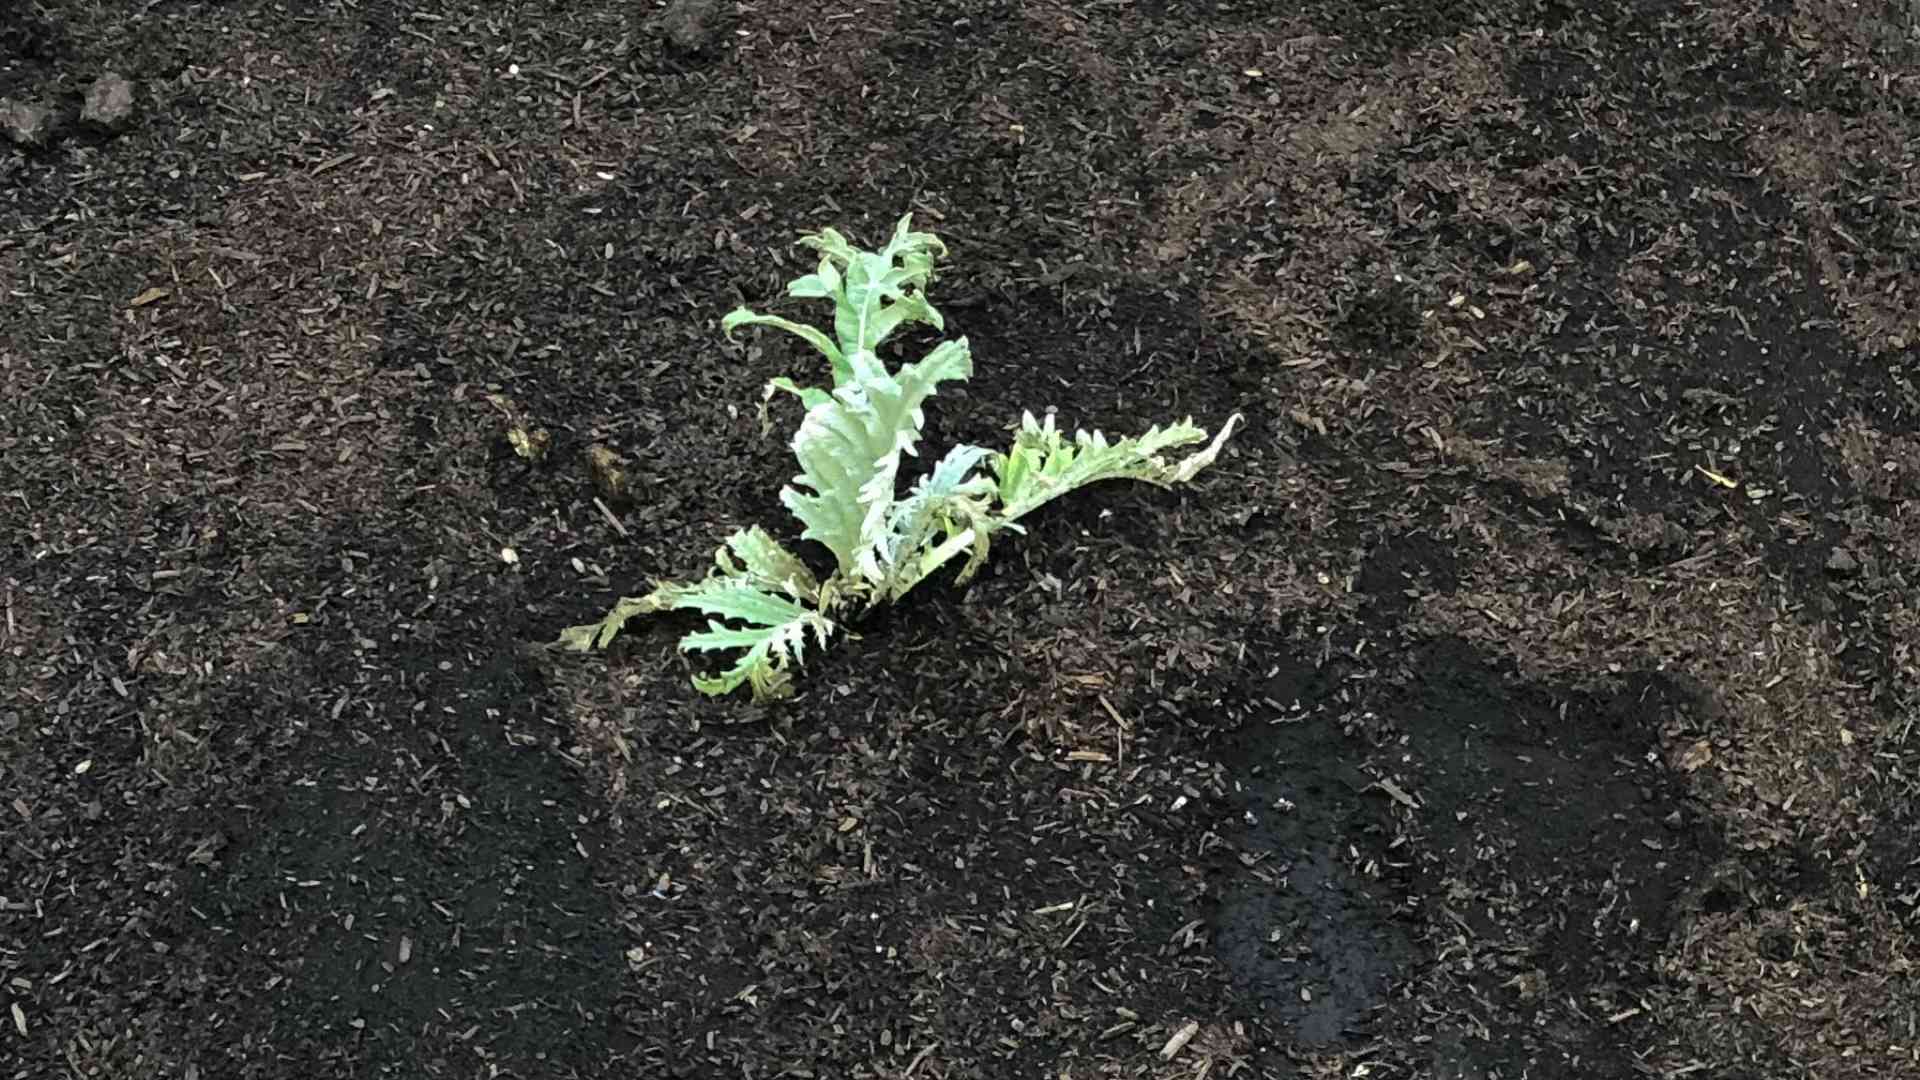
Starting Artichoke Seeds Indoors
This is where the magic begins! Starting seeds indoors gives them a head start and protects them from harsh weather.
1. Gather Your Supplies: You’ll need:
* Artichoke seeds
* Seed starting trays or small pots
* Seed starting mix (a light, well-draining soil)
* A spray bottle
* A heat mat (optional, but helpful)
* A grow light (optional, but recommended)
2. Sow the Seeds: Fill your seed starting trays or pots with seed starting mix. Moisten the soil with the spray bottle. Plant the artichoke seeds about 1/4 inch deep in the soil. Gently cover the seeds with soil and lightly water again.
3. Provide Warmth and Light: Place the seed starting trays on a heat mat (if using) and under a grow light (if using). The ideal temperature for germination is around 70-75°F (21-24°C). If you don’t have a grow light, place the trays in a sunny window, but be sure to rotate them regularly to prevent the seedlings from leaning towards the light.
4. Keep the Soil Moist: Check the soil moisture daily and water as needed to keep it consistently moist, but not soggy. Use the spray bottle to gently water the seedlings.
5. Harden Off the Seedlings: Once the seedlings have developed several sets of true leaves (usually after 6-8 weeks), it’s time to harden them off. This process gradually acclimates the seedlings to outdoor conditions. Start by placing the trays outdoors in a sheltered location for a few hours each day, gradually increasing the amount of time they spend outdoors over the course of a week or two. Protect them from direct sunlight and strong winds.
Preparing the Garden Bed
Artichokes are hungry plants, so preparing the garden bed is crucial for success.
1. Choose a Sunny Location: Artichokes need at least 6-8 hours of sunlight per day. Choose a location in your garden that receives plenty of sun.
2. Amend the Soil: Artichokes prefer well-drained soil that is rich in organic matter. Amend the soil with compost, aged manure, or other organic materials. This will improve drainage, fertility, and water retention.
3. Check the Soil pH: Artichokes prefer a slightly acidic to neutral soil pH (around 6.0-7.0). Test your soil pH and amend it as needed. You can use lime to raise the pH or sulfur to lower it.
4. Create Raised Beds (Optional): If your soil is heavy or poorly drained, consider creating raised beds. This will improve drainage and prevent root rot.
Planting Artichoke Starts or Seedlings
Now for the exciting part – getting those artichokes in the ground!
1. Choose the Right Time: Plant artichoke starts or seedlings in the spring after the last frost. Make sure the soil has warmed up to at least 60°F (15°C).
2. Space the Plants: Artichokes need plenty of space to grow. Space the plants at least 3-4 feet apart.
3. Dig the Holes: Dig holes that are slightly larger than the root balls of the starts or seedlings.
4. Plant the Artichokes: Gently remove the starts or seedlings from their containers and place them in the holes. Make sure the top of the root ball is level with the surrounding soil.
5. Fill the Holes: Fill the holes with soil and gently firm the soil around the plants.
6. Water Thoroughly: Water the newly planted artichokes thoroughly.
Caring for Your Artichoke Plants
Once your artichokes are planted, it’s important to provide them with the care they need to thrive.
1. Watering: Artichokes need consistent moisture, especially during hot, dry weather. Water deeply and regularly, especially when the plants are young and establishing themselves. Aim for about 1-2 inches of water per week. Avoid overhead watering, as this can promote fungal diseases.
2. Fertilizing: Artichokes are heavy feeders and benefit from regular fertilization. Fertilize them every 4-6 weeks with a balanced fertilizer or a fertilizer specifically formulated for vegetables. You can also side-dress the plants with compost or aged manure.
3. Mulching: Apply a layer of mulch around the artichoke plants. Mulch helps to retain moisture, suppress weeds, and regulate soil temperature. Use organic mulches such as straw, wood chips, or shredded leaves.
4. Weeding: Keep the area around the artichoke plants free of weeds. Weeds compete with the artichokes for water and nutrients.
5. Pest and Disease Control: Artichokes can be susceptible to certain pests and diseases. Monitor the plants regularly for signs of problems. Common pests include aphids, slugs, and snails. Common diseases include powdery mildew and root rot. Use organic pest and disease control methods whenever possible. For aphids, try spraying the plants with a strong stream of water or using insecticidal soap. For slugs and snails, use beer traps or handpick them off the plants. For powdery mildew, improve air circulation and apply a fungicide if necessary. Prevent root rot by ensuring good drainage.
6. Pruning: After the artichokes have finished producing for the season, cut the plants back to the ground. This will encourage new growth in the spring. You can also remove any dead or damaged leaves throughout the growing season.
Harvesting Your Artichokes
The moment you’ve been waiting for! Harvesting your own artichokes is incredibly rewarding.
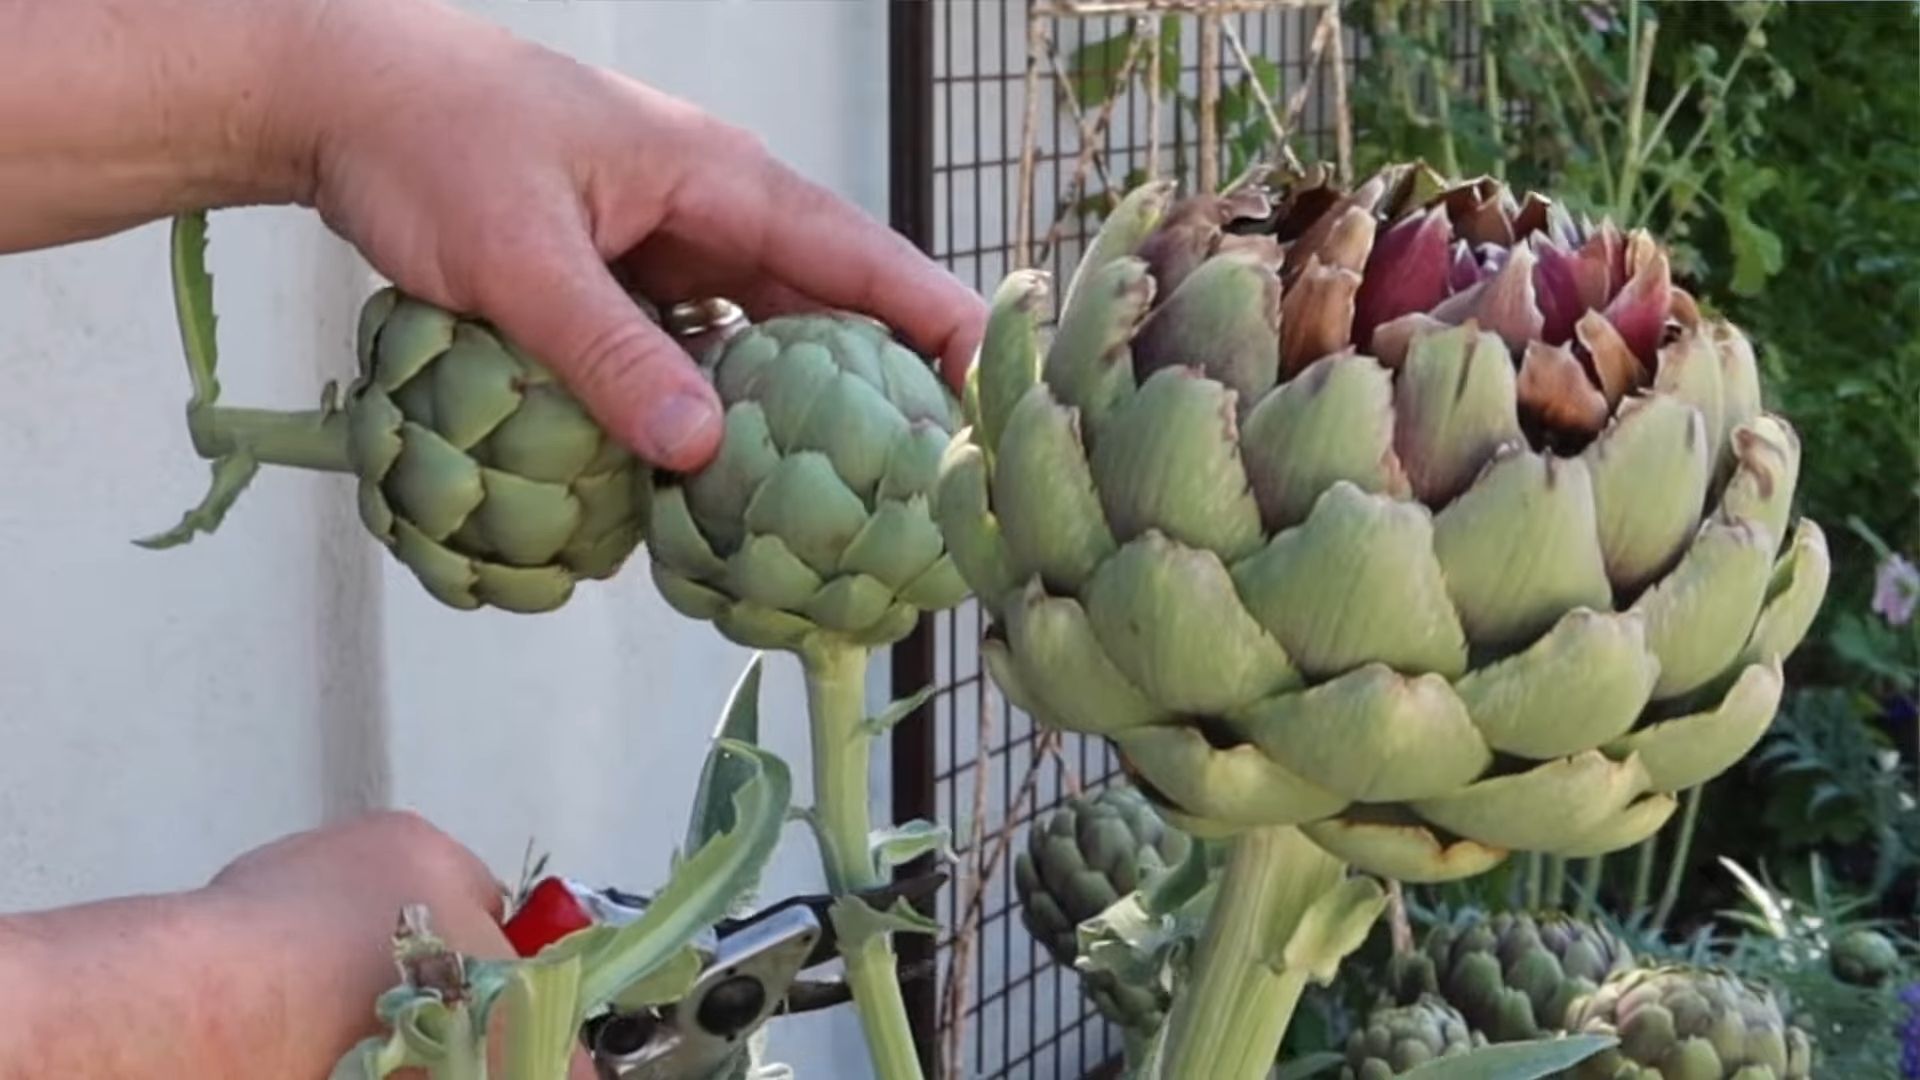
1. When to Harvest: Artichokes are ready to harvest when the buds are still tight and firm, but the bracts (the outer leaves) have begun to open slightly. The size of the artichoke will vary depending on the variety, but generally, you should harvest them when they are about 3-4 inches in diameter.
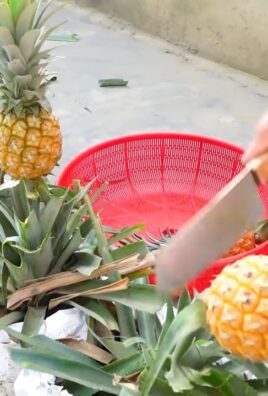
2. How to Harvest: Use a sharp knife to cut the artichoke stem about 2-3 inches below the bud.
3. Harvesting Side Shoots: After harvesting the main bud, the plant will produce smaller side shoots. These can also be harvested when they are the right size.
4. Enjoy Your Harvest: Artichokes are delicious steamed, grilled, or baked. The heart is the most prized part, but the fleshy base of the bracts is also edible.
Overwintering Artichokes
Artichokes are perennial plants, meaning they can live for several years. However, they are not very cold-hardy and may need protection during the winter in colder climates.
1. Cut Back the Plants: After the first frost, cut the plants back to the ground.
2. Mulch Heavily: Apply a thick layer of mulch around the base of the plants. This will help to insulate the roots and protect them from freezing temperatures.
3. Cover the Plants (Optional): In very cold climates
Conclusion
So, there you have it! Growing artichokes at home might seem daunting at first, but with a little patience and the right approach, you can cultivate these architectural beauties and enjoy their delicious hearts right from your own backyard. We’ve walked you through the key steps, from selecting the right variety for your climate to nurturing your plants through their various stages of growth.
Why is this DIY trick a must-try? Because it offers a unique connection to your food, a sense of accomplishment, and the unparalleled flavor of freshly harvested artichokes. Store-bought artichokes simply can’t compare to the taste and satisfaction of those you’ve nurtured yourself. Plus, you’ll know exactly what went into growing them, ensuring they’re free from unwanted chemicals and pesticides.
But the benefits extend beyond just the culinary. Artichoke plants are stunning additions to any garden, adding a touch of Mediterranean charm with their silvery-green foliage and impressive size. They attract beneficial pollinators, contributing to a healthier ecosystem in your backyard. And let’s not forget the sheer joy of watching these plants thrive under your care.
Looking for variations? Consider these ideas to personalize your artichoke-growing experience:
* Experiment with different varieties: ‘Green Globe’ is a classic, but explore others like ‘Violetta’ for a beautiful purple hue or ‘Imperial Star’ for earlier harvests.
* Companion planting: Plant basil, rosemary, or thyme near your artichokes to deter pests and enhance their flavor.
* Container gardening: If you have limited space, grow artichokes in large containers. Just ensure they have adequate drainage and sunlight.
* Overwintering strategies: In colder climates, protect your plants with mulch or move them indoors to a cool, dark location during the winter months.
We’ve covered a lot of ground, but the best way to truly master the art of growing artichokes at home is to get your hands dirty and give it a try. Don’t be afraid to experiment, learn from your mistakes, and adapt your approach as needed. Every garden is unique, and what works for one person may not work for another.
We are confident that with the information provided, you can successfully cultivate these delectable thistles. So, grab your gardening gloves, select your seeds or starts, and embark on this rewarding journey. We encourage you to share your experiences with us! Post photos of your artichoke plants on social media using #HomeGrownArtichokes and let us know what tips and tricks you’ve discovered along the way. Your insights could help other aspiring artichoke growers achieve success.
Happy gardening, and may your harvest be bountiful! Remember, the secret to delicious, homegrown artichokes is patience, care, and a little bit of love. Now go forth and grow!
Frequently Asked Questions (FAQ)
What is the best time of year to plant artichokes?
The ideal time to plant artichokes depends on your climate. In regions with mild winters, you can plant them in the fall for a spring harvest. In colder climates, it’s best to start them indoors in late winter or early spring and transplant them outdoors after the last frost. The goal is to give them enough time to establish themselves before the heat of summer or the chill of winter sets in.
How much sunlight do artichokes need?
Artichokes are sun-loving plants and require at least 6-8 hours of direct sunlight per day to thrive. Choose a location in your garden that receives ample sunlight throughout the day. If you’re growing them in containers, make sure to place them in a sunny spot. Insufficient sunlight can lead to weak growth and reduced yields.
What kind of soil is best for growing artichokes?
Artichokes prefer well-drained, fertile soil that is rich in organic matter. The ideal soil pH is between 6.0 and 7.0. Before planting, amend your soil with compost, aged manure, or other organic materials to improve its drainage and fertility. Avoid planting in heavy clay soil, as this can lead to root rot. If you have clay soil, consider growing artichokes in raised beds or containers.
How often should I water my artichoke plants?
Artichokes need consistent moisture, especially during their growing season. Water deeply and regularly, especially during dry spells. Avoid overwatering, as this can lead to root rot. A good rule of thumb is to water when the top inch of soil feels dry to the touch. Mulching around the plants can help retain moisture and suppress weeds.
How do I fertilize my artichoke plants?
Artichokes are heavy feeders and benefit from regular fertilization. Apply a balanced fertilizer (e.g., 10-10-10) every 4-6 weeks during the growing season. You can also side-dress your plants with compost or aged manure. Avoid over-fertilizing, as this can lead to excessive foliage growth at the expense of flower production.
When are artichokes ready to harvest?
Artichokes are typically ready to harvest in the spring or early summer, depending on the variety and your climate. The buds should be firm and plump, with tightly closed scales. Harvest them when they are about two-thirds of their full size. Use a sharp knife to cut the stem about 2-3 inches below the bud.
How do I protect my artichoke plants from pests and diseases?
Artichokes can be susceptible to pests such as aphids, snails, and slugs. Regularly inspect your plants for signs of infestation and take appropriate action. You can use organic pest control methods such as insecticidal soap or diatomaceous earth. To prevent diseases, ensure good air circulation around your plants and avoid overwatering.
Can I grow artichokes in containers?
Yes, you can grow artichokes in containers, but you’ll need to choose a large container (at least 20 gallons) to accommodate their extensive root system. Use a well-draining potting mix and provide regular watering and fertilization. Container-grown artichokes may need to be moved indoors during the winter in colder climates.
How do I overwinter my artichoke plants in cold climates?
In regions with harsh winters, artichokes need protection to survive. After the first frost, cut back the foliage to about 6 inches above the ground. Cover the plants with a thick layer of mulch, such as straw or leaves. In extremely cold areas, you can dig up the plants and store them in a cool, dark location until spring. Alternatively, consider growing artichokes as annuals and replanting them each year.
My artichoke plant is not producing buds. What could be the problem?
There are several reasons why your artichoke plant might not be producing buds. It could be due to insufficient sunlight, poor soil, inadequate watering, or lack of fertilization. Make sure your plant is getting at least 6-8 hours of direct sunlight per day, and that the soil is well-drained and fertile. Water regularly and fertilize every 4-6 weeks during the growing season. Also, ensure that your plant is mature enough to produce buds. Some varieties may take a year or two to start producing.
Leave a Comment