
Grow Radicchio Indoors? Absolutely! Imagine harvesting vibrant, slightly bitter radicchio leaves right from your kitchen windowsill, adding a gourmet touch to your salads and dishes all winter long. Forget those wilted, overpriced heads at the grocery store; with a few simple tricks, you can cultivate your own fresh supply.
Radicchio, with its striking red and white leaves, has a rich history rooted in the Veneto region of Italy. For centuries, Italians have prized this chicory for its unique flavor and nutritional benefits. But you don’t need an Italian villa to enjoy this delicacy. I’m going to show you how to easily grow radicchio indoors, regardless of your gardening experience.
In today’s busy world, finding time for a traditional garden can be challenging. That’s where indoor gardening comes in! This DIY guide will provide you with easy-to-follow steps and essential tips to successfully grow radicchio indoors. You’ll learn about the best soil, lighting, and watering techniques to ensure a bountiful harvest. Plus, I’ll share some insider secrets to prevent common problems and maximize your yield. So, let’s ditch the store-bought greens and embark on this exciting indoor gardening adventure together!
Growing Radicchio Indoors: A Colorful DIY Guide
Hey there, fellow plant enthusiasts! Ever thought about adding a touch of vibrant color and slightly bitter goodness to your indoor garden? Well, look no further than radicchio! This beautiful leafy vegetable, often mistaken for red cabbage, is surprisingly easy to grow indoors, and I’m here to guide you through the whole process. Get ready to enjoy fresh, homegrown radicchio right from your windowsill!
What You’ll Need
Before we dive in, let’s gather our supplies. Here’s a checklist of everything you’ll need to successfully grow radicchio indoors:
* **Radicchio Seeds:** Choose a variety that suits your taste. Some popular options include ‘Chioggia’, ‘Treviso’, and ‘Castelfranco’.
* **Seed Starting Tray or Small Pots:** These will be used to germinate your seeds.
* **Seed Starting Mix:** A light, well-draining mix is crucial for successful germination.
* **Larger Pots (at least 6 inches in diameter):** These will be the final homes for your radicchio plants.
* **Potting Soil:** A good quality potting mix that retains moisture but also drains well.
* **Grow Lights (optional but recommended):** Radicchio needs plenty of light, especially during the shorter days of winter.
* **Watering Can or Spray Bottle:** For gentle watering.
* **Liquid Fertilizer:** A balanced liquid fertilizer to feed your plants.
* **A Sunny Windowsill or Grow Light Setup:** Radicchio thrives in bright light.
* **Small Shovel or Trowel:** For transplanting.
Section 1: Starting Your Radicchio Seeds
This is where the magic begins! Getting your seeds to sprout is the first step towards a bountiful radicchio harvest.
1. **Prepare Your Seed Starting Tray:** Fill your seed starting tray or small pots with seed starting mix. Gently pat it down to create a level surface.
2. **Sow the Seeds:** Sprinkle a few radicchio seeds on top of the soil in each cell or pot. Don’t overcrowd them – about 2-3 seeds per cell is ideal.
3. **Cover the Seeds:** Lightly cover the seeds with a thin layer of seed starting mix. Radicchio seeds need light to germinate, so don’t bury them too deep.
4. **Water Gently:** Use a spray bottle or watering can with a gentle nozzle to moisten the soil. Avoid overwatering, as this can lead to rot. The soil should be damp, not soggy.
5. **Create a Humid Environment:** Cover the seed starting tray with a clear plastic lid or plastic wrap to create a humid environment. This will help the seeds germinate.
6. **Place in a Warm Location:** Place the tray in a warm location, ideally around 65-75°F (18-24°C). A heat mat can be helpful if your home is cooler.
7. **Monitor Germination:** Keep an eye on your seeds. They should germinate within 5-10 days. Once the seedlings emerge, remove the plastic lid or wrap to allow for air circulation.
8. **Provide Light:** Once the seedlings have sprouted, they need plenty of light. Place them under grow lights or on a sunny windowsill. If using a windowsill, rotate the tray regularly to ensure even growth.
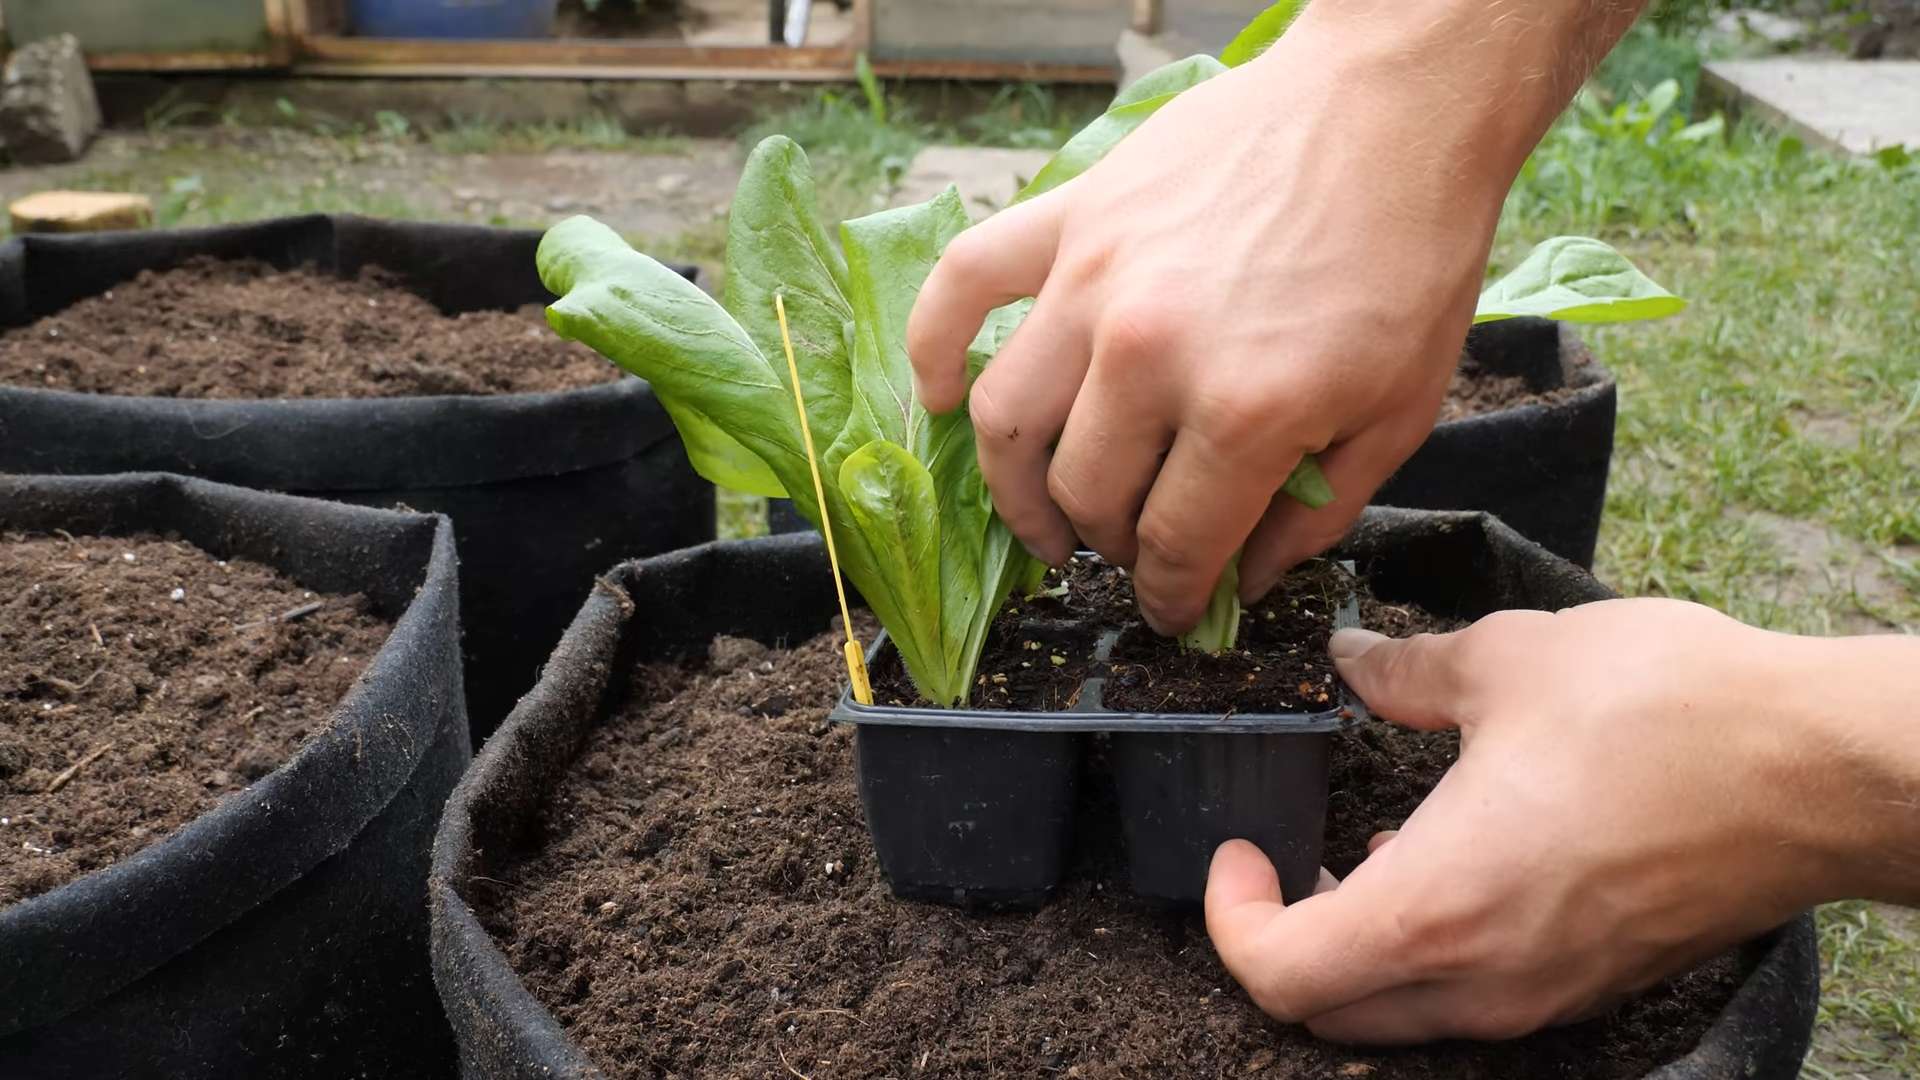
Section 2: Transplanting Your Radicchio Seedlings
Once your seedlings have developed a few sets of true leaves (the leaves that look like miniature radicchio leaves, not just the initial seed leaves), it’s time to transplant them into larger pots.
1. **Prepare Your Larger Pots:** Fill your larger pots (at least 6 inches in diameter) with potting soil. Leave about an inch of space at the top of the pot.
2. **Gently Remove Seedlings:** Carefully remove the radicchio seedlings from the seed starting tray or small pots. Be gentle to avoid damaging the roots. I like to use a small spoon or fork to help lift them out.
3. **Plant the Seedlings:** Make a small hole in the center of the potting soil in each pot. Place the seedling in the hole and gently cover the roots with soil.
4. **Water Thoroughly:** Water the transplanted seedlings thoroughly. Allow the water to drain out of the bottom of the pot.
5. **Provide Support (Optional):** If your seedlings are a bit leggy (tall and spindly), you can provide them with some support by gently staking them with small sticks or skewers.
Section 3: Caring for Your Indoor Radicchio Plants
Now that your radicchio plants are settled in their new homes, it’s time to provide them with the care they need to thrive.
1. **Light:** Radicchio needs at least 6 hours of direct sunlight per day. If you don’t have a sunny windowsill, use grow lights. Position the lights about 6-12 inches above the plants.
2. **Watering:** Water your radicchio plants when the top inch of soil feels dry to the touch. Avoid overwatering, as this can lead to root rot. Water deeply, allowing the water to drain out of the bottom of the pot.
3. **Fertilizing:** Feed your radicchio plants with a balanced liquid fertilizer every 2-3 weeks. Follow the instructions on the fertilizer label.
4. **Temperature:** Radicchio prefers cooler temperatures, ideally between 60-70°F (15-21°C). Avoid placing your plants near heat sources, such as radiators or vents.
5. **Air Circulation:** Good air circulation is important to prevent fungal diseases. Make sure your plants have plenty of space around them and avoid overcrowding. You can also use a small fan to improve air circulation.
6. **Pest Control:** Keep an eye out for pests, such as aphids and spider mites. If you notice any pests, treat them with insecticidal soap or neem oil.
7. **Bolting:** Bolting (when the plant prematurely flowers) can occur if the temperature is too high. If your radicchio plants start to bolt, harvest them immediately.
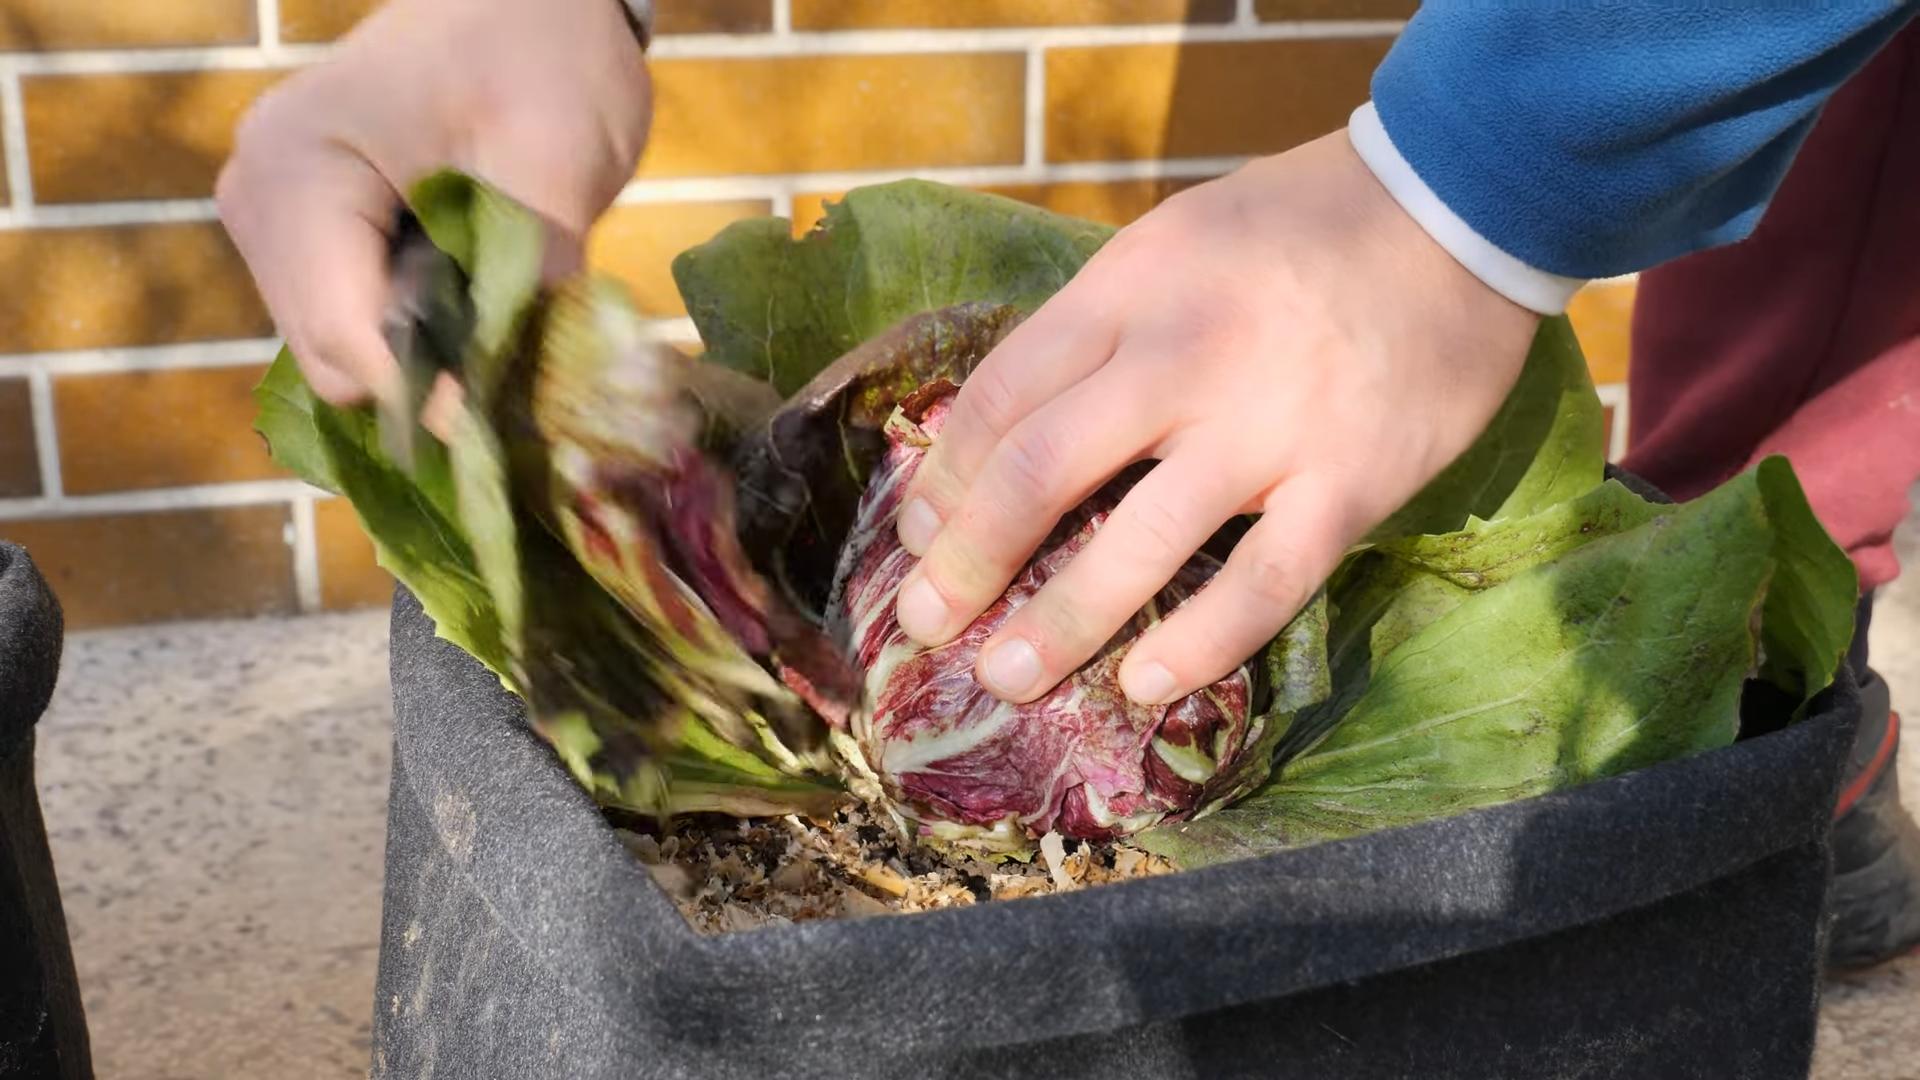
Section 4: Harvesting Your Radicchio
The moment you’ve been waiting for! Harvesting your homegrown radicchio is incredibly rewarding.
1. **Harvest Time:** Radicchio is typically ready to harvest about 60-80 days after sowing. The heads should be firm and well-formed.
2. **Harvesting Method:** To harvest, simply cut the radicchio head off at the base with a sharp knife. Leave about an inch of the stem attached.
3. **Succession Planting:** To enjoy a continuous harvest of radicchio, sow new seeds every few weeks. This is called succession planting.
4. **Storage:** Store your harvested radicchio in the refrigerator for up to a week. Wrap it in a damp paper towel to keep it fresh.
Troubleshooting Tips
Even with the best care, you might encounter some challenges along the way. Here are a few common problems and how to address them:
* **Leggy Seedlings:** If your seedlings are tall and spindly, they’re not getting enough light. Move them closer to the light source or provide supplemental lighting.
* **Yellowing Leaves:** Yellowing leaves can be a sign of overwatering, underwatering, or nutrient deficiency. Check the soil moisture and adjust your watering accordingly. If the problem persists, try fertilizing your plants.
* **Slow Growth:** Slow growth can be caused by a variety of factors, including insufficient light, poor soil, or cool temperatures. Make sure your plants are getting enough light and warmth, and that the soil is well-draining and nutrient-rich.
* **Bitter Taste:** Radicchio can sometimes have a bitter taste. To reduce bitterness, you can soak the leaves in cold water for about 30 minutes before using them.
Radicchio Varieties to Try Indoors
While most radicchio varieties can be grown indoors, some are particularly well-suited for container gardening. Here are a few of my favorites:
* **Chioggia:** This is the most common type of radicchio, with round, tightly packed heads and a slightly bitter flavor.
* **Treviso:** This variety has elongated heads and a milder, sweeter flavor than Chioggia.
* **Castelfranco:** This is a beautiful variety with speckled leaves and a delicate, slightly sweet flavor.
* **Palla Rossa:** This is another round variety, similar to Chioggia, but with a deeper red color.
Growing radicchio indoors is a fun and rewarding experience. With a little bit of care and attention, you can enjoy fresh, homegrown radicchio all year round. So, grab your seeds, get your hands dirty, and start growing! Happy gardening!
Conclusion
So, there you have it! Growing radicchio indoors might seem like a challenge at first, but with a little patience and the right approach, you can enjoy the slightly bitter, beautifully colored leaves of this Italian chicory right from your own home. This DIY trick isn’t just about saving money; it’s about connecting with your food, understanding its growth cycle, and experiencing the satisfaction of nurturing something from seed to table.
Why is this a must-try? Because fresh radicchio from the grocery store often lacks the vibrancy and crispness of homegrown varieties. Plus, you have complete control over the growing environment, ensuring organic, pesticide-free leaves. Imagine adding freshly harvested radicchio to your salads, risottos, or grilled dishes – the flavor is simply unmatched.
Don’t be afraid to experiment! Try different varieties of radicchio, such as Chioggia, Treviso, or Castelfranco. Each offers a unique flavor profile and appearance. You can also adjust the lighting and temperature to influence the bitterness of the leaves. Some gardeners prefer a slightly more bitter taste, while others prefer a milder flavor. Play around with the conditions to find what works best for you.
Consider companion planting your indoor radicchio with herbs like parsley or chives. These herbs can help deter pests and enhance the flavor of your radicchio. You can also use different types of containers, from traditional pots to hydroponic systems, to find what suits your space and preferences.
We highly encourage you to give this DIY trick a try. It’s a rewarding experience that will not only provide you with fresh, delicious radicchio but also deepen your appreciation for the art of gardening. And most importantly, we want to hear about your experiences! Share your photos, tips, and challenges in the comments below. Let’s build a community of indoor radicchio growers and learn from each other. What are you waiting for? Get those seeds started and embark on your indoor radicchio adventure today! Mastering the art of growing radicchio indoors is easier than you think, and the rewards are well worth the effort.
Frequently Asked Questions (FAQ)
Q: What is radicchio, and why should I grow it indoors?
Radicchio is a leafy vegetable, a type of Italian chicory, known for its slightly bitter taste and vibrant red or variegated leaves. Growing it indoors allows you to enjoy fresh, organic radicchio year-round, regardless of your climate. It also gives you control over the growing environment, ensuring pesticide-free leaves and a superior flavor compared to store-bought options. Plus, it’s a fun and rewarding gardening project!
Q: What are the best varieties of radicchio to grow indoors?
Several varieties thrive indoors. Chioggia is a popular choice due to its round shape and relatively mild bitterness. Treviso is another excellent option, known for its elongated shape and slightly more intense flavor. Castelfranco, with its beautiful variegated leaves, is also a great choice for adding visual appeal to your indoor garden. Experiment with different varieties to find your favorite!
Q: What kind of lighting does radicchio need indoors?
Radicchio requires at least 6-8 hours of sunlight per day. If you don’t have a sunny windowsill, you’ll need to supplement with grow lights. Fluorescent or LED grow lights are excellent options. Position the lights about 6-12 inches above the plants and adjust as they grow. Proper lighting is crucial for healthy growth and vibrant color development.
Q: What type of soil is best for growing radicchio indoors?
Use a well-draining potting mix that is rich in organic matter. A mix of peat moss, perlite, and vermiculite works well. You can also add compost to the mix to provide extra nutrients. Avoid using garden soil, as it can be too heavy and may contain pests or diseases.
Q: How often should I water my indoor radicchio plants?
Water regularly, keeping the soil consistently moist but not waterlogged. Check the soil moisture by sticking your finger about an inch deep. If it feels dry, it’s time to water. Avoid overwatering, as this can lead to root rot. Ensure your containers have drainage holes to prevent water from accumulating at the bottom.
Q: How do I fertilize my indoor radicchio plants?
Feed your radicchio plants with a balanced liquid fertilizer every 2-3 weeks. Follow the instructions on the fertilizer label. Avoid over-fertilizing, as this can lead to excessive leaf growth and a bitter taste. Organic fertilizers, such as fish emulsion or seaweed extract, are also excellent options.
Q: How long does it take to grow radicchio indoors?
Radicchio typically takes 70-90 days to mature from seed. However, you can start harvesting the outer leaves earlier for a continuous supply. The exact time will depend on the variety, growing conditions, and your desired size.
Q: How do I harvest radicchio indoors?
You can harvest radicchio by cutting the entire head at the base or by harvesting the outer leaves as needed. For a continuous harvest, focus on harvesting the outer leaves, allowing the inner leaves to continue growing. Harvest in the morning for the best flavor.
Q: How can I reduce the bitterness of radicchio?
The bitterness of radicchio can be influenced by several factors. Cooler temperatures and less sunlight tend to increase bitterness. You can also soak the leaves in cold water for about 30 minutes before using them to reduce bitterness. Grilling or roasting radicchio can also mellow out the flavor.
Q: What are some common pests and diseases that affect indoor radicchio, and how can I prevent them?
Common pests include aphids, spider mites, and whiteflies. Regularly inspect your plants for signs of infestation. You can control pests by spraying with insecticidal soap or neem oil. Ensure good air circulation to prevent fungal diseases. Avoid overwatering and remove any dead or decaying leaves promptly.
Q: Can I grow radicchio indoors year-round?
Yes, you can grow radicchio indoors year-round, provided you have adequate lighting and temperature control. Maintain a consistent temperature between 60-70°F (15-21°C) for optimal growth.
Q: What are some creative ways to use homegrown radicchio?
Radicchio is incredibly versatile. Use it in salads, risottos, pasta dishes, and grilled dishes. It can also be braised or roasted. The slightly bitter flavor pairs well with sweet and savory ingredients. Experiment with different recipes and find your favorite ways to enjoy your homegrown radicchio.
Q: How do I store harvested radicchio?
Store harvested radicchio in the refrigerator in a plastic bag or container. It will typically last for about a week. Wash the leaves just before using them to prevent them from becoming soggy.
Q: Can I save seeds from my indoor radicchio plants?
Saving seeds from radicchio can be challenging, as it requires allowing the plant to bolt (flower) and produce seeds. This can take a significant amount of time and space. However, if you’re interested in seed saving, research the specific requirements for your chosen variety.
Q: What if my radicchio isn’t forming a tight head?
Several factors can contribute to loose heads, including insufficient light, high temperatures, and overcrowding. Ensure your plants are receiving adequate light and maintain a consistent temperature. Thin out the plants if they are too close together.
Leave a Comment