
Grow Carrots at Home Easily? Absolutely! Imagine plucking vibrant, sweet carrots straight from your own backyard – fresher than anything you’ll find at the grocery store. Sounds like a dream, right? Well, it doesn’t have to be! This isn’t just about gardening; it’s about connecting with nature, enjoying the fruits (or vegetables!) of your labor, and knowing exactly where your food comes from.
Carrots have a rich history, dating back thousands of years. Originally cultivated for their aromatic leaves and seeds, the sweet, orange root we know and love today is a relatively modern development. From ancient medicinal uses to becoming a staple in cuisines worldwide, the carrot’s journey is as fascinating as it is delicious.
But why should you learn to grow carrots at home easily? In today’s world, where we’re increasingly conscious of sustainability and healthy eating, homegrown produce offers unparalleled benefits. You control the pesticides, you minimize your carbon footprint, and you get the satisfaction of nurturing something from seed to table. Plus, let’s be honest, there’s nothing quite like the taste of a freshly harvested carrot. This DIY guide will provide you with simple, effective tricks and hacks to ensure a bountiful carrot harvest, even if you’re a complete beginner. So, grab your gardening gloves, and let’s get started!
Grow Your Own Delicious Carrots: A Beginner’s Guide
Hey there, fellow gardening enthusiasts! I’m so excited to share my tried-and-true method for growing plump, juicy carrots right in your own backyard (or even in containers!). Forget those bland, store-bought carrots – nothing beats the taste of homegrown goodness. This guide will walk you through every step, from choosing the right variety to harvesting your bounty. Let’s get digging!
Choosing the Right Carrot Variety
Before we even think about soil, let’s talk carrots! Not all carrots are created equal, and selecting the right variety for your climate and space is crucial. Here’s a quick rundown of some popular choices:
* Nantes: These are classic, cylindrical carrots with a sweet flavor. They’re relatively short (around 6-7 inches) and mature quickly, making them a great option for beginners. I personally love ‘Nantes Half Long’ for its reliable performance.
* Danvers: These are longer, tapered carrots, known for their robust flavor and good storage capabilities. ‘Danvers 126’ is a popular heirloom variety.
* Chantenay: These are shorter, thicker carrots with broad shoulders. They’re ideal for heavier soils and are less prone to forking. ‘Red Core Chantenay’ is a reliable choice.
* Imperator: These are the long, slender carrots you often see in supermarkets. They require loose, well-drained soil to grow properly.
* Round Carrots (Parisian): If you’re short on space or have rocky soil, these are your best bet! They’re small, round, and mature quickly. ‘Paris Market’ is a classic variety.
* Novelty Colors: Don’t be afraid to experiment with colorful carrots like purple (‘Purple Haze’), yellow (‘Yellowstone’), or white (‘White Satin’). They add a fun twist to your garden and plate!
Consider your climate and soil type when making your selection. Some varieties are better suited to certain conditions than others. Read the seed packet descriptions carefully!
Preparing the Soil: The Key to Success
Carrots are notoriously picky about their soil. They need loose, well-drained soil that’s free of rocks and clumps. Rocky soil can cause carrots to fork or become stunted. Here’s how I prepare my carrot beds:
* Timing: Prepare your soil a few weeks before you plan to sow your seeds. This gives the soil time to settle.
* Location: Choose a spot that gets at least 6 hours of sunlight per day.
* Clearing: Remove any rocks, weeds, and debris from the area.
* Tilling/Digging: Till or dig the soil to a depth of at least 12 inches. This loosens the soil and makes it easier for carrot roots to penetrate.
* Amending: Amend the soil with plenty of compost or well-rotted manure. This adds nutrients and improves drainage. I usually add a generous layer (2-3 inches) of compost.
* Raking: Rake the soil smooth and level. This creates a uniform surface for sowing seeds.
* Soil Testing (Optional): If you’re unsure about your soil’s pH or nutrient levels, consider getting a soil test. Carrots prefer a slightly acidic soil pH (around 6.0-6.8).
Don’t add fresh manure directly to the soil before planting carrots. This can cause forking and other problems. Use well-rotted manure or compost instead.
Sowing Carrot Seeds: Patience is a Virtue
Carrot seeds are tiny and can be tricky to sow evenly. Here’s my method for getting the best results:
1. Create Furrows: Use a hoe or trowel to create shallow furrows in the soil, about 1/4 to 1/2 inch deep and 1-2 inches apart.
2. Sow Seeds Sparsely: Sow the seeds as thinly as possible along the furrows. This is the most challenging part! I often mix the seeds with sand or coffee grounds to help space them out.
3. Cover Seeds: Gently cover the seeds with a thin layer of soil or vermiculite.
4. Water Gently: Water the area gently with a watering can or hose with a gentle spray nozzle. Avoid washing away the seeds.
5. Keep Moist: Keep the soil consistently moist until the seeds germinate. This may require watering daily, especially in hot weather.
6. Mark Rows: Label your rows with the carrot variety and date of sowing.
Carrot seeds can take 1-3 weeks to germinate, so be patient! Keep the soil consistently moist during this time.
Thinning Seedlings: Crucial for Carrot Development
Thinning is essential for giving your carrots enough space to grow. If you don’t thin them, they’ll become overcrowded and stunted.
1. First Thinning: When the seedlings are about 1-2 inches tall, thin them to about 1 inch apart.
2. Second Thinning: When the seedlings are about 3-4 inches tall, thin them to about 2-3 inches apart.
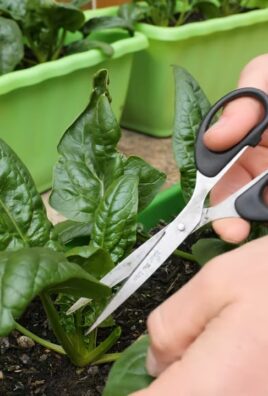
3. Thinning Technique: Gently pull out the unwanted seedlings, being careful not to disturb the roots of the remaining plants. You can also use small scissors to snip the seedlings at the soil line.
4. Water After Thinning: Water the area after thinning to help settle the soil around the remaining plants.
Don’t be afraid to thin aggressively! It’s better to have fewer, larger carrots than a crowded patch of small ones.
Watering and Weeding: Maintaining Your Carrot Patch
Consistent watering and weeding are crucial for healthy carrot growth.
* Watering: Water your carrots regularly, especially during dry spells. Aim for about 1 inch of water per week. Water deeply and less frequently, rather than shallowly and often.
* Weeding: Keep your carrot patch free of weeds. Weeds compete with carrots for nutrients and water. Hand-pull weeds carefully to avoid disturbing the carrot roots.
* Mulching: Apply a layer of mulch around your carrots to help retain moisture, suppress weeds, and regulate soil temperature. Straw, hay, or shredded leaves are good options.
Avoid overhead watering, as this can promote fungal diseases. Water at the base of the plants instead.
Pest and Disease Control: Protecting Your Crop
Carrots are generally pest-resistant, but they can be susceptible to certain problems.
* Carrot Rust Fly: This is a common pest that can damage carrot roots. Cover your carrot bed with row covers to prevent the flies from laying their eggs.
* Nematodes: These microscopic worms can attack carrot roots. Improve soil health by adding compost and practicing crop rotation.
* Leaf Spot Diseases: These fungal diseases can cause spots on carrot leaves. Improve air circulation by spacing plants properly and avoiding overhead watering.
* Aphids: These small insects can suck sap from carrot leaves. Spray them with insecticidal soap or neem oil.
Inspect your carrot plants regularly for signs of pests or diseases. Early detection is key to preventing serious problems.
Harvesting Carrots: The Sweet Reward
The moment you’ve been waiting for! Carrots are typically ready to harvest 60-80 days after sowing, depending on the variety.
1. Check Maturity: Check the seed packet for the expected maturity date. You can also gently dig around the base of a carrot to check its size and color.
2. Loosen the Soil: Loosen the soil around the carrots with a garden fork or trowel.
3. Pull Gently: Grasp the carrot tops firmly and pull gently, twisting if necessary.
4. Wash and Store: Wash the carrots thoroughly and store them in the refrigerator. You can also store them in a cool, moist root cellar.
Harvest carrots on a dry day to prevent them from rotting in storage.
Growing Carrots in Containers: A Great Option for Small Spaces
If you don’t have a garden, you can still grow carrots in containers!
* Choose the Right Container: Select a container that is at least 12 inches deep and wide.
* Use a Good Potting Mix: Use a well-draining potting mix that is free of rocks and clumps.
* Sow Seeds: Sow seeds as described above, spacing them about 1-2 inches apart.
* Water Regularly: Water the containers regularly, keeping the soil consistently moist.
* Fertilize: Fertilize the carrots every few weeks with a balanced liquid fertilizer.
* Thin Seedlings: Thin the seedlings as described above.
* Harvest: Harvest the carrots when they are mature.
Choose shorter carrot varieties for container gardening. ‘Paris Market’ and ‘Nantes Half Long’ are good options.
Troubleshooting Common Carrot Problems
Even
Conclusion
So, there you have it! Growing carrots at home, while it might seem daunting at first, is actually a surprisingly simple and rewarding experience. We’ve walked you through the essential steps, from selecting the right carrot variety to ensuring proper soil conditions and providing consistent care. But why should you bother with all this effort when you can simply buy carrots at the grocery store? The answer lies in the unparalleled freshness, flavor, and satisfaction that comes from harvesting your own homegrown produce.
Imagine biting into a crisp, sweet carrot, pulled directly from your garden, still warm from the sun. The taste is unlike anything you’ve ever experienced from a store-bought carrot. Plus, you have complete control over the growing process, ensuring that your carrots are free from harmful pesticides and herbicides. You know exactly what went into them, making them a healthier and more sustainable choice for you and your family.
This DIY trick for growing carrots at home is more than just a gardening project; it’s an investment in your health, your taste buds, and your connection to nature. It’s about experiencing the joy of nurturing a plant from seed to harvest and reaping the delicious rewards of your labor.
But the fun doesn’t stop there! Feel free to experiment with different carrot varieties to discover your personal favorites. Try growing colorful carrots like purple haze or yellow sun for a visually stunning addition to your salads and snacks. You can also explore different planting techniques, such as succession planting, to ensure a continuous harvest throughout the growing season. Consider companion planting with herbs like rosemary or sage, which can help deter pests and enhance the flavor of your carrots.
And don’t be afraid to get creative with your carrot recipes! From classic carrot cake to roasted carrot fries to refreshing carrot juice, the possibilities are endless. Use your homegrown carrots in soups, stews, salads, and even smoothies. Let your imagination run wild and discover new and exciting ways to enjoy the fruits (or rather, vegetables) of your labor.
We strongly encourage you to give this DIY trick a try. Even if you’ve never gardened before, you’ll be surprised at how easy and enjoyable it can be. Start small, with just a few carrot seeds, and watch them grow into vibrant, delicious vegetables.
Once you’ve harvested your first batch of homegrown carrots, we’d love to hear about your experience! Share your tips, tricks, and photos with us in the comments below. Let us know what challenges you faced, what successes you celebrated, and what you learned along the way. Together, we can create a community of passionate gardeners who are dedicated to growing their own fresh, healthy food. So, grab your seeds, get your hands dirty, and start growing carrots at home today! You won’t regret it.
FAQ
What is the best time of year to plant carrots?
The best time to plant carrots depends on your climate. In general, carrots are a cool-season crop, meaning they thrive in temperatures between 60°F and 70°F (15°C and 21°C). For most regions, this means planting carrots in early spring or late summer/early fall. Spring plantings should occur as soon as the soil can be worked, typically a few weeks before the last expected frost. Fall plantings should be timed so that carrots have enough time to mature before the first hard frost. Check your local planting calendar for specific dates tailored to your region.
What kind of soil is best for growing carrots?
Carrots need loose, well-drained soil to grow properly. Rocky or compacted soil can cause carrots to become stunted, forked, or misshapen. The ideal soil for carrots is sandy loam, which is a mixture of sand, silt, and clay. This type of soil provides good drainage while still retaining enough moisture for the carrots to thrive. Before planting, amend your soil with compost or other organic matter to improve its drainage and fertility. Avoid using fresh manure, as it can cause carrots to become hairy or develop forked roots.
How much sunlight do carrots need?
Carrots need at least six hours of sunlight per day to grow well. Choose a planting location that receives full sun for most of the day. If you live in a hot climate, you may need to provide some afternoon shade to prevent the carrots from overheating.
How often should I water my carrots?
Carrots need consistent moisture to grow properly. Water your carrots regularly, especially during dry periods. Aim to keep the soil consistently moist but not waterlogged. Overwatering can lead to root rot, while underwatering can cause carrots to become stunted or bitter. A good rule of thumb is to water deeply once or twice a week, depending on the weather conditions.
How do I prevent carrot flies from attacking my carrots?
Carrot flies are a common pest that can damage carrot crops. The larvae of carrot flies burrow into the roots of carrots, causing them to become discolored and inedible. To prevent carrot flies from attacking your carrots, you can use several methods:
* Row covers: Cover your carrot bed with a fine mesh row cover to prevent carrot flies from laying their eggs on the plants.
* Companion planting: Plant carrots with strong-smelling herbs like rosemary, sage, or marigolds, which can help deter carrot flies.
* Crop rotation: Avoid planting carrots in the same location year after year, as this can allow carrot fly populations to build up in the soil.
* Remove infested plants: If you notice any carrots that are infested with carrot fly larvae, remove them immediately to prevent the infestation from spreading.
When are carrots ready to harvest?
Carrots are typically ready to harvest 60-80 days after planting, depending on the variety. You can check the size of the carrots by gently digging around the top of the root. Carrots are usually ready to harvest when they are about 1-2 inches in diameter at the top. To harvest carrots, gently loosen the soil around the base of the plant and pull the carrot straight up. If the soil is dry, you may need to water it first to make it easier to pull the carrots.
Can I grow carrots in containers?
Yes, you can grow carrots in containers, as long as the container is deep enough to accommodate the length of the carrot roots. Choose a container that is at least 12 inches deep and has drainage holes. Fill the container with a well-draining potting mix and plant the carrot seeds according to the instructions on the seed packet. Water the carrots regularly and fertilize them with a balanced fertilizer every few weeks.
What are some common problems when growing carrots?
Some common problems when growing carrots include:
* Forked roots: This can be caused by rocky or compacted soil.
* Stunted growth: This can be caused by poor soil fertility, lack of sunlight, or underwatering.
* Root rot: This can be caused by overwatering or poorly drained soil.
* Pest infestations: Carrots can be attacked by various pests, such as carrot flies, aphids, and nematodes.
By addressing these problems promptly, you can ensure a healthy and bountiful carrot harvest.
Leave a Comment