
Growing fresh sage at home is easier than you might think, and I’m here to show you how! Forget those sad, dried-up leaves from the grocery store – imagine stepping outside your back door and snipping fragrant, vibrant sage whenever you need it. This isn’t just about convenience; it’s about connecting with nature and adding a touch of magic to your cooking.
Sage has a rich history, dating back to ancient times when it was revered for its medicinal properties. The Romans called it “salvia,” derived from “salvere,” meaning “to heal.” For centuries, cultures around the world have used sage for everything from treating snakebites to improving memory. While I can’t promise those benefits, I *can* guarantee that having fresh sage on hand will elevate your culinary creations!
Why do you need these DIY tricks for growing fresh sage at home? Well, let’s face it, gardening can sometimes feel intimidating. But with a few simple hacks, even those of us without a “green thumb” can enjoy the satisfaction of harvesting our own herbs. Plus, store-bought herbs can be expensive and often lack the intense flavor of homegrown varieties. I’m going to share some easy and affordable ways to cultivate your own thriving sage plant, whether you have a sprawling garden or just a sunny windowsill. Get ready to unlock the secrets to a bountiful sage harvest!
Growing Fresh Sage at Home: A DIY Guide
Hey there, fellow gardening enthusiasts! I’m so excited to share my guide on growing fresh sage right in your own home. Sage is such a versatile herb, adding a wonderful earthy flavor to so many dishes. Plus, it smells amazing! And let’s be honest, there’s nothing quite like snipping fresh herbs from your own little garden. So, let’s get started!
Choosing Your Sage Variety
Before we dive into the nitty-gritty, let’s talk about sage varieties. There are a few different types you can choose from, each with its own unique characteristics.
* **Common Sage (Salvia officinalis):** This is the most popular variety and the one you’ll likely find at most nurseries. It has a classic sage flavor and grayish-green leaves.
* **Purple Sage (Salvia officinalis ‘Purpurascens’):** As the name suggests, this variety has beautiful purple-tinged leaves. It’s just as flavorful as common sage and adds a lovely pop of color to your garden.
* **Golden Sage (Salvia officinalis ‘Aurea’):** This variety boasts golden-yellow leaves, making it a visually stunning addition to your herb collection. The flavor is slightly milder than common sage.
* **Tricolor Sage (Salvia officinalis ‘Tricolor’):** This variety features leaves with a mix of green, white, and pink hues. It’s a real showstopper! The flavor is similar to common sage.
I personally love growing common sage because it’s so reliable and versatile, but feel free to experiment and find the variety that you like best!
Getting Started: Seeds vs. Cuttings
You have two main options for starting your sage plant: seeds or cuttings.
* **Seeds:** Starting from seeds is a more economical option, but it takes a bit longer to see results.
* **Cuttings:** Taking cuttings from an existing sage plant is a faster way to get a new plant, but you’ll need access to a healthy sage plant to take the cuttings from.
I’ve had success with both methods, but for this guide, I’ll focus on starting from seeds since it’s the most accessible option for most people.
Materials You’ll Need
Before we get started, let’s gather all the materials you’ll need:
* Sage seeds
* Seed starting tray or small pots
* Seed starting mix or well-draining potting soil
* Spray bottle
* Grow light (optional, but recommended)
* Larger pot (for transplanting)
* Well-draining potting mix (for transplanting)
* Watering can or hose
* Pruning shears or scissors
Step-by-Step Guide: Growing Sage from Seeds
Okay, let’s get our hands dirty! Here’s a step-by-step guide to growing sage from seeds:
1. **Prepare Your Seed Starting Tray or Pots:** Fill your seed starting tray or small pots with seed starting mix or well-draining potting soil. Gently press down on the soil to create a firm surface.
2. **Sow the Seeds:** Sprinkle the sage seeds evenly over the surface of the soil. Sage seeds are quite small, so don’t worry about overcrowding them too much.
3. **Cover the Seeds:** Lightly cover the seeds with a thin layer of soil. You don’t want to bury them too deep, as they need light to germinate.
4. **Water Gently:** Use a spray bottle to gently mist the soil. You want to moisten the soil without disturbing the seeds.
5. **Provide Light and Warmth:** Place the seed starting tray or pots in a warm location with plenty of light. A sunny windowsill is a good option, but a grow light will provide more consistent results. Aim for a temperature of around 70-75°F (21-24°C).
6. **Keep the Soil Moist:** Keep the soil consistently moist, but not soggy. Check the soil daily and mist with a spray bottle as needed.
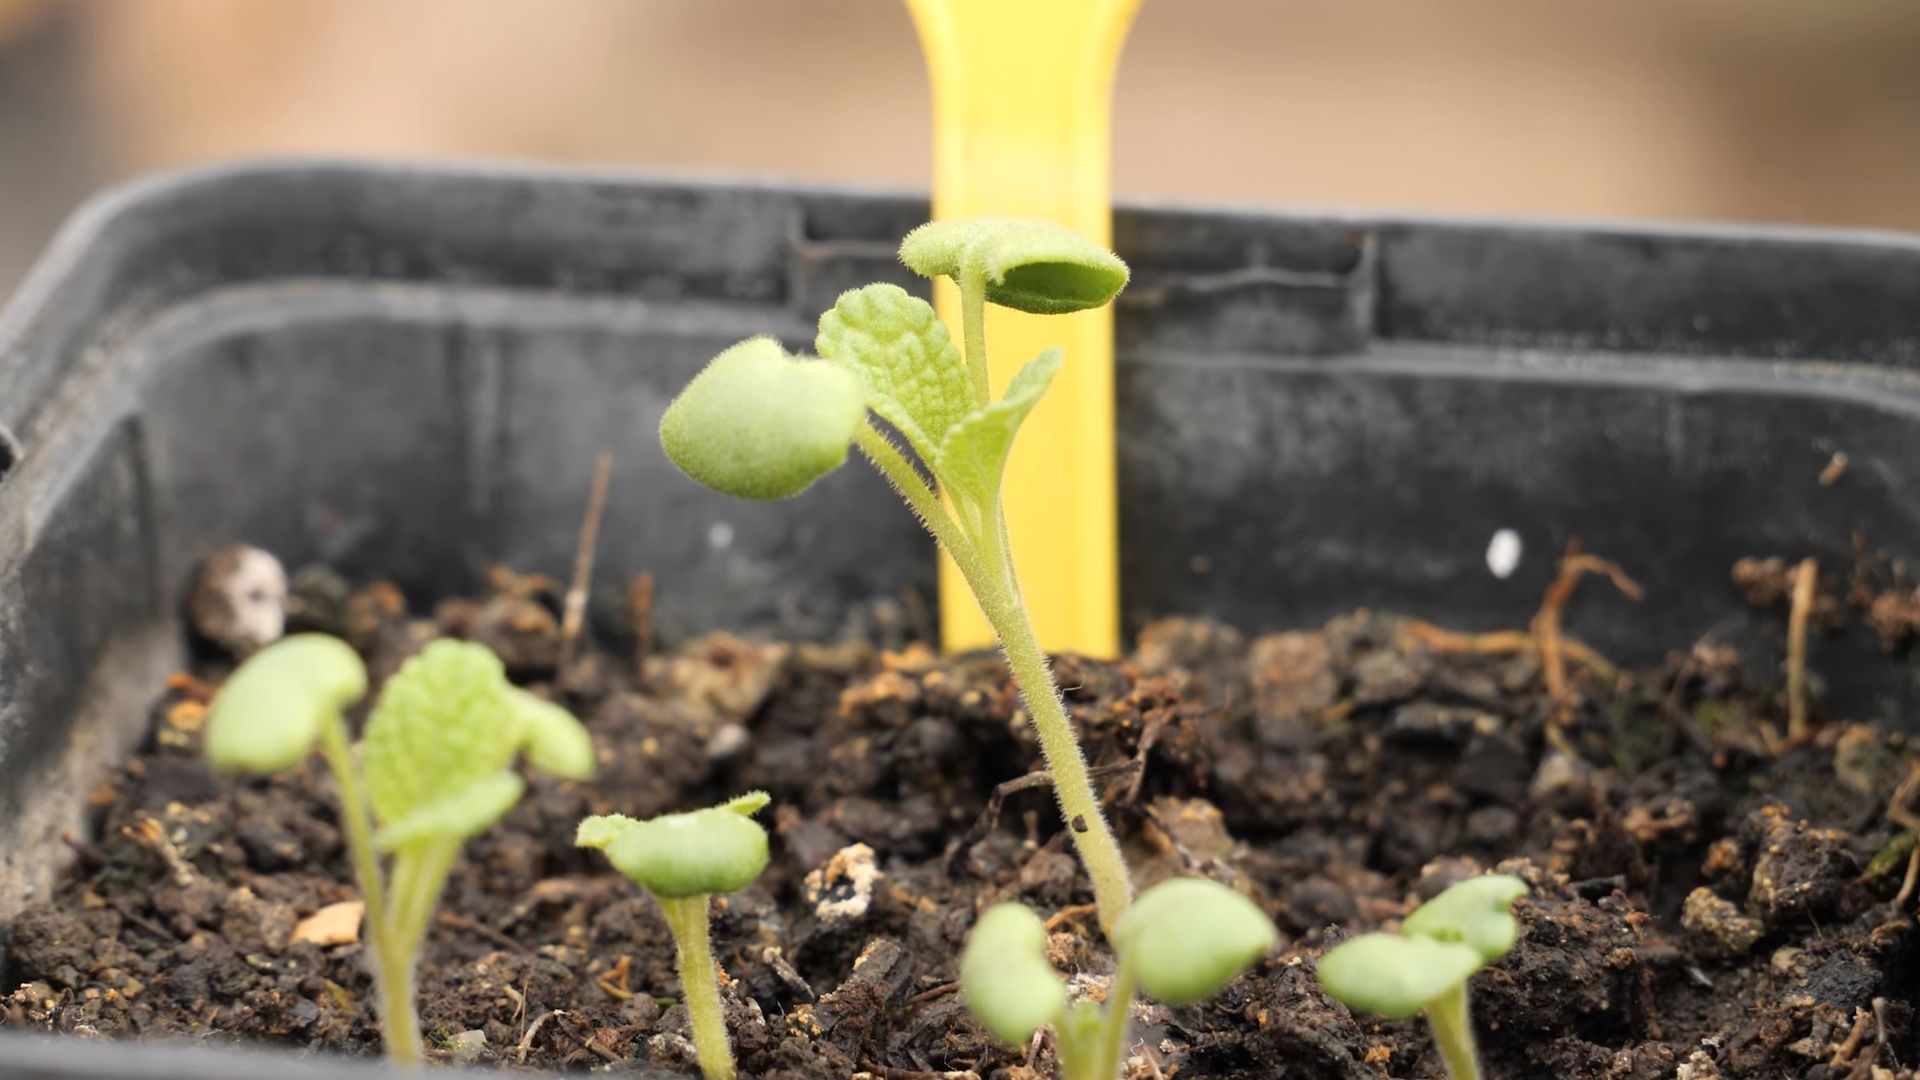
7. **Wait for Germination:** Be patient! Sage seeds can take anywhere from 10 to 21 days to germinate. Once you see tiny seedlings emerge, you’re on your way!
8. **Thin the Seedlings (If Necessary):** If you have multiple seedlings growing in the same pot, you may need to thin them out to give them enough space to grow. Snip off the weaker seedlings at the soil line, leaving the strongest one in each pot.
9. **Harden Off the Seedlings:** Before transplanting your sage seedlings outdoors, you’ll need to “harden them off.” This process gradually acclimates the seedlings to outdoor conditions. Start by placing the seedlings outdoors in a sheltered location for a few hours each day, gradually increasing the amount of time they spend outdoors over the course of a week.
10. **Transplant to a Larger Pot:** Once your sage seedlings have developed a few sets of true leaves and have been hardened off, it’s time to transplant them to a larger pot. Choose a pot that is at least 6 inches in diameter and has drainage holes.
11. **Fill the Pot with Potting Mix:** Fill the pot with well-draining potting mix.
12. **Carefully Remove the Seedling:** Gently remove the seedling from its original pot, being careful not to damage the roots.
13. **Plant the Seedling:** Place the seedling in the center of the pot and fill in around it with potting mix. Gently press down on the soil to secure the seedling.
14. **Water Thoroughly:** Water the newly transplanted sage plant thoroughly.
15. **Place in a Sunny Location:** Place the pot in a sunny location that receives at least 6 hours of sunlight per day.
16. **Water Regularly:** Water your sage plant regularly, allowing the soil to dry out slightly between waterings.
17. **Fertilize Sparingly:** Sage doesn’t need a lot of fertilizer. You can fertilize it once a month with a balanced liquid fertilizer diluted to half strength.
18. **Prune Regularly:** Pruning your sage plant will encourage bushier growth and prevent it from becoming leggy. Prune regularly by snipping off the tips of the stems.
19. **Harvest Your Sage:** You can start harvesting your sage leaves once the plant is established. Simply snip off the leaves as needed.
Caring for Your Sage Plant
Now that you’ve got your sage plant growing, here are some tips for keeping it healthy and happy:
* **Sunlight:** Sage needs at least 6 hours of sunlight per day. If you’re growing it indoors, place it near a sunny window or use a grow light.
* **Watering:** Water your sage plant regularly, allowing the soil to dry out slightly between waterings. Overwatering can lead to root rot.
* **Soil:** Sage prefers well-draining soil. Avoid heavy clay soils that retain too much moisture.
* **Fertilizing:** Sage doesn’t need a lot of fertilizer. You can fertilize it once a month with a balanced liquid fertilizer diluted to half strength.
* **Pruning:** Prune your sage plant regularly to encourage bushier growth and prevent it from becoming leggy.
* **Pests and Diseases:** Sage is generally pest and disease resistant, but it can be susceptible to aphids, spider mites, and powdery mildew. Inspect your plant regularly and treat any problems promptly.
* **Overwintering:** Sage is a perennial herb, meaning it will come back year after year. In colder climates, you may need to protect your sage plant from frost by bringing it indoors or covering it with a layer of mulch.
Harvesting and Using Your Sage
One of the best parts of growing your own sage is being able to harvest fresh leaves whenever you need them!
* **When to Harvest:** You can start harvesting sage leaves once the plant is established, usually after a few months.
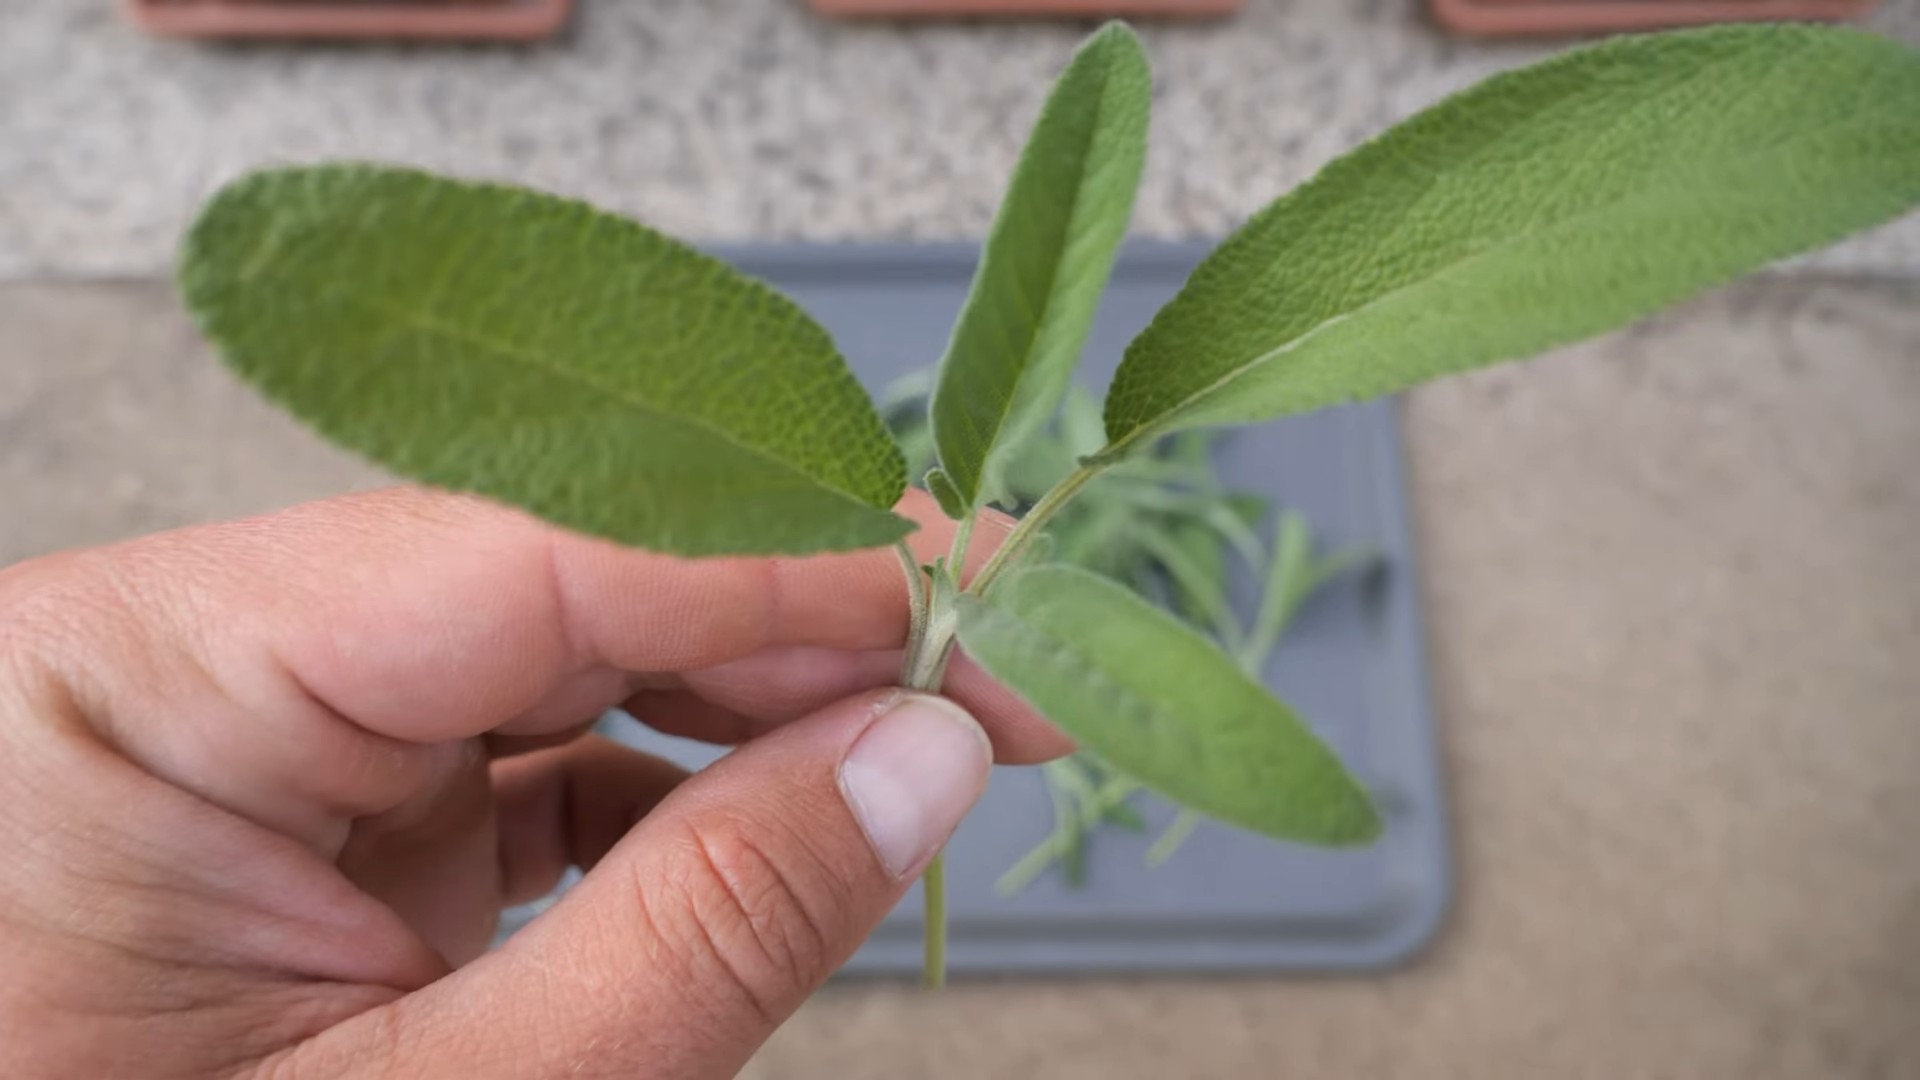
* **How to Harvest:** Simply snip off the leaves as needed using pruning shears or scissors.
* **Using Fresh Sage:** Fresh sage leaves can be used in a variety of dishes, including soups, stews, sauces, and stuffings. They can also be used to flavor meats, poultry, and vegetables.
* **Drying Sage:** If you have more sage than you can use fresh, you can dry it for later use. To dry sage, simply hang the stems upside down in a cool, dry place until the leaves are brittle. You can also dry sage in a dehydrator or oven.
Troubleshooting
Even with the best care, you might encounter some problems while growing your sage. Here are a few common issues and how to address them:
* **Yellowing Leaves:** This could be a sign of overwatering, underwatering, or nutrient deficiency. Check the soil moisture and adjust your watering accordingly. If the soil is dry, water thoroughly. If the soil is soggy, allow it to dry out before watering again. You can also try fertilizing your plant with a balanced liquid fertilizer.
* **Leggy Growth:** This is usually caused by insufficient sunlight. Move your plant to a sunnier location or use
Conclusion
So, there you have it! Growing fresh sage at home is not only achievable, but it’s also a rewarding experience that elevates your culinary creations and adds a touch of fragrant beauty to your living space. We’ve explored the simple steps, from selecting the right variety to nurturing your plant for optimal growth. But why is this DIY trick a must-try?
Firstly, the flavor of homegrown sage is simply unparalleled. Store-bought sage, often dried, can lack the vibrant, nuanced taste that fresh sage offers. Imagine the difference it will make in your Thanksgiving stuffing, your browned butter sauces, or even a simple cup of sage tea. The aroma alone is enough to transport you to a Tuscan countryside!
Secondly, growing your own sage is incredibly cost-effective. A single sage plant can provide you with a continuous supply of fresh herbs for months, even years, eliminating the need to constantly purchase expensive bunches from the grocery store. Think of all the money you’ll save!
Thirdly, it’s a sustainable choice. By growing your own herbs, you’re reducing your reliance on commercially grown produce, which often involves long-distance transportation and potentially harmful pesticides. You’re contributing to a healthier planet, one sage leaf at a time.
But the benefits don’t stop there. Growing sage can be a therapeutic and meditative activity. Tending to your plant, observing its growth, and harvesting its leaves can be a calming and grounding experience, offering a welcome respite from the stresses of daily life.
Ready to take your sage growing to the next level? Consider these variations:
* Sage Tea Blends: Experiment with different combinations of herbs to create your own unique sage tea blends. Try adding lemon balm, mint, or even a touch of honey for a soothing and flavorful beverage.
* Sage-Infused Oils: Infuse olive oil with fresh sage leaves for a delicious and aromatic cooking oil. This is perfect for drizzling over roasted vegetables, pasta dishes, or even grilled meats.
* Sage Butter: Create a compound butter with fresh sage, garlic, and lemon zest. This is a fantastic way to add flavor to grilled fish, chicken, or even crusty bread.
* Different Sage Varieties: Explore different varieties of sage, such as purple sage, golden sage, or tricolor sage. Each variety offers a unique flavor and visual appeal.
Ultimately, growing fresh sage at home is an investment in your culinary creativity, your well-being, and the environment. It’s a simple yet profound way to connect with nature and enjoy the fruits (or rather, the herbs) of your labor.
So, what are you waiting for? Grab a pot, some soil, and a sage seedling, and embark on your own sage-growing adventure. We’re confident that you’ll be amazed by the results.
We encourage you to try this DIY trick and share your experience with us! Post photos of your sage plants on social media using #HomegrownSage and tag us. We can’t wait to see your green thumbs in action! Let us know what challenges you faced, what successes you celebrated, and what delicious recipes you created with your homegrown sage. Your feedback will help us improve this guide and inspire others to embrace the joy of growing their own herbs. Happy growing!
Frequently Asked Questions (FAQ)
1. What is the best time of year to plant sage?
The best time to plant sage depends on your climate. In warmer climates, you can plant sage in the spring or fall. In colder climates, it’s best to plant sage in the spring after the last frost. This gives the plant ample time to establish itself before the winter months. If you are starting from seeds indoors, begin 6-8 weeks before the last expected frost.
2. What kind of soil does sage need?
Sage thrives in well-draining soil with a slightly alkaline pH (around 6.5 to 7.0). Avoid heavy clay soils that retain too much moisture, as this can lead to root rot. Amend your soil with compost or other organic matter to improve drainage and fertility. A mixture of potting soil, perlite, and vermiculite works well for container gardening.
3. How much sunlight does sage need?
Sage needs at least 6-8 hours of sunlight per day to thrive. Choose a sunny location in your garden or place your potted sage plant near a south-facing window. If you don’t have enough natural sunlight, you can supplement with grow lights. Insufficient sunlight can lead to leggy growth and reduced flavor.
4. How often should I water my sage plant?
Water your sage plant deeply but infrequently, allowing the soil to dry out slightly between waterings. Overwatering is a common mistake that can lead to root rot. Check the soil moisture by sticking your finger about an inch deep. If the soil feels dry, it’s time to water. Reduce watering during the winter months when the plant is dormant.
5. How do I harvest sage leaves?
You can harvest sage leaves as needed throughout the growing season. Simply snip off the leaves with scissors or pruning shears. Avoid removing more than one-third of the plant at a time, as this can stress the plant. For the best flavor, harvest sage leaves in the morning after the dew has dried.
6. How do I prune my sage plant?
Prune your sage plant in the spring to encourage bushier growth and prevent it from becoming woody. Cut back the stems by about one-third, removing any dead or damaged growth. Regular pruning will also help to maintain the plant’s shape and size.
7. Can I grow sage indoors?
Yes, you can grow sage indoors, but it requires bright light and well-draining soil. Place your potted sage plant near a south-facing window or supplement with grow lights. Be sure to water sparingly and provide good air circulation to prevent fungal diseases.
8. How do I propagate sage?
Sage can be propagated from seeds, cuttings, or layering. Cuttings are the easiest and most reliable method. Take 4-6 inch cuttings from new growth in the spring or summer. Remove the lower leaves and dip the cut end in rooting hormone. Plant the cuttings in a well-draining potting mix and keep them moist until they root.
9. What are some common pests and diseases that affect sage?
Sage is generally pest-resistant, but it can be susceptible to aphids, spider mites, and whiteflies. These pests can be controlled with insecticidal soap or neem oil. Root rot is a common disease that can affect sage plants that are grown in poorly draining soil. Prevent root rot by ensuring that your soil is well-draining and avoiding overwatering.
10. How do I dry sage leaves?
To dry sage leaves, harvest them in the morning and tie them into small bundles. Hang the bundles upside down in a cool, dry, and well-ventilated place. Alternatively, you can dry sage leaves in a dehydrator or oven at a low temperature. Once the leaves are completely dry, store them in an airtight container in a cool, dark place.
11. Can I use sage in cooking?
Absolutely! Sage is a versatile herb that can be used in a variety of dishes. It pairs well with poultry, pork, vegetables, and pasta. Use fresh or dried sage to flavor stuffing, sauces, soups, and stews. Sage is also a key ingredient in many Italian dishes, such as gnocchi with sage butter.
12. Is sage safe to consume?
Sage is generally safe to consume in moderate amounts. However, pregnant or breastfeeding women should avoid consuming large quantities of sage, as it may have hormonal effects. People with epilepsy should also avoid sage, as it may trigger seizures. Always consult with your doctor before using sage for medicinal purposes.
13. My sage plant is getting woody. What should I do?
Woody growth in sage plants is a natural part of aging. To rejuvenate your plant, prune it back hard in the spring, removing the woody stems. This will encourage new growth and improve the plant’s overall appearance. You can also propagate new plants from cuttings to replace older, woody plants.
14. How long does a sage plant live?
With proper care, a sage plant can live for several years. However, its productivity and flavor may decline after a few years. It’s a good idea to propagate new plants from cuttings every few years to ensure a continuous supply of fresh sage.
15. Can I grow sage in a container?
Yes, sage grows very well in containers. Choose a pot that is at least 12 inches in diameter and has good drainage holes. Use a well-draining potting mix and place the container in a sunny location. Water regularly, allowing the soil to dry out slightly between waterings. Fertilize occasionally with a balanced fertilizer.


Leave a Comment