
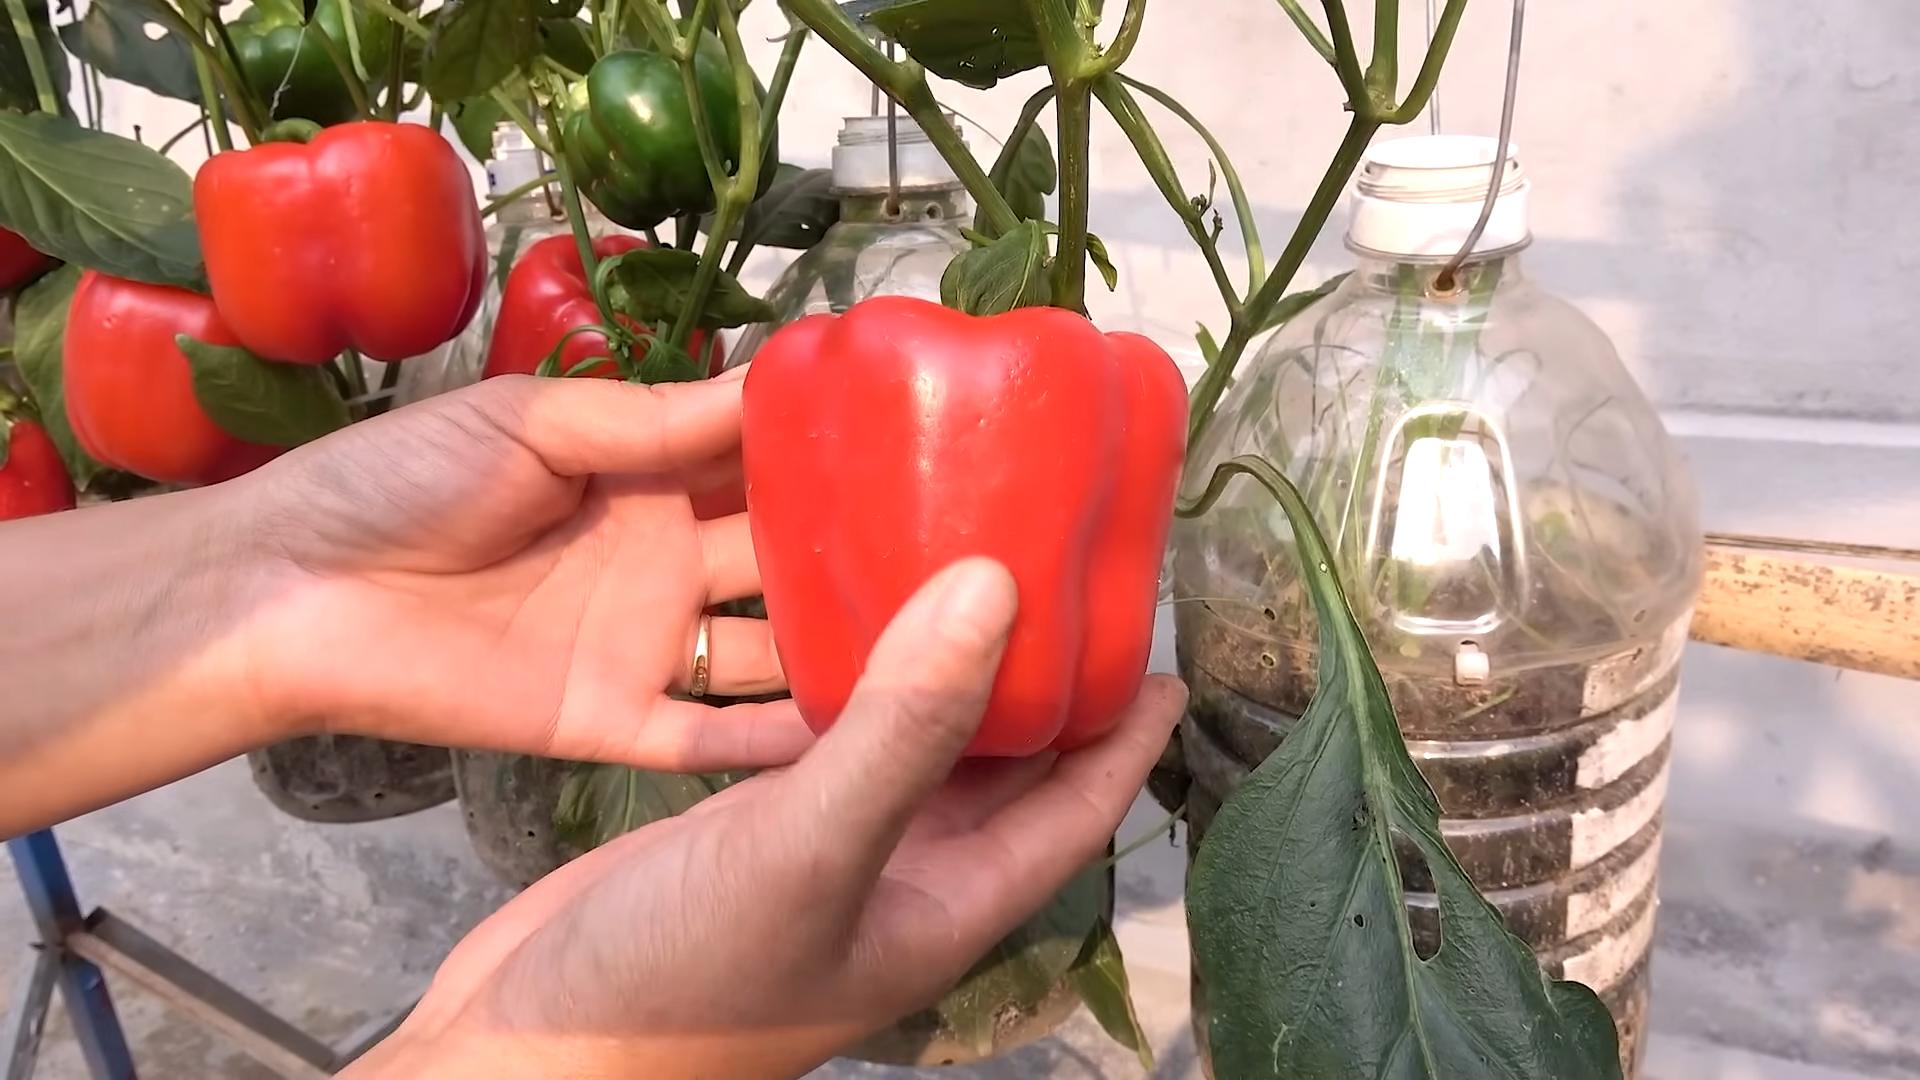
Pepper Harvest Home: Are you dreaming of a vibrant garden overflowing with colorful peppers, ready to spice up your meals? I know I am! But let’s be honest, sometimes getting those peppers from the vine to your table can feel like a challenge. That’s where a few clever DIY tricks come in handy.
For centuries, cultures around the globe have cherished peppers, not just for their fiery flavor, but also for their medicinal properties and vibrant colors. From the ancient Aztecs using chili peppers in rituals to the modern-day obsession with hot sauce, peppers have always held a special place in our hearts (and on our palates!).
But what if I told you that maximizing your pepper harvest home doesn’t require a green thumb of steel? What if simple, do-it-yourself hacks could help you extend your growing season, protect your precious plants, and ultimately, yield a bumper crop of delicious peppers?
That’s exactly what this article is all about! I’m going to share some of my favorite, tried-and-true DIY tricks and tips that will transform your pepper-growing experience. Whether you’re a seasoned gardener or just starting out, these easy-to-implement strategies will help you achieve a bountiful pepper harvest home and enjoy the fruits (or should I say, peppers!) of your labor. So, grab your gardening gloves, and let’s get started!
DIY Hot Sauce from Your Homegrown Peppers: A Fiery Guide
Okay, pepper lovers, let’s talk about turning that beautiful bounty of homegrown peppers into something truly special: homemade hot sauce! I’m going to walk you through the entire process, from prepping your peppers to bottling your liquid fire. Trust me, once you taste hot sauce made with your own peppers, you’ll never go back to store-bought.
Gathering Your Arsenal: Ingredients and Equipment
Before we dive in, let’s make sure we have everything we need. This is crucial for a smooth and enjoyable hot sauce-making experience.
Ingredients:
* Fresh Peppers: This is the star of the show! Use a variety of peppers for a complex flavor. Jalapeños, serranos, habaneros, ghost peppers – the choice is yours! Remember to handle hotter peppers with extreme care.
* Vinegar: White vinegar, apple cider vinegar, or even rice vinegar can be used. I personally love apple cider vinegar for its slightly sweet and tangy flavor.
* Garlic: Fresh garlic cloves are essential for adding depth and complexity.
* Onion: A yellow or white onion will provide a savory base.
* Salt: Kosher salt or sea salt is best.
* Optional Ingredients: These are where you can really get creative!
* Fruits: Mango, pineapple, peaches, or even berries can add sweetness and a unique flavor profile.
* Vegetables: Carrots, bell peppers, or roasted red peppers can add body and sweetness.
* Spices: Cumin, coriander, smoked paprika, or chili powder can enhance the heat and flavor.
* Herbs: Fresh oregano, thyme, or cilantro can add a fresh, vibrant note.
* Sugar or Honey: A touch of sweetness can balance the heat and acidity.
* Lime or Lemon Juice: Adds brightness and acidity.
Equipment:
* Gloves: Essential for handling hot peppers! Trust me, you don’t want to rub your eyes after touching a habanero.
* Cutting Board: A sturdy cutting board for chopping vegetables.
* Knife: A sharp knife for prepping your ingredients.
* Blender or Food Processor: To puree the ingredients. A high-speed blender will give you the smoothest sauce.
* Saucepan: For simmering the sauce.
* Wooden Spoon or Spatula: For stirring.
* Fine-Mesh Strainer or Cheesecloth: To remove seeds and skins for a smoother sauce.
* Bottles: For storing your hot sauce. You can use recycled hot sauce bottles or purchase new ones online. Make sure they are clean and sterilized.
* Funnel: For easy bottling.
* Optional:
* Kitchen Scale: For precise measurements.
* pH Meter: To ensure the safety and shelf stability of your hot sauce. (More on this later!)
* Fermentation Jar with Airlock: If you want to try fermenting your peppers.
Step-by-Step: Making Your Hot Sauce
Alright, let’s get down to business! Here’s how I make my favorite hot sauce. Remember, this is just a guideline – feel free to experiment and adjust the recipe to your liking.
1. Prepare Your Peppers (With Caution!): This is the most important step, and where those gloves come in handy.
* Wear Gloves! Seriously, don’t skip this step.
* Wash the Peppers: Rinse your peppers thoroughly under cold water.
* Remove Stems: Cut off the stems of the peppers.
* Decide on Seeds: If you want a milder sauce, remove the seeds and membranes. For a hotter sauce, leave them in. I usually remove some of the seeds, but not all, to control the heat level.
* Chop the Peppers: Roughly chop the peppers into smaller pieces.
2. Prep the Other Ingredients:
* Peel and Chop Garlic: Peel and roughly chop the garlic cloves.
* Chop Onion: Chop the onion into smaller pieces.
* Prepare Other Ingredients: If you’re using any other fruits, vegetables, or herbs, prepare them accordingly. For example, peel and chop mango, roast red peppers, or chop fresh herbs.
3. Combine Ingredients in a Blender or Food Processor:
* Add Peppers: Place the chopped peppers into the blender or food processor.
* Add Garlic and Onion: Add the chopped garlic and onion.
* Add Other Ingredients: Add any other fruits, vegetables, herbs, or spices you’re using.
* Add Vinegar: Pour in the vinegar. Start with a smaller amount and add more as needed to achieve the desired consistency.
* Add Salt: Add salt to taste.
* Blend: Blend everything until it’s a smooth puree. You may need to scrape down the sides of the blender or food processor a few times.
4. Simmer the Sauce:
* Pour into Saucepan: Pour the pureed mixture into a saucepan.
* Bring to a Simmer: Bring the sauce to a gentle simmer over medium heat.
* Simmer: Reduce the heat to low and simmer for at least 15-20 minutes, or longer for a thicker sauce. Stir occasionally to prevent sticking. Simmering helps to meld the flavors and reduce the acidity.
* Taste and Adjust: Taste the sauce and adjust the seasoning as needed. Add more salt, vinegar, sugar, or spices to your liking.
5. Strain the Sauce (Optional):
* Strain: If you want a smoother sauce, strain it through a fine-mesh strainer or cheesecloth. This will remove any seeds, skins, or pulp.
* Discard Solids: Discard the solids that are left in the strainer.
6. Bottle the Hot Sauce:
* Sterilize Bottles: Sterilize your bottles by boiling them in water for 10 minutes or running them through a dishwasher on the sanitize cycle.
* Cool Bottles Slightly: Let the bottles cool slightly before filling them.
* Fill Bottles: Use a funnel to carefully pour the hot sauce into the sterilized bottles, leaving a little headspace at the top.
* Seal Bottles: Seal the bottles tightly.
7. Cool and Store:
* Cool Completely: Let the bottles cool completely at room temperature.
* Store: Store the hot sauce in a cool, dark place. Homemade hot sauce can last for several months, or even longer, if properly stored. Refrigerate after opening.
Safety First: pH Levels and Shelf Stability
This is a crucial section, especially if you plan on making hot sauce regularly. Ensuring your hot sauce is safe to consume and has a decent shelf life requires understanding pH levels.
Why pH Matters:
The pH level of your hot sauce determines its acidity. A pH of 4.6 or lower is generally considered safe for long-term storage at room temperature because it inhibits the growth of harmful bacteria like *Clostridium botulinum*, which can cause botulism.
Testing pH:
You can test the pH of your hot sauce using pH strips or a digital pH meter. pH meters are more accurate but also more expensive.
Adjusting pH:
If your hot sauce has a pH above 4.6, you’ll need to lower it by adding more acid, typically vinegar or lemon/lime juice. Add small amounts at a time, test the pH, and repeat until you reach a safe level.
Important Considerations:
* Fermented Hot Sauce: Fermented hot sauces often have a naturally lower pH due to the lactic acid produced during fermentation. However, it’s still essential to test the pH to ensure safety.
* Ingredients: Some ingredients, like certain fruits and vegetables, can affect the pH of your hot sauce.
* Consistency: Always test the pH of each batch of hot sauce you make, as the pH can vary depending on the ingredients and process.
Fermenting Your Peppers: A Deeper Dive
Want to take your hot sauce game to the next level? Consider fermenting your peppers! Fermentation adds a unique depth of flavor and complexity that you just can’t get with a simple simmer.
What is Fermentation?
Fermentation is a process where microorganisms, like bacteria and yeast, break down sugars and starches in food, producing acids, gases, and alcohol. In the case of hot sauce, lactic acid bacteria (LAB) are the key players. They convert sugars into lactic acid, which lowers the pH, preserves the peppers, and creates that tangy

Conclusion
So, there you have it! Transforming your pepper harvest at home into a vibrant, flavorful array of culinary delights is not only achievable but surprisingly simple. We’ve walked you through the process, highlighting the ease and cost-effectiveness of preserving your precious peppers. Forget expensive store-bought options loaded with preservatives; with this DIY trick, you control every ingredient and tailor the flavors to your exact preferences.
Why is this a must-try? Because it unlocks a world of culinary possibilities. Imagine adding a fiery kick to your winter stews with peppers you nurtured yourself. Picture gifting beautifully packaged jars of homemade pepper relish to friends and family, a testament to your resourcefulness and culinary skills. This isn’t just about preserving food; it’s about preserving memories, flavors, and the satisfaction of creating something truly special.
But the fun doesn’t stop there! Feel free to experiment with variations. Add a touch of sweetness with honey or maple syrup. Infuse your peppers with aromatic herbs like rosemary or thyme. For a smoky depth, consider grilling your peppers before pickling or drying. The possibilities are endless, limited only by your imagination.
Don’t be afraid to get creative and make this DIY pepper preservation method your own!
We’re confident that once you experience the joy of transforming your pepper harvest at home, you’ll never look at store-bought peppers the same way again. It’s a rewarding process that connects you to the food you eat and empowers you to create delicious, healthy meals.
So, gather your peppers, follow our simple steps, and embark on this exciting culinary adventure. We can’t wait to hear about your experiences! Share your photos, tips, and variations in the comments below. Let’s build a community of pepper-loving enthusiasts who are passionate about preserving the bounty of their gardens. Happy harvesting and happy preserving! Let us know how your pepper harvest at home goes.
Frequently Asked Questions (FAQs)
Q: What types of peppers are best suited for this DIY preservation method?
A: The beauty of this method is its versatility! You can use virtually any type of pepper, from mild bell peppers to scorching hot habaneros. Consider the final product you desire. For pickling, firmer peppers like jalapenos, banana peppers, and bell peppers work well. For drying and making chili flakes, thinner-walled peppers like cayenne, Thai chilies, and serranos are ideal. For sauces and relishes, a mix of peppers can create a complex and interesting flavor profile. Experiment and discover your favorites! Remember to always handle hot peppers with gloves to avoid skin irritation.
Q: How long will my preserved peppers last?
A: The shelf life depends on the preservation method. Properly pickled peppers, stored in a sterilized jar and processed correctly, can last for up to a year or even longer in a cool, dark place. Dried peppers, stored in an airtight container, can also last for a year or more. Pepper sauces and relishes, especially those with a high vinegar content, can last for several months in the refrigerator after opening. Always check for signs of spoilage, such as mold, discoloration, or an off odor, before consuming. When in doubt, throw it out.
Q: Do I need any special equipment for this DIY project?
A: The equipment needed depends on the preservation method you choose. For pickling, you’ll need canning jars, lids, and rings, as well as a large pot for boiling the jars. A jar lifter is also highly recommended to safely handle hot jars. For drying, you can use a dehydrator, an oven set to a very low temperature, or simply air-dry them in a well-ventilated area. For sauces and relishes, you’ll need basic kitchen equipment like a blender or food processor, pots, and pans. A good knife and cutting board are essential for all methods.
Q: How do I sterilize my canning jars?
A: Sterilizing your canning jars is crucial for preventing spoilage. There are several methods you can use. The most common method is to boil the jars in a large pot of water for 10 minutes. Make sure the jars are completely submerged. You can also sterilize them in the dishwasher on the sanitize cycle or in the oven at 250°F (120°C) for 20 minutes. Always sterilize your lids and rings as well, following the manufacturer’s instructions.
Q: Can I adjust the level of spiciness in my preserved peppers?
A: Absolutely! You have complete control over the spiciness. If you prefer a milder flavor, remove the seeds and membranes from the peppers before preserving them. These parts contain most of the capsaicin, the compound that makes peppers hot. You can also add other ingredients to balance the heat, such as sugar, honey, or vinegar. If you want to increase the spiciness, use hotter varieties of peppers or add a pinch of cayenne pepper to your recipes.
Q: What are some creative ways to use my preserved peppers?
A: The possibilities are endless! Pickled peppers are delicious on sandwiches, salads, and pizzas. Dried peppers can be ground into chili flakes and used to season soups, stews, and sauces. Pepper sauces and relishes can be used as condiments for grilled meats, vegetables, and eggs. You can also add them to dips, spreads, and marinades for an extra kick of flavor. Get creative and experiment with different combinations to discover your favorite ways to use your preserved peppers.
Q: What if I don’t have a garden and can’t grow my own peppers?
A: No problem! You can still enjoy this DIY preservation method by purchasing peppers from your local farmers market or grocery store. Look for fresh, high-quality peppers that are free from blemishes and bruises. Choose peppers that are in season for the best flavor and price. Even store-bought peppers can be transformed into delicious and unique culinary creations with this simple DIY trick.
Q: Is it safe to can peppers at home? I’ve heard there are risks.
A: Canning peppers at home is safe as long as you follow proper canning procedures. Peppers are a low-acid food, which means they require special handling to prevent the growth of botulism bacteria. Always use a tested recipe from a reputable source, such as the USDA Complete Guide to Home Canning or a university extension service. Add acid to your recipes in the form of vinegar or lemon juice to ensure a safe pH level. Process your jars in a boiling water bath or pressure canner according to the recipe instructions. Always check for a proper seal before storing your jars. If you are unsure about any aspect of the canning process, consult with a canning expert or take a canning class.
Q: Can I freeze my peppers instead of pickling or drying them?
A: Yes, freezing is another excellent way to preserve your pepper harvest at home. To freeze peppers, wash and dry them thoroughly. You can freeze them whole, sliced, or diced. For best results, blanch the peppers in boiling water for 2-3 minutes, then immediately plunge them into ice water to stop the cooking process. This helps to preserve their color and texture. Drain the peppers well and pack them into freezer bags or containers, removing as much air as possible. Frozen peppers can last for up to a year in the freezer. They are best used in cooked dishes, as they may become slightly soft after thawing.

Leave a Comment