
Pot Spinach Harvest: Imagine stepping outside your door and gathering fresh, vibrant spinach leaves for your salad, all grown in your own backyard! Sounds idyllic, right? Well, it’s more achievable than you think! For centuries, cultivating your own food has been a cornerstone of self-sufficiency and a connection to the earth. From ancient Roman kitchen gardens to the victory gardens of wartime, growing your own produce has always been a way to ensure fresh, healthy food.
But let’s be honest, not everyone has acres of land or hours to dedicate to gardening. That’s where the magic of container gardening and clever DIY tricks comes in! I’m here to show you how to maximize your pot spinach harvest, even in the smallest of spaces. Whether you’re a seasoned gardener or a complete beginner, these simple hacks will help you enjoy a bountiful crop of delicious spinach right at your fingertips.
Why is this important? Because fresh, homegrown spinach tastes infinitely better than anything you can buy at the store. Plus, you know exactly what’s gone into growing it – no pesticides or mystery ingredients! So, let’s dive into some easy and effective DIY methods to boost your spinach yield and enjoy the fruits (or rather, leaves!) of your labor. Get ready to transform your patio, balcony, or even a sunny windowsill into a thriving spinach oasis!

Harvesting Spinach from Your Container Garden: A Step-by-Step Guide
Hey there, fellow gardeners! So, you’ve nurtured your spinach plants in pots, and now they’re looking lush and leafy. Awesome! It’s time to reap the rewards of your hard work. Harvesting spinach is actually pretty straightforward, but doing it right ensures you get the most out of your plants and encourages them to keep producing. Let’s dive into how to harvest spinach from your container garden like a pro.
When to Harvest Your Spinach
Knowing when to harvest is key. You don’t want to pick too early and miss out on flavor, or wait too long and end up with tough, bitter leaves. Here’s what to look for:
* Leaf Size: Aim for leaves that are at least 4-6 inches long. This is usually when they have the best flavor and texture.
* Plant Maturity: Generally, spinach is ready to harvest about 40-50 days after planting from seed. Check your seed packet for specific information.
* Avoid Bolting: Bolting (when the plant sends up a flower stalk) makes the leaves bitter. Hot weather is a major trigger for bolting. If you see a flower stalk starting to form, harvest all the remaining leaves immediately.
* Successive Harvesting: You don’t have to harvest the entire plant at once. You can pick outer leaves as needed, allowing the inner leaves to continue growing. This extends your harvest period.
Tools You’ll Need
Luckily, you don’t need a ton of fancy equipment. Here’s what I usually grab:
* Sharp Scissors or Garden Snips: A clean, sharp cutting tool is essential for a clean cut that minimizes damage to the plant.
* Basket or Container: To collect your freshly harvested spinach.
* Water (Optional): For rinsing the leaves if they’re a bit dusty or dirty.
Step-by-Step Harvesting Instructions
Alright, let’s get down to the nitty-gritty. Here’s how I harvest my container spinach:
1. Choose Your Harvesting Time: The best time to harvest spinach is in the morning, after the dew has dried but before the sun gets too hot. The leaves will be crisper and more flavorful.
2. Inspect Your Plants: Take a good look at your spinach plants. Identify the outer leaves that are large enough to harvest. Check for any signs of pests or diseases. Remove any yellowing or damaged leaves.
3. Prepare Your Cutting Tool: Make sure your scissors or snips are clean and sharp. This will help prevent the spread of disease and ensure a clean cut. I usually wipe mine down with rubbing alcohol.
4. Harvest Individual Leaves (Cut-and-Come-Again Method): This is my preferred method for extending the harvest.
* Locate the Leaf Stem: Find the base of the leaf stem where it connects to the main stem of the plant.
* Make the Cut: Using your scissors or snips, carefully cut the leaf stem about an inch above the soil line. Be careful not to damage the central bud of the plant, as this is where new leaves will emerge.
* Repeat: Continue harvesting the outer leaves, working your way around the plant. Leave the smaller, inner leaves to continue growing.
5. Harvest the Entire Plant (If Necessary): If your plant is bolting or if you want to clear space for other plants, you can harvest the entire plant.
* Cut at the Base: Using your scissors or snips, cut the entire plant off at the base, about an inch above the soil line.
* Clean the Roots: Discard the roots or compost them.
6. Collect Your Harvest: Place the harvested spinach leaves in your basket or container.
7. Rinse (Optional): If the leaves are dusty or dirty, gently rinse them under cool water. Be careful not to bruise the leaves.
8. Dry the Leaves: Gently pat the leaves dry with a clean towel or spin them in a salad spinner. This will help prevent them from becoming slimy in storage.
Storing Your Freshly Harvested Spinach
Proper storage is crucial to keeping your spinach fresh and delicious. Here’s what I do:
* Refrigerate Immediately: Store the spinach in the refrigerator as soon as possible after harvesting.
* Use a Storage Container: Place the dry spinach leaves in a resealable plastic bag or a storage container lined with a paper towel. The paper towel will absorb excess moisture and help prevent the leaves from wilting.
* Don’t Overpack: Avoid overpacking the container, as this can crush the leaves and shorten their shelf life.
* Use Within a Week: Freshly harvested spinach is best used within a week.
Troubleshooting Common Issues
Sometimes things don’t go exactly as planned. Here are a few common issues you might encounter and how to deal with them:
* Yellowing Leaves: Yellowing leaves can be a sign of nutrient deficiency, overwatering, or underwatering. Make sure your plants are getting enough nutrients and that the soil is draining well.
* Pest Infestation: Keep an eye out for pests like aphids, spider mites, and leaf miners. Treat infestations promptly with insecticidal soap or neem oil.
* Bolting: As mentioned earlier, bolting is triggered by hot weather. To prevent bolting, try to plant your spinach in a shady location or provide shade during the hottest part of the day. Choose bolt-resistant varieties.
* Bitter Taste: If your spinach tastes bitter, it’s likely due to bolting or overmaturity. Harvest the leaves when they’re young and tender.
Encouraging Continued Growth
After harvesting, there are a few things you can do to encourage your spinach plants to keep producing:
* Fertilize: Replenish the nutrients in the soil by fertilizing your plants with a balanced fertilizer. Follow the instructions on the fertilizer package.
* Water Regularly: Keep the soil consistently moist, but not waterlogged.
* Remove Dead Leaves: Remove any dead or yellowing leaves to prevent disease and encourage new growth.
* Provide Shade: If the weather is hot, provide shade to prevent bolting.
Enjoying Your Harvest
Now for the best part – enjoying your homegrown spinach! Here are a few ideas:
* Salads: Fresh spinach is a delicious addition to salads.
* Smoothies: Add a handful of spinach to your smoothies for a boost of nutrients.
* Sautéed Spinach: Sauté spinach with garlic and olive oil for a simple and healthy side dish.
* Spinach Dip: Use your fresh spinach to make a creamy and delicious spinach dip.
* Soups and Stews: Add spinach to soups and stews for extra flavor and nutrients.
Additional Tips for Success
Here are a few extra tips to help you get the most out of your container spinach:
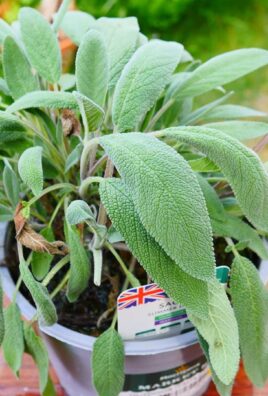
* Choose the Right Container: Make sure your container is large enough to accommodate the spinach plants. A container that is at least 6-8 inches deep and wide is ideal.
* Use High-Quality Potting Mix: Use a well-draining potting mix that is rich in organic matter.
* Provide Adequate Sunlight: Spinach needs at least 4-6 hours of sunlight per day.
* Water Wisely: Water your spinach plants regularly, but avoid overwatering.
* Protect from Pests: Keep an eye out for pests and diseases, and take action promptly if you notice any problems.
So there you have it! Harvesting spinach from your container garden is a rewarding experience. By following these steps, you can enjoy a continuous supply of fresh, delicious spinach throughout the growing season. Happy gardening!

Conclusion
So, there you have it! Mastering the art of harvesting spinach from your own pots is not just a gardening endeavor; it’s a gateway to fresher, more flavorful meals and a deeper connection with the food you consume. We’ve walked through the simple yet effective steps to ensure you’re getting the most out of your potted spinach, and hopefully, you’re feeling confident and ready to get your hands dirty.
Why is this DIY trick a must-try? Because it puts you in control. You dictate the quality, the freshness, and even the variety of spinach you enjoy. Store-bought spinach, while convenient, often lacks the vibrant taste and nutritional punch of homegrown greens. Plus, there’s an undeniable satisfaction in nurturing a plant from seed (or seedling) to harvest, knowing you’ve played a direct role in bringing healthy food to your table.
But the beauty of this method lies in its adaptability. Feel free to experiment with different spinach varieties. Try baby spinach for tender, delicate leaves perfect for salads, or opt for a more robust variety like Bloomsdale for cooking. Consider companion planting in your pots. Marigolds can deter pests, while basil can enhance the flavor of your spinach. The possibilities are endless!
Don’t be afraid to adjust the watering schedule based on your local climate and the specific needs of your spinach. Observe your plants closely, and you’ll quickly learn to recognize the signs of overwatering or underwatering. Remember, consistent moisture is key, but soggy soil is a no-no.
Furthermore, think about succession planting. By sowing new seeds every few weeks, you can ensure a continuous supply of fresh spinach throughout the growing season. This is especially beneficial if you’re a regular spinach consumer or if you’re looking to share your harvest with friends and neighbors.
Ultimately, growing and harvesting your own pot spinach is a rewarding experience that connects you to the natural world and provides you with a delicious and nutritious food source. It’s a simple, sustainable, and satisfying way to enhance your culinary creations and improve your overall well-being.
We wholeheartedly encourage you to give this DIY trick a try. Start small, learn as you go, and don’t be discouraged by initial setbacks. Gardening is a journey, and every mistake is an opportunity to learn and grow.
And most importantly, we want to hear about your experiences! Share your photos, tips, and stories in the comments below. Let us know what varieties of spinach you’re growing, what challenges you’ve encountered, and what successes you’ve celebrated. Your feedback will not only inspire others but also help us refine and improve this guide for future gardeners. So, grab your pots, your seeds, and your gardening gloves, and get ready to enjoy the delicious rewards of homegrown pot spinach!
Frequently Asked Questions (FAQ)
What kind of pot is best for growing spinach?
The ideal pot for growing spinach should be at least 6-8 inches deep and wide. This provides enough space for the roots to develop properly. Choose a pot made from a breathable material like terracotta or a durable plastic container with drainage holes. Good drainage is crucial to prevent root rot. You can also use grow bags, which are lightweight and allow for excellent aeration. Consider the location where you’ll be placing the pot and choose a size that’s manageable to move if needed.
How often should I water my potted spinach?
Watering frequency depends on several factors, including the weather, the type of pot you’re using, and the stage of growth of your spinach. Generally, you should aim to keep the soil consistently moist but not waterlogged. Check the soil moisture by sticking your finger about an inch deep. If it feels dry, it’s time to water. In hot, sunny weather, you may need to water daily, while in cooler, cloudier weather, you may only need to water every few days. Avoid overhead watering, as this can promote fungal diseases. Instead, water at the base of the plant.
What kind of soil should I use for growing spinach in pots?
Spinach thrives in well-draining, nutrient-rich soil. A good potting mix specifically formulated for vegetables is ideal. You can also create your own mix by combining equal parts of compost, peat moss (or coconut coir), and perlite or vermiculite. Compost provides essential nutrients, peat moss (or coconut coir) helps retain moisture, and perlite or vermiculite improves drainage. Avoid using garden soil, as it can be too heavy and may contain pests or diseases.
How much sunlight does potted spinach need?
Spinach needs at least 4-6 hours of sunlight per day to thrive. However, in hot climates, it can benefit from some afternoon shade to prevent the leaves from wilting. If you’re growing spinach indoors, place it near a sunny window or use grow lights to supplement natural light. Rotate the pot regularly to ensure even growth.
When is the best time to harvest my potted spinach?
You can start harvesting spinach leaves when they are about 4-6 inches long. This is usually about 4-6 weeks after planting. Harvest the outer leaves first, leaving the inner leaves to continue growing. This cut-and-come-again method allows you to harvest spinach continuously for several weeks. Avoid harvesting during the hottest part of the day, as the leaves will be more prone to wilting.
How do I prevent pests and diseases from affecting my potted spinach?
Regularly inspect your spinach plants for signs of pests or diseases. Common pests include aphids, spider mites, and slugs. You can control aphids and spider mites by spraying the plants with insecticidal soap or neem oil. Slugs can be handpicked or trapped using beer traps. To prevent fungal diseases, ensure good air circulation around the plants and avoid overhead watering. Remove any infected leaves promptly. Companion planting with marigolds can also help deter pests.
Can I grow spinach in pots during the winter?
Yes, you can grow spinach in pots during the winter, especially in milder climates. In colder climates, you may need to provide some protection from frost, such as moving the pots indoors or covering them with a frost blanket. Choose a cold-hardy variety of spinach for winter growing.
How do I fertilize my potted spinach?
Spinach is a heavy feeder, so it benefits from regular fertilization. Use a balanced liquid fertilizer diluted to half strength every 2-3 weeks. You can also amend the soil with compost or worm castings at planting time. Avoid over-fertilizing, as this can lead to excessive leaf growth and reduced flavor.
What are some good companion plants for spinach in pots?
Good companion plants for spinach include radishes, lettuce, carrots, onions, garlic, and marigolds. Radishes and lettuce mature quickly and can be harvested before the spinach gets too large. Carrots help loosen the soil, while onions and garlic deter pests. Marigolds also deter pests and add a splash of color to your garden.
My spinach leaves are turning yellow. What could be the problem?
Yellowing spinach leaves can be caused by several factors, including nutrient deficiencies, overwatering, underwatering, or pests. Check the soil moisture and adjust your watering schedule accordingly. Fertilize the plants with a balanced fertilizer to address any nutrient deficiencies. Inspect the leaves for signs of pests and treat them as needed. If the yellowing is widespread and accompanied by other symptoms, such as wilting or spots, it could be a sign of a fungal disease. Remove any infected leaves and treat the plants with a fungicide if necessary.

Leave a Comment