
Sun Parsley Kitchen Garden: Imagine stepping outside your kitchen door and snipping fresh, vibrant sun parsley to add a burst of flavor to your meal. Sounds idyllic, right? Well, it’s more achievable than you think! For centuries, cultivating herbs and vegetables close to home has been a cornerstone of self-sufficiency and culinary delight. From ancient Roman herb gardens to the cottage gardens of the English countryside, the practice of growing your own food has deep roots in human history.
But let’s be honest, not everyone has acres of land or the time to dedicate to a sprawling garden. That’s where the magic of DIY home gardening tricks comes in! I’m here to show you how to create your very own thriving Sun Parsley Kitchen Garden, even if you’re short on space, time, or experience. We’ll explore simple, effective hacks that will have you harvesting fresh herbs in no time.
Why do you need these DIY tricks? Because store-bought herbs can be expensive and often lack the vibrant flavor of freshly grown ones. Plus, there’s nothing quite like the satisfaction of nurturing a plant from seed to table. So, let’s ditch the wilted supermarket herbs and embark on a journey to create your own flourishing sun parsley haven. Get ready to unlock the secrets to a bountiful and flavorful kitchen garden!
Creating Your Own Thriving Sun Parsley Kitchen Garden
Hey there, fellow gardening enthusiasts! I’m so excited to share my experience with creating a sun parsley kitchen garden. It’s a fantastic way to have fresh, flavorful herbs right at your fingertips, and it’s surprisingly easy to set up, even if you’re a beginner. Sun parsley, also known as Italian parsley, is a culinary staple, and growing your own ensures you always have a supply of this versatile herb. Let’s dive in!
Choosing the Right Location and Preparing the Soil
Before we even think about planting, we need to find the perfect spot and get the soil ready. This is crucial for healthy, happy sun parsley plants.
* Sunlight is Key: Sun parsley, as the name suggests, loves sunshine! Aim for a location that receives at least 6 hours of direct sunlight per day. A south-facing garden bed or a sunny balcony is ideal.
* Soil Drainage Matters: Parsley doesn’t like soggy feet. Make sure your chosen spot has well-draining soil. If your soil is heavy clay, you’ll need to amend it.
* Soil Testing (Optional but Recommended): A soil test can tell you the pH level and nutrient content of your soil. Parsley prefers a slightly acidic to neutral pH (around 6.0 to 7.0). You can buy a soil testing kit at most garden centers.
Step-by-Step Soil Preparation:
1. Clear the Area: Remove any grass, weeds, rocks, or debris from the planting area. A clean slate is essential.
2. Loosen the Soil: Use a garden fork or tiller to loosen the soil to a depth of at least 12 inches. This will improve drainage and allow the parsley roots to penetrate easily.
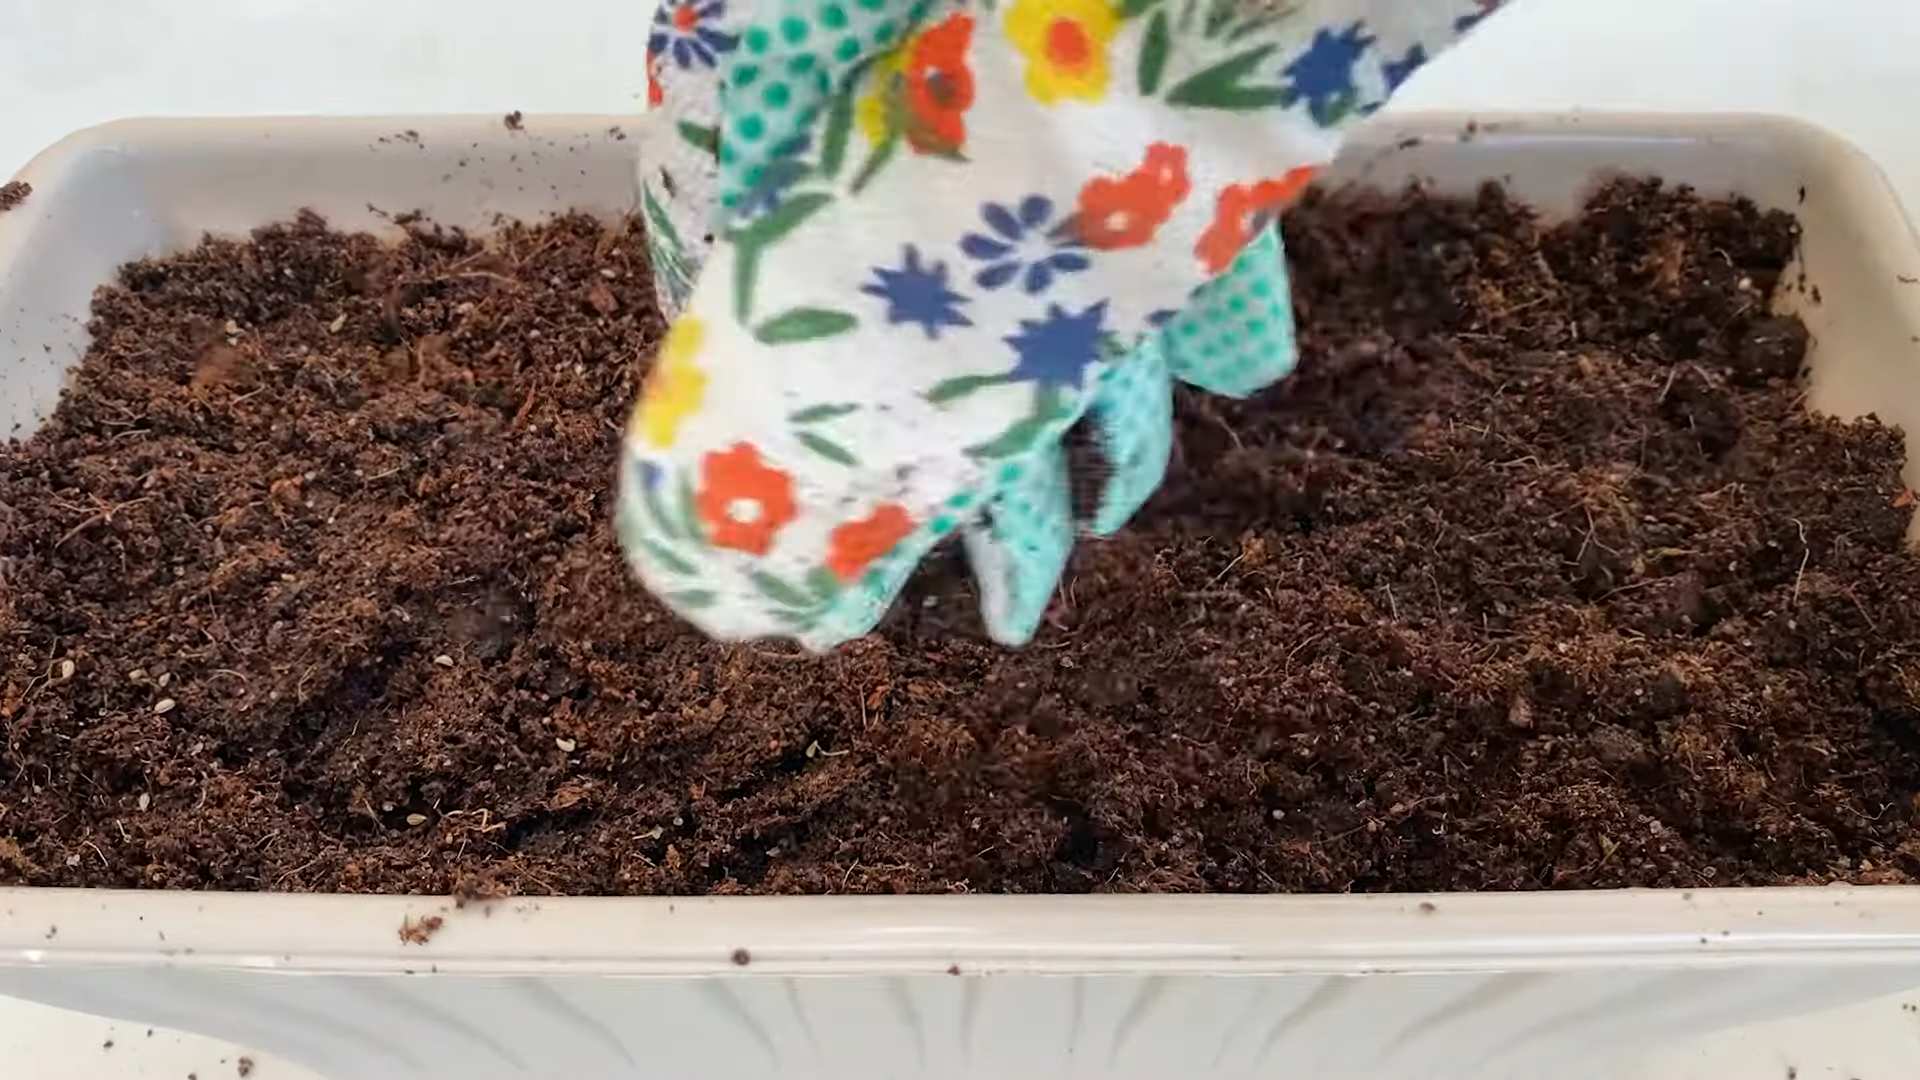
3. Amend the Soil: This is where the magic happens! Incorporate plenty of organic matter, such as compost, well-rotted manure, or peat moss. This will improve soil structure, drainage, and fertility. I usually add a generous layer (about 2-3 inches) of compost and mix it in thoroughly.
4. Check the pH (If Tested): If your soil test indicates a pH that’s too high (alkaline), you can lower it by adding sulfur or peat moss. If it’s too low (acidic), you can raise it by adding lime. Follow the instructions on the product label carefully.
5. Rake Smooth: Once you’ve amended the soil, rake the area smooth to create a level planting surface.
Starting Your Sun Parsley: Seeds vs. Seedlings
You have two main options for starting your sun parsley: from seeds or from seedlings (also known as transplants). Both have their pros and cons.
* Seeds: Starting from seeds is more economical, but it takes longer, and parsley seeds can be a bit slow to germinate.
* Seedlings: Seedlings offer a head start, allowing you to harvest sooner. They’re also a good option if you’re short on time or don’t have a lot of space for starting seeds indoors.
I’ve tried both methods, and I personally prefer starting with seedlings because I’m impatient and love seeing results quickly! However, starting from seeds is definitely rewarding.
Starting from Seeds (Indoor or Direct Sowing)
Indoor Seed Starting:
1. Choose Your Containers: Use seed trays, small pots, or even recycled containers with drainage holes.
2. Fill with Seed Starting Mix: Use a sterile seed starting mix to prevent fungal diseases.
3. Sow the Seeds: Sprinkle the parsley seeds evenly over the surface of the soil. Gently press them down, but don’t bury them too deeply (about 1/4 inch deep is sufficient).
4. Water Gently: Water the seeds gently with a spray bottle or watering can to avoid disturbing them.
5. Provide Warmth and Light: Cover the seed trays with a clear plastic dome or plastic wrap to create a humid environment. Place them in a warm location (around 70-75°F) and provide plenty of light. A sunny windowsill or a grow light works well.
6. Keep the Soil Moist: Check the soil regularly and water as needed to keep it consistently moist, but not soggy.
7. Remove the Cover: Once the seeds germinate (usually in 2-3 weeks, but parsley can be slow!), remove the plastic cover.
8. Thin the Seedlings: Once the seedlings have their first true leaves (the second set of leaves), thin them out, leaving only the strongest seedlings.
9. Harden Off: Before transplanting the seedlings outdoors, you’ll need to harden them off. This means gradually exposing them to outdoor conditions over a period of 7-10 days. Start by placing them in a sheltered location for a few hours each day, gradually increasing the amount of time they spend outdoors.
Direct Sowing:
1. Wait for Warm Weather: Direct sow parsley seeds after the last frost, when the soil has warmed up to at least 50°F.
2. Prepare the Soil: Make sure the soil is well-prepared as described in the previous section.
3. Sow the Seeds: Sow the seeds directly into the garden bed, spacing them about 1 inch apart. Cover them with a thin layer of soil (about 1/4 inch deep).
4. Water Gently: Water the seeds gently to keep the soil moist.
5. Thin the Seedlings: Once the seedlings emerge, thin them out, spacing them about 6-8 inches apart.
Starting from Seedlings (Transplants)
1. Choose Healthy Seedlings: Select seedlings that are healthy, vigorous, and free from pests and diseases. Look for plants with bright green leaves and a strong root system.
2. Dig Holes: Dig holes in the prepared soil, spacing them about 6-8 inches apart. The holes should be slightly larger than the root ball of the seedlings.
3. Remove Seedlings from Containers: Gently remove the seedlings from their containers, being careful not to damage the roots. If the roots are pot-bound (tightly circling the root ball), gently loosen them before planting.
4. Plant the Seedlings: Place the seedlings in the holes, making sure the top of the root ball is level with the surrounding soil.
5. Fill with Soil: Fill the holes with soil and gently firm the soil around the seedlings.
6. Water Thoroughly: Water the seedlings thoroughly after planting.
Caring for Your Sun Parsley Plants
Once your sun parsley plants are in the ground, it’s important to provide them with proper care to ensure they thrive.
* Watering: Water regularly, especially during dry spells. Parsley prefers consistently moist soil, but avoid overwatering, which can lead to root rot. I usually water deeply once or twice a week, depending on the weather.
* Fertilizing: Parsley is a relatively light feeder, but it will benefit from occasional fertilization. You can use a balanced organic fertilizer or compost tea. I like to side-dress my parsley plants with compost every few weeks.
* Weeding: Keep the area around your parsley plants free of weeds. Weeds compete with parsley for water and nutrients.
* Mulching: Apply a layer of mulch around your parsley plants to help retain moisture, suppress weeds, and regulate soil temperature. Straw, wood chips, or shredded leaves work well.
* Pest and Disease Control: Parsley is generally resistant to pests and diseases, but occasionally, aphids or spider mites may become a problem. You can control these pests with insecticidal soap or neem oil. If you notice any signs of disease, such as yellowing leaves or fungal spots, remove the affected leaves and treat the plants with a fungicide.
Harvesting Your Sun Parsley
The best part of growing your own sun parsley is, of course, harvesting it!
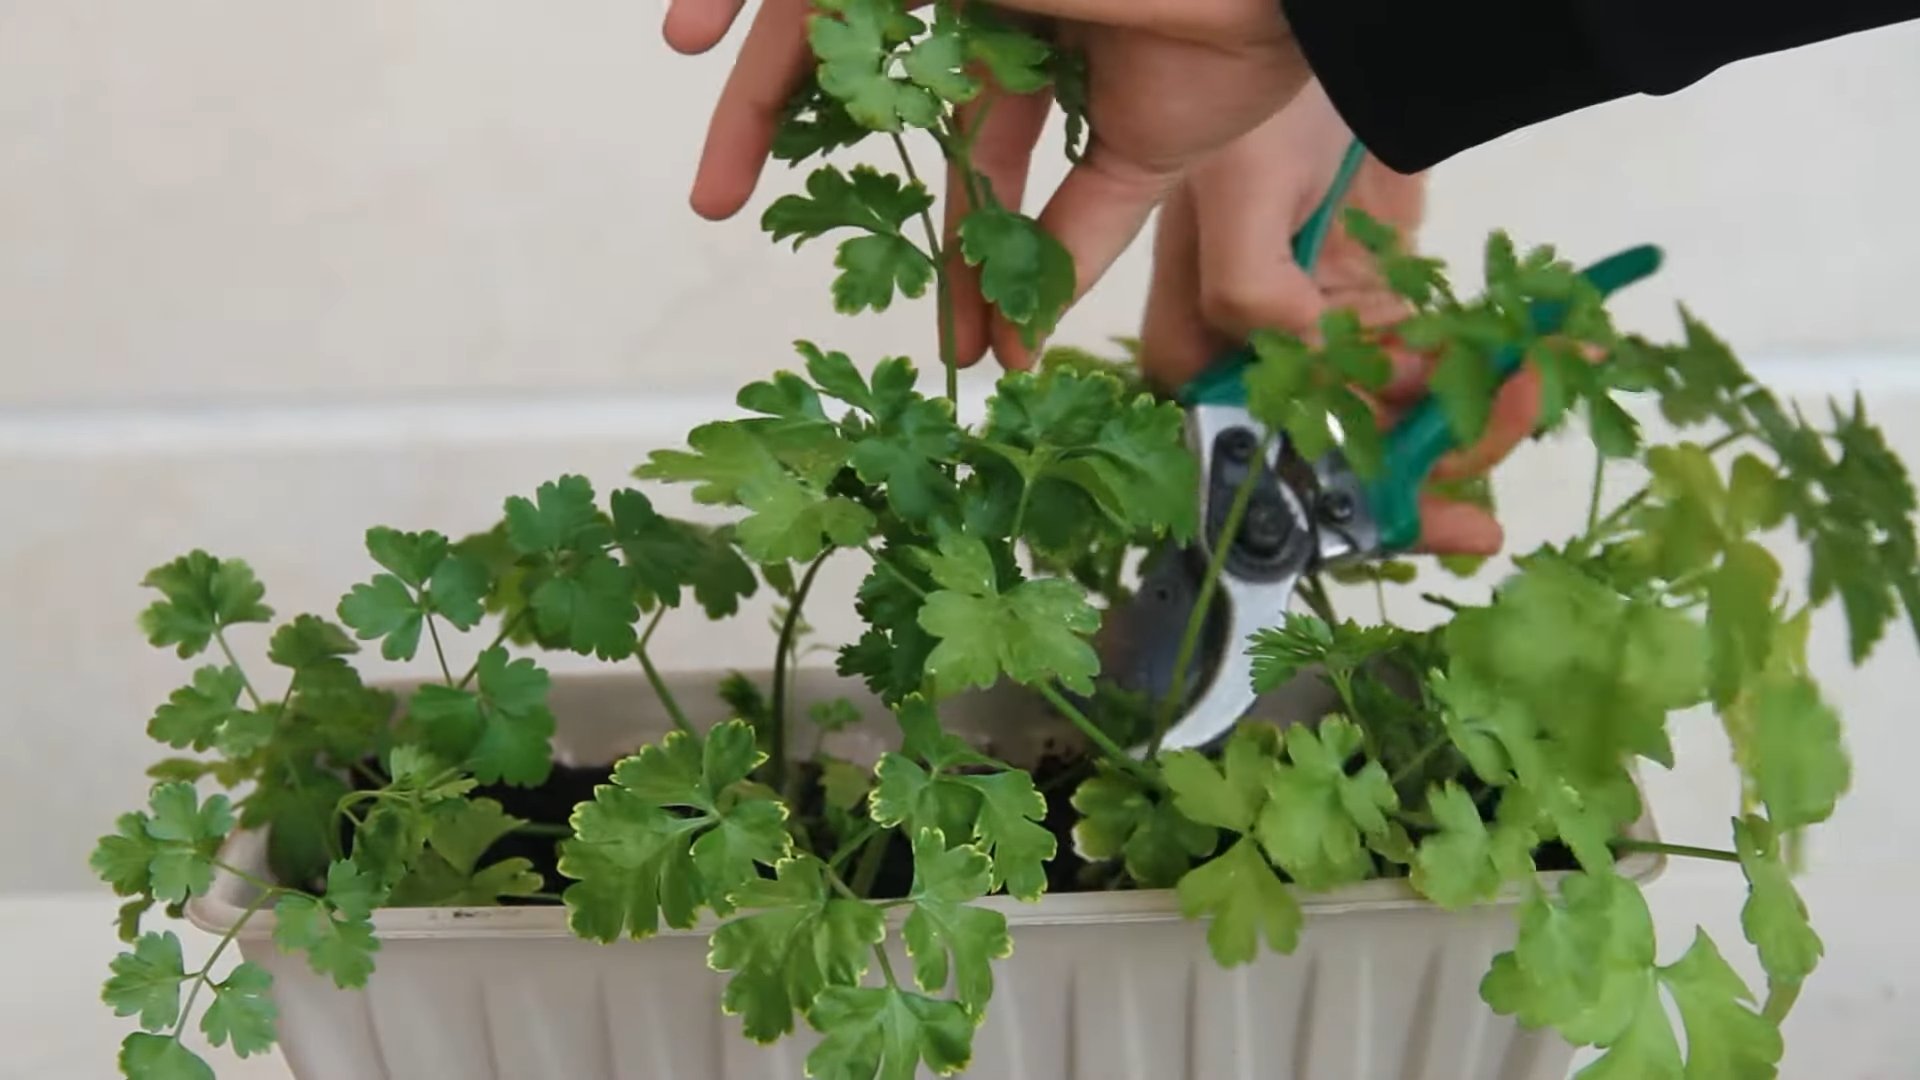
* When to Harvest: You can start harvesting parsley leaves as soon as the plants are large enough, usually about 6-8 inches tall.
* How to Harvest: Use scissors or pruning shears to cut the outer leaves, leaving the inner leaves to continue growing. Avoid cutting more than one-third of the plant at a time.
* Harvesting for Drying: If you want to dry your parsley for later use, harvest the leaves in the morning, after the dew has dried. Tie the stems together and hang them upside down in a cool, dry, well-ventilated place. Once the leaves are completely dry, crumble them and store them in an airtight container.
Troubleshooting Common Problems
Even with the best care, you might encounter some problems while growing sun parsley. Here are a few common issues and how to address them:
* Yellowing Leaves: This can be caused by overwatering, underwatering, nutrient deficiencies, or pests. Check the soil moisture, fertilize if necessary, and inspect the plants for pests
Conclusion
So, there you have it! Transforming your kitchen windowsill into a thriving haven for sun parsley is not only achievable but incredibly rewarding. We’ve walked you through the simple steps, from selecting the right seeds and soil to providing the perfect amount of sunlight and water. But why is this DIY trick a must-try?
Firstly, imagine the convenience of having fresh, vibrant sun parsley readily available whenever you need it. No more last-minute trips to the grocery store or settling for wilted herbs. You’ll have a constant supply of this delicate, anise-flavored herb to elevate your culinary creations. Think of the possibilities: a sprinkle of freshly chopped sun parsley on your morning eggs, a vibrant addition to your summer salads, or a fragrant garnish for your grilled fish. The flavor is simply unmatched by dried herbs, and the freshness adds a whole new dimension to your dishes.
Secondly, growing your own sun parsley is a sustainable and eco-friendly choice. You’re reducing your carbon footprint by eliminating the need for transportation and packaging associated with store-bought herbs. Plus, you’re in control of what goes into your plants, ensuring they’re free from harmful pesticides and chemicals. It’s a small step towards a greener lifestyle that makes a big difference.
Thirdly, and perhaps most importantly, cultivating your own sun parsley is a deeply satisfying experience. There’s something truly magical about nurturing a tiny seed into a flourishing plant. Watching your sun parsley grow and thrive is a constant reminder of the beauty and resilience of nature. It’s a therapeutic activity that can help you de-stress and reconnect with the natural world.
Now, let’s talk about variations. While we’ve focused on growing sun parsley indoors, you can also adapt this method for outdoor containers or raised beds, provided you have a sunny location. Consider companion planting your sun parsley with other herbs like basil or chives to create a diverse and fragrant herb garden. You can also experiment with different varieties of sun parsley to discover your favorite flavor profiles. Some varieties are more compact, while others have a more pronounced anise flavor.
Don’t be afraid to get creative and personalize your sun parsley garden. Use decorative pots, add small trellises for support, or even create a miniature fairy garden around your plants. The possibilities are endless!
We strongly encourage you to try this DIY sun parsley kitchen garden trick. It’s a simple, affordable, and rewarding way to bring fresh flavor and natural beauty into your home. Once you’ve experienced the joy of harvesting your own sun parsley, you’ll never go back to store-bought herbs again.
So, grab your seeds, soil, and a sunny spot, and get ready to embark on your sun parsley growing adventure. And most importantly, don’t forget to share your experiences with us! We’d love to see your sun parsley gardens and hear about your favorite ways to use this versatile herb. Share your photos and tips on social media using #SunParsleyGarden and let’s inspire others to grow their own fresh herbs. Happy gardening!
Frequently Asked Questions (FAQ)
What exactly is sun parsley, and how does it differ from regular parsley?
Sun parsley, also known as anise parsley or myrrhis odorata, is a perennial herb with a distinct anise-like flavor. While it shares a similar appearance to flat-leaf parsley, its taste is much sweeter and more aromatic. Regular parsley, on the other hand, has a more grassy and slightly bitter flavor. Sun parsley also boasts attractive feathery foliage and delicate white flowers, making it a beautiful addition to any garden or kitchen windowsill. Its unique flavor profile makes it a versatile ingredient in both sweet and savory dishes.
How much sunlight does sun parsley need when grown indoors?
Sun parsley thrives in bright, indirect sunlight. Aim for at least 6 hours of sunlight per day. If you don’t have a naturally sunny windowsill, you can supplement with a grow light. Place the grow light about 6-12 inches above the plants and keep it on for 12-14 hours per day. Rotate the plants regularly to ensure even light exposure on all sides. Insufficient sunlight can lead to leggy growth and reduced flavor.
What type of soil is best for growing sun parsley in containers?
Sun parsley prefers well-draining soil that is rich in organic matter. A good potting mix for sun parsley would be a blend of equal parts potting soil, compost, and perlite or vermiculite. The potting soil provides a base for the plants to grow, the compost adds nutrients and improves drainage, and the perlite or vermiculite helps to aerate the soil and prevent it from becoming compacted. Avoid using heavy clay soils, as they can retain too much moisture and lead to root rot.
How often should I water my sun parsley plants?
Water your sun parsley plants regularly, keeping the soil consistently moist but not waterlogged. Check the soil moisture by sticking your finger about an inch deep into the soil. If it feels dry, it’s time to water. Water thoroughly until excess water drains out of the bottom of the pot. Avoid overwatering, as this can lead to root rot. During the warmer months, you may need to water more frequently.
How do I harvest sun parsley, and when is the best time to do so?
You can harvest sun parsley leaves as needed, starting when the plants are about 6 inches tall. Simply snip off the leaves with scissors or your fingers. The best time to harvest is in the morning, after the dew has dried, as this is when the leaves are at their most flavorful. Avoid harvesting more than one-third of the plant at a time, as this can stress the plant and slow down its growth. Regular harvesting will also encourage the plant to produce more leaves.
Can I grow sun parsley from seed, or is it better to start with a transplant?
You can grow sun parsley from seed, but it can be a bit slow to germinate. It’s often easier to start with a transplant from a local nursery or garden center. If you choose to grow from seed, sow the seeds indoors 6-8 weeks before the last expected frost. Keep the soil moist and warm, and be patient, as germination can take up to 3 weeks. Once the seedlings are large enough to handle, transplant them into individual pots.
How do I prevent pests and diseases from affecting my sun parsley plants?
Sun parsley is generally resistant to pests and diseases, but it can occasionally be affected by aphids or spider mites. To prevent these pests, keep your plants clean and well-ventilated. You can also spray them with a mild solution of soapy water. If you notice any signs of disease, such as yellowing leaves or powdery mildew, remove the affected leaves and treat the plant with a fungicide. Avoid overwatering, as this can create a favorable environment for fungal diseases.
Can I dry or freeze sun parsley for later use?
Yes, you can dry or freeze sun parsley to preserve its flavor. To dry sun parsley, hang the stems upside down in a cool, dry place until the leaves are brittle. You can also use a dehydrator. Once the leaves are dry, store them in an airtight container. To freeze sun parsley, chop the leaves and place them in ice cube trays with water or olive oil. Once frozen, transfer the cubes to a freezer bag. Dried sun parsley will retain its flavor for several months, while frozen sun parsley can be stored for up to a year.
Is sun parsley safe for pets?
Sun parsley is generally considered safe for pets in small quantities. However, it’s always best to consult with your veterinarian before introducing any new herbs or plants into your pet’s diet. Some pets may be sensitive to the anise-like flavor of sun parsley, and excessive consumption could potentially cause digestive upset.
How long will my sun parsley plant last?
Sun parsley is a perennial herb, meaning it can live for several years. With proper care, your sun parsley plant can thrive for many years, providing you with a continuous supply of fresh herbs. Be sure to repot your plant every year or two to refresh the soil and provide it with more space to grow. You can also propagate new plants from cuttings or by dividing the root ball.
Leave a Comment