
Indoor Taro Planting: Ever dreamt of bringing a touch of the tropics into your home? I know I have! There’s something incredibly satisfying about nurturing a plant from a humble bulb to a lush, vibrant specimen. And that’s precisely what we’re diving into today – the wonderful world of growing taro indoors.
Taro, also known as Colocasia esculenta, boasts a rich history, deeply intertwined with Polynesian and Asian cultures. For centuries, it has been a staple food source and a symbol of prosperity and sustenance. Imagine bringing that ancient heritage into your living space! But beyond its cultural significance, taro is simply a stunning plant with its large, heart-shaped leaves that add a dramatic flair to any room.
Now, you might be thinking, “Indoor taro planting? Sounds complicated!” But trust me, it’s not as daunting as it seems. In fact, with a few simple tricks and DIY hacks, you can successfully cultivate these beauties indoors, even if you don’t have a green thumb. This guide will equip you with the knowledge to overcome common challenges like providing adequate humidity and light, ensuring proper drainage, and even propagating new plants from your existing taro. So, are you ready to embark on this exciting journey and transform your home into a mini-tropical paradise? Let’s get started with indoor taro planting!

Growing Taro Indoors: A Beginner’s Guide
Hey there, plant enthusiasts! Ever thought about growing your own taro indoors? It’s totally doable, and honestly, it’s a really rewarding experience. Taro, with its lush, heart-shaped leaves, can add a tropical vibe to any room. Plus, it’s a relatively low-maintenance plant once you get the hang of it. So, let’s dive into how you can successfully cultivate taro right in your home!
Choosing Your Taro Variety
First things first, not all taro varieties are created equal when it comes to indoor growing. Some are just too big and demanding for a confined space. Here are a few that I’ve found work well indoors:
* ‘Elepaio’: This variety stays relatively compact, making it perfect for smaller spaces. Its leaves have a beautiful, slightly ruffled texture.
* ‘Bun Long’: Another good choice for indoor growing, ‘Bun Long’ is known for its vibrant green leaves and relatively manageable size.
* ‘Black Magic’: If you’re looking for something a little more dramatic, ‘Black Magic’ taro has deep purple, almost black, leaves. Just be aware that it might need a bit more light than the other varieties.
Gathering Your Supplies
Before you even think about planting, you’ll need to gather all your supplies. Trust me, having everything ready beforehand will make the whole process much smoother. Here’s what you’ll need:
* Taro Corm or Seed: You can find these at most nurseries or online retailers. Make sure the corm is firm and healthy-looking.
* Pot: Choose a pot that’s at least 12 inches in diameter and has drainage holes. Taro likes to have room to spread its roots.
* Potting Mix: A well-draining potting mix is crucial. I recommend a mix of peat moss, perlite, and vermiculite. You can also add some compost for extra nutrients.
* Water: Use filtered or distilled water if possible, as taro can be sensitive to tap water.
* Fertilizer: A balanced liquid fertilizer will help your taro thrive.
* Spray Bottle: For misting the leaves to increase humidity.
* Grow Light (Optional): If you don’t have a lot of natural light, a grow light can be a lifesaver.
Planting Your Taro
Okay, now for the fun part – planting! Follow these steps carefully, and you’ll be well on your way to having a thriving indoor taro plant.
1. Prepare the Pot: Fill the pot with your well-draining potting mix, leaving about an inch or two of space at the top.
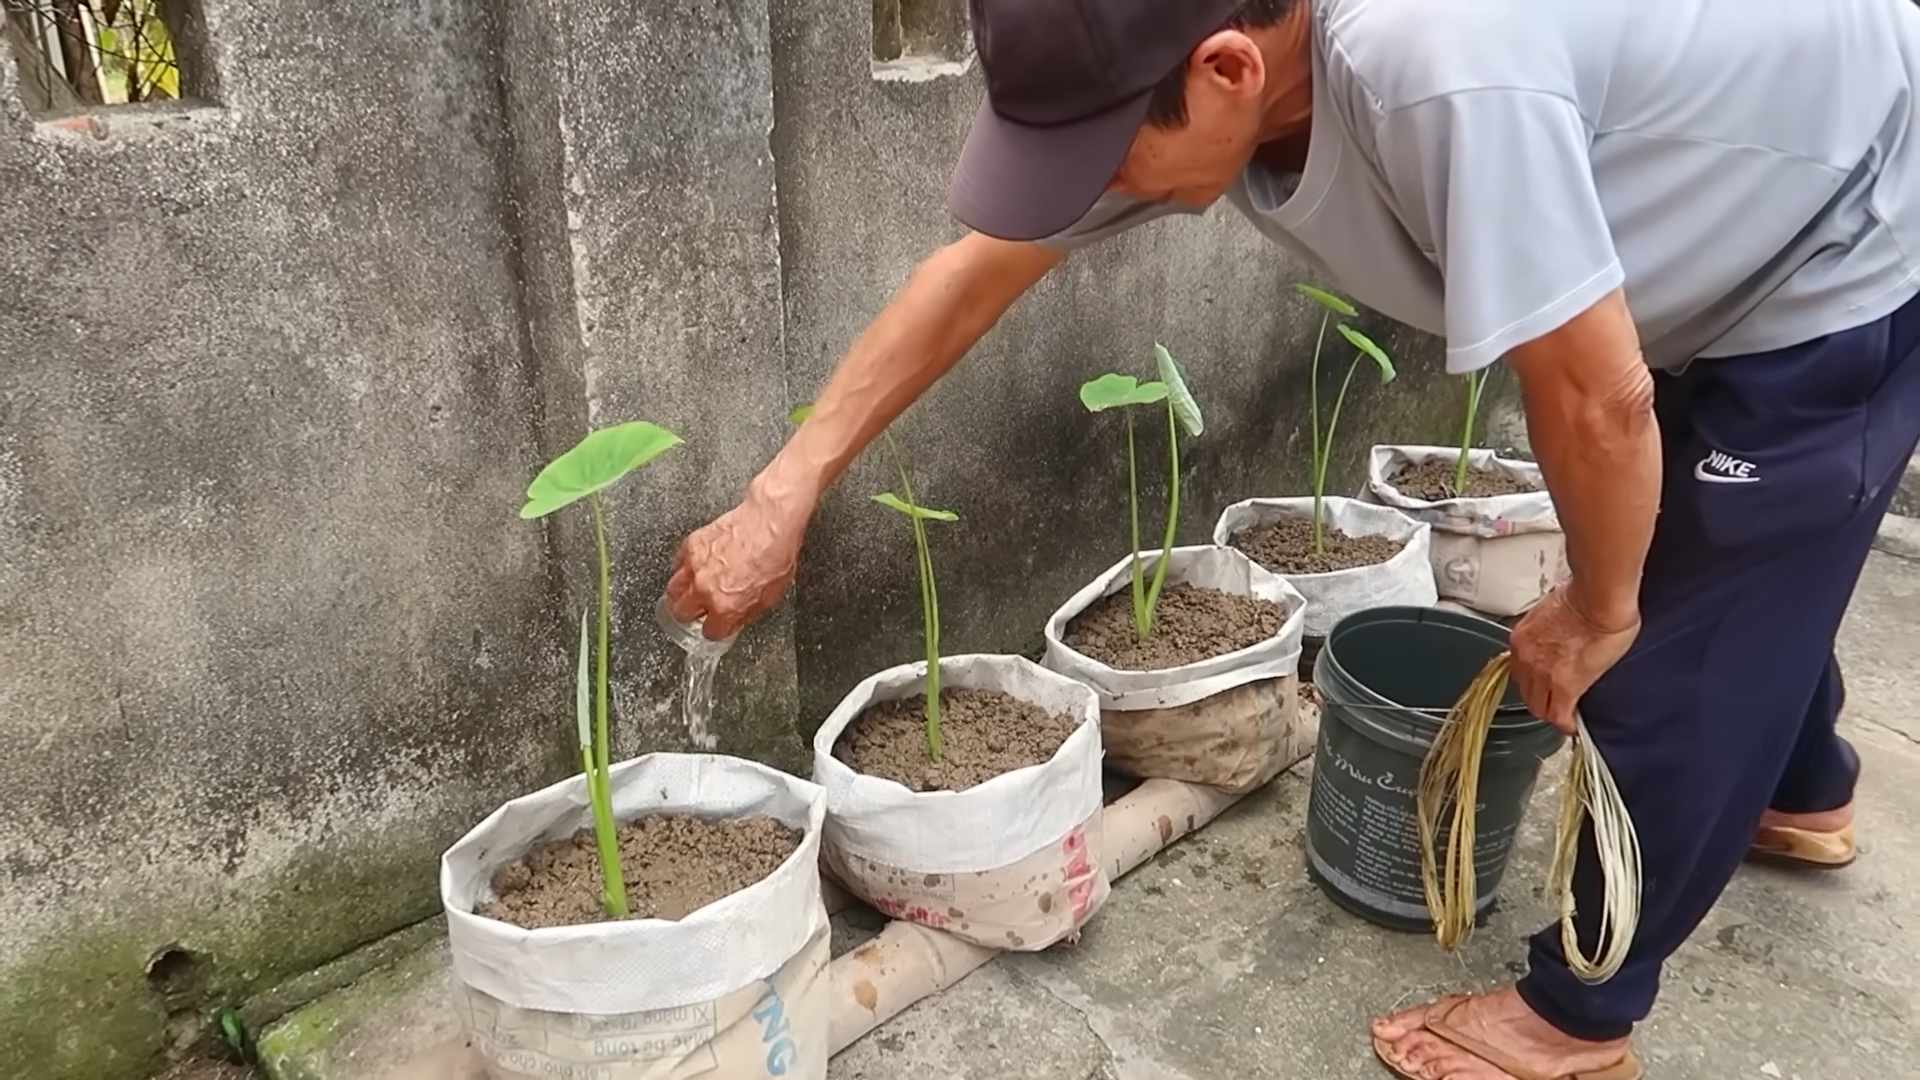
2. Plant the Corm: Dig a hole in the center of the pot that’s about 2-3 inches deep. Place the taro corm in the hole, with the pointed end facing up.
3. Cover the Corm: Gently cover the corm with potting mix, making sure it’s firmly planted.
4. Water Thoroughly: Water the pot thoroughly until water drains out of the drainage holes. This will help settle the soil and get the corm off to a good start.
Creating the Ideal Environment
Taro is a tropical plant, so it needs a warm, humid environment to thrive. Here’s how to create the perfect conditions for your indoor taro:
* Light: Taro prefers bright, indirect light. Avoid placing it in direct sunlight, as this can scorch the leaves. An east-facing window is usually a good choice. If you don’t have enough natural light, use a grow light.
* Temperature: Taro thrives in temperatures between 65°F and 85°F (18°C and 29°C). Avoid placing it near drafts or cold windows.
* Humidity: Taro loves humidity! Mist the leaves regularly with a spray bottle, or place the pot on a tray filled with pebbles and water. You can also use a humidifier to increase the humidity in the room.
* Watering: Keep the soil consistently moist, but not soggy. Water when the top inch of soil feels dry to the touch. Be careful not to overwater, as this can lead to root rot.
* Fertilizing: Feed your taro plant with a balanced liquid fertilizer every 2-4 weeks during the growing season (spring and summer). Dilute the fertilizer to half strength to avoid burning the roots.
Troubleshooting Common Problems
Even with the best care, you might encounter some problems along the way. Here are a few common issues and how to fix them:
* Yellowing Leaves: This can be caused by overwatering, underwatering, or lack of nutrients. Check the soil moisture and adjust your watering schedule accordingly. If the soil is consistently moist, you’re probably overwatering. If the soil is dry, you’re probably underwatering. Also, make sure you’re fertilizing regularly.
* Brown Leaf Tips: This is usually a sign of low humidity. Mist the leaves more frequently or use a humidifier.
* Drooping Leaves: This can be caused by underwatering, lack of light, or cold temperatures. Check the soil moisture and adjust your watering schedule accordingly. Make sure your taro plant is getting enough light and is not exposed to cold drafts.
* Root Rot: This is a serious problem that can kill your taro plant. It’s usually caused by overwatering. If you suspect root rot, remove the plant from the pot and inspect the roots. If the roots are brown and mushy, cut off the affected areas and repot the plant in fresh, well-draining potting mix. Be sure to water less frequently.
* Pests: Taro can be susceptible to pests like spider mites and aphids. Inspect your plant regularly for signs of infestation. If you find pests, treat the plant with insecticidal soap or neem oil.
Propagating Your Taro
Once your taro plant is established, you can propagate it to create new plants! There are a few different ways to propagate taro:
* Division: This is the easiest method. When you repot your taro plant, you can divide the corm into smaller pieces, each with its own roots and shoots. Plant each piece in its own pot.
* Cormels: Taro plants often produce small cormels (baby corms) around the base of the main corm. You can remove these cormels and plant them in their own pots.
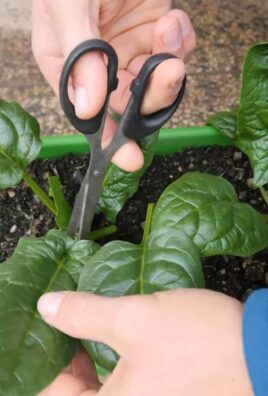
* Stem Cuttings: You can also propagate taro from stem cuttings. Cut a stem with a few leaves and place it in water. Once roots develop, plant the cutting in potting mix.
Harvesting Taro (Eventually!)
Hey there, plant enthusiasts! Ever thought about growing your own taro indoors? It’s totally doable, and honestly, it’s a really rewarding experience. Taro, with its lush, heart-shaped leaves, can add a tropical vibe to any room. Plus, it’s a relatively low-maintenance plant once you get the hang of it. So, let’s dive into how you can successfully cultivate taro right in your home!
Choosing Your Taro Variety
First things first, not all taro varieties are created equal when it comes to indoor growing. Some are just too big and demanding for a confined space. Here are a few that I’ve found work well indoors:
* ‘Elepaio’: This variety stays relatively compact, making it perfect for smaller spaces. Its leaves have a beautiful, slightly ruffled texture.
* ‘Bun Long’: Another good choice for indoor growing, ‘Bun Long’ is known for its vibrant green leaves and relatively manageable size.
* ‘Black Magic’: If you’re looking for something a little more dramatic, ‘Black Magic’ taro has deep purple, almost black, leaves. Just be aware that it might need a bit more light than the other varieties.
Gathering Your Supplies
Before you even think about planting, you’ll need to gather all your supplies. Trust me, having everything ready beforehand will make the whole process much smoother. Here’s what you’ll need:
* Taro Corm or Seed: You can find these at most nurseries or online retailers. Make sure the corm is firm and healthy-looking.
* Pot: Choose a pot that’s at least 12 inches in diameter and has drainage holes. Taro likes to have room to spread its roots.
* Potting Mix: A well-draining potting mix is crucial. I recommend a mix of peat moss, perlite, and vermiculite. You can also add some compost for extra nutrients.
* Water: Use filtered or distilled water if possible, as taro can be sensitive to tap water.
* Fertilizer: A balanced liquid fertilizer will help your taro thrive.
* Spray Bottle: For misting the leaves to increase humidity.
* Grow Light (Optional): If you don’t have a lot of natural light, a grow light can be a lifesaver.
Planting Your Taro
Okay, now for the fun part – planting! Follow these steps carefully, and you’ll be well on your way to having a thriving indoor taro plant.
1. Prepare the Pot: Fill the pot with your well-draining potting mix, leaving about an inch or two of space at the top.
2. Plant the Corm: Dig a hole in the center of the pot that’s about 2-3 inches deep. Place the taro corm in the hole, with the pointed end facing up.
3. Cover the Corm: Gently cover the corm with potting mix, making sure it’s firmly planted.
4. Water Thoroughly: Water the pot thoroughly until water drains out of the drainage holes. This will help settle the soil and get the corm off to a good start.
Creating the Ideal Environment
Taro is a tropical plant, so it needs a warm, humid environment to thrive. Here’s how to create the perfect conditions for your indoor taro:
* Light: Taro prefers bright, indirect light. Avoid placing it in direct sunlight, as this can scorch the leaves. An east-facing window is usually a good choice. If you don’t have enough natural light, use a grow light.
* Temperature: Taro thrives in temperatures between 65°F and 85°F (18°C and 29°C). Avoid placing it near drafts or cold windows.
* Humidity: Taro loves humidity! Mist the leaves regularly with a spray bottle, or place the pot on a tray filled with pebbles and water. You can also use a humidifier to increase the humidity in the room.
* Watering: Keep the soil consistently moist, but not soggy. Water when the top inch of soil feels dry to the touch. Be careful not to overwater, as this can lead to root rot.
* Fertilizing: Feed your taro plant with a balanced liquid fertilizer every 2-4 weeks during the growing season (spring and summer). Dilute the fertilizer to half strength to avoid burning the roots.
Troubleshooting Common Problems
Even with the best care, you might encounter some problems along the way. Here are a few common issues and how to fix them:
* Yellowing Leaves: This can be caused by overwatering, underwatering, or lack of nutrients. Check the soil moisture and adjust your watering schedule accordingly. If the soil is consistently moist, you’re probably overwatering. If the soil is dry, you’re probably underwatering. Also, make sure you’re fertilizing regularly.
* Brown Leaf Tips: This is usually a sign of low humidity. Mist the leaves more frequently or use a humidifier.
* Drooping Leaves: This can be caused by underwatering, lack of light, or cold temperatures. Check the soil moisture and adjust your watering schedule accordingly. Make sure your taro plant is getting enough light and is not exposed to cold drafts.
* Root Rot: This is a serious problem that can kill your taro plant. It’s usually caused by overwatering. If you suspect root rot, remove the plant from the pot and inspect the roots. If the roots are brown and mushy, cut off the affected areas and repot the plant in fresh, well-draining potting mix. Be sure to water less frequently.
* Pests: Taro can be susceptible to pests like spider mites and aphids. Inspect your plant regularly for signs of infestation. If you find pests, treat the plant with insecticidal soap or neem oil.
Propagating Your Taro
Once your taro plant is established, you can propagate it to create new plants! There are a few different ways to propagate taro:
* Division: This is the easiest method. When you repot your taro plant, you can divide the corm into smaller pieces, each with its own roots and shoots. Plant each piece in its own pot.
* Cormels: Taro plants often produce small cormels (baby corms) around the base of the main corm. You can remove these cormels and plant them in their own pots.
* Stem Cuttings: You can also propagate taro from stem cuttings. Cut a stem with a few leaves and place it in water. Once roots develop, plant the cutting in potting mix.
Harvesting Taro (Eventually!)
While you’re primarily growing taro indoors for its beautiful foliage, you *can* eventually harvest the corms. However, it takes a long time (usually several years) for the corms to mature indoors. When the leaves start to die back, it’s a sign that the corm is ready to harvest. Carefully dig up the plant and remove the corm. Be sure to cook the corm thoroughly before eating, as it contains calcium oxalate crystals that can cause irritation.
Enjoying Your Indoor Taro
Growing taro indoors is a rewarding experience that can bring a touch of the tropics to your home. With a little care and attention, you can enjoy the beauty of this unique plant for years to come. Don’t be afraid to experiment and find what works best for you and your taro plant. Happy growing!
Conclusion
So, there you have it! Transforming your living space into a lush, tropical oasis with your own indoor taro plant is not only achievable but surprisingly simple with this DIY trick. We’ve walked you through the process, highlighting the key steps to ensure your success, from selecting the right corm to providing the ideal growing conditions. But why is this DIY approach a must-try?
Firstly, it’s incredibly rewarding. There’s a unique satisfaction in nurturing a plant from its humble beginnings to a thriving, vibrant specimen. Watching those broad, heart-shaped leaves unfurl is a constant reminder of your green thumb prowess. Secondly, it’s cost-effective. Purchasing mature taro plants can be expensive, but starting from a corm significantly reduces the financial burden, allowing you to enjoy the beauty of taro without breaking the bank. Thirdly, it’s adaptable. This DIY method allows you to tailor the growing environment to your specific space and preferences.
Consider these variations to personalize your indoor taro planting experience:
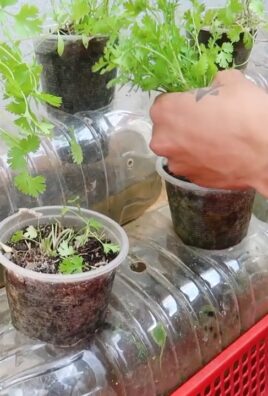
* Experiment with different pot sizes: While we recommend a specific size, feel free to adjust based on the size of your corm and your desired aesthetic. Larger pots generally allow for more root growth and a larger plant.
* Explore different soil mixes: While our recommended mix is a great starting point, you can incorporate other amendments like perlite or vermiculite to improve drainage and aeration.
* Play with lighting: Taro plants thrive in bright, indirect light, but you can experiment with different locations in your home to find the sweet spot for your plant. Just be mindful of direct sunlight, which can scorch the leaves.
* Try different taro varieties: There are many different varieties of taro, each with its own unique leaf shape and color. Experiment with different varieties to create a diverse and visually appealing indoor garden.
But the most compelling reason to embrace this DIY trick is the sheer joy of bringing a touch of the tropics into your home. Taro plants are not just beautiful; they also purify the air and create a calming, relaxing atmosphere. Imagine sipping your morning coffee surrounded by the lush greenery of your own indoor taro forest.
We are confident that with a little patience and care, you can successfully grow your own indoor taro plant using this simple DIY trick. Don’t be afraid to experiment, adapt, and learn along the way. Gardening is a journey, not a destination.
Now, we want to hear from you! Have you tried this DIY trick? What challenges did you face? What successes did you celebrate? Share your experiences in the comments below. Your insights can help other aspiring indoor gardeners on their own taro-growing adventures. Let’s create a community of passionate plant lovers, sharing tips, tricks, and inspiration. So go ahead, grab a taro corm, get your hands dirty, and experience the magic of growing your own indoor taro plant. We can’t wait to see your results!
Frequently Asked Questions (FAQ)
What exactly is a taro corm, and where can I get one?
A taro corm is essentially an underground stem, similar to a bulb or tuber. It’s the part of the taro plant that stores nutrients and from which new growth emerges. You can typically find taro corms at Asian grocery stores, nurseries that specialize in tropical plants, or even online retailers. When selecting a corm, look for one that is firm, free from blemishes or soft spots, and ideally has some small sprouts or “eyes” indicating that it’s ready to grow.
How much light does my indoor taro plant need?
Taro plants thrive in bright, indirect light. Avoid placing them in direct sunlight, especially during the hottest part of the day, as this can scorch the leaves. A spot near an east-facing window is often ideal, or a few feet away from a south- or west-facing window. If you don’t have access to sufficient natural light, you can supplement with a grow light. Observe your plant closely; if the leaves start to look pale or stretched, it may not be getting enough light.
What kind of soil should I use for my indoor taro plant?
Taro plants prefer well-draining soil that is rich in organic matter. A good mix would be equal parts potting soil, peat moss (or coconut coir), and perlite. This combination provides the necessary nutrients, moisture retention, and drainage to support healthy growth. Avoid using heavy clay soils, as they can become waterlogged and lead to root rot.
How often should I water my indoor taro plant?
Taro plants like to be kept consistently moist, but not waterlogged. Water thoroughly when the top inch of soil feels dry to the touch. Ensure that the pot has drainage holes to prevent water from accumulating at the bottom. During the growing season (spring and summer), you may need to water more frequently than during the dormant season (fall and winter). Adjust your watering schedule based on the humidity levels in your home and the specific needs of your plant.
What is the ideal temperature and humidity for my indoor taro plant?
Taro plants thrive in warm, humid environments. Aim for temperatures between 65°F and 85°F (18°C and 29°C). They also appreciate high humidity levels, ideally above 60%. If your home is dry, you can increase humidity by using a humidifier, placing the plant on a pebble tray filled with water, or grouping it with other plants. Avoid placing your taro plant near drafts or heating vents, as this can dry out the leaves.
How often should I fertilize my indoor taro plant?
During the growing season (spring and summer), fertilize your taro plant every 2-4 weeks with a balanced liquid fertilizer diluted to half strength. Look for a fertilizer with an NPK ratio (nitrogen, phosphorus, potassium) of around 10-10-10 or 20-20-20. Avoid over-fertilizing, as this can burn the roots. During the dormant season (fall and winter), you can reduce or eliminate fertilization.
My taro plant’s leaves are turning yellow. What could be the problem?
Yellowing leaves can be a sign of several issues. Overwatering is a common culprit, as it can lead to root rot. Make sure your pot has drainage holes and that you’re not letting the plant sit in standing water. Underwatering can also cause yellowing leaves, so check the soil moisture regularly. Other potential causes include nutrient deficiencies, pest infestations, or exposure to cold drafts. Inspect your plant carefully to identify the specific problem and take appropriate action.
Are taro plants toxic to pets or humans?
Yes, taro plants contain calcium oxalate crystals, which can cause irritation and discomfort if ingested. Keep taro plants out of reach of children and pets. If ingested, symptoms may include burning sensation in the mouth, difficulty swallowing, and drooling. Contact a medical professional or veterinarian immediately if ingestion occurs.
How do I propagate my indoor taro plant?
The easiest way to propagate taro is by dividing the corms. When repotting your plant, you can carefully separate the corms that have developed around the main corm. Each corm can then be planted in its own pot to create a new plant. You can also propagate taro from stem cuttings, but this method is less reliable.
Can I grow taro in water only?
While taro can be started in water to encourage root growth, it’s not ideal for long-term growth. Taro plants need the nutrients and support provided by soil to thrive. Once the roots have developed, it’s best to transplant the taro plant into a pot with well-draining soil.

Leave a Comment